FASTRON. VISION VC-220 User manual

$5.00 USD
This document contains confidential
information. The dissemination, publication,
copying, or duplication of this document or
the software described herein without prior
written authorization is strictly prohibited.
Toll-Free Technical Support
24 Hours A Day, 365 Days A Year
(from the U.S., Canada and the Caribbean)
1-800-243-9271
the time is right.
w
w
w
.
f
a
s
t
i
n
c
.
c
o
m
1
-
8
0
0
-
F
A
S
T
R
N
perating Guide
VC-220 VISI N Series
8 Product Keys / VFD Display

Notices–Before You Start, Please Read Entire Manual
2
This document contains confidential information. The dissemination, publication, copying, or duplication of this document or the software described herein without prior written authorization is strictly prohibited.
(FASTR N.) VC-220 www.fastinc.com 1-800-243-9271 229-51300 E © 2005-2010 FAST
(FAST.) is not liable for any use of product not in
accordance with its installation and operating
instructions.
Before using this equipment, or for any questions on
the operation of the appliance, consult and follow all
instructions and safety warnings found in the
appliance operator’s manual supplied from the
manufacturer of the appliance.
Not all features are available on some models.
CONTROLLER OPERATING ENVIRONMENT
The solid state components in this controller are
designed to operate reliably in a temperature range up to
158°F/70°C. Before installing this controller, it should be
verified that the ambient temperature at the mounting
location does not exceed 158°F/70°C.
CLEANING THE CONTROLLER
Using a clean damp cloth, wipe down your controller
daily using a commercial quality foodservice-approved
detergent.
Do not allow oil to build up on any part of the controller.
NEVER use chemical or abrasive cleaners on your
controller. The controller’s overlay may be damaged.
NOTE: This manual will thoroughly familiarize you with
the operation of the (FASTRON.) Controller so that you
may use it in the most effective way to enhance the
smooth running of your restaurant’s cooking
operations.
There are four modes of operation on the Controller:
• Operating Mode — used to time various menu
items
• Product Program Mode — used to add or modify
menu items or change settings
• System Program Mode — used to modify
operating parameters
• Diagnostic Mode — used to test product key
LEDs, product key audible signals, the VFD display,
and cook status LEDs
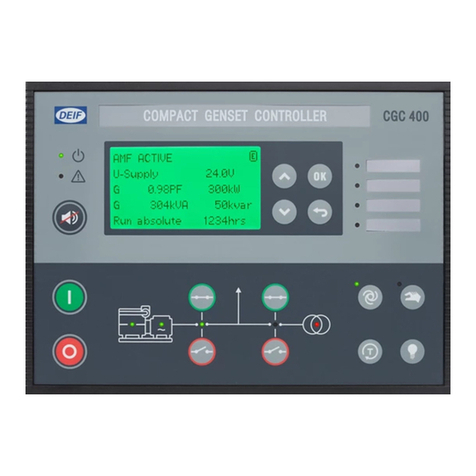
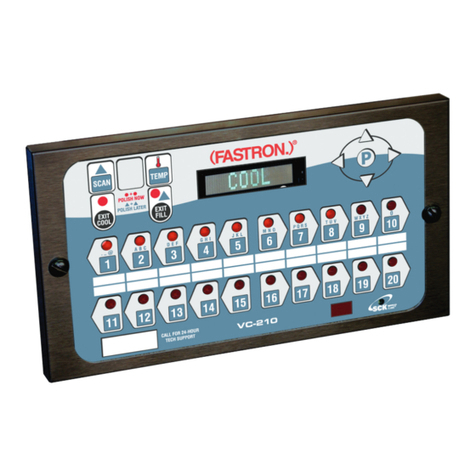
This instruction booklet covers (FASTRON.) Vision
Controller Model VC-220.
f any problems occur, or if you have any questions
about the instructions, contact FAST technical support
toll-free at 1-800-243-9271.
INSTALLING THE CONTROLLER
1. Use supplied mounting screws and brackets to
secure controller to appliance.
2. Attach the grill control cable to controller and the gas
control valve on the grill.

Controller Features
3
This document contains confidential information. The dissemination, publication, copying, or duplication of this document or the software described herein without prior written authorization is strictly prohibited.
(FASTR N.) VC-220 www.fastinc.com 1-800-243-9271 229-51300 E © 2005-2010 FAST
1 PRODUCT KEY: n “Programming” mode used to program product cooking
times. n “Operating” mode, used to start product timing cycles.
2 ACROSS-THE-K TCHEN MON TOR NG: Easy-to-read, VFD (vacuum fluores-
cent) display allows crew members to quickly check the status of any food
product from across the kitchen. The display will show the countdown or
name of product.
3 STATUS LAMPS: Red, yellow and green lamp lights provide visual indication
of stage time (cooking, hold, discard, and idle). See page 6 for further explana-
tion.
4 PROGRAMM NG KEY: n “Operating” mode, allows access to the program-
ming mode. n “Programming” mode, steps to the next function to be pro-
grammed.
5 ENGL SH/SPAN SH KEY: User can toggle between English and Spanish lan-
guages during or prior to a cook cycle.
6 ENTER KEY: Used to save “Programming” changes. t is also used during sys-
tem information, system program and disgnostic modes.
7 UP and DOWN ARROW KEYS: n “Programming” mode, scrolls through fea-
tures forwards (up) or backwards (down).
8 Clear window for replaceable menu strip.
9 ON/OFF SW TCH: Located in the rear of unit.
NOTE: The controller operates in minutes and seconds.

www.fastinc.com 1-800-243-9271 229-51300 E © 2005-2010 FAST
(FASTR N.) VC-220
Feature Definitions
4
This document contains confidential information. The dissemination, publication, copying, or duplication of this document or the software described herein without prior written authorization is strictly prohibited.
Stage Timing
Each product key has up to eleven (11) timing stages.
Each stage has:
1. Product name
2. Auto preheat flag
3. Stage or preheat time
4. Stage name
5. Heat ON time
6. Lamp color
7. Lamp state
8. Stage done
9. Hold mode flag
10. Cancel mode
11. Beep frequency
Cancel Mode
The VC-220 offers a choice of Manual or Automatic
canceling of each product stage.
English/Spanish Mode
The user can switch from English to Spanish languages
by pressing this key on the front panel either before or
during a timing cycle.
Alarm Frequency — 6 Different
The VC-220 can be programmed for one of six (6)
different alarm frequencies. Choices are NONE, 1, 2, 3,
4, 5 or 6 beeps per second.
Hold Mode
Each recipe stage has an associated hold mode flag.
The hold mode flag is used by the auto-preheat
function, and the auto cancel and restart function. f an
active recipe stage has its hold mode flag set to
enabled, then the stage is referred to as a “Hold
mode” stage and is used to warm and/or hold the
product for a programmable amount of time. f the flag
is set to disabled, then the stage is a cook stage and is
used to cook the product or dissipate excess steam. A
“Hold Mode” stage uses the same programmable
parameters as a cook stage. However, one unique
functional difference of an active “Hold Mode” stage is
that the recipe may be restarted while performing this
type of stage.
Intuitive User Interface
a. Bright blue 16x2 (16 characters x 2 lines) VFD
(vacuum flourescent display).
b. Red LED lights for each product key.
Cook Status Lamp Lights
a. SOL D RED: dle Mode
b. FLASH NG RED: Discard Mode (until someone
presses the product button to
return to idle mode).
c. SOL D YELLOW: Last Hold Mode
d. SOL D GREEN: Ready to Serve, nitial Hold Modes
e. FLASH NG GREEN: Pre-Heat/Cooking Modes
NOTE: These are default settings that can be
configured in each stage.
Power Loss Protection
n the event of a momentary power loss, the controller
will resume its current operation from the point power
was interrupted. Programmed recipes are always
saved.
Free Technical Support
24x7x365 toll-free, no charge, technical support for
programming assistance.

Eng ish or Spanish Language Mode
The VC-220 displays either English or
Spanish text. Language mode can be
selected either before or during a cook
cycle.
www.fastinc.com 1-800-243-9271 229-51300 E © 2005-2010 FAST
(FASTR N.) VC-220
Operating the Controller
5
This document contains confidential information. The dissemination, publication, copying, or duplication of this document or the software described herein without prior written authorization is strictly prohibited.
Start a Timing Cyc e
To start a timing cycle, simply press the
product key for the product you wish to
cook. f the product key is programmed for
a count “down” mode, the cooking time
will be displayed for each stage of the
cooking cycle and this stage time will
immediately start to count down.
A red, yellow or green lamp light will be lit to indicate if
a product is pre-heating, cooking, holding, ready to
discard, or if the controller is in idle mode. When the
timing cycle is complete, STAGE/00:00 will be
displayed and the controller will sound an audible alarm
and visual signal. f READY is displayed and nothing
happens when the key is pressed, that key does not
have a programmed time.
Timing can be programmed up to 99 minutes and 59
seconds.
•T CANCEL THE ALARM WHEN A
C K STAGE IS C MPLETE, press
the same product key once.
•T CANCEL A C K R H LD
CYCLE IN PR GRESS, press and hold
the same product key used to start the
timing cycle for 3 seconds.
•T CANCEL A H LD NLY AND
BEGIN A NEW C K, press and the same
product key momentarily.
Stage A arms
The controller is programmed with stage alarms that
will signal at the end of each stage. This signal will also
be accompanied by a visual indication on the controller.
Once the alarm is canceled (see above), the controller
then continues counting down to the end of the next
stage.
Ho ding Times
Holding times are programmed and they will
automatically start counting upon expiration of the
timing cycle.
When there is an active hold time, the display will
show HOLD/XX:XX. The time remaining in the hold
cycle will be displayed. Once a hold cycle is complete,
press the product key to proceed to the next stage or
to complete the cook cycle.
NOTE: Make sure when programming a hold that HOLD is entered
as the product name.
Display Descriptions
The controller is in the dle Mode and is
ready to start a timing cycle.
The controller is in the Operating Mode;
a timing cycle is in progress. The stage
name is displayed.
The controller is in the Operating Mode
and a timing cycle has completed. f
programmed the “Stage Name / 00:00”
will flash in the display.
The controller is in the Operating Mode;
a hold time is active, displaying time
remaining, or a hold time has expired
and hold time is displayed.
Programming Mode Entry. All LEDs are
lit solid.
n Programming Mode, choose between
automatic and manual alarm canceling.
Programming Mode Beep Frequency
selection. Choices are NONE, F1, F2,
F3, F4, F5 or F6. This translates to 0, 1,
2, 3, 4, 5 or 6 beeps per second.
n Programming Mode, select duration
of Heat On stage.

www.fastinc.com 1-800-243-9271 229-51300 E © 2005-2010 FAST
(FASTR N.) VC-220
Product Programming
6
This document contains confidential information. The dissemination, publication, copying, or duplication of this document or the software described herein without prior written authorization is strictly prohibited.
Enter Product
Programming Mode
C DE 1724
Se ect A Product
Product Name
Preheat
Press and
hold for 3
seconds.
Press PROG
to confirm
selection.
Press PROG
to select the
letter and
advance.
When word
is complete,
press ENTER
to confirm.
To confirm
your choice,
press ENTER.
To confirm
your entry,
press ENTER.
Press PROG
to spell out a
word.
Press PROG to
choose from
the Library.
elect the
product you
would like to
program.
Use the Up/Down
arrows to toggle
choices.
Use the Up/Down
arrows to scroll
through the
letters.
Use the Up/Down
arrows to scroll
through the
Library.
Use the Up/Down
arrows to toggle
choices.
If DI ABLED is
selected, press
ENTER to
continue.
If ENABLED is
selected, press
ENTER to
program.
et Preheat Time
using the
numbered keys.
Enter code
1 7 2 4
Follow these steps to Program
a New Word.
Follow these steps to Program
an item from the Library.

www.fastinc.com 1-800-243-9271 229-51300 E © 2005-2010 FAST
(FASTR N.) VC-220
Product Programming
7
This document contains confidential information. The dissemination, publication, copying, or duplication of this document or the software described herein without prior written authorization is strictly prohibited.
Stage(s)
Heat On &
Ho d Mode
Lamps
To confirm
your entry,
press ENTER.
To confirm
your choice,
press PROG.
Use the Up/Down
arrows to toggle
choices.
Use the Up/Down
arrows to toggle
choices.
Press PROG
to select the
letter and
advance.
When word
is complete,
press ENTER
to confirm.
Press PROG
to spell out a
word.
Use the Up/Down
arrows to scroll
through the
letters.
Follow these steps to Program
a New Word.
To confirm
your choice,
press ENTER.
To confirm
your choice,
press ENTER.
Use the Up/Down
arrows to toggle
choices.
To confirm
your choice,
press ENTER.
Press PROG to
choose from
the Library.
Use the Up/Down
arrows to scroll
through the
Library.
Follow these steps to Program
an item from the Library.
et tage Time
using the
numbered keys.
et Heat On Time
using the
numbered keys.
NOTE: f a time is
programmed, con-
trol will go to next
step. f no time is
programmed, skip
the next step.
NOTE: Up to 11 Stages can be
programmed. f a time is pro-
grammed, control will go to next
step. f no time is programmed,
programming of the next prod-
uct key can begin.
Use the Up/Down
arrows to toggle
choices.
To confirm
your choice,
press ENTER.

www.fastinc.com 1-800-243-9271 229-51300 E © 2005-2010 FAST
(FASTR N.) VC-220
Product Programming
8
This document contains confidential information. The dissemination, publication, copying, or duplication of this document or the software described herein without prior written authorization is strictly prohibited.
Done Mode
To confirm
your choice,
press ENTER.
Use the Up/Down
arrows to choose
Automatic or
Manual.
Beep Frequency
Additiona Stages
Exit Product
Programming Mode
To confirm
your choice,
press ENTER.
To confirm
your choice,
press ENTER.
Use the Up/Down
arrows to scroll
through Frequen-
cies. Choices are:
NONE (F0); 1
through 6 (F1-F6).
et a new stage time using the
numbered keys.
NOTE: f no additional stages
are desired, set the time for
the next stage to zero then
press ENTER to continue to
Exit Program Mode. (Up to 11
stages can be programmed.)

www.fastinc.com 1-800-243-9271 229-51300 E © 2005-2010 FAST
(FASTR N.) VC-220
System Programming
9
This document contains confidential information. The dissemination, publication, copying, or duplication of this document or the software described herein without prior written authorization is strictly prohibited.
Auto Pre-Heat
G oba Timer
To confirm
your choice,
press ENTER.
Press PROG
twice to exit.
et a new time using the num-
bered keys (see example).
Exit System
Programming Mode
Enter System
Programming Mode
C DE 1712
Press and
hold for 3
seconds.
Enter code
1 7 1 2
The Auto Pre-heat Global Timer can be enabled or disabled. When it is enabled, an
internal clock keeps track of how long the grill control has been idle. f the auto pre-
heat option is enabled for a given recipe, and the recipe is selected in idle mode by
pressing the appropriate product key after power up, the controller software will al-
ways perform a pre-heat cycle in cook/timer mode for the time specified by the first
stage of the recipe. Once the recipe is completed and the controller software returns
to the idle mode, a programmable auto pre-heat global timer will be counting down. f
a recipe button is pushed during this time the pre-heat cycle (stage 1 timer) will be
skipped and the recipe will continue with stage 2 instead. However, if no recipe is
started within 20 minutes, the “Auto pre-heat” function will become active. Once the
“Auto Pre-heat” function becomes active, any recipe that is started with its auto pre-
heat option enabled will perform a pre-heat cycle for a time specified by its stage 1
time.
The following are all conditions that will activate or reset the “Auto Pre-heat” global
timer:
Auto Pre-heat global timer will start counting down after a recipe is completed or can-
celed during a “Hold Mode” stage (Hold Mode flag = enabled). The timer will not start
counting down if the recipe is canceled during a cook stage (Hold Mode flag =
disabled).
Auto Pre-heat global timer will be reset after all consecutive cook stages are com-
pleted. f there is only one cook stage for a given recipe, then the Auto Pre-heat global
timer will be reset after the one cook stage is done.
NOTE: You can only exit system
programming when a key or
keys have been completely
programmed and the display
shows SYSTEM PROGRAM.

www.fastinc.com 1-800-243-9271 229-51300 E © 2005-2010 FAST
(FASTR N.) VC-220
System nformation Access
Diagnostics: Front Panel
10
This document contains confidential information. The dissemination, publication, copying, or duplication of this document or the software described herein without prior written authorization is strictly prohibited.
Enter System
Information Mode
C DE 2000
Press and
hold for 3
seconds.
Enter code
2 0 0 0
After all sys-
tem informa-
tion has been
displayed (as
shown
above), the
controller will
exit program
mode and re-
turn to idle.
Enter Diagnostics
Mode
C DE 6435
Press and
hold for 3
seconds.
Press and
hold for 3
seconds.
Press PROG
again.
Controller is
now back in
idle mode.
Enter code
6 4 3 5
To confirm
your entry,
press ENTER.
Press ENTER. All discrete
LEDs and all segments of
the display will be on.
As you press each of the eight product keys, all LEDs (except the
associated LED above the key) will be turned off. Also, “Key 1”
through “Key 8” will be shown in the display, along with a short
beep, depending on which key is pressed. As the remaining
bottom row of keys are pressed (including hidden keys), the display
will show “Key 9” through “Key 16.” A short beep will sound as
each key is pressed. Also, as you press keys 1 through 3, the red,
yellow or green lamps will be lit, respectively.
NOTE: The gas valve output signal (head demand on/off) may be
tested by monitoring the gas valve connector pins 1 and 4 for
24VAC once the product Key 1 through Key 7 is pressed during
normal operation.
Exit Diagnostics
Mode

www.fastinc.com 1-800-243-9271 229-51300 E © 2005-2010 FAST
(FASTR N.) VC-220
Notes
11
This document contains confidential information. The dissemination, publication, copying, or duplication of this document or the software described herein without prior written authorization is strictly prohibited.

Customer Service and Technical Assistance
Our customer service department is available for orders and questions
Monday through Friday between the hours of 8 AM and 5 PM EST. Call us
toll-free at 1-800-FASTR N (800-327-8766) if you’re in the US, Canada or
the Caribbean, or at 203-378-6860 if you’re outside of these areas.
Toll-free technical assistance is available 24 hours a day, 365 days a year by
calling 1-800-243-9271 (from the U.S., Canada and the Caribbean) when
help is needed immediately.
You can also send an instant email message to a FAST technician, Monday
through Friday, 8am-5pm EST, by going to www.fastinc.com, selecting the
‘Support’ link at the top of the page, and clicking on ‘Contact Tech Support.’
Free Program for Service Exchanges
FAST provides an Exchange Program, at no extra cost, if a unit should fail.
n the event of failure, you have the option of (1) receiving a replacement
product from our factory, freight prepaid; (2) exchanging the failed product
for a replacement product at one of our authorized local service centers; or
(3) selecting on-site repair or replacement of the failed unit by one of our
authorized local service centers.
To take advantage of this program, simply call our toll-free customer service
number, 1-800-243-9271. f you elect to receive an exchange unit from the
factory, a replacement unit will be sent immediately. Upon receipt of the
replacement unit, simply return the failed unit to the factory, freight prepaid,
using the same carton and packing material in which the replacement unit
was shipped. The unit will be replaced free of charge, if still under warranty,
and if the product shows no evidence of abuse or alteration. f the unit is
not under warranty, you will pay repair charges and shipping costs to and
from the factory.
Any minor adjustment or calibration and any labor costs for the
replacement of probes will be made at your expense.
The FAST Exchange Program is available to any FAST Domestic Customer
whose account is current, and applies to all FAST Timers, Computers and
Controllers.
This document contains confidential information. The
dissemination, publication, copying, or duplication of this
document without prior written authorization is strictly
prohibited.
Specifications subject to change without notice.
229-51300 Rev E
© 2005-2010 FAST Printed in the U.S.A. | 23FEB2010
Food Automation - Service Techniques, Inc.
905 Honeyspot Road
Stratford, CT 06615-7147 USA
Phone: +1-203-377-4414
Sales: 1-800-FASTR N
Fax: +1-203-377-8187
nternational Callers: +1-203-378-6860
www.fastinc.com
Toll-free technical support 24/7 from the U.S.,
Canada, and Caribbean: 1-800-243-9271
WARRANTY
FAST warrants all new timers, computers, and controllers
for 1 year from the date of purchase including computers,
controllers, and timers. FAST warrants all other items for a
period of 90 days unless otherwise stated at the time of
purchase.
PATENTS
The products manufactured by FAST are protected under
one or more of the following U.S. Patents:
5,331,575 5,539,671 5,711,606 5,723,846
5,726,424 5,875,430 6,142,666 6,339,930
6,401,467 6,505,546 6,581,391 7,015,433
7,650,833
Plus foreign patents and patents pending. Plus licensed
patent 5,973,297
International offices are located in the
United Kingdom, China and Singapore:
Europe, Middle East, Africa, South Asia
FAST NTERNAT ONAL
31 Saffron Court
Southfields Business Park
Basildon, Essex SS15 6SS ENGLAND
Phone: +44 0 1268-544000
Asia Pacific
1803, 18F, No 922 Hengshan Rd
Shanghai 200030, CH NA
Phone: +86-13916 854 613
15-101, Block 290G, Bukit Batok St. 24
S NGAPORE 65629
Phone: +65 98315927
Want to learn more about
FAST products?
Visit our Web site:
www.fastinc.com
SCK Link® is a registered trademark of Technology Licensing
Corporation and use is subject to the appropriate license
agreement.
*When used with a gateway.
*
(FASTRON.) Vision Series VC-220
Table of contents
Other FASTRON. Controllers manuals
FASTRON.
FASTRON. VC-210 User manual
FASTRON.
FASTRON. MERIDIAN Series User manual

FASTRON.
FASTRON. VC-210 User manual
FASTRON.
FASTRON. F330 Series Manual
FASTRON.
FASTRON. Meridian MEC-110 User manual
FASTRON.
FASTRON. VC-210 User manual
FASTRON.
FASTRON. S-S Series Use and care manual
FASTRON.
FASTRON. FTM1 Series User manual

FASTRON.
FASTRON. Meridian MEC-110 User manual
FASTRON.
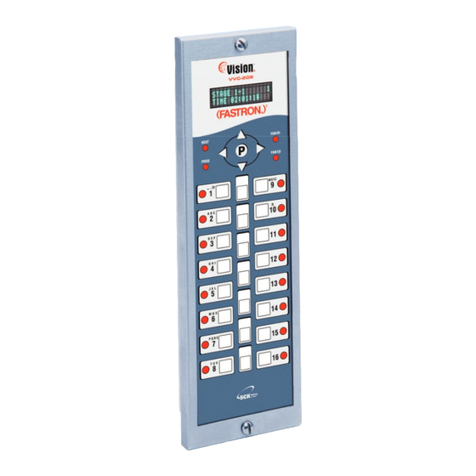
FASTRON. VISION Series Operating instructions
