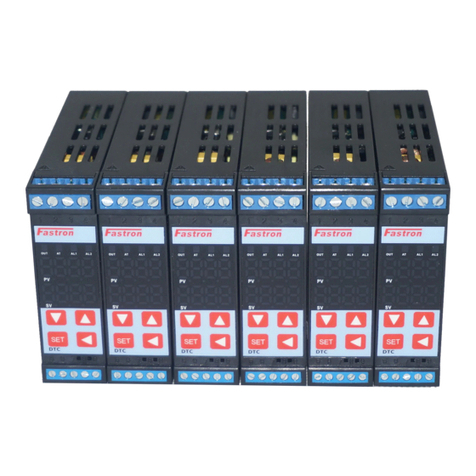
FASTRON. DTC1 Series User manual

DTC1Series
IntelligentTemperature/HumidityPID
Controllerwith60StepProgramControl
UserManualV1.0
ThankyouforpurchasingFastronDTCseriesPID
Temperature/HumidityController.Thismanualexplains
howtoinstallandoperateyournewPIDController.
Beforeoperation,pleasereadthismanualfirsttofully
understandtheoperationofthisproduct.Thiscontroller
shouldbeinstalledbyaqualifiedElectricalEngineer,
TechnicianorElectrician.Forspecifictechnicalsupport
pleasecontactyouragentorrepresentative.
SafetyWarning
1a)AvoidtouchingtheACpowerterminalsafterthecontrollerispowered
on.
1b)Alwaysensurethesupplypowerisofffirstbeforeconnectingany
wires.
1c)Donotoperatethisinstrumentinplacesfullofexplosiveand
combustiblegases.
2.IncorrectConnectionofthePowerSupplycancausepermanent
damage.
3.Themaximumtorqueoftheterminalsshouldnotexceed8KN.
4.Pleasedonotuseinthefollowingcircumstances:
●wherethetemperaturechangesdramatically
●Placeswherehumidityistoohigh(~85%)andwaterisproduced
●Wherevibrationorimpactishigh
●Wherecorrosivegasesordustarepresent
●splashofwater,oilandchemicals
6.AllWiringshouldbekeptawayfromhighvoltage,highcurrentpower
ImprovedFeatures
(1)Slopevalueoffsetcompensation.
(2)2in(input)2out(output):1to2isolatedtransmission,2to1isolatedtransmission
(Optional)
(3)Multiplealarmmodes
(4)TransmissionofPV,SVandMV:forward,reverseanddifferencevaluein8ways.
(5)Outputsoftstartfunction.
(6)Dehumidificationfunction.
(7)ServoMotorControl(Optional)
(8)Optional60Segment,MultiSequence,ProgramControl
ProgrammingMenu
WiringConfiguration


1.SensorTypeSetting
A.PressSET+◄keytoenterLEVEL3
B.OnceyoureachINPPress◄andtheSV
displaywillblink
C.Press▼or▲selecttheinputtype(refertothe
signalinputselectiontable).PressSETtoconfirm
E.Atthesametime,pressSET+◄toreturnto
LEVEL1
2.AL1/AL2Alarmmodesetting
A.PressSETfor5secondstoenterLEVEL2
B.PressSETseveraltimestoaccessAD1,thenpressthe
◄keyandthedisplaywillstarttoflash.
C.Press▼or▲selectthealarmtype(seealarmselection
table)
D.PressSETtoconfirm
E.PressSETtoreturntoLEVEL1
Step(3):SetalarmvalueAL1/AL2
SeeAL1andAL2inalarmmodeTable
A.PressSETkeyseveraltimestoaccessAL1
selection,andthenpress◄toenablethe
selection.
B.Press▲or▼toSETthevalue,andthenpress
the◄keytomovetothenextdigitanddoBoth
AL1andAL2canchoosealarmmodefrom0to10,
whichcanthesamesetting.
C.Aftersetting,pressSETkeytoconfirm.Pattern
EndoutputcanbeselectedasAlarmmode11.
Thereisalsoaconstanttemperatureandtiming
alarmmode19
D.PressSETtoreturntoLEVEL1settingandtest
thealarmfunctionorpatternendoutput.
Step(4):ProgramControlSettingand
Operation(Optional)
A.AtLEVEL1masterPV/SVdisplaypressSETkeyseveral
timestoreach“C01”inordertostarttosettheprogram.
Press◄and▲or▼andSETtosetthetemperatureforthe
fristsegment.
B.PressSETtoselectT01.Press◄and▲or▼andSET
tosetthetimeforthefristsegment.
C.PressSETseveraltimesuntilyoureachOU01.Press◄
and▲or▼andSETtosettheMVhighlimitforthefirst
segment.Repeatforeachsteptocreatethepattern.
D.EnsureallremainingCX,TXandOUXvaluesaresetto
0
Youmaywanttosetupmultiplepatterns.
E.NotethatwhenpresettingofsegmentsIscomplete,CX,TXandOUXofthenextsegmentmustallbeput"0"
astheisolationsegmentandmarkbetweengroups.
E.60isthemaximumofsegments.
G.CALsettingisthefirststepnumberofthestartupoperationgroup.Forexample,ifthesecondgroupsbegins
atC08,thenCALshouldbesetto08.
F.IftheprogramControlneedstostartfrom0DegC,setSTAparameterto1;ifPVisneeded,puttheSTAitem
into2or3.ProgramcontrolENDmodehastwooptionsseeoperationflowchart(endofLEVEL3)
G.Duringoperationtheprogramsegmentorstepnumberyoucanchangethecurrentsegment/stepnumberto
runforwardorbackwardwithintherangeofthecurrentgroup;SelectStitemtoseethecurrentsteptimeofthe
currentrunningsegmentinordertoknowwhereexactlyintheprogramyouarecurretlyoperating.
H.Tostart/endtheprogram,pleasepressSETkeyand▲keyatthesametime.
I.Pressthe▲buttontopause/continuetheprogram.
J.Toensurethecontrollerreachesthedesiredtemperatureregardlessofthetimeperiod,youcanselectWait
Value(WB)intherangeof(0.110DegC),WB=0meansthecontrollerwilladvanceeveniftheset
temperatureisnotreached.SeeendlfLEVEL3menu
K.Thecontrollerwillstarteitherbyshortingterminals6and7,orbypressingthe
·Pressthe▲andSETkeyonce(34seconds)tostarttheprogramcontrol;ifpressthe▲andSETkeyonce
again(34seconds)programcontrolwillend;·duringtheprogramcontroloperation,press▲keyonce(12
seconds)topausetheprogramcontrol.Ifpressthe▲keyagainprogramcontrolwillcontinuetorun.

Step(5):Autotuning(AT)Function
A.Onceinstalledinthefield,carryoutselftuningtoallowthecontrollertodeterminetheoptimumAT
parameters.
B.ATcalculationwillchoosetheoptimumPIDParametersbasedonthecontrollersautotuningalgorithm.
C.Themaximumvalueoftheprocesscurveshouldbeabout80%oftherangeofinstrumentdetection.
D.Beforetheprogramisnotstarted(fixedvaluecontrolSTA=0),itisbettertocarryoutATaroundthemaximum
valueoftheprocesscurve(SV=0.3).E.InLEVEL1process,pressSETkeyseveraltimestoreachAToption,
Step(6)ManuallymodifyingPIDparameters.(OptionalFineTuning)
UsethebelowduietochangetheP,I,Dvaluesforfinetuningofmanualtuning(LEVEL2)
Example:ToSetfourgroupsasshownintheabovefigure
Inthefirstgroup,therearefivestages:thefirststage,thesteptemperatureisC1,andthesteptimeisT1.Inthe
secondsegment,theendtemperatureisC2andtheendtimeisT2.Inthethirdstage,thesteptemperatureisC3
andthesteptimeisT3.Inthefourthsection,thesteptemperatureisC4andthesteptimeisT4.Inparagraph5,
thesteptemperatureisC5andthesteptimeisT5.
Thesecondsetofsevensections:thefirstsection,theendtemperatureisC7,theendtimeisT7.Inthesecond
segment,theendtemperatureisC8andtheendtimeisT8.Inthethirdsection,theendtemperatureisC9and
theendtimeisT9.Inthefourthsegment,theendtemperatureisC10andtheendtimeisT10.Inparagraph5,
thesteptemperatureisC11andthesteptimeisT11.Inthesixthparagraph,thesteptemperatureisC12and
thesteptimeisT12.Intheseventhsection,theendtemperatureisC13andtheendtimeisT13.Thethirdsetof
threesections:thefirstsection,theendtemperatureisC15,theendtimeisT15.Inthesecondsegment,theend
temperatureisC16andtheendtimeisT16.Inthethirdsection,theendtemperatureisC17andtheendtimeis
T17.
Thefourthsetoffivesegments:thefirstsegment,theendtemperatureisC19,theendtimeisT19.Inthesecond
segment,theendtemperatureisC20andtheendtimeisT20.Inthethirdsection,thesteptemperatureisC21

RateofChange/SlopeTemperatureLimit
Whenyoursystemneedsasoftstart(SVpresetslopeheating),pleaseoperateinthefollowingorder:
SETSVvalue→atLEVEL1,pressSETkeytofindRAPtoSETslopetemperaturevalue,and→thenpressSET
keytofindRTMtoSETslopetimeinminutes(forexample,SETslopeto10 /min,RAPto10.0,RTMto001.0)
→aftersetting,SVvaluewillbeSETimmediatelyfromthecurrentPVvalueto10 /min,untilreachingtheSET
SVvalue.
SlopeheatingprocessPROTheoutputpercentageofnormaltemperaturelightsflashingcontrolprocessis
automaticallycontrolledbyPID
DehumidificationFunction
Forsystemswhichrequiredehumidificationfunction.
InLevel1Menu,pressSETbuttonseveraltimestoreach
SRTtopresetdehumidificationPVvalue,(Mostcommon
rangeis1040DegC)pressSETkeyagainandreach
LMOtopresetdehumidificationworkoutputpercentage,
generally2.0to5.0%.ForexampleforSRT=40,andLMO
=2%,theControllerwilloutputat2%whenthesystem
temperaturedropsbelow40DegC.Thisfeaturecanhelp
avoidheaterburnout.
Theabovecurveshowstwopoints,theDipintheheating
curveiscausedbythedehumidificationsetting.The
secondpointisthenormaloutputofthePIDController.
SoftStartFunction
OutputSoftStart
ToenablesimplesoftstartfeaturesettheSVasfollows;
SetSVvalue>Inlevel3pressSETkeytoreachDLY,SETtheoutputsoftstartvalueinseconds(I.e.ifDLYis
setto10,thenthesoftstarttimewillbe10seconds).Exitthemenubypressingsetuntilyoureturntothemain
screen.Nowthesoftstartfunctionisactivatedwhenthecontrolissettobeginheating.

JumperSettingsforTC JumperSettingsforRTD
Note:futureversionV1.2willhavefullmultirangeinputtypewithoutJumperselection
This manual suits for next models
1
Table of contents
Other FASTRON. Temperature Controllers manuals
Popular Temperature Controllers manuals by other brands
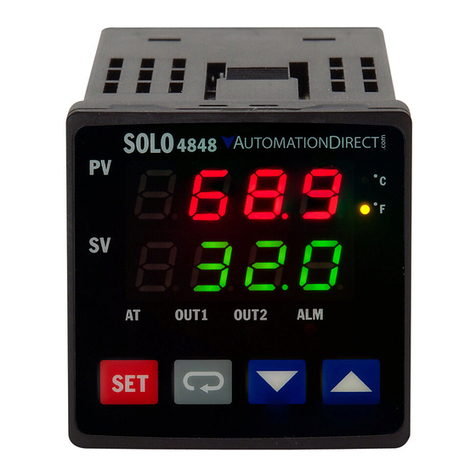
Solo
Solo SL4848 Series quick start guide
Tech Controllers
Tech Controllers EU-T-3.1 user manual
Resistron
Resistron RES-430 operating instructions
Airmar Technology Corporation
Airmar Technology Corporation T42 Owner's guide & installation instructions
Autonics
Autonics TN Series product manual
domat
domat AERASGARD RCO2 -W Operating Instructions, Mounting & Installation
