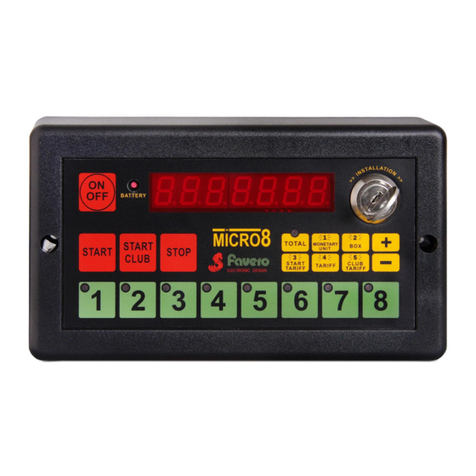
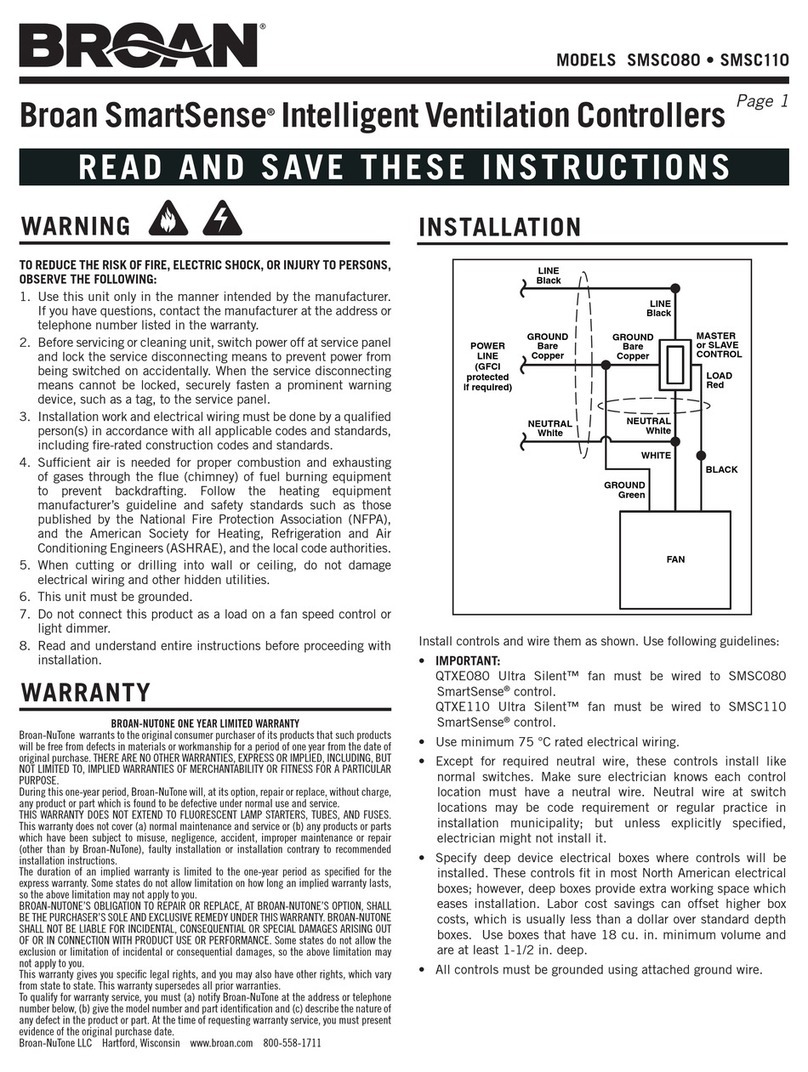
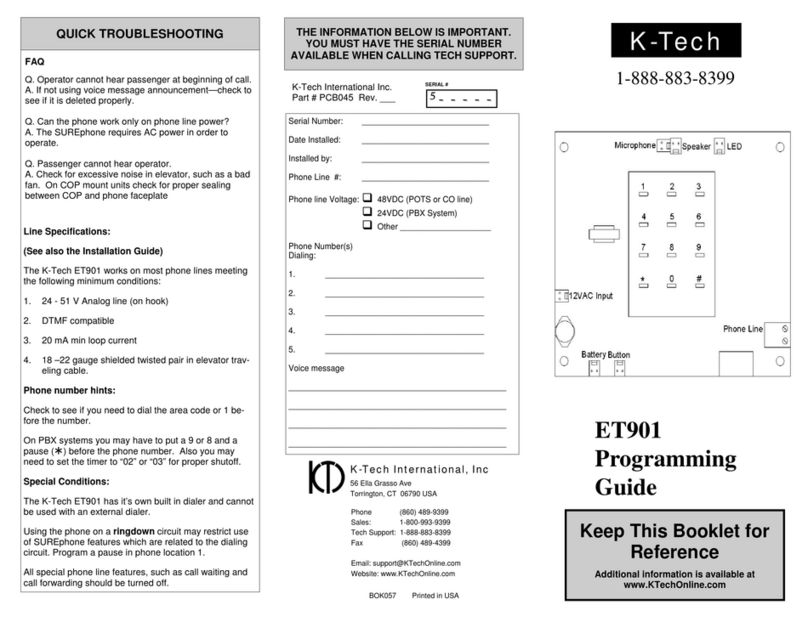
Favero Micro32 Vers.2 User manual

ITALIANO
ENGLISH
DEUTSCH
FRANÇAIS
ESPAÑOL
MANUALE DEL MICRO32 (Versione 2) E ACCESSORI
MANUAL FOR THE MICRO32 (2nd Vers.) AND ACCESSORIES
HANDBUCH MICRO32 (Version 2) UND ZUBEHÖR
LIVRET D'INSTRUCTIONS MICRO32 (Vers. 2) ET ACCESSOIRES
MANUAL MICRO32 (Version 2) Y ACCESORIOS
cod. A212
MICRO
Vers.2

ITALIANO
ENGLISH
DEUTSCH
FRANÇAIS
ESPAÑOL
INDICE
CONTENTS
MANUALE DEL MICRO32 (Versione 2) E ACCESSORI
NOTE PER L'INSTALLAZIONE
PROGRAMMAZIONE MICRO32
FUNZIONAMENTO MICRO32
Installazione STAMPANTE
Installazione CONTROL-LAMP per accensione luci
Installazione CONTROL-BALL per controllo bilie
CODICI ARTICOLI
1
1
4
4
4
5
7
MANUAL FOR THE MICRO32 (2nd Vers.) AND ACCESSORIES
NOTES ON THE INSTALLATION
PROGRAMMING MICRO32
OPERATING MICRO32
Installing the PRINTER
Installing CONTROL-LAMP for turning on lights
Installing the CONTROL-BALL to manage the balls
ARTICLE CODES
8
8
11
11
11
12
14
HANDBUCH MICRO32 (Version 2) UND ZUBEHÖR
INHALTSVERZEICHNISAnmerkung zur Installation
Programmierung MICRO32
Funktionsablauf MICRO32
Installation DRUCKER
Installation CONTROL-LAMP zum Einschalten der Beleuchtung
Installation CONTROL-BALL zur Kugelnkontrolle
ARTIKELNUMMERN
15
15
18
19
19
19
21
LIVRET D'INSTRUCTIONS MICRO32 (Vers. 2) ET ACCESSOIRES
TABLE DES MATIÈRES NOTICE D'INSTALLATION
PROGRAMMATION MICRO32
FONCTIONNEMENT MICRO32
Installation IMPRIMANTE
Installation CONTROL-LAMP pour allumer les lampes
Installation CONTROL-BALL pour le contrôle des boules
CODES ARTICLES
22
22
25
25
26
26
28
INDICE
MANUAL MICRO32 (Version 2) Y ACCESORIOS
NOTAS PARA LA INSTALACIÓN
PROGRAMACIÓN MICRO32
FUNCIONAMIENTO MICRO32
Instalación de la IMPRESORA
Instalación CONTROL-LAMP para el encendido de las lámparas
Instalación CONTROL-BALL para el control de las bolitas
CODIGOS ARTICULOS
29
29
32
33
33
33
35

1
ITALIANO
NOTE PER L'INSTALLAZIONE
Inserire la spina in una presa 230 Vca e poi accendere
col tasto ON/OFF. Prima di iniziare ad operare è bene
eseguire tutta la programmazione in modo che siano
abilitate le funzioni che interessano.
Ecco una tabella con tutti i passi di programmazione che
in seguito verranno descritti dettagliatamente:
P.01 LINGUA
P.02 UNITÁ MONETARIA
P.03 ABILITAZIONE GESTIONE BAR
P.04 SOMMA TOTALI GIOCO
P.05 SOMMA TOTALI BAR (CONSUMAZIONI)
P.06 TOTALI NON AZZERABILI
P.07 SERVICE *** TOTALE GIOCO
P.08 SERVICE *** TOTALE BAR (CONSUMAZIONI)
P.10 STAMPA Dl TUTTA LA PROGRAMMAZIONE
P.11 ABILITA STAMPA AUTOMATICA SCONTRINO
P.12 ABILITA STAMPA ORARI DI START E STOP
SULLO SCONTRINO
P.13 SELEZIONE DEI BILIARDI CON BOX
CONTROLLO BILIE
P.14 PROGRAMMAZIONE PUBBLICITA' SU
SCONTRINO
P.15 PROGRAMMAZIONE ORA E DATA
P.16 CALIBRAZIONE OROLOGIO
P.17 ABILITAZIONE FASCE ORARIE
P.18 PROGRAMMAZIONE FASCE ORARIE
P.19 ABILITAZIONE TARIFFE CLUB
P.40 - P.49 1 GRUPPO TARIFFE
P.50 - P.59 2 GRUPPO TARIFFE
P.60 - P.69 3 GRUPPO TARIFFE
P.70 - P.79 4 GRUPPO TARIFFE
P.80 - P.89 5 GRUPPO TARIFFE
P.90 - P.99 6 GRUPPO TARIFFE
P.100 TEMPO PER LA RINUNCIA AL GIOCO
P.101 ABILITAZIONE TASTI SPECIALI BAR (num. 17-32)
P.117 - P.132 DESCRIZIONE TASTI SPECIALI BAR
P.217 - P.232 PREZZO TASTI SPECIALI BAR
– Per accedere alla programmazione, girare nel senso
della freccia la chiave INSTALLATION. Sul display rosso
apparirà P.01 ad indicare il primo passo da programmare.
Usare i tasti UP e DOWN per andare avanti o indietro per
la scelta del passo da programmare ed i tasti (+) e (–) per
modificare il valore di ogni passo.
O
O
O
O
O
O
ATTENZIONE: PRIMA DI APRIRE L'INVOLUCRO
TOGLIERE LA TENSIONE DI ALIMENTAZIONE
Assicurarsi che la presa di corrente, per I'alimen-
tazione elettrica, sia provvista di conduttore di terra.
MICRO32 Versione 2
Alimentazione: 230Vca 50-60Hz 50mA MAX.
Fusibili di protezione primario:2xT315mA, 250Vac.
Apparecchiatura: Classe I.
P.01 LINGUA.
P.02 UNITÁ MONETARIA.
P.03 ABILITAZIONE GESTIONE BAR.
P.04 SOMMA TOTALI GIOCO.
P.05 SOMMA TOTALI BAR (CONSUMAZIONI).
P.06 TOTALI NON AZZERABILI.
P.07 SERVICE *** TOTALE GIOCO.
P.08 SERVICE *** TOTALE BAR (CONSUMAZIONI).
Usare i tasti (+) e (–) per scegliere la lingua dei messaggi
visualizzati sul display di destra. Usare il tasto UP per
passare al passo successivo.
Il valore dipende dalla valuta monetaria della nazione e
dall'arrotondamento che si desidera avere sull'importo da
pagare.
I valori disponibili sono: 0,05 0,10 0,20 0,5012510
20 50 100. Esempi: per l’EURO 0,05 , USA 0,10 ,
RUSSIA 1 , GIAPPONE 10.
Il MICRO32 può essere abilitato alla GESTIONE BAR. È
cioè possibile addebitare ad un tavolo gli importi delle
consumazioni dei giocatori (bibite, toast, ecc.).
A fine gioco viene dato l'importo GIOCO, l'importo BAR, e
la loro somma.
Vengono anche gestiti dei totalizzatori separati per il
GIOCO e il BAR. Se si desidera quindi la GESTIONE BAR,
impostare YES col tasto (+).
In seguito, nel capitolo "FUNZIONAMENTO", verrà
spiegato come eseguire l'addebito delle consumazioni
(semplice e rapido).
Viene visualizzata la somma di tutti i totali gioco dei 32
tavoli ed inoltre l'ora e la data di quando è avvenuto
l'ultimo azzeramento. Per vedere il totale gioco di ogni
tavolo basta tenere premuto il num. corrispondente.
Premere PRINT per stampare il resoconto gioco di tutti i
tavoli. Quelli con importo zero non vengono stampati.
Per azzerare tutti i totali gioco dei 32 tavoli premere il
tasto (–). Per visualizzare tramite la stampante un grafico
che permetta una rapida visione di confronto fra i totali,
premere il tasto MEMORY LAST STOP.
Questo passo viene saltato se la gestione bar non è
abilitata in P.03.
È uguale al passo P.04 ma riguarda i totali BAR.
I totali visualizzati servono come ulteriore controllo e
possono essere azzerati solo premendo in successione
ed entro 3 secondi i seguenti 3 tasti: START, BAR, STOP.
È un ulteriore contatore degli importi di gioco incassati,
utile quando c'è del personale dipendente. Infatti, a
questo contatore si può accedere anche con la chiave
SERVICE che viene data ai dipendenti. Al momento del
cambio turno il dipendente uscente può vedere il suo
incasso totale, stamparlo col tasto PRINT e poi azzerarlo
col tasto (–). All'azzeramento viene registrata l'ora e la
data. Per una gestione impeccabile del personale, nel
momento del cambio turno: 1) visualizzare l'importo con
la chiave SERVICE; 2) premere PRINT per stamparlo; 3)
premere il tasto (–) per azzerare.
Usare il tasto UP per andare al passo successivo.
Questo passo viene saltato se la gestione bar non è
abilitata in P.03. È uguale al passo P.07 ma riguarda le
consumazioni.
PROGRAMMAZIONE MICRO32 - Vers. 2

2
P.10 STAMPA DI TUTTA LA PROGRAMMAZIONE.
P.11 ABILITA STAMPA AUTOMATICA SCONTRINO.
P.12 ABILITA STAMPA ORARI DI START E DI STOP
SULLO SCONTRINO.
P.13 SELEZIONE DEI BILIARDI CON BOX
CONTROLLO BILIE.
P.14 PROGRAMMAZIONE PUBBLICITA' SU
SCONTRINO.
P.15 PROGRAMMAZIONE ORA E DATA.
P.16 CALIBRAZIONE OROLOGIO.
P.17 ABILITAZIONE FASCE ORARIE.
Se la stampante è collegata basta premere PRINT per
stampare lo stato di tutti i passi della programmazione per
un eventuale resoconto.
Se YES, quando a fine gioco si fa lo STOP del tavolo
interessato avverrà la stampa dello scontrino.
Se NO, la stampa avverrà solo se dopo lo STOP del
tavolo si preme anche PRINT.
Se YES sullo scontrino appaiono gli orari di inizio e di fine
del gioco. Se gli orari non sono ritenuti necessari, verrà
stampata una riga di meno.
Il MICRO32 può essere collegatoa2CONTROL-BALL.
Ognuno di essi controlla la presenza delle bilie per 4, 8 o
16 biliardi mediante appositi BOX. In questo passo di
programmazione si definisce quali biliardi hanno il BOX
per il controllo delle bilie. Premendo un tasto numerato si
può accendere o spegnere il relativo led lampeggiante
per definire, se acceso, che il biliardo corrispondente ha il
BOX bilie. Per i collegamenti dei box vedere il capitolo
relativo alla "INSTALLAZIONE CONTROL-BALL".
Se si utilizza la stampante, sulla prima riga di ogni
scontrino può essere inserito un messaggio (nome del
locale, telef. ecc.). Utilizzare i tasti (+) e (–) per spostare il
cursoreavantieindietro.Coitastinumeratida1a32si
possono inserire le lettere che sono indicate in piccolo a
fianco dei led rossi. Il tasto 32 (space) inserisce uno
spazio. Il tasto 31 commuta da maiuscolo a minuscolo.
Premendo ripetutamente ENTER si vedrà alternarsi
l'accensione di una parte dei tasti.
Quando sono accesi i primi 10 tasti si potranno inserire
nel messaggio i numeri anziché le lettere.
Se non si desidera tale stampa, cancellare tutti i caratteri
sulla riga con SPACE (32).
In questo passo si può programmare l'orologio interno.
Il valore lampeggiante può essere variato coi tasti (+) e
(–). Col tasto ENTER si sceglie quale valore cambiare.
L'orologio del MICRO32 viene calibrato in fabbrica. Se
per qualsiasi ragione non dovesse essere preciso, è
possibile calibrarlo in questo passo. Coi tasti (+) e (–) si
può variare la precisione a scatti di 10 sec. al mese.
Anzitutto dovete verificare con un segnale orario di
precisione, di quanti secondi va avanti o indietro in un
mese. Se, supponiamo, l'orologio del MICRO32 va avanti
di 37 sec. al mese, si deve premere 4 volte il tasto (–) per
rallentarlo di 40 sec. al mese. Ricordare, una volta
calibrato, di programmare l'ora esatta (P. 15).
Se si desidera che le tariffe cambino automaticamente in
determinati orari della settimana, programmare YES. I
valori delle 4 tariffe possibili e degli orari di cambiamento
(FASCE ORARIE) vengono programmati in passi
successivi.
Se le fasce orarie non sono abilitate la tariffa oraria rimane
fissa e non varia con gli orari. Rimane sempre attiva la
TARIFFA 1 oppure la TARIFFA 1 CLUB se è avvenuto uno
START-CLUB.
Questa fase viene saltata se al passo P.17 le fasce orarie
non sono abilitate.
La programmazione di tutti gli orari in cui deve avvenire
un cambio di tariffa richiede un certo tempo poiché si
dovrà percorrere tutta la settimana giorno per giorno. E'
bene quindi Vi scriviate su un foglio, cominciando dal
lunedi, gli orari in cui deve avvenire un cambio tariffa e
quale delle 4 tariffe disponibili entrerà in funzione ad
ognuno di detti orari. Le 4 tariffe vengono chiamate
TARIFFA 1, 2, 3, 4 ed il loro valore verrà programmato più
avanti.
Gli orari possibili variano di mezz'ora in mezz'ora. Come
visualizzato dal display si inizierà dalle ore zero di lunedi.
A fianco dell'ora è indicata la tariffa che è in funzione a
dettoorario.Utilizzareitasti1,2,3e4percambiarela
tariffa.
Una volta decisa la tariffa alle ore zero di lunedi, avanzare
l'orario con il tasto (+) (o indietro col tasto (–)) di mezz'ora
in mezz'ora controllando che la tariffa impostata rimanga
uguale finché si raggiunge il nuovo orario al quale deve
avvenire il cambio tariffa. Utilizzare ancora i tasti 1, 2, 3 o
4 per selezionare la nuova tariffa e proseguire con l'orario.
Dopo le 23:30 di lunedi si passerà alle ore zero di martedi
fino alle 23:30 di domenica. Per avanzare o indietreggiare
velocemente con l'orario tenere premuti i tasti (+) o (–).
Una volta terminato, potete controllare il tutto con il tasto
ENTER che permette di visualizzare l'orario di ogni
cambiamento di tariffa. Col tasto PRINT si può avere il
resoconto di tutte le fasce orarie.
Per abilitare o disabilitare le tariffe club a seconda che ci
sia o meno la gestione di soci club con tariffe ridotte. Se
non abilitate, il tasto START-CLUB non funzionerà.
Ci sono 9 tariffe che possono essere associate ad un
tavolo ed esattamente: 1 importo minimo di gioco, 4 tariffe
orarie più le 4 corrispondenti tariffe club.
Le 9 tariffe definiscono un GRUPPO TARIFFE. Si possono
programmare 6 GRUPPI tariffe e definire quali sono i
tavoli associati a ciascun GRUPPO. Se per esempio i
tavoli devono avere tutti le stesse tariffe, basterà
programmare un solo gruppo di tariffe ed associare a
quel gruppo tutti i tavoli.
Le 4 tariffe orarie cambieranno automaticamente agli orari
già definiti al passo P.18. Se c'è stato uno START-CLUB
saranno invece attive le 4 corrispondenti TARIFFE CLUB.
Se le fasce orarie sono state disabilitate al passo P.17,
allora sarà sempre attiva la TARIFFA 1 oppure la TARIFFA
1 CLUB. Anche le TARIFFE CLUB possono essere
disabilitate: al passo P.19. I passi per programmare le
tariffe non abilitate, vengono saltati.
L'importo minimo di gioco è utile per i casi in cui i
giocatori occupano il tavolo per poco tempo. Per la
programmazione: come al passo P.41.
P.18 PROGRAMMAZIONE FASCE ORARIE.
P.19 ABILITAZIONE TARIFFE CLUB.
PREMESSA ALLA PROGRAMMAZIONE TARIFFE.
1 GRUPPO TARIFFE.
P.40 1 GRUPPO: IMPORTO MINIMO DI GIOCO.
o
o
ITALIANO

3
P.41 1 GRUPPO: TARIFFA 1.
P.42 1 GRUPPO: TARIFFA 2.
P.43 1 GRUPPO: TARIFFA 3.
P.44 1 GRUPPO: TARIFFA 4.
P.45 1 GRUPPO: TARIFFA 1 CLUB.
P.46 1 GRUPPO: TARIFFA 2 CLUB.
P.47 1 GRUPPO: TARIFFA 3 CLUB.
P.48 1 GRUPPO: TARIFFA 4 CLUB.
P.49 DEFINIZIONE DEI TAVOLI CON TARIFFE
DEL 1 GRUPPO.
P.50 2 GRUPPO IMPORTO MINIMO DI GIOCO
P.51 2 GRUPPO TARIFFA 1
P.52 2 GRUPPO TARIFFA 2
P.53 2 GRUPPO TARIFFA 3
P.54 2 GRUPPO TARIFFA 4
P.55 2 GRUPPO TARIFFA 1 CLUB
P.56 2 GRUPPO TARIFFA 2 CLUB
P.57 2 GRUPPO TARIFFA 3 CLUB
P.58 2 GRUPPO TARIFFA 4 CLUB
P.59 DEFINIZIONE DEI TAVOLI CON TARIFFE DEL 2
GRUPPO.
P.60 3 GRUPPO IMPORTO MINIMO DI GIOCO
P.61 3 GRUPPO TARIFFA 1
P.62 3 GRUPPO TARIFFA 2
o
o
O
O
O
O
O
O
O
O
O
O
O
O
O
O
O
O
O
O
O
O
Per digitare l'importo usare i tasti numerati accesi dal 1 al
12 (vedere le scritte sopra tali tasti). Il tasto 14 (CANC.)
cancella in caso di errore.
Una volta digitato l'importo confermarlo col tasto ENTER.
Anche i tasti (+) e (–) possono essere utilizzati per
incrementare o diminuire l'importo.
Questa fase viene saltata se al passo P.17 le fasce orarie
non sono abilitate.
Per la programmazione: come al passo P.41.
Questa fase viene saltata se al passo P.17 le fasce orarie
non sono abilitate.
Per la programmazione: come al passo P.41.
Questa fase viene saltata se al passo P.17 le fasce orarie
non sono abilitate.
Per la programmazione: come al passo P.41.
Questa fase viene saltata se al passo P.19 le tariffe club
non sono abilitate.
Per la programmazione: come al passo P.41.
Questa fase viene saltata se al passo P.17 le fasce orarie
non sono abilitate oppure se al passo P.19 non sono
abilitate le tariffe club.
Per la programmazione: come al passo P.41.
Questa fase viene saltata se al passo P.17 le fasce orarie
non sono abilitate oppure se al passo P.19 non sono
abilitate le tariffe club.
Per la programmazione: come al passo P.41.
Questa fase viene saltata se al passo P.17 le fasce orarie
non sono abilitate oppure se al passo P.19 non sono
abilitate le tariffe club.
Per la programmazione: come al passo P.41.
Vengono decisi quali tavoli funzioneranno con le tariffe del
1 GRUPPO. Premendo un tasto numerato si può
accendere o spegnere il relativo led lampeggiante per
definire, se acceso, che il tavolo corrispondente
funzionerà con le tariffe del 1 GRUPPO.
O
O
P.63 3 GRUPPO TARIFFA 3
P.64 3 GRUPPO TARIFFA 4
P.65 3 GRUPPO TARIFFA 1 CLUB
P.66 3 GRUPPO TARIFFA 2 CLUB
P.67 3 GRUPPO TARIFFA 3 CLUB
P.68 3 GRUPPO TARIFFA 4 CLUB
P.69 DEFINIZIONE DEI TAVOLI CON TARIFFE DEL 3
GRUPPO.
P.70 4 GRUPPO IMPORTO MINIMO DI GIOCO
P.71 4 GRUPPO TARIFFA 1
P.72 4 GRUPPO TARIFFA 2
P.73 4 GRUPPO TARIFFA 3
P.74 4 GRUPPO TARIFFA 4
P.75 4 GRUPPO TARIFFA 1 CLUB
P.76 4 GRUPPO TARIFFA 2 CLUB
P.77 4 GRUPPO TARIFFA 3 CLUB
P.78 4 GRUPPO TARIFFA 4 CLUB
P.79 DEFINIZIONE DEI TAVOLI CON TARIFFE DEL 4
GRUPPO.
P.80 5 GRUPPO IMPORTO MINIMO DI GIOCO
P.81 5 GRUPPO TARIFFA 1
P.82 5 GRUPPO TARIFFA 2
P.83 5 GRUPPO TARIFFA 3
P.84 5 GRUPPO TARIFFA 4
P.85 5 GRUPPO TARIFFA 1 CLUB
P.86 5 GRUPPO TARIFFA 2 CLUB
P.87 5 GRUPPO TARIFFA 3 CLUB
P.88 5 GRUPPO TARIFFA 4 CLUB
P.89 DEFINIZIONE DEI TAVOLI CON TARIFFE DEL 5
GRUPPO.
P.90 6 GRUPPO IMPORTO MINIMO DI GIOCO
P.91 6 GRUPPO TARIFFA 1
P.92 6 GRUPPO TARIFFA 2
P.93 6 GRUPPO TARIFFA 3
P.94 6 GRUPPO TARIFFA 4
P.95 6 GRUPPO TARIFFA 1 CLUB
P.96 6 GRUPPO TARIFFA 2 CLUB
P.97 6 GRUPPO TARIFFA 3 CLUB
P.98 6 GRUPPO TARIFFA 4 CLUB
P.99 DEFINIZIONE DEI TAVOLI CON TARIFFE DEL 6
GRUPPO.
P.100 TEMPO PER LA RINUNCIA AL GIOCO.
P.101 ABILITAZIONE TASTI SPECIALI BAR (n. 17-32)
P.117 - P.132 DESCRIZIONE TASTI SPECIALI BAR.
O
O
O
O
O
O
O
O
O
O
O
O
O
O
O
O
O
O
O
O
O
O
O
O
O
O
O
O
O
O
O
O
O
O
O
O
O
E' possibile programmare un tempo da 0 a 300 sec.
affinchè, se dal momento dello START a quello dello
STOP non è trascorso tale tempo perchè il giocatore ha
rinunciato a giocare, non gli risulterà nessun importo da
pagare. Usare i tasti (+) e (–) per impostare il tempo
desiderato.
Questa fase viene saltata se al passo P.03 la gestione
BAR non è abilitata.
Se YES si potranno associare le 16 consumazioni più
frequenti ai 16 tasti dal num. 17 al 32. In questo modo
quando si dovranno addebitare tali consumazioni sarà
sufficiente premere solo i tasti corrispondenti.
Queste fasi vengono saltate se ai passi P.03 e P.101 la
gestione BAR e l'abilitazione TASTI SPECIALI BAR non
sono attivate. In ognuno di questi passi si può
memorizzare una scritta di max. 8 caratteri (lettere e
numeri) che viene associata ad ognuno dei 16 tasti
speciali bar. Inserire i caratteri come per il passo P.14.
ITALIANO

4
INSTALLAZIONE STAMPANTE
INSTALLAZIONE PER
ACCENSIONE LUCI
CONTROL-LAMP
Per collegare la stampante basta inserire il connettore in
dotazione nella presa PRINT situata posteriormente al
MICRO32. Allegate alla stampante ci sono le istruzioni per
il suo uso.
La stampante, oltre che per lo scontrino, può essere utile
per stampare un resoconto di tutti i totalizzatori (vedi
passi P.04 e P.05 della programmazione) e dello stato
della programmazione (passo P.10). Inoltre qualsiasi dato
visualizzato può essere mandato in stampa premendo il
tasto PRINT.
CONTROL-LAMP
Alimentazione: 230Vca, 50-60Hz, 100mA MAX.
Corrente di carico per ogni via di lampade: 5 A MAX.
Fusibile per ogni via di lampade: F 6,3A, 250Vca.
Apparecchiatura: Classe II.
ATTENZIONE: Prima di aprire I'involucro togliere la
tensione anche all'impianto lampade.
Prima di iniziare ad operare è bene sia avvenuta la
programmazione in modo che siano abilitate le funzioni
che interessano.
Inserire la spina in una presa 230 Vca e accendere col
tasto ON/OFF. In mancanza di energia elettrica potete
accendere MICRO32 premendo con la punta di una
penna dentro al foro BATTERY che è situato a fianco di
ON/OFF. La batteria interna (2 comuni pile da 9 Volts) ha
una durata dipendente dal suo utilizzo, e in condizioni
medie superiore ai 5 anni. Tale batteria NON serve a
mantenere i dati in memoria ma solamente a permettere
la visualizzazione degli importi in caso di black-out
elettrico.
Per far partire il conteggio premere START e poi il num.
del tavolo interessato. Nel caso di soci club utilizzare
START-CLUB anzichè START. Sul tasto numerato si
accenderà il led ad indicare che il tavolo è in conteggio.
Se il conteggio è con tariffe club il led ha un leggero
lampeggìo. Una volta comandato lo START, si può
cambiare in START-CLUB o viceversa entro il tempo di un
minuto.
Se la gestione bar è abilitata (passo P.03 della
programmazione), si può addebitare una consumazione
ad un tavolo in gioco premendo BAR e poi il num.
interessato.
Dopodichè inserire la consumazione usando i tasti
lampeggianti, osservando le scritte riportate sopra ad
essi. Con i tasti dal 1 al 12 si digita l'importo. Il tasto
CANC. (14) cancella in caso di errore. Il tasto REP. (15)
permette di ripetere più volte l'importo digitato se si
servono più consumazioni dello stesso valore. Il tasto (+)
(16) addiziona più importi.
Qualora siano stati abilitati e opportunamente memorizzati
anche i tasti speciali bar (num. 17-32) è possibile inserire
le relative consumazioni semplicemente premendoli.
Infine premere ENTER per confermare il tutto.
Un importo addebitato erroneamente può essere corretto
inserendone uno negativo con il tasto (–).
Durante il conteggio si può vedere l'importo maturato fino
a quel momento da un tavolo semplicemente premendo il
suo numero, poi si può stamparlo premendo PRINT (se la
stampante è collegata). Viene visualizzato anche il suo
orario di partenza.
Finito il gioco, per arrestare il conteggio premere STOP e
poi il num. interessato. Sul display rosso apparirà
l'importo totale e sul display di destra verrà visualizzato
l'importo gioco e l'importo consumazioni. Se è collegata
la stampante, verrà stampato lo scontrino, sempre che ciò
sia stato abilitato al passo P.11 della programmazione.
Se si comanda lo STOP di un tavolo che ha il controllo
delle bilie, senza che queste siano al loro posto, lo STOP
viene accettato ma avviene una ripartenza automatica.
FUNZIONAMENTO MICRO32 - Versione 2
P.217 - P.232 PREZZO TASTI SPECIALI BAR.
Queste fasi vengono saltate se ai passi P.03 e P.101 la
gestione BAR e l'abilitazione TASTI SPECIALI BAR non
sono attivate. In questi passi si memorizza l'importo che
verrà associato ad ognuno dei 16 tasti speciali bar. Per
digitare l'importo usare i tasti lampeggianti dall'1 al 12
(vedere le scritte sopra a tali tasti). Il tasto 14 (CANC.)
cancella in caso di errore. Una volta digitato l'importo,
confermarlo con ENTER.
Questo è utile per permettere lo scambio di giocatori
senza dover rimettere le bilie al loro posto.
In questo caso la ripartenza automatica non è CLUB e
quindi, se il giocatore entrante è socio club, si ha un
minuto di tempo per premere START-CLUB e poi il numero
tavolo.
Il tasto DOWN invece, permette lo scambio fra due tavoli
consentendo ai giocatori di spostarsi presso un altro
tavolo. Per effettuare lo scambio premere DOWN, poi i
numeri dei 2 tavoli ed infine ENTER.
Lo scambio è permesso solo fra tavoli con le stesse tariffe
e che sono entrambi in conteggio, oppure fra uno in
conteggio ed uno in STOP se nessuno dei due ha il BOX
bilie abilitato (passo P.13).
Con il tasto MEMORY-LAST-STOP e poi il num. del tavolo
interessato, si visualizza il suo ultimo importo pagato,
anche se il tavolo ha ripreso un nuovo conteggio.
Girando la chiave INSTALLATION si accede alla
programmazione e alla visualizzazione dei totalizzatori.
Vedere il capitolo "PROGRAMMAZIONE' per una
descrizione più dettagliata. I totalizzatori sono visualizzati
ai passi: da P.04 a P.08. Usare i tasti UP e DOWN per
raggiungere tali passi.
Girando la chiave SERVICE si accede ai 2 totalizzatori di
servizio per i dipendenti. Vedere i passi P.07 e P.08 nel
capitolo "PROGRAMMAZIONE".
Allo scopo di facilitare la pulizia dei tavoli e a condizione
che non ci siano tavoli in conteggio, è possibile
accendere contemporaneamente tutte le luci
semplicemente girando la chiave SERVICE e premendo il
tasto num. 32.
Lo stesso risultato si ottiene premendo il tasto num. 32 al
passo P.07 della programmazione.
Svitare le 2 viti sul frontale, girare la chiave
INSTALLATION e tirare a se. Staccare i 2 connettori sulla
scheda e togliere tutto il frontale. Utilizzarei2fori
posteriori per il fissaggio alla parete.
FISSAGGIO A PARETE.
Prima di aprire MICRO32 staccare sempre la spina.
ITALIANO

5
INSTALLAZIONE PER
CONTROLLO BILIE
CONTROL-BALL
Il CONTROL-BALL nelle tre versioni, per 4, 8 e per 16
tavoli, controlla la presenza delle bilie. Ad esso possono
essere collegati 4, 8 o 16 BOX (cassetti) contenenti le
bilie.
Può essere posto fino ad una distanza di 100 mt. dal
MICRO32. In dotazione c'è un sottile cavo lungo 15 mt.
Per distanze maggiori sono disponibili prolunghe oppure
allungare il cavo seguendo le istruzioni fornite per il
CONTROL-LAMP.
Posteriormente al MICRO 32 ci sono 2 prese
contrassegnate da BALL1 e BALL2 alle quali è possibile
collegare 2 CONTROL-BALL. La presa BALL1 riguarda i
tavoli dal num. 1 al num. 16, mentre la presa BALL 2 quelli
dal num. 17 al 32.
Nella programmazione del MICRO32, al passo P.13 (vedi
capitolo PROGRAMMAZIONE), si deve specificare su
quali tavoli si desidera ci sia il controllo delle bilie.
Il collegamento dal CONTROL-BALL ad ogni BOX viene
effettuato con due soli fili ed in bassa tensione. Inoltre
nessun danno si verifica per cortocircuiti o collegamenti
errati. Il BOX è un robusto contenitore in metallo che
contiene un vassoio con tutte le bilie. Il BOX si apre
solamente quando viene comandato un inizio gioco
(START) dal MICRO 32, permettendo così al giocatore di
estrarre il vassoio. A fine gioco, quando nel BOX viene
reinserito il vassoio con tutte le bilie e chiuso lo sportello
(se manca una bilia non si chiude), il MICRO 32 arresta il
conteggio del tempo e indica all'operatore la fine del
gioco facendo lampeggiare il led rosso sul tasto del tavolo
interessato.
I collegamenti del CONTROL-BALL sono indicati in fig. 2.
L'alimentazione 230 Vca del CONTROL-BALL deve essere
sulla stessa linea di alimentazione del MICRO32 in modo
che siano entrambi spenti o accesi dal medesimo
interruttore generale.
I BOX bilie, anche se funzionanti con sistema isolato a 24
Volt, sono predisposti internamente con faston per il
collegamento all'impianto di terra.
CONTROL-BALL
Alimentazione: 230Vca, 50-60 Hz, 250 mA MAX.
Fusibile di protezione primario: T 315mA, 250Vca.
Tensione per ogni uscita: 24 Vca.
Corrente MAX per ogni uscita: 2 A AC per 40 mSec circa.
Apparecchiatura: Classe II.
ATTENZIONE: prima di aprire l'involucro togliere la
tensione di alimentazione.
ITALIANO
FIG. 1 COLLEGAMENTI
CONTROL-LAMP
230V
SERIAL
LINE
ALIMENTAZIONE LAMPADARI
LAMP.
ALIMENTAZIONE
CONTROL-LAMP
COLLEGAMENTO
AL MICRO32
230 Vca
230 Vca 100m
12345678
21345678
FUSIBILI 6,3A 250 VcaF
SCHEDA
CONTROL-LAMP
Il CONTROL-LAMP permette di gestire l'accensione e lo
spegnimento dei lampadari, o di altri carichi elettrici, in
funzione dello stato dei tavoli.
Ci sono 3 modelli di CONTROL-LAMP in modo da
ottimizzare l'impiego in base al num. di lampadari da
collegare: per 4, 8 e per 16 luci.
Il CONTROL-LAMP può essere posto fino a una distanza
di 100 mt. dal MICRO32. In dotazione c'è un sottile cavo
lungo 15 mt. Per distanze maggiori sono disponibili
prolunghe, oppure è possibile tagliare questo cavo ed
allungarlo con 2 soli fili collegando un filo ai 2 conduttori
centrali del cavo ed il secondo filo ai 2 conduttori laterali (il
cavo ha 4 conduttori).
Posteriormente al MICRO32 ci sono 2 prese,
contrassegnate con LAMP1 e LAMP2. La presa LAMP1
riguarda i tavoli che vanno dal num. 1 al num. 16, mentre
la presa LAMP2 i tavoli dal num. 17 al 32. Ad ognuna di
queste prese può essere collegato un CONTROL-LAMP
scelto, in base alle esigenze, fra le 3 versioni disponibili
(vedi CODICI ARTICOLI).
Lo schema dei collegamenti è indicato in FIG. 1.
Sulla scheda del CONTROL-LAMP un led rosso indica:
il collegamento con MICRO32 è ok
non c'è il collegamento con
MICRO32
manca l' alimentazione al CONTROL-
LAMP oppure è guasto.
led lampeggiante;
led sempre acceso;
led spento;

6
Ci sono BOX per tutti i tipi di gioco: vedere il capitolo
"CODICI ARTICOLI".
Sulla scheda del CONTROL-BALL un led rosso indica:
il collegamento con MICRO32 è ok
non c'è il collegamento con
MICRO32
manca l'alimentazione al
CONTROL-BALL oppure è guasto.
Al CONTROL-BALL possono essere collegati anche dei
semplici contenitori per bilie nei quali l'estrazione del
vassoio provoca l'apertura di un microinterruttore. In
questo caso lo START del gioco avviene automaticamente
quando si estrae il vassoio.
Se si desidera che tale START automatico sia CLUB, si
può comandarlo prima oppure entro un minuto
dall'estrazione del vassoio premendo START-CLUB e poi il
num. interessato.
I due fili del microinterruttore vanno collegati allo stesso
modo dei due fili del BOX.
led lampeggiante;
led sempre acceso;
led spento;
FIG. 2 COLLEGAMENTI
CONTROL-BALL
230V SERIAL
LINE
COMMON-BOX
SCHEDA CONTROL-BALL
BOX
minimo 1mm2
Sezione fili
ALIMENTAZIONE
CONTROL-BALL
COLLEGAMENTO
AL MICRO32
230 Vca 250mA
2
1
3
12345678
FUSIBILE T 315mA 250 Vca
NOTE
Le custodie di CONTROL-LAMP e CONTROL-BALL sono
in materiale Classe: IEC 650.
La protezione da corto-circuiti e contatti indiretti per tutte
le apparecchiature, se non già esistente nell'impianto
elettrico, sarà da provvedere a cura del cliente.
II costruttore declina ogni responsabilità in caso di
manomissione alle proprie apparecchiature.
ITALIANO

7
ITALIANO
A pagina 36 sono presenti alcune foto degli articoli seguenti.
Art. 700/2.. .
Art. 710..... .
Art. 739..... per 4 lampadari.
Art. 740..... per 8 lampadari.
Art. 741..... per 16 lampadari.
Art. 728..... per 4 box bilie.
Art. 729..... per 8 box bilie.
Art. 730..... per 16 box bilie.
Art. 750.....PROLUNGA 15 mt. aggiuntiva per CONTROL-BALL-LAMP.
Art. 711.....NASTRO per STAMPANTE.
Art. 403..... per Internazionale (3 bilie Ø61,5 mm).
Art. 403A.. per Italiana (2 x Ø68+1xØ59mm).
Art. 404..... per 4 bilie (4 x Ø61,5 mm).
Art. 409..... per Boccette Internazionali (9 x Ø61,5 mm).
Art. 409A.. per Boccette Nazionali (8 x Ø59+ 1 x Ø54 mm).
Art. 416..... per Pool (16 x Ø57 mm).
+ Art. 446 SPESSORE 6mm per Pool con bilie Ø50-52 mm.
Art. 416A.. per Pool Inglese (16 x Ø50-52 mm).
Art. 416B.. per Piramide Russa (16 x Ø68 mm).
Art. 422..... per Snooker (22 x Ø52-54 mm).
Art. 402..... per 2 racchette Ping-Pong + pallina.
Tutti i BOX sopraelencati hanno un rialzo posteriore in lamiera per poter
essere facilmente fissati a parete.
Se i BOX devono essere accatastati uno sull'altro, sono disponibili senza il
rialzo posteriore in lamiera e con una gomma antiscivolo: sono identificati
dal codice articolo seguito da ( Esempio: Art. 403/L ).
Sono disponibili anche BOX CON STAFFE per il fissaggio sotto al biliardo,
questi ultimi vengono identificati dal codice articolo seguito da .
Art. 440..... per pallino Bocce o Ping-Pong (Ø35-40 mm).
Art. 743..... per il controllo di un terminale Internet.
MICRO32 Versione 2
STAMPANTE
CONTROL-LAMP-4
CONTROL-LAMP-8
CONTROL-LAMP-16
CONTROL-BALL-4
CONTROL-BALL-8
CONTROL-BALL-16
BOX-3B
BOX-3B
BOX-4B
BOX-9B
BOX-9B
BOX-16B
BOX-16B/52
BOX-16B/68
BOX-22B
BOX-PING-PONG
/L
/S
MINI BOX
INTERNET ACCESS/PC
Ci riserviamo di modificare le caratteristiche senza preavviso.
CODICI ARTICOLI

8
ENGLISH
Insert the plug in a 230 Vac outlet and then use the ON/OFF
button to turn the device on.
Before starting to run the device, it would be best to carry
out all the programming so that each and every function
you wish to use will be activated.
Here is a list of all the programming steps (as indicated by
the letter P) which will be described in detail one by one:
P.01 LANGUAGE
P.02 MONETARY UNIT
P.03 BAR MANAGEMENT CAPACITY
P.04 TOTAL SUM OF GAMES
P.05 TOTAL BAR SUM (FOOD & DRINKS)
P.06 NON ERASABLE TOTALS
P.07 SERVICE REGISTER METER *** GAME TOTAL
P.08 SERVICE REGISTER METER ** BAR TOTAL
(FOOD & DRINKS)
P.10 PRINTOUT OF THE ENTIRE PROGRAMMING
P.11 AUTOMATIC RECEIPT PRINTOUT CAPACITY
P.12 PRINTOUT CAPACITY FOR RECORDING THE
START AND STOP TIMES ON THE RECEIPT
P.13 BILIARDS SELECTION WITH CONTROL-BALL BOX
P.14 PROGRAMMING FOR ADVERTISING ON THE
RECEIPT
P.15 PROGRAMMING THE HOUR AND DATE
P.16 CLOCK-SETTING
P.17 HOURLY BANDS CAPACITY
P.18 PROGRAMMING THE HOURLY BANDS
P.19 CLUB RATE CAPACITY
P.40 - P.49 1st GROUP RATES
P.50 - P.59 2nd GROUP RATES
P.60 - P.69 3rd GROUP RATES
P.70 - P.79 4th GROUP RATES
P.80 - P.89 5th GROUP RATES
P.90 - P.99 6th GROUP RATES
P.100 TIME FOR ABANDONING A GAME
P.101 ENABLE SPECIAL BAR BUTTONS (nr. 17-32)
P.117 - P.132 DESCRIPTION OF THE SPECIAL BAR
BUTTONS
P.217 - P.232 PRICE OF SPECIAL BAR BUTTONS
To gain access to the programming, turn the
INSTALLATION key in the direction of the arrow. The symbol
–
P.01 will appear on the red display to indicate the first step
to be programmed.
Use the UP and DOWN buttons to go forward or backward
so as to choose the step to be programmed and the (+)
and (–) buttons to change the figure of each step.
Use the (+) and (–) buttons to select the language of the
messages to be shown on the right display. Use the UP
button to go on to the next step.
The value depends on the monetary value of the country
and the rounding desired on the sum to pay. The figures
available are: 0.05, 0.10, 0.20, 0.50, 1, 2, 5, 10, 20, 50,
100.
The MICRO32 may be programmed for BAR
MANAGEMENT. That means that it is possible to assign to
a table the amount due for the food and drinks consumed
by the players.
At the end of the game, there will be given the game total,
the BAR bill, and their sum total. There is also a separate
register meter for the GAME and the BAR. So, if you wish to
have BAR MANAGEMENT, set YES with the (+) button. An
explanation on how to charge for food and drinks is given in
the chapter "OPERATING" (fast and simple).
It shows the sum of all the total games of 32 tables and also
the date and hour when the counter was last reset. To see
the game total of every table, you simply have to push and
hold down the corresponding number. Push PRINT for a
printout of the game report for all the tables. Those tables
with a zero total will not appear on the printout. To reset all
the game totals of the 32 tables to zero, push the (–) button.
To print a graph for a rapid comparison of the totals, press
the MEMORY-LAST-STOP button.
This step is bypassed if the bar management phase was
not activated in P.03.
This is the same as P.04, but it relates to the BAR totals.
The totals shown help only as a further check. Resetting the
"NON ERASABLE" TOTALS can be carried out by pressing
the buttons START, BAR, STOP in succession and within
three seconds from one another.
This is yet another counter of the game amounts paid for,
and it is useful when you have employees. As a matter of
fact, access can be gained to this counter with the
SERVICE key given to your employees. At the end of his
work shift, the employee who is leaving can see his total
intake collected, get a printout of that sum with the PRINT
button and then turn the counter back to zero with the (–)
button. The date and hour are recorded when the count
goes back to zero. So as to assure perfect management by
your employees, have them do the following at the end of
their work shift: 1) get a show of the money total by using
the SERVICE key; 2) push PRINT to get a printout; 3) push
the (–) button to take the counter back to zero.
Push the UP button to go on to the next step.
P.01 LANGUAGE.
P.02 MONETARY UNIT.
P.03 BAR MANAGEMENT CAPACITY.
P.04 TOTAL SUM OF GAMES.
P.05 TOTAL BAR SUM (FOOD & DRINKS).
P.06 "NON ERASABLE" TOTALS.
P.07 SERVICE REGISTER METER *** GAME TOTAL.
Example: EURO 0,05 , USA 0,10 , RUSSIA 1 , JAPAN 10.
PROGRAMMING MICRO32 - 2nd Version
NOTES ON THE INSTALLATION
ATTENTION: DISCONNECT THE POWER SUPPLY
BEFORE OPENING THE CASE.
Make sure that the plug for the power supply is fitted
with an earth connector.
MICRO32 - 2nd Version.
Power supply: 230 Vac 50-60 Hz 50 mA MAX.
Primary protection fuses: 2 x T 315mA, 250Vac.
Equipment: 1st Class.

9
P.08 SERVICE CHARGE *** BAR TOTAL
(FOOD & DRINKS).
P.10 PRINTOUT OF THE ENTIRE PROGRAMMING.
P.11 AUTOMATIC RECEIPT PRINTOUT CAPACITY.
This step is bypassed if the bar management phase was
not activated in P.03.
This is the same as P.07, but it relates to the consumption
of food and drinks.
If the printer is connected, push the PRINT button to get a
printout on the status of all the steps in the programming
for a possible report.
If YES, you will get a printing of the receipt when STOP is
pressed at the end of the game on the table involved.
If NO, the printing will appear only if, after having pressed
STOP, you push the PRINT button too.
If YES, the start and the stop times will appear on the
receipt. If the time is not shown, one line less will be
printed.
The MICRO32 may be connected to two CONTROL-
BALLs, each of which makes sure that all the balls for 4, 8
or 16 billiards contained in a suitably prepared BOX are at
their place. In this programming step, you decide which
billiards has the BOX to control the balls. By pushing a
numbered button, one can turn on or turn off the
respective flashing light to decide (if turned on) that the
corresponding billiard has the ball BOX. For the BOX
connection, see the chapter on CONTROL-BALL
installation.
If the printer is used, the first line on every receipt may be
used for advertising (name of the premises, telephone
number, etc.). Utilize the (+) and (–) buttons to move the
electronic marker back and forth. By using the buttons
numbered from 1 to 32, you can insert the letters
indicated in lower case beside the red leds. Button 32
(space) inserts a space. Button 31 changes from small
letters to capitals. By pushing the ENTER button
repeatedly, you will see various groups of buttons light up
and turn off. When the first ten buttons are lit up, you can
insert numbers on the message instead of letters. If you
do not wish to have a message, cancel all the letters on
the line with SPACE button (32).
This step lets you program the inner clock. The flashing
figure may be changed by using the (+) and (–) buttons.
Use the ENTER button to choose the figures to be
changed.
The clock for the MICRO32 is calibrated in the factory. If
for some reason the time on the clock goes too fast or too
slow, this step will allow you to calibrate the clock. By
using the (+) and (–) buttons, you can adjust the precision
of the clock by ten seconds a month. Above all, you will
have to resort to an exact time tone to determine how
many seconds the clock is slow or fast every month. If, for
example, the MICRO32 clock is 37 seconds fast every
month, you must push the (–) button four times to slow the
clock down 40 seconds a month.
P.12 PRINTOUT CAPACITY FOR RECORDING THE
START AND THE STOP TIMES ON THE RECEIPT.
P.13 BILLIARDS SELECTION WITH CONTROL-BALL
BOX.
P.14 PROGRAMMING ADVERTISING ON THE
RECEIPT.
P.15 PROGRAMMING THE HOUR AND THE DATE.
P.16 CALIBRATION - CLOCK.
Once the clock has been calibrated, remember to
program the exact time (P.15).
If you wish the rates to change automatically at given
hours during the week, program YES. The figures for the
four possible rates and time change (HOURLY BANDS)
will be programmed in later steps. If the hourly bands are
not activated, the hourly rate remains as a set number
and will not change with the hours. The rate in effect will
always be RATE1 or CLUB RATE 1 if a START-CLUB is
pressed.
This phase is bypassed if the hourly bands have not been
activated in P.17.
The programming of all the hours in which a rate change
must take place takes some time inasmuch as you will
have to run through the week day by day. It would be a
good idea, therefore, to write on a piece of paper,
beginning with Monday, the times at which a rate change
must take effect and which of the four (4) rates available
will go into effect for each of those times. The hours
possible go from half-hour to half-hour. As shown on the
display terminal, you will begin on Monday at zero hours.
Next to the hour there is indicated the rate in effect at that
time. You can change the rate by using the buttons 1, 2, 3
and 4. Once you have set the rate for zero hours on
Monday, move the time ahead with the (+) button (or back
with the (–) button) thirty minutes at a time, making sure
that the set rate stays the same, until you get the new time
in which the rate change is to take effect. Use the 1, 2, 3
or 4 buttons once again to select the new rate and then
move ahead with the time. After 23:30 on Monday, you will
see shown zero hours on Tuesday and so on, up to 23:30
on Sunday . To move the time back or ahead rapidly,
simply hold down the (+) and (–) buttons.
Once finished, you can check all the results by using the
ENTER button; the display will show the hour for each rate
change. By using the PRINT button, you can get a printed
account of all the hourly bands.
To activate or de-activate the club rates depending on
whether or not there is a club membership with reduced
rates. If not activated, the START-CLUB button will not
work.
There are nine rates that may be assigned to a table.
Specifically, these rates are: one minimum charge for a
game, four hourly rates and four corresponding club
rates.
The nine rates determine a RATE GROUP. We can pro-
gram a total of six RATE GROUPS and define which
tables are assigned to each GROUP. For example, if all
the tables operate at the same rate, you need only to
program one single rate group and then assign all the
tables to that group.
The 4 hourly rates will change automatically at the times
already set up in step P.18. If a START-CLUB has been
established, on the other hand, the 4 corresponding
CLUB RATES will be activated.
If the hourly rates have been deactivated in step P.17,
then RATE 1 or CLUB RATE 1 will always be in effect. The
CLUB RATES, too, may be deactivated in step P.19. The
steps for programming the nonactivated rates are to be
bypassed.
P.17 HOURLY BANDS CAPACITY.
P.18 PROGRAMMING THE HOURLY BANDS.
P.19 CLUB RATE CAPABILITY.
PREFACE TO THE PROGRAMMING OF RATES
ENGLISH

10
1st GROUP RATES.
P.40 1st GROUP: MINIMUM CHARGE FOR A GAME.
P.41 1st GROUP: RATE 1.
P.42 1st GROUP: RATE 2.
P.43 1st GROUP: RATE 3.
P.44 1st GROUP: RATE 4.
P.45 1st GROUP: CLUB RATE 1.
P.46 1st GROUP: CLUB RATE 2.
P.47 1st GROUP: CLUB RATE 3.
P.48 1st GROUP: CLUB RATE 4.
P.49 DETERMINATION OF THE TABLES
WITH 1st GROUP RATES.
P.50 2nd GROUP MINIMUM CHARGE FOR A GAME
P.51 2nd GROUP RATE 1
P.52 2nd GROUP RATE 2
P.53 2nd GROUP RATE 3
P.54 2nd GROUP RATE 4
P.55 2nd GROUP CLUB RATE 1
P.56 2nd GROUP CLUB RATE 2
P.57 2nd GROUP CLUB RATE 3
P.58 2nd GROUP CLUB RATE 4
P.59 DETERMINATION OF TABLES WITH 2nd
GROUP RATES
The minimum charge for a game is useful for those cases
in which the players use the table for just a short time. For
the programming, see step P.41.
To set up the charge, use the lighted-up numbers from 1 to
12 (see what is printed above those buttons).
Button 14 (CANC.) cancels in the event of an error.
Once the charge has been set up, confirm it by pushing
the ENTER button. Buttons (+) and (–) may likewise be
used to increase or lower the charge.
This stage is bypassed if the hourly bands were not
activated in step P.17. The programming is the same as in
step P.41.
This stage is to be bypassed if the hourly bands were not
activated in step P.17. The programming is the same as in
step P.41.
This stage is to be bypassed if the hourly bands were not
activated in step P.17. The programming is the same as in
step P.41.
This stage is to be bypassed if the club rates were not
activated in step P.19. The programming is the same as in
step P.41.
This stage is to be bypassed if the hourly bands were not
activated in step P.17 or if the club rates were not
activated in step P.19. The programming is the same P.41.
This stage is to be bypassed if the hourly bands were not
activated in step P.17 or if the club rates were not
activated in step P.19. The programming is the same as in
step P.41.
This stage is to be bypassed if the hourly bands were not
activated in step P.17 or if the club rates were not
activated in step P.19. The programming is the same as in
step P.41.
Here the decision is made about which tables will run with
the 1st group rates. By pushing a numbered button, you
can turn on or turn off the respective blinking light in order
to determine (if lighted) that the table involved will operate
with the 1st GROUP rates.
P.60 3rd GROUP MINIMUM CHARGE FOR A GAME
P.61 3rd GROUP RATE 1
P.62 3rd GROUP RATE 2
P.63 3rd GROUP RATE 3
P.64 3rd GROUP RATE 4
P.65 3rd GROUP CLUB RATE 1
P.66 3rd GROUP CLUB RATE 2
P.67 3rd GROUP CLUB RATE 3
P.68 3rd GROUP CLUB RATE 4
P.69 DETERMINATION OF TABLES WITH 3rd
GROUP RATES
P.70 4th GROUP MINIMUM CHARGE FOR A GAME
P.71 4th GROUP RATE 1
P.72 4th GROUP RATE 2
P.73 4th GROUP RATE 3
P.74 4th GROUP RATE 4
P.75 4th GROUP CLUB RATE 1
P.76 4th GROUP CLUB RATE 2
P.77 4th GROUP CLUB RATE 3
P.78 4th GROUP CLUB RATE 4
P.79 DETERMINATION OF TABLES WITH 4th
GROUP RATES
P.80 5th GROUP MINIMUM CHARGE FOR A GAME
P.81 5th GROUP RATE 1
P.82 5th GROUP RATE 2
P.83 5th GROUP RATE 3
P.84 5th GROUP RATE 4
P.85 5th GROUP CLUB RATE 1
P.86 5th GROUP CLUB RATE 2
P.87 5th GROUP CLUB RATE 3
P.88 5th GROUP CLUB RATE 4
P.89 DETERMINATION OF TABLES WITH 5th
GROUP RATES
P.90 6th GROUP MINIMUM CHARGE FOR A GAME
P.91 6th GROUP RATE 1
P.92 6th GROUP RATE 2
P.93 6th GROUP RATE 3
P.94 6th GROUP RATE 4
P.95 6th GROUP CLUB RATE 1
P.96 6th GROUP CLUB RATE 2
P.97 6th GROUP CLUB RATE 3
P.98 6th GROUP CLUB RATE 4
P.99 DETERMINATION OF TABLES WITH 6th
GROUP RATES
P.100 TIME FOR ABANDONING A GAME.
P.101 ENABLE SPECIAL BAR BUTTONS (nr 17-32)
P.117 - P.132 DESCRIPTION OF THE SPECIAL BAR
BUTTONS.
It is possible to program a 0 - to 300 - seconds span of
time, thus allowing a player to decide against a game
(from the moment the START button is pushed to the
moment the STOP button is pushed) without having to pay.
Use the (+) and (–) buttons to set up the desired time
span.
This phase is skipped if the BAR management at step P.03
has not been enabled.
If YES, the 16 most common refreshments can be
assigned to the 16 buttons from nr 17 to 32. In this way
when the refreshments have to be billed, just press the
corresponding buttons.
These phases are skipped if the BAR management at step
ENGLISH

11
INSTALLING THE PRINTER
INSTALLING FOR
TURNING ON LIGHTS
CONTROL-LAMP
To connect the printer, you just need to insert the unit's
connector piece to the PRINT outlet located on the back of
the MICRO32.
Instructions on how to use the printer are enclosed therein.
As well as for providing receipts, the printer may be used
to provide an account on all the totalizers (see steps P.04
and P.05 in the Programming) and on the status of the
programming itself (step P.10). In addition, whatever data
is shown on the display terminal may be printed out by
pushing the PRINT button.
CONTROL-LAMP
Feed: 230Vac 50-60 Hz 100 mA MAX.
Current load for each line of lamps: 5 A MAX.
Fuse for each line of lamps: F 6,3A, 250Vac.
Equipment: 2nd Class.
ATTENTION: Before opening the case, disconnect the
lamp installation from the power supply.
Before beginning to operate the unit, it would be best to
carry out all the programming so that each and every
operation you wish to utilize will be activated. Insert the
plug in a 230 VAC outlet and then turn the unit on with the
ON/OFF button.
If there is no electricity, you can turn on the MICRO32 by
pushing the tip of a pen into the BATTERY hole located on
the side of the ON/OFF button. The battery inside (two
normal batteries of 9 volts each) has a lifespan which
depends on how often it is used, and under usual
conditions the average lifespan is more than five years.
This battery will NOT help keep data in the memory bank;
it only permits a terminal display of the figure amounts in
the event of electrical blackout.
To start the counter, push the START button and then the
number of the table involved. The same holds true with
START-CLUB for possible club members. The numbered
button will light up to indicate that the counter is operating.
If the counter is linked to club rates, the light will blink
slightly. Once the START button has been pushed, you will
have one minute to change to START-CLUB or vice-versa.
If bar management has been activated (programming in
P.03), you may charge food or drink to a table being
played by pushing BAR and then the number involved.
Then record the amount by using the numbered buttons
which are lit up, taking note at the same time of what is
written ABOVE those buttons. The amount charged is
recorded by using buttons from 1 to 12.
The CANC. button (14) cancels eventual errors. The REP.
button (15) allows you to repeat the same amount if
successive servings of food and drink have that same
price. The (+) button (16) adds up subsequent charges.
If also the special BAR buttons have been activated and
memorized correctly (nr 17-32) the corresponding
refreshments can be entered just by pressing the said
buttons.
Finally, press the ENTER button to confirm the total.
If a price is entered by mistake, it can be corrected by
entering a negative one using the (–) button.
During the count, you can see just how much has been
charged up until then at a given table simply by pushing
the number of that table, and then you can get a printout
of that total by pushing the PRINT button (if the printer is
connected). You will also see what time that count began.
Once the game is finished, you may stop the count by
pushing the STOP button and then the table number
involved. The total charges will appear on the red display
terminal and the right display will show the game charge
and the food and drink charge.
If the printer is connected, the receipt will be printed - if,
OPERATING MICRO32 - 2nd Vers.
P.03 and P.101 ENABLE SPECIAL BAR BUTTONS are not
activated.
In each of these steps a script of maximum 8 characters
(letters and numbers) can be assigned to each of the 16
special bar buttons. Insert the characters as per step P.14.
These phases are skipped if the BAR management at step
P.03 and P.101 ENABLE SPECIAL BAR BUTTONS are not
activated. In these steps, the price for each of the 16
special bar buttons is memorized. To enter the price use
the flashing buttons from 1 to 12 (see the writing above the
buttons). Use button 14 (CANC.) for erasing if an error
occurs. After having entered the price, press ENTER to
confirm it.
P.217 - P.232 PRICE OF THE SPECIAL BAR BUTTONS.
that is, that operation was programmed in step P. 11.
If STOP is pressed for a table which has control of the
balls when those balls are not in place, the STOP will be
registered but there will be an automatic restart. This is
useful for letting the players change without having to put
the balls back in place.
ln this instance, the automatic restart is not a CLUB rate,
so if the new player is a club member you will have one
minute to push START-CLUB and then the table number.
The DOWN button instead allows to swap two tables
allowing the players to change tables. To carry out the
swap press DOWN then the numbers of the two tables
followed by ENTER.
The swap is allowed only between tables which have the
same tariff and if they are both in use, or if one is in use
and the other is in STOP, if none of the two tables has the
ball BOX enabled (step P.13).
By pushing the MEMORY-LAST-STOP button and then the
number of the table involved, you will have shown the last
total paid, even if that table has already begun a new
count.
By turning the INSTALLATION key, you will access
programming and a read-out of the totalizing counters.
See the chapter on "PROGRAMMING" for a more detailed
description. The totalizers are shown in the steps from P.04
to P.08.
Use the UP and DOWN buttons to reach those steps.
By turning the SERVICE key, you will access the two
totalizers for the service charge for the employees.
See steps P.07 - P.08 in the chapter on PROGRAMMING.
To help cleaning the tables, if no tables are being used, all
the lamps can be turned on together by turning the
SERVICE key and pressing button nr 32.
The same can be obtained by pressing button nr 32
during step P.07 whilst programming.
Unscrew the two screws on the front, turn the INSTALLA-
TION key and pull the unit toward you. Detach the two
connectors on the board and remove the front completely.
Use the two holes on the back to fasten the unit to the wall.
WALL FASTENING
Always remove the plug before opening MICRO32.
ENGLISH

12
INSTALLING THE TO
MANAGE THE BALLS
CONTROL-BALL
CONTROL-LAMP allows for the control of the switching on
and off of the lamps or other electrical loads, according to
the state of the tables. There are three CONTROL-LAMP
models available in order to provide the best usage based
on the number of bulbs to be connected: for four, eight
and for sixteen lights.
The socket LAMP1 concerns all the tables from nr
1 to nr 16, whilst the LAMP2 socket concerns all the tables
from nr 17 to 32. Each of these sockets can be connected
to a CONTROL-LAMP chosen, according to your
requirements, amongst the 3 versions available
The CONTROL-LAMP may be positioned up to a distance
of one hundred metres from the MICRO32. It comes
equipped with a thin cable fifteen metres in length.
Extension cords are available for greater distances, or you
may cut this cable and lengthen it with only 2 wires,
connecting one wire with the two central cable's leads
and the second wire with the 2 lateral leads (the cable
has 4 leads).
There are two outlets on the back of the MICRO32 for
connecting two CONTROL-LAMPs marked LAMP1 and
LAMP2.
(see
ARTICLE CODES).
The CONTROL-LAMP connections are indicated in FIG. 1.
On the CONTROL-LAMP board, a red light indicates:
connection to the MICRO32 is okay
the unit is not connected to the
MICRO32
the CONTROL-LAMP is either broken or
has no power supply.
flashing light:
light always on:
light off:
The CONTROL-BALL governs the where abouts of the
balls for 4, 8 or 16 billiard tables (3 models).
The CONTROL-BALL can be connected with 4, 8 or 16
BOXes (drawers) holding the balls.
It may be positioned at a distance of one hundred metres
from the MICRO32. It comes equipped with a thin cable
fifteen metres long.
For distances of more than 100 metres, extension cords
are available, but you may also lengthen the cable by
following the instructions given for the CONTROL-LAMP.
Behind the MICRO32 there are 2 sockets marked BALL1
and BALL2 to which 2 CONTROL-BALLs can be
connected.
During step P.13 of the programming of the MICRO32
(see the chapter on Programming), you must specify on
which tables you want to have balls control.
The connection from the CONTROL-BALL to each BOX
takes place with just two low-tension wires.
In addition, no harm will be done in the event of short-
circuiting or mismanaged connections.
The BOX is a sturdy metal container which holds a tray
with all the balls. The BOX opens only when it receives a
command (START) from the MICRO32 to begin a game,
and at that moment the player can take out the tray. When
the game is over, and after the tray with ALL the balls has
been put back into the BOX and the door has been
closed (the door will not close if even one ball is missing),
the MICRO32 stops the time count and tells the operator
that game is over by flashing the red light on the button of
table involved.
The CONTROL-BALL connections are indicated in FIG. 2.
The CONTROL-BALL's 230 Vac power supply must be on
the same line as the MICRO32 feed so that the same
switch can turn each unit on or off.
The socket BALL1 concerns all the tables from
nr 1 to nr 16, whilst the BALL2 socket concerns all the
tables from nr 17 to 32.
ENGLISH
CONTROL-BALL
Power supply: 230 Vac 50-60 Hz 250 mA MAX.
Primary protection fuse: T 315mA, 250Vac.
Voltage for each output: 24 Vac.
MAX current for each output: 2 A AC for 40mSec approx.
Equipment: 2nd Class.
ATTENTION: REMOVE THE POWER SUPPLY BEFORE
OPENING THE CASE
FIG. 1 CONTROL-LAMP
CONNECTIONS
230V
SERIAL
LINE
POWER SUPPLY TO THE LAMPS
LAMP.
CONTROL-LAMP
POWER SUPPLY
CONNECTION
TO MICRO32
230 Vac
230 Vac 100mA
12345678
21345678
FUSES F 6,3A 250 Vac
CONTROL-LAMP
BOARD

13
ENGLISH
Even through operating with a 24 Volt insulating system,
the ball BOXes are equipped on the inside with a faston
device in order to be connected to the electrical
grounding system.
There are BOXes for all kinds of games. See the section
on "ARTICLE CODES".
On the CONTROL-BALL board, a red light indicates:
the connection to the MICRO32 is okay
the unit is not connected to the
MICRO32
the CONTROL-BALL is either broken or
has no power supply.
The CONTROL-BALL may also be connected to simple
ball containers in which the withdrawal of the tray turns on
a micro-switch. In this case, the game start takes place
automatically when the tray is taken out.
If you wish that automatic START to be a club operation,
you can regulate it before or within one minute of the tray's
extraction by pushing the START-CLUB button and then
the button for the table involved.
The two micro-switch wires are connected in the same
way as the two BOX wires.
flashing light:
light always on:
light off:
FIG. 2 CONTROL-BALL
CONNECTIONS
230V SERIAL
LINE
COMMON-BOX
CONTROL-BALL BOARD
BOXes
1mm2min.
Wire section
CONTROL-BALL
POWER-SUPPLY
CONNECTION
TO THE MICRO32
230 Vac 250mA
2
1
3
12345678
FUSE T 315mA 250 Vac
NOTES
Containers of CONTROL-LAMP and CONTROL-BALL are
in material Class: IEC 650.
If the wiring is not fitted with protection from short circuits
and indirect contacts for all equipment, this must be
carried out by the client.
The Manufacturer declines all responsibility if the
equipment is tampered with.

14
ENGLISH
ARTICLE CODES
Photographs of some of the following articles can be seen on page 36.
Art. 700/2.. .
Art. 710..... .
Art. 739..... for 4 lamps.
Art. 740..... for 8 lamps.
Art. 741..... for 16 lamps.
Art. 728..... for 4 ball boxes.
Art. 729..... for 8 ball boxes.
Art. 730..... for 16 ball boxes.
Art. 750.....EXTENSION WIRE 15m long, additional for
CONTROL-BALL-LAMP.
Art. 711.....RIBBON CARTRIDGE for PRINTER.
Art. 403..... for Carambol (3 balls Ø61,5 mm).
Art. 403A.. for Italiana (2 x Ø68+1xØ59mm).
Art. 404..... for controlling 4 balls (4 x Ø61,5 mm).
Art. 409..... for 9 balls (9 x Ø61,5 mm).
Art. 409A.. for 9 balls (8 x Ø59+1xØ54mm).
Art. 416..... for Pool (16 x Ø57 mm).
+Art. 446 SPACER 6 mm in thickness for Pool balls Ø50-52 mm.
Art. 416A.. for English-Pool (16 x Ø50-52 mm).
Art. 416B.. for Russian Pyramid (16 x Ø68 mm).
Art. 422..... for Snooker (22 x Ø52-54 mm).
Art. 402..... for controlling 2 bats and a ball.
All the above mentioned BOXES have a rear shoulder in sheet metal for
wall mounting.
If the boxes have to be stacked one on top of another, they are available
without rear shoulder and with an anti-slip rubber insert; their code number
has the word added (example: Art. 403/L). There are also available
BOXES for fitting underneath the billiard table with appropriate brackets;
their code number has the word added.
Art. 440..... for controlling a small ball
(Ø35-40 mm: Ping-Pong ball).
Art. 743..... for controlling one Internet terminal.
MICRO32 - 2nd Version
PRINTER
CONTROL-LAMP-4
CONTROL-LAMP-8
CONTROL-LAMP-16
CONTROL-BALL-4
CONTROL-BALL-8
CONTROL-BALL-16
BOX-3B
BOX-3B
BOX-4B
BOX-9B
BOX-9B
BOX-16B
BOX-16B/52
BOX-16B/68
BOX-22B
BOX-PING-PONG
/L
/S
MINI-BOX
INTERNET ACCESS/PC
We reserve the rights to carry out changes without prior notice.

15
DEUTSCH
PROGRAMMIERUNG
ANMERKUNG ZUR INSTALLATION
Verbinden Sie den Netzstecker mit einer 230 Vac-
Steckdose und schalten Sie dann mit der Taste ON/OFF
ein. Vor der Inbetriebnahme sollte die gesamte
Programmierung durchgeführt werden, damit die
gewünschten Funktionen befähigt sind. Hier eine Tabelle
mit allen Programmierungsschritten, die nachstehend im
Einzelnen beschrieben werden:
P.01 SPRACHE
P.02 GELDEINHEIT
P.03 BEFÄHIGUNG LEITUNG BAR
P.04 GESAMTSUMMEN SPIEL
P.05 GESAMTSUMMEN BAR (ZECHE)
P.06 GESAMTWERTE NICHT NULLSTELLBAR
P.07 SERVICE *** SPIEL GESAMT
P.08 SERVICE *** BAR GESAMT (ZECHE)
P.10 AUSDRUCK DER GESAMTEN
PROGRAMMIERUNG
P.11 BEFÄHIGUNG AUTOMATISCHER
BELEGAUSDRUCK
P.12 BEFÄHIGUNG AUSDRUCK VON ANFANGS- UND
ENDZEIT AUF DEM BELEG
P.13 WAHL DER BILLIARDTISCHE MIT
KUGELKONTROLLBOX
P.14 PROGRAMMIERUNG VON WERBUNG AUF DEM
BELEG
P.15 PROGRAMMIERUNG UHRZEIT UND DATUM
P.16 KALIBRIEREN DER UHR
P.17 BEFÄHIGUNG ZEITAUSSCHNITTE
P.18 PROGRAMMIERUNG ZEITAUSSCHNITTE
P.19 BEFÄHIGUNG CLUBTARIFE
P.40 - P.49 1. TARIFGRUPPE
P.50 - P.59 2. TARIFGRUPPE
P.60 - P.69 3. TARIFGRUPPE
P.70 - P.79 4. TARIFGRUPPE
P.80 - P.89 5. TARIFGRUPPE
P.90 - P.99 6. TARIFGRUPPE
P.100 ZEIT, UM AUF DAS SPIEL ZU VERZICHTEN
P.101 BEFÄHIGUNG SONDERTASTEN BAR (Nr. 17-32)
P.117 - 132 BESCHREIBUNG SONDERTASTEN BAR
P.217 - 232 PREIS SONDERTASTEN BAR
Um Zugang zur Programmierung zu erhalten, wird der
Schlüssel INSTALLATION in Pfeilrichtung gedreht. Auf
dem roten Display erscheint P.01, was den ersten zu
programmierenden Schritt anzeigt.
–
Verwenden sie dieTasten UP und DOWN, um vorwärts
oder rückwärts schreitend den zu programmierenden
Schritt zu wählen und die Tasten (+) und (–), um den Wert
eines jeden Schritts zu modifizieren.
Verwenden Sie die Tasten (+) und (–), um die Sprache der
auf dem rechten Display angezeigten Nachrichten zu
wählen. Verwenden Sie die Taste UP, um zum nächsten
Schritt zu gelangen.
Der Wert hängt von der Geldwährung des Landes und von
der gewünschten Aufrundung des zu zahlenden Betrages
ab.DieverfügbarenWertesind:0,050,100,200,50125
10 20 50 100. Beisp. für EURO 0,05 , USA 0,10 ,
RUßLAND 1 , JAPAN 10 .
Das MICRO32 kann zur LEITUNG BAR befähigt werden.
Dadurch wird es möglich, an einem Billiardtisch die
Verzehrsummen der Spieler (Getränke, Toast usw.)
gutzuschreiben. Bei Spielende wird der Betrag SPIEL, der
Betrag BAR und deren Gesamtsumme angezeigt. Sie
werden auch von Totalisatoren, getrennt für SPIEL und
BAR, geleitet. Wird also die LEITUNG BAR gewünscht,
geben Sie mit der Taste (+) YES ein. Im nachfolgenden
Kapitel "FUNKTIONSABLAUF" wird erklärt, wie die
Belastung des Verzehrs durchgeführt wird (einfach und
schnell).
Es wird die Gesamtumme aller Spiele der 32 Billiardtische
und desweiteren Uhrzeit und Datum angezeigt, zu dem
die letzte Nullstellung erfolgt ist. Um die
Gesamtspielsumme eines jeden Billiardtisches zu sehen,
ist es ausreichend, die entsprechende Nummer gedrückt
zu halten. Drücken Sie PRINT, um den Spielbericht aller
Tische auszudrucken. Die Tische mit dem Wert Null
werden nicht ausgedruckt. Um alle Gesamtspielsummen
der 32 Billiardtische zu nullen, drücken Sie die Taste (–).
Um mittels Drucker eine Graphik anzuzeigen, die eine
rasche Vergleichsübersicht zwischen den Gesamtsummen
erlaubt, wird die Taste MEMORY LAST STOP gedrückt.
Dieser Schritt wird übersprungen, sofern die Leitung Bar
unter P.03 nicht befähigt wurde. Er ist gleich dem Schritt
P.04, bezieht sich jedoch auf die Gesamtsummen BAR.
Die angezeigten Gesamtwerte dienen nur als weitere
Kontrolle. Das Nullen der GESAMMTSUMMEN "NICHT
NULLSTELLBAR" ist nur möglich, wenn
aufeinanderfolgend und innerhalb von 3 Sekunden die
folgenden Tasten gedrückt werden: START, BAR, STOP.
Ist ein weiterer Zähler der einkassierten Spielsummen, der
nützlich ist, falls Angestellte im Betrieb arbeiten. Zu
diesem Zähler erhält man auch mit dem Schlüssel
SERVICE Zugang, der den Angestellten übergeben wird.
Bei Schichtwechsel kann der ausscheidende Angestelle
seine Gesamteinnahme sehen, diese mit der Taste PRINT
ausdrucken und danach mit der Taste (–) nullen. Bei der
Nullstellung werden Uhrzeit und Datum registriert. Zur
einwandfreien Leitung des Personals, bei Schichtwechsel:
1 ) mit dem Schlüssel SERVICE den Betrag anzeigen; 2)
PRINT drücken, um ihn auszudrucken; 3) die Taste (–)
drücken um zu nullen.
P.01 SPRACHE.
P.02 GELDWERT.
P.03 BEFÄHIGUNG LEITUNG BAR.
P.04 GESAMTSUMMEN SPIEL.
P.05 GESAMTSUMMEN BAR (ZECHE).
P.06 GESAMTWERTE NICHT "NULLSTELLBAR".
P.07 SERVICE *** SPIELGESAMTSUMME.
VORSICHT: VOR DEM ENTFERNEN DER HÜLLE DIE
ANSCHLUSSPANNUNG UNTERBRECHEN.
MICRO32 Ausführung 2
Speisung: 230 Vac 50-60 Hz 50 mA MAX.
Primäre Schmelzsicherungen:2xT315mA, 250Vac.
Gerät: I Klasse.
Sicherstellen, dass die Steckdose für die
Stromzuführung mit Erdungsleitung versehen ist.

16
Verwenden der Taste UP, um zum nächsten Schritt zu
gelangen.
Dieser Schritt wird übersprungen sofern die Leitung Bar
unter P.03 nicht befähigt wurde. Er ist gleich dem Schritt
P.07, betrifft jedoch die Zeche.
Ist der Drucker angeschlossen, reicht es aus PRINT zu
drücken, um den Stand aller Programmationsschritte für
einen eventuellen Bericht, auszudrucken.
Bei YES erfolgt der Belegausdruck, wenn bei Spielende
ein STOP des betreffenden Tisches durchgeführt wird.
Bei NO erfolgt der Ausdruck nur, falls nach dem STOP der
Nummer auch PRINT gedrückt wird.
Bei YES erscheinen auf dem Beleg die Anfangs - und
Endzeiten des Spiels. Werden die Uhrzeiten nicht
angezeigt, wird eine Reihe weniger ausgedruckt.
Das MICRO32 kann mit 2 CONTROL-BALL verbunden
werden, jeder der beiden kontrolliert das Vorhandensein
der Kugeln für 4, 8 oder 16 Billiardtische, die in den
entsprechenden BOX enthalten sind. Bei diesem
Programmierungsschritt wird festgelegt, welche
Billiardtische eine BOX zur Kugelkontrolle haben. Wird
eine numerierte Taste gedrückt, kann das entsprechende
leuchtende Led ein - oder ausgeschaltet werden, um
festzulegen, wenn eingeschaltet, ob der entsprechende
Billiardtisch die Kugel-BOX hat. Für die Verbindungen der
BOX siehe das entsprechende Kapitel bezüglich der
Installation des CONTROL-BALL.
Wird der Drucker verwendet, kann in der ersten Reihe
eines jeden Beleges eine Nachricht eingegeben werden
(Name des Lokals, Telefon usw.). Verwenden der Tasten
(+) und (–) um den Cursor vorwärts oder rückwarts zu
bewegen. Mit den Tasten, die von 1 bis 32 numeriert sind,
können die Buchstaben eingegeben werden, die seitlich
der roten Leds in klein angegeben sind. Die Taste 32
(space) fügt einen Freiraum ein. Die Taste 31 schaltet von
Groß- auf Kleinschreibung um. Wird wiederholt ENTER
gedrückt, sieht man das alternierende Einschalten eines
Teils der Tasten. Sind die ersten 10 Tasten eingeschaltet,
können auf der Nachricht Nummern anstelle von
Buchstaben eingegeben werden . Wird dieser Ausdruck
nicht gewünscht, werden alle Buchstaben in der Reihe mit
SPACE (32) gelöscht.
Mit diesen Schritt kann die innere Uhr programmiert
werden. Der leuchtende Wert kann mit den Tasten (+) und
(–) verändert werden. Mit der Taste ENTER wählt man,
welcher Wert geändert wird.
Die Uhr des MICRO32 wird im Werk kalibriert. Sollte sie
aus irgendeinem Grund nicht genau gehen, kann sie bei
P.08 SERVICE *** BAR GESAMT (ZECHE).
P.10 AUSDRUCK DER GESAMTEN
PROGRAMMIERUNG.
P.11 BEFÄHIGUNG AUTOMATISCHER
BELEGAUSDRUCK.
P.12 BEFÄHIGUNG AUSDRUCK VON ANFANGS- UND
ENDZEITEN AUF DEM BELEG.
P.13 WAHL DER BILLIARDTISCHE MIT
KUGELKONTROLLBOX.
P.14 PROGRAMMIERUNG VON WERBUNG AUF
DEM BELEG.
P.15 PROGRAMMIERUNG UHRZEIT UND DATUM.
P.16 KALIBRIEREN DER UHR.
diesem Schritt kalibriert werden.
Mit den Tasten (+) und (–) kann die Präzision mit Einheiten
von 10 Sek. im Monat geändert werden.
Zuerst wir mit einem Präzisionsuhrzeitsignal überprüft, um
wieviele Sekunden die Uhr in einem Monat vor- oder
nachgeht. Nehmen wir an, die Uhr des MICRO32 geht um
37 Sek. im Monat vor, also muß viermal die Taste (–)
gedrückt werden, um um 40 Sek. im Monat zu
verlangsamen. Nicht vergessen, nach erfolgter
Kalibrierung die genaue Uhrzeit zu programmieren (P.15).
Wird gewünscht, daß sich die Tarife automatisch zu
bestimmten Zeiten der Woche ändern, programmieren Sie
YES. Die Werte der 4 möglichen Tarife und der
Änderungszeiten (ZEITAUSSCHNITTE) werden in
aufeinanderfolgenden Schritten programmiert.
Werden die Zeitausschnitte nicht befähigt, bleibt der
Zeittarif stabil und ändert sich nicht mit den Uhrzeiten. Der
TARIF 1 oder der TARIF 1 CLUB bleiben stets aktiv, wenn
ein START-CLUB erfolgt ist.
Diese Phase wird übersprungen, sofern bei Schritt P.17
die Zeitausschnitte nicht befähigt wurden.
Die Programmierung aller Zeiten, zu denen eine
Tarifänderung erfolgen soll, erfordert etwas Zeit, da die
ganze Woche, Tag für Tag zurückgelegt werden muß. Aus
diesem Grund ist es vorteilhaft, wenn sie beginnend bei
Montag, die Zeiten auf ein Blatt schreiben, zu denen eine
Tarifänderung erfolgen soll und welcher der 4 verfügbaren
Tarife zu jeder der besagten Zeiten in Funktion tritt. Die 4
Tarife heißen TARIF 1, 2, 3, 4 und ihr Wert wird später
programmiert.
Die möglichen Uhrzeiten sind von einer halben Stunde zur
nächsten. Wie auf dem Display angezeigt, beginnt man
bei Montag um Null Uhr. Neben der Uhrzeit wird der Tarif
angezeigt, der zu diesem Zeitpunkt in Betrieb ist.
Unter Venwendung der Tasten 1, 2, 3 und 4 kann man den
Tarif verändern. Nach der Entscheidung des Tarifs um Null
Uhr am Montag, schreitet man die Zeit von einer halben
Stunde zur nächsten mit der Taste (+) vor (oder zurück mit
der Taste (–) ), kontrollierend daß der eingegebene Wert
gleich bleibt, bis die neue Uhrzeit erreicht wird, zu welcher
der Tarifwechsel erfolgen soll. Verwenden Sie wieder die
Tasten 1, 2, 3 oder 4, um den neuen Tarif zu wählen und
danach fahren Sie mit den Zeiten fort. Nach 23:30 Uhr am
Montag gelangt man zu Null Uhr am Dienstag und immer
so weiter bis um 23:30 Uhr am Sonntag. Um mit den
Zeiten beschleunigt vorwärts oder rückwarts zu schreiten,
halten sie die Tasten (+) und (–) gedrückt. Nach
Beendigung, können Sie das Ganze mit der Taste ENTER
kontrollieren, die es ermöglicht, die Zeit einer jeden
Tarifänderung anzuzeigen. Mit der Taste PRINT, können
Sie einen Beleg aller Zeitausschnitte erhalten.
Dient der Befähigung oder dem Ausschluß der Clubtarife,
falls oder nicht eine Leitung von Clubmitgliedern zu
reduzierten Tarifen erfolgen soll. Falls nicht befähigt,
funktioniert die Taste START-CLUB nicht.
Es gibt 9 Tarife, die in einem Tisch aufgenommen werden
können und das sind: 1 Mindestspielbetrag, 4 Zeittarife
plus der 4 entsprechenden Clubtarife.
Die 9 Tarife bestimmen eine TARIFGRUPPE.
P.17 BEFÄHIGUNG ZEITAUSSCHNITTE.
P.18 PROGRAMMIERUNG ZEITAUSSCHNITTE.
P.19 BEFÄHIGUNG CLUBTARIFE.
VORWORT ZUR TARIFPROGRAMMIERUNG
DEUTSCH

17
Es können 6 Tarif GRUPPEN programmiert werden und
man kann festlegen, welche Tische einer jeden GRUPPE
zugeordnet sind.
Sind zum Beispiel alle Tische in Betrieb, ist es ausreichend
für die selben Tarife eine einzige Tarifgruppe zu
programmieren und dieser Gruppe alle Tische zuzuordnen.
Die 4 Zeittarife wechseln automatisch zu den bereits bei
Schritt P.18 festgelegten Zeiten. Ist ein START-CLUB
erfolgt, sind anstelle derer die 4 entsprechenden
CLUBTARIFE aktiv. Wurden die Zeitausschnitte bei Schritt
P.17 ausgeschlossen, ist stets der TARIF 1 oder TARIF 1
CLUB aktiv. Unter P.19 können auch die CLUBTARIFE
ausgeschlossen werden. Die Schritte überspringen, die
der Programmierung der ausgeschlossenen Tarife dienen.
Der Mindestspielbetrag ist für die Fälle nützlich, in denen
die Spieler die Billiardtische für kurze Zeit beanspruchen.
Für die Programmierung siehe Schritt P.41.
Um den Betrag einzugeben, verwenden Sie die von 1 bis
12 numerierten, eingeschalteten Tasten (siehe die Schriften
über diesen Tasten). Die Taste 14 (CANC.) löscht bei
Fehleingabe. Nach Eingabe des Betrags, mit der Taste
ENTER bestätigen. Auch die Tasten (+) und (–) können
verwendet werden, um den Betrag zu erhöhen oder zu
erniedrigen.
Diese Phase wird übersprungen, wenn bei Schritt P.17
keine Zeitausschnitte befähigt wurden. Für die
Programmierung siehe Schritt P.41.
Diese Phase wird übersprungen, wenn bei Schritt P.17
keine Zeitausschnitte befähigt wurden. Für die
Programmierung siehe Schritt P.41.
Diese Phase wird übersprungen, wenn bei Schritt P.17
keine Zeitausschnitte befähigt wurden. Für die
Programmierung siehe Schritt P.41.
Diese Phase wird übersprungen, sofern unter Schritt P.19
keine Clubtarife befähigt wurden. Für die Programmierung
siehe Schritt P.41.
Diese Phase wird übersprungen, sofern unter Schritt P.17
keine Zeitausschnitte befähigt wurden oder wenn unter
Schritt P.19 keine Clubtarife befähigt wurden. Für die
Programmierung siehe Schritt P.41.
Diese Phase wird übersprungen, sofern unter Schritt P.17
keine Zeitausschnitte befähigt wurden oder wenn unter
Schritt P.19 keine Clubtarife befähigt wurden. Für die
Programmierung siehe Schritt P.41.
Diese Phase wird übersprungen, sofern unter Schritt P.17
keine Zeitausschnitte befähigt wurden oder wenn unter
Schritt P.19 keine Clubtarife befähigt wurden. Für die
Programmierung siehe Schritt P.41.
1. TARIFGRUPPE
P.40 1. GRUPPE MINDESTSPIELBETRAG.
P.41 1.GRUPPE TARIF 1.
P.42 1. GRUPPE TARIF 2.
P.43 1. GRUPPE TARIF 3.
P.44 1. GRUPPE TARIF 4.
P.45 1.GRUPPE TARIF 1 CLUB.
P.46 1. GRUPPE TARIF 2 CLUB.
P.47 1. GRUPPE TARIF 3 CLUB.
P.48 1. GRUPPE TARIF 4 CLUB.
P.49 FESTLEGUNG DER TISCHE MIT
TARIFEN DER 1. GRUPPE.
Es wird entschieden, welche Tische mit den Tarifen der 1.
Gruppe funktioneren werden. Wird eine numerierte Taste
gedrückt, kann das entsprechende leuchtende Led ein-
oder ausgeschaltet werden, um festzulegen, wenn
eingeschaltet, ob der entsprechende Tisch mit den Tarifen
der 1. GRUPPE funktionieren wird.
P.50 2. GRUPPE MINDESTSPIELBETRAG
P.51 2. GRUPPE TARIF 1
P.52 2. GRUPPE TARIF 2
P.53 2. GRUPPE TARIF 3
P.54 2. GRUPPE TARIF 4
P.55 2. GRUPPE TARIF 1 CLUB
P.56 2. GRUPPE TARIF 2 CLUB
P.57 2. GRUPPE TARIF 3 CLUB
P.58 2. GRUPPE TARIF 4 CLUB
P.59 FESTLEGUNG DER TISCHE MIT
TARIFEN DER 2. GRUPPE
P.60 3. GRUPPE MINDESTSPIELBETRAG
P.61 3. GRUPPE TARIF 1
P.62 3. GRUPPE TARIF 2
P.63 3. GRUPPE TARIF 3
P.64 3. GRUPPE TARIF 4
P.65 3. GRUPPE TARIF 1 CLUB
P.66 3. GRUPPE TARIF 2 CLUB
P.67 3. GRUPPE TARIF 3 CLUB
P.68 3. GRUPPE TARIF 4 CLUB
P.69 FESTLEGUNG DER TISCHE MIT
TARIFEN DER 3. GRUPPE.
P.70 4. GRUPPE MINDESTSPIELBETRAG
P.71 4. GRUPPE TARIF 1
P.72 4. GRUPPE TARIF 2
P.73 4. GRUPPE TARIF 3
P.74 4. GRUPPE TARIF 4
P.75 4. GRUPPE TARIF 1 CLUB
P.76 4. GRUPPE TARIF 2 CLUB
P.77 4. GRUPPE TARIF 3 CLUB
P.78 4. GRUPPE TARIF 4 CLUB
P.79 FESTLEGUNG DER TISCHE MIT
TARIFEN DER 4. GRUPPE
P.80 5. GRUPPE MINDESTSPIELBETRAG
P.81 5. GRUPPE TARIF 1
P.82 5. GRUPPE TARIF 2
P.83 5. GRUPPE TARIF 3
P.84 5. GRUPPE TARIF 4
P.85 5. GRUPPE TARIF 1 CLUB
P.86 5. GRUPPE TARIF 2 CLUB
P.87 5. GRUPPE TARIF 3 CLUB
P.88 5. GRUPPE TARIF 4 CLUB
P.89 FESTLEGUNG DER TISCHE MIT
TARIFEN DER 5. GRUPPE
P.90 6. GRUPPE MINDESTSPIELBETRAG
P.91 6. GRUPPE TARIF 1
P.92 6. GRUPPE TARIF 2
P.93 6. GRUPPE TARIF 3
P.94 6. GRUPPE TARIF 4
P.95 6. GRUPPE TARIF 1 CLUB
P.96 6. GRUPPE TARIF 2 CLUB
P.97 6. GRUPPE TARIF 3 CLUB
P.98 6. GRUPPE TARIF 4 CLUB
P.99 FESTLEGUNG DER TISCHE MIT
TARIFEN DER 6. GRUPPE
DEUTSCH

18
Vor der Anwendung ist es ratsam, daß die
Programmierung so erfolgt ist, daß alle in Betracht
kommenden Funktionen befähigt sind.
Führen Sie den Stecker in eine 230 Vac Steckdose ein und
schalten Sie die Taste ON/OFF ein, Bei Fehlen von
elektrischer Energie können Sie MICRO32 einschalten,
indem sie mit einer Kugelschreiberspitze BATTERY
drücken, dies im Inneren des Lochs, das seitlich von
ON/OFF liegt. Die innere Batterie (2 herkömmliche 9 Volt
Batterien) hat eine Lebensdauer, die von der Verwendung
abhängig ist, das bedeutet, unter mittleren Umständen,
hält sie mehr als 5 Jahre.
Diese Batterie dient NICHT dazu, die Daten zu speichern,
sondern ausschließlich um die Anzeige der Beträge zu
ermöglichen, sofern ein elektrischer Blackout auftritt.
Um das Zählen zu beginnen, drücken Sie START und
dann die Nummer des betreffenden Tisches. Das selbe
gilt für START-CLUB, für eventuelle Clubmitglieder. Auf der
numeriertenTaste leuchtet das Led auf, um anzuzeigen,
daß es sich im Zählzustand befindet. Erfolgt das Zählen
durch Clubtarif, zeigt das Led ein leichtes Flimmern. Nach
dem Steuern von Start, kann innerhalb von einer Minute
auf START-CLUB oder vice-versa umgeschaltet werden.
Ist die Leitung Bar befähigt (Programmierung Schritt P.03),
kann der Verzehr an einem sich im Spiel befindlichen
Tisch belastet werden, indem BAR und danach die
entsprechende Nummer gedrückt wird. Danach wird der
Betrag unter Verwendung der leuchtenden numerierten
Tasten eingegeben, unter Beobachtung der Schriften
"über" diesen Tasten. Mit den Tasten von 1 bis 12 wird der
Betrag eingegeben. Die Taste CANC. (14) löscht bei
Fehleingabe. Die Taste REP. (15) ermöglicht, den
eingegebenen Betrag mehrmals zu wiederholen, wenn
Verzehr gleichen Wertes serviert wird. Die Taste (+) (16)
addiert mehrere Beträge auf.
Bei Befähigung und dazugehöriger Speicherung auch
der Sondertasten Bar (Nr. 17-32), ist es möglich, die
entsprechenden Zechen einzugeben, indem einfach die
Sondertasten gedrückt werden.
Abschliessend ENTER drücken, um alles zu bestätigen.
Ein aus Versehen berechneter Betrag kann korrigiert
werden, indem ein gleicher Betrag mit der Taste (–)
eingegeben wird.
Während des Zählens kann man den bis zum derzeitigen
Zeitpunkt angewachsenen Betrag eines Tisches sehen,
indem einfach dessen Nummer gedrückt wird, danach
kann man durch Drücken von PRINT ausdrucken (sofern
der Drucker angeschlossen ist). Es wird auch die
Anfangszeit angezeigt.
Bei Spielbeendigung wird, um das Zählen zu beenden,
STOP gedrückt und danach die entsprechende Nummer.
Auf dem roten Display erscheint der Gesamtbetrag und
aut dem rechten Display werden der Spielbetrag und der
Verzehrbetrag angezeigt. Ist der Drucker angeschlossen,
wird der Beleg ausgedruckt, sofern dies bei der
Programmierung unter Schritt 11 befähigt wurde.
Wird STOP an einem Tisch gesteuert, der die
Kugelkontrolle hat, ohne daß sich diese an ihrem Platz
befinden, wird der STOP akzeptiert, es erfolgt jedoch ein
automatischer Neubeginn. Dies ist nützlich, um den
Spielerwechsel zu ermöglichen, ohne daß die Kugeln an
ihren Platz zurückgebracht werden müssen. In diesem Fall
ist der erneute Beginn nicht CLUB, aus diesem Grund,
falls der beginnende Spieler Clubmitglied sein sollte,
verbleibt eine Minute, um START-CLUB und danach die
Tischnummer zu drücken.
Die Taste DOWN hingegen ermöglicht es, zwei Tische
abzuwechseln, so dass die Spieler zu einem anderen
Tisch übergehen können. Um den Wechsel
durchzuführen, die Taste DOWN drücken, dann die
Nummer der zwei Tische und schliesslich ENTER.
Der Wechsel ist nur möglich zwischen Tischen mit selbem
Tarif und die sich im Zählzustand befinden, oder auch
zwischen einem Tisch in Zählzustand und dem anderen in
STOP-Zustand, wenn keiner der beiden die Kugel-BOX
aktiviert hat.
Mit der Taste MEMORY-LAST-STOP und darauffolgend mit
der Nummer des entsprechenden Tisches, beginnt ein
neues Zählen.
Durch Drehen des Schlüssels INSTALLATION gelangt man
in die Programmierung und zur Anzeige der Totalisatoren.
Siehe Kapitel "PROGRAMMIERUNG" für die ausführliche
Beschreibung. Die Totalisatoren werden von Schritt P.04
bis P.08 angezeigt. Verwenden der Tasten UP und DOWN,
um zu diesen Schritten zu gelangen.
Durch Drehen des Schlüssels SERVICE gelangt man zu 2
Service-Totalisatoren für die Angestellten. Siehe Schritte
P.07 und P.08 im Kapitel "PROGRAMMIERUNG".
Um die Reinigung der Tische zu erleichtern, und unter der
Bedingung dass sich keine Tische im Zählzustand
befinden, ist es möglich, alle Leuchter gleichzeitig
FUNKTIONSABLAUF
P.100 ZEIT, UM AUF DAS SPIEL ZU VERZICHTEN.
P.101 BEFÄHIGUNG SONDERTASTEN BAR (Nr. 17-32).
P.117 - P.132 BESCHREIBUNG SONDERTASTEN BAR.
P.217 - P.232 PREIS SONDERTASTEN BAR.
Es ist möglich eine Zeit von 0 bis 300 Sek. zu
programmieren, damit, sofern vom Moment START bis zu
dem von STOP diese Zeit nicht abgelaufen ist, dem
Spieler, der auf das Spiel verzichtet hat, kein zu zahlender
Betrag belastet wird. Um die gewünscht Zeit einzugeben
werden die Tasten (+) und (–) verwendet.
Diese Phase wird übersprungen, sofern unter Schritt P.03
die Leitung der BAR nicht befähigt wurde.
Bei YES können die 16 meistverlangten Zechen den 16
Tasten, von Nr. 17 bis 32, zugeordnet werden. Auf dieser
Weise genügt es, die entsprechenden Tasten zu drücken,
um die Zechen dann zu berechnen.
Diese Phasen werden übersprungen, sofern unter den
Schritten P.03 und P.101 die Leitung der BAR und die
Befähigung der SONDERTASTEN BAR nicht aktiviert
wurden. Unter jedem dieser Schritte kann eine Aufschrift
von höchstens 8 Typen (Buchstaben und Nummern)
gespeichert werden. Diese wird jeder der 16 Sondertasten
Bar zugeordnet.
Die Typen wie unter Schritt P.14 eingeben.
Diese Phasen werden übersprungen, sofern unter den
Schritten P.03 und P.101 die Leitung der Bar und die
Befähigung der SONDERTASTEN BAR nicht aktiviert
wurden. Unter diesen Schritten wird der Betrag, der jeder
der 16 Sondertasten Bar zugeordnet wird, gespeichert.
Um den Betrag einzugeben, die leuchtenden Tasten von 1
bis 12 verwenden (siehe die Aufschriften über diesen
Tasten). Die Taste 14 (CANC.) löscht den Betrag bei
Fehleingabe. Nach der Eingabe den Betrag mit ENTER
bestätigen.
DEUTSCH
This manual suits for next models
1
Table of contents
Languages:
Other Favero Controllers manuals
Popular Controllers manuals by other brands

IFM Electronic
IFM Electronic ecomot100 ExtendedController CR0253 installation instructions
Frymaster
Frymaster FilterQuick Version 2 Operation manual
Delta Electronics
Delta Electronics Programmable Logic Controller DVP06XA-H2 instruction sheet
BERMAD
BERMAD BIC-F Operation manual
Mitsubishi
Mitsubishi MELSEC-F user manual
Carel
Carel thTx user manual
