Fels Mobilis ELITE User manual
- 1 -
MOBILIS
ELITE
NOTICE DE MONTAGE
A lire impérativement avant le montage
Cette notice complète la notice générale (SPMO038)
ASSEMBLY INSTRUCTIONS
Must be read before the assembly
These instructions complete the general instructions (SPMO038)
MONTAGEANLEITUNGEN
Unbedingt vor der Montage lesen
Diese Anleitung ergänzt die Hauptanleitung (SPMO038)
2
-
FRONT
Travaillant continuellement au développement de nos produits, nous nous réservons le droit à
toutes modifications.
As we are continually striving to improve our products, we reserve the right to make any modifications without prior
warning.
Aufgrund der stetigen Entwicklungen unserer Produkte behalten wir uns das Recht für jegliche
Änderungen vor.
SPMO 064-8
COURBES
KURVEN
CURVES
- 2 -
Préambule : les circuits courbes peuvent être constitués avec des courbes ou avec des éléments droits à conducteurs
rallongés d’un côté.
Preamble: curve circuits can be made with curves or with straights elements with lengthened conductors on one
side.
Präambel: kurven Anlagen können entweder mit Kurven oder mit gerade Elementen mit auf einer Seite verlängerte
Leitungen aufgebaut werden
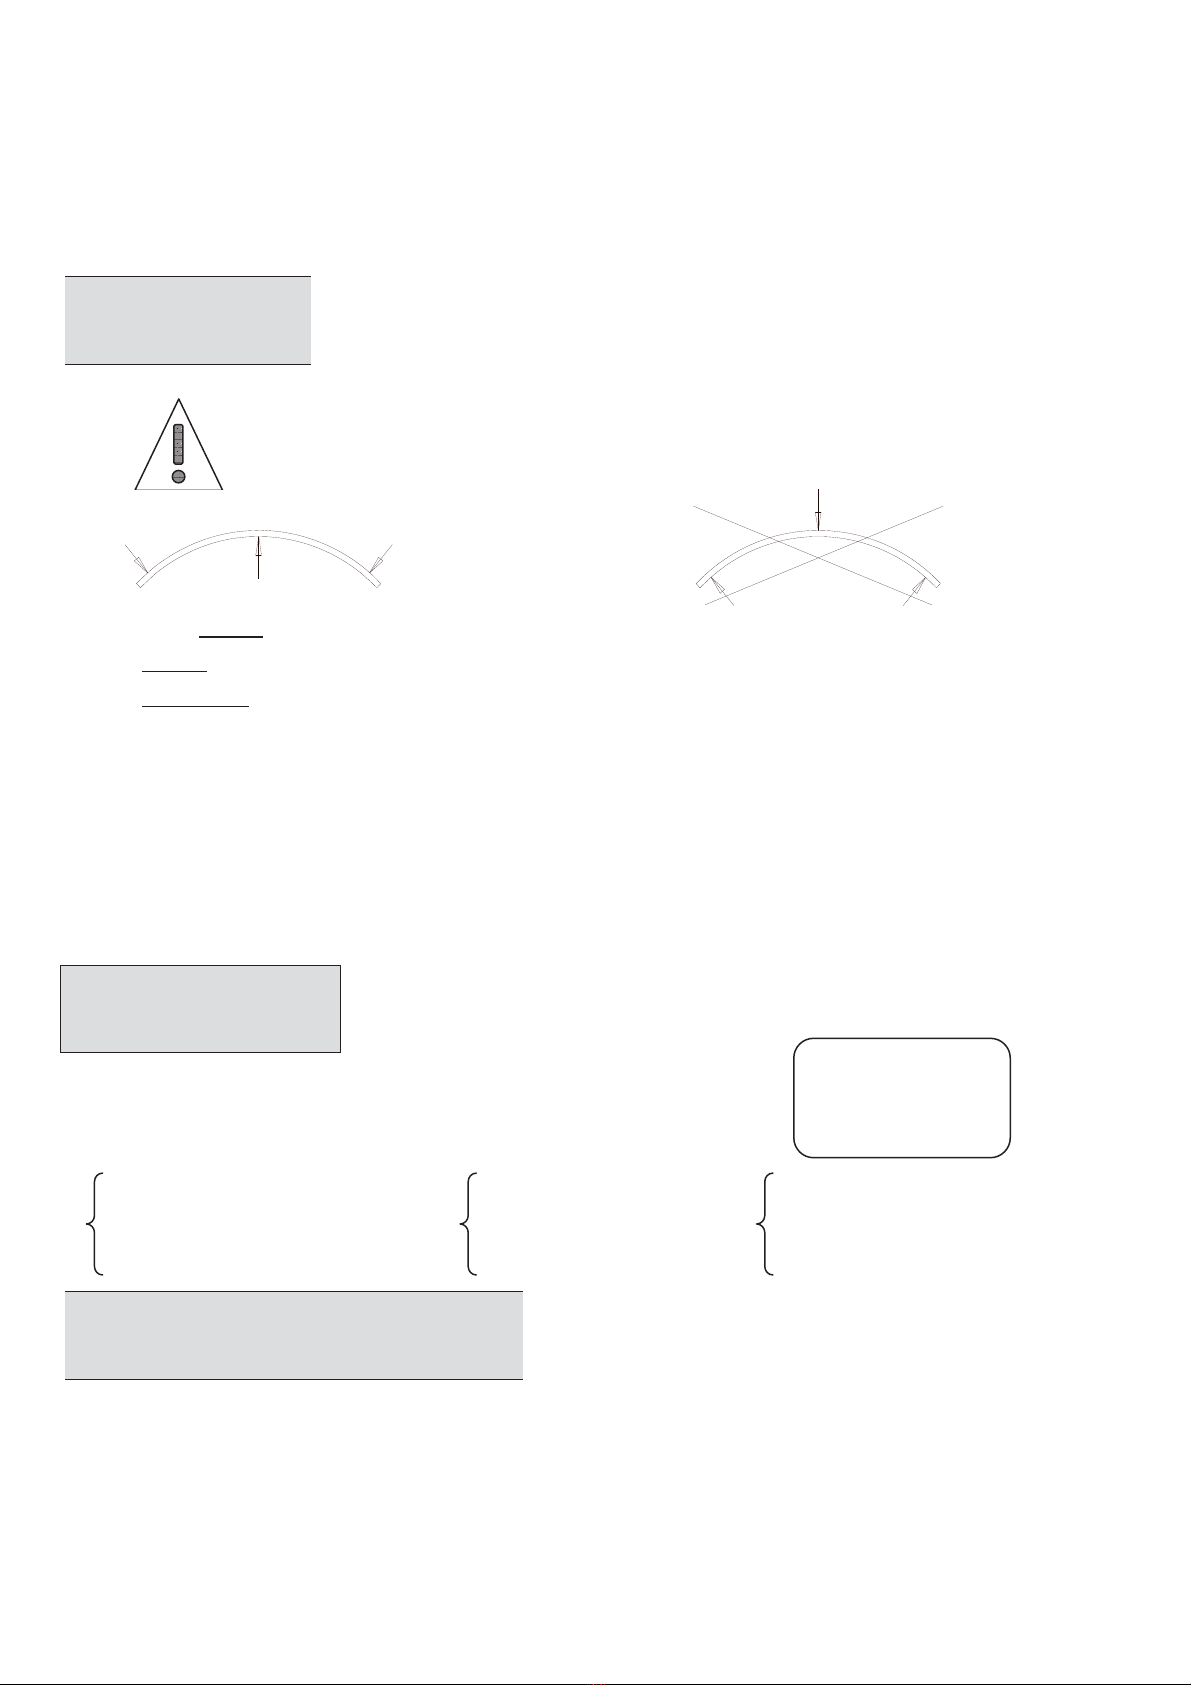
1. Avertissements
Warning
Warnung Important : Ne pas enlever le cerclage des courbes avant montage sur chantier.
Ne pas tenter d'enlever les pièces grises.
Important: Don't take off the tightening of curves before assembly on site.
Don't try to take off the grey pieces.
Wichtig : Das Verschnüren nicht vor der Montage auf dem Bauplatz ablegen.
Nicht versuchen die grauen Teile abzumontieren.
Effort modéré admissible Important risque de rupture
Medium effort acceptable Important breaking risk
Mittelmäßige Kraft zulässig Großes Bruchrisiko
Pour contrôler le rayon de la courbe, enlever le cerclage (Attention, cela fragilise la courbe).
De par sa souplesse, la courbe au repos peut se trouver à un rayon légèrement différent du rayon nominal.
To control the radius of the curve, take off the tightening (Warning : the curve becomes fragile).
Through its flexibility, the radius of the curve at rest can be a little bit different from the nominal radius.
Um den Radius der Kurve zu kontrollieren, das Verschnüren ablegen (Achtung : die Kurve wird zerbrechlich).
Durch ihre Biegsamkeit kann der ruhe Radius der Kurve ein bißchen unterschiedlich von dem nominalen Radius sein.
2. Identification
Identification
Identifizierung
Toutes les courbes comportent une étiquette d'identification. Exemple :
All curves have an identification label. Example :
Alle Kurven haben eine Identifizierung Etikette. Beispiel :
Rayon de la courbe dans l'axe Angle de la courbe Longueur développée de la courbe
RRadius of the curve in the axis
D
Angle of the curve LDth Developed length of the curve
Radius der Kurve in der Axe Winkel der Kurve Entwickelte Länge der Kurve
3. Joint de dilatation entre courbes
Expansion joint between curves
Dehnungsstück zwischen Kurven
Si le montage d'un joint de dilatation est prévu entre deux courbes, le placer impérativement à égale
distance entre les courbes.
If an expansion joint is planed between two curves, it must imperatively be placed at equal distance between the
curves.
Wenn die Montage eines Dehnungsstücks zwischen zwei Kurven vorgesehen ist, soll es unbedingt mit gleicher
Entfernung zwischen den Kurven eingesetzt werden.
ME4420 08/2000
R=2,25m
D
=60°
LDth = 2,356 m
֒D֒֒D֒
D
D
- 3 -
4. Point d'ancrage
Fixed hanger
Festaufhängung
Toujours placer des points d'ancrage sur les courbes, à proximité des extrémités (évite le décrochement
en cas de dilatation).
Always place fixed hangers on all curves, close to the ends (risk of unhooking in case of expansion).
Immer Festaufhängungen auf alle Kurven in der Nähe den Enden einsetzen (sonst gibt es ein Risiko, daß die
Linie wegen der Dehnung abhängt).
150mm
150m
m
150m
m
150m
m
=
=
Si LDth
֒
2 m et
D֒
90°
2 points d'ancrage
If LDth
֒
2 m and
D֒
90°
2 fixed hangers
Wenn LDth ֒ 2 m und D֒ 90°
2 Festaufhängungen
֒
Si LDth > 2 m ou
D
> 90°
֒
3 points d'ancrage
If LDt > 2 m or
D<
90°
3 fixed hangers
Wenn LDth > 2 m oder D> 90°
3 Festaufhängungen
5. Couvre-joint Covering
flange
Verbindungsabdeckung
Courbes de calibre 20A à 130A : à chaque extrémité, le dernier tronçon forme un angle de 3° avec l'élément auquel il est
raccordé, sauf inversion du sens de courbure.
Curves for intensity 20A to 130A : the last section, at each end of the curve, makes a 3° angle with the next element, excepted if
bending reversal.
Kurven für Stromstärke 20A bis 130A: das letzte Teil, an jedem Ende des Elements, macht ein 3° Winkel mit dem nächsten
Element, außer wenn Biegungsumkehrung.
Connexion courbe-élément droit : Connexions courbe courbe :
Connexion curve – straight element: Connexion curve – curve :
Kurve – Gerade Element Verbindung : Kurve – Kurve Verbindung :
3
6
0
ou
or
oder
MExxxx-CO MExxxx-CO MExxxx
Courbes avec éléments droits à conducteurs rallongés :
Curves with straight elements with lengthened conductors:
Kurven mit gerade Elementen mit verlängerten Leitungen:

- 4 -
De ce fait, il faut utiliser des couvre-joints spéciaux ME2000-CO ou boîtes d'alimentation ME1300-CO /
ME1330-CO à chaque extrémité des courbes.
Therefore, it is necessary to use special covering flanges ME2000-CO or feed-boxes ME1300-CO / ME1330-CO at each
end of the curve whatever the configuration is.
Aus diesem Grund müssen speziale Verbindungsabdeckungen ME2000-CO oder Einspeisungen ME1300-CO /
ME1330-CO an jeden Enden der Kurven verwendet werden, egal wie die Konfiguration aussieht.
Courbes de calibre 160A et 200A : utiliser les couvre-joints standards ME2000.
Curves for intensity 160A and 200A: it is necessary to use the standard covering flanges ME2000.
Kurven für Stromstärke 160A und 200A: die Standardverbindungsabdeckungen ME2000 benützen.
6. Procédure de montage
Assembly procedure
Montage Verfahren
6.1. Mettre en place les points d'ancrage sur les supports de fixation (cf. § 4).
Put the fixed hangers on the fixing brackets (see § 4).
Festaufhängungen auf Abstandskonsolen montieren (siehe § 4).
6.2. Placer la courbe dans les points d'ancrage sans mettre en place les vis de fixation.
Put the curve in the fixed hangers without fixing anchoring screws.
Die Kurve in die Festaufhängungen einsetzen, ohne die Verankerungsschrauben zu montieren.
6.3. Etablir les connexions d'un côté, conducteurs jointifs.
Assemble connections on one side, conductors abutting.
Verbindungen auf einer Seite zusammensetzen, Leiter aneinanderstoßend.
6.4. Placer l'élément suivant dans les suspensions, puis jouer légèrement avec la courbe si nécessaire pour
établir les connexions restantes de la courbe, conducteurs jointifs.
Place the next element in the hangers, then move a little bit the curve if necessary to assemble the remaining
curve connections, conductors abutting.
Das nächste Element in die Aufhängungen hinlegen, dann die Kurve ein wenig bewegen wenn nötig um die
letzten Verbindungen der Kurve zusammensetzen zu können, Leiter aneinanderstoßend.
6.5. Mettre en place les couvre-joints ME2000-CO ou boite d'alimentation ME1300-CO / ME1330-CO.
Place the covering flanges ME2000-CO or feed-box ME1300-CO / ME1330-CO.
Verbindungsabdeckung ME2000-CO oder Einspeisung ME1300-CO / ME1330-CO montieren.
6.6. Mettre en place les vis de fixation des points d'ancrage.
Assemble anchoring screws of fixed hangers.
Die Verankerungsschrauben der Festaufhängungen einsetzen.
7. Chariot + Entraîneur
Trolley + Carrier
Stromwagen + Mitnehmer
Dans tous les cas, il faut utiliser un chariot articulé (simple / double /
triple) sur une ligne avec courbe. Lors de la mise en tension des
chaînettes du chariot, celles-ci doivent être le plus parallèle possible à la
gaine. Afin d’ajuster au mieux le positionnement de l’entraîneur,
effectuer des passages manuels du chariot dans les secteurs avec courbe
et orienter les chaînettes en fonction du mouvement le plus fluide
obtenu.
Always use an articulated trolley (simple / double / triple) on an installation with curve. During the putting under
tension chains of the collector one must as parallel as possible to the conductor. To better adjust the positioning of the carrier,
drive the articulated trolley manual in sections with curve and orientate chains according to the most fluid movement obtained.
Auf einer Linie mit Kurve, auf jeden Fall ein gelenkiger Stromwagen einsetzen (einfach / doppelt / dreifach). Beim
Anspannen der Stromabnehmerketten, bitte vergewissern, dass die Ketten so parallel wie möglich von der Schiene sind. Um die
Mitnehmer Positionierung besten anzupassen, den Stromabnehmerwagen in den Kurvenabschnitten manuell fahren und die
Ketten für eine flüssige Bewegung einstellen.
Other manuals for Mobilis ELITE
1
Other Fels Industrial Equipment manuals


