manuals.online logo
Brands
  1. Home
  2. •
  3. Brands
  4. •
  5. Fender
  6. •
  7. Speakers System
  8. •
  9. Fender PowerStage Xpander 100 User manual

Fender PowerStage Xpander 100 User manual

Owner's Manual for
PowerStage Xpander 100
P/N 051199
REV B
From Fender Pro Audio
POWERED MONITORS
A. LINE INPUT - A 1/4 inch TRS
unbalanced input jack designed
to receive a line level signal from
the PowerStage 100. Before
plugging or unplugging any cord
into the line input, make sure the
PowerStage Xpander 100 is off.
B. SUPPLY CORD JACK - The
supply cord connects here. This is
a grounding type supply cord to
reduce the possibility of shock
hazard. Be sure to connect it to a
grounded receptacle. DO NOT
ALTER THE AC PLUG.
C. POWER LED - This LED illuminates
when the PowerStage Xpander 100 is
on.
D. POWER SWITCH - Turns the
AC power ON and OFF. When
the switch is in the OFF position,
the PowerStage Xpander 100 is
completely shut down.
XPANDER PANEL FUNCTIONS
1/4 inch Phone Input Jack
Coaxial Speaker System
Tough Metal Grille
Carpet Covered Cabinet with Three
Angles of Orientation 45º, 25º and 0º
The PowerStage Xpander 100 is the companion unit
designed to accompany the PowerStage 100. We
are sure you will find the PowerStage Xpander 100
to be both a unique and effective sound
reinforcement product, providing years of trouble-
free service.
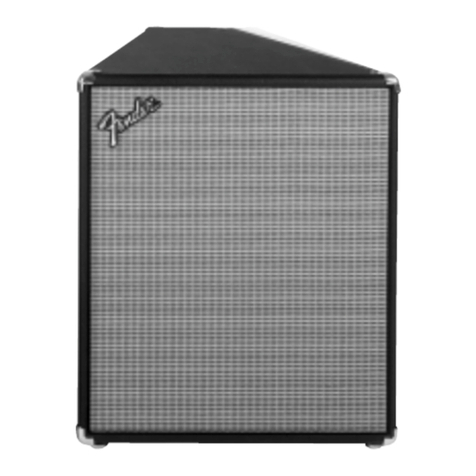
Enclosed in a quasi-trapezoidal floor monitor style
cabinet, the PowerStage Xpander 100 includes a
100 watt power amp, a power supply and a full-
range coaxial speaker system. With three angles of
orientation, your PowerStage Xpander 100 is ideally
suited for use as either a small PA system or to
compliment your monitoring needs.
WARNING:
- TO REDUCE THE RISK OF FIRE OR SHOCK
HAZARD, DO NOT EXPOSE THIS UNIT TO RAIN OR
MOISTURE.
- NO USER SERVICEABLE PARTS INSIDE, REFER
SERVICING TO QUALIFIED PERSONAL ONLY.
- THIS UNIT MUST BE EARTH GROUNDED.
INTRODUCTION
POWERST
POWERSTAGE XP
AGE XPANDER 100
ANDER 100
PROFESSIONAL POWERED
MONITOR SYSTEM
MONITOR SYSTEM
D
B
AC
Before using the PowerStage Xpander
100, please read and follow the steps
listed below:
1. Heed all safety warnings when
operating the PowerStage Xpander 100.
2. Make sure the power switch is in the OFF position.
3. Plug the female end of the supply cord into the
supply cord jack (item B previous page) of the
PowerStage Xpander 100. Next, plug the supply
cord into a power source with the correct voltage.
4. Connect the cord from the PowerStage 100's line
output jack to the line input jack of the PowerStage
Xpander 100.
5. First turn the PowerStage Xpander 100 ON, then the
PowerStage 100.
6. Adjust volume levels on the PowerStage 100 to
the appropriate levels, listening for feedback or other
ringing.
7. If feedback is encountered, rotate the appropriate
(LOW or HIGH band) frequency notch filter control on
the PowerStage 100 down to its lowest position.
Next, slowly turn the frequency control knob to
pinpoint the location of the problem frequency and
cancel it.
8. Steps 6 and 7 may need to be performed more
than once if several feedback problems occur.
The PowerStage Xpander 100 is covered
in a tough, soil resistant synthetic
indoor/outdoor carpet for long life and
lasting good looks. To clean the
carpeted cabinet, use a brush to wipe
away any smudges or dirt. For stubborn stains, a
sponge with a light soapy solution may be used.
Avoid spilling liquids on the operating surface, heat
sink, grille, volume and tone controls, switches and
speakers. ALWAYS unplug the PowerStage Xpander
100 before cleaning it and wait until it has dried
before plugging in the PowerStage Xpander 100.
Ground loops are probably the most
common cause of hum and buzz in
sound reinforcement systems and other
audio products. A ground loop usually
occurs if the separate pieces of
equipment are plugged into different AC
circuits. Also, if the audio wiring is placed too close
to the power cords, hums or buzzes can also bleed
into the system. Still, improperly maintained power
and audio cables are yet another cause of
bothersome noise. In order to help minimize stray
hums and buzzes, here are some helpful hints.
1. Keep all electronics connected to the sound
system on the same electrical circuit.
2. Keep audio signals cables away from the AC
power cords.
3. Use balanced cables when applicable.
4. Always plug the PowerStage Xpander 100 into a
grounded AC electrical outlet.
5. Be sure to use properly maintained cords and
cables with the PowerStage Xpander 100.
If the PowerStage 100 is set up but
does not function, please check the
following items:
• Is the PowerStage Xpander 100 power cord
properly plugged into an electrical outlet?
• Is the power cord properly plugged into the
PowerStage Xpander 100’s supply cord jack?
• Is there power at the outlet?
• Does PowerStage 100 have power?
• Are the volume control knobs on the Power
Stage 100 turned above the MIN position?
• Is the Power Stage 100 properly plugged into the
PowerStage Xpander 100?
• Is the mic/instrument turned on?
• Are your audio cables frayed, cut or damaged?
If after checking all of the above the PowerStage
Xpander 100 is still not performing correctly, consult
your authorized Fender Service Center.
TROUBLESHOOTING
GROUNDING AND HUMS
CARPET COVERING CARE
SETTING UP THE PS XPANDER 100
SPECIFICATIONS
A PRODUCT OF:
FENDER®MUSICAL INSTRUMENTS CORP.
CORONA, CA 91720 USA
DESIGNATION TYPE PR 306
PART NUMBER 071-0101-000 (120 V)
071-0101-030 (240 V) Aust
071-0101-040 (230 V) UK
071-0101-060 (230 V) Euro
POWER SPECIFICATION 120 V version: 120 VAC, 60 Hz 360 W
230 V version: 230 VAC, 50 Hz 360 W
240 V version: 240 VAC, 50 Hz 360 W
POWER AMP Nominal Power 100 W into 8 Ω, <0.05% THD+Noise @ 1kHz
Maximum Power 108 W into 8 Ω, <0.1% THD+Noise @ 1 kHz
Frequency Response +0 dB, -3 dB 20 Hz to 40 kHz @ Nominal Power
THD + Noise <0.05% @ 1 kHz, 100 W into 8 Ω
Output Impedance 0.2 Ω@ 1 kHz, 0.02 Ω@ 100 Hz
Input Sensitivity 1 V RMS, 0 dBV
DIMENSIONS (At 25º) Height: 18 in 45.7 cm
Width: 23.5 in 59.7 cm
Depth: 12 in 30.5 cm
Weight: 41 lbs 18.6 kg
Product specifications are subject to change without notice.
THIS EQUIPMENT CONFORMS TO
THE FOLLOWING DIRECTIVES :
EMC 89/336/EEC AND LV 73/23/EEC

This manual suits for next models

4

Other Fender Speakers System manuals

Fender Passport PD-150 User manual

Fender

Fender Passport PD-150 User manual

Fender 110-ELC User manual

Fender

Fender 110-ELC User manual

Fender 2912(C) User manual

Fender

Fender 2912(C) User manual

Fender PASSPORT User manual

Fender

Fender PASSPORT User manual

Fender Speaker System User manual

Fender

Fender Speaker System User manual

Fender PASSPORT P-10 User manual

Fender

Fender PASSPORT P-10 User manual

Fender PASSPORT Parts list manual

Fender

Fender PASSPORT Parts list manual

Fender XP 110 User manual

Fender

Fender XP 110 User manual

Fender PASSPORT PDP-1 User manual

Fender

Fender PASSPORT PDP-1 User manual

Fender 1110X User manual

Fender

Fender 1110X User manual

Fender 215S User manual

Fender

Fender 215S User manual

Fender 1272X User manual

Fender

Fender 1272X User manual

Fender Passport Conference User manual

Fender

Fender Passport Conference User manual

Fender PASSPORT Quick start guide

Fender

Fender PASSPORT Quick start guide

Fender SPL 1282 Mark Two User manual

Fender

Fender SPL 1282 Mark Two User manual

Fender SPL-1211 Mk. II User manual

Fender

Fender SPL-1211 Mk. II User manual

Fender 118S User manual

Fender

Fender 118S User manual

Fender PASSPORT PD-500 User manual

Fender

Fender PASSPORT PD-500 User manual

Fender 110XP User manual

Fender

Fender 110XP User manual

Fender Camcorder Bag PD-150 User manual

Fender

Fender Camcorder Bag PD-150 User manual

Fender Passport Venue Quick start guide

Fender

Fender Passport Venue Quick start guide

Popular Speakers System manuals by other brands

Q Acoustics 7000 Series User manual and technical specifications

Q Acoustics

Q Acoustics 7000 Series User manual and technical specifications

Cambridge Sound Works PlayWorks PS2000 Digital user guide

Cambridge Sound Works

Cambridge Sound Works PlayWorks PS2000 Digital user guide

B2 Audio HNC6.1 owner's manual

B2 Audio

B2 Audio HNC6.1 owner's manual

A&S Studio Bar 100 user manual

A&S

A&S Studio Bar 100 user manual

Vizio S3821w-C0 quick start guide

Vizio

Vizio S3821w-C0 quick start guide

iLive ITB183B v859-04 user guide

iLive

iLive ITB183B v859-04 user guide

Yamaha HTY-7040 owner's manual

Yamaha

Yamaha HTY-7040 owner's manual

QSC SC-323 user manual

QSC

QSC SC-323 user manual

Sony SA-D10 operating instructions

Sony

Sony SA-D10 operating instructions

Kenwood KSC-9903 instruction manual

Kenwood

Kenwood KSC-9903 instruction manual

Sharp HT-SBW420 quick start guide

Sharp

Sharp HT-SBW420 quick start guide

Sony SA-WCT100 Service manual

Sony

Sony SA-WCT100 Service manual

JVC CA-FSX1 instructions

JVC

JVC CA-FSX1 instructions

Bowers & Wilkins Matrix 1 instruction manual

Bowers & Wilkins

Bowers & Wilkins Matrix 1 instruction manual

Renkus-Heinz iConyx DC12/2 installation manual

Renkus-Heinz

Renkus-Heinz iConyx DC12/2 installation manual

Fbt jolly 15b a manual

Fbt

Fbt jolly 15b a manual

Benewake CE30-A Operation manual

Benewake

Benewake CE30-A Operation manual

Monitor Audio VECTA V240 installation guide

Monitor Audio

Monitor Audio VECTA V240 installation guide

manuals.online logo
manuals.online logoBrands
  • About & Mission
  • Contact us
  • Privacy Policy
  • Terms and Conditions

Copyright 2025 Manuals.Online. All Rights Reserved.