Ferno Fernotrac 441 User manual

Users'
Manual
Pub. No. 234-1830-01
Fernotrac
Model 441 Combination Kit
Model 443 Traction Splint
Model 444 Traction Splint

Models 441, 443, & 444 Users' Manual
2 © Ferno-Washington, Inc. 234-1830-01 November 1996
Disclaimer
This manual contains general instructions for the use,
operation and care of the Model 441 Fernotrac Combination
Kit, Model 443 Fernotrac Traction Splint (ped.), and the Model
444 Fernotrac Traction Splint (adult). The instructions are not
all-inclusive. Safe and proper use of this product is solely at
the discretion of the user. Safety information is included as
a service to the user. All other safety measures taken by the
user should be within and under consideration of applicable
regulations. It is recommended that training on the proper
use of this product be provided before using this product in an
actual situation.
Retain this manual for future reference. Inlude it with the
Fernotrac in the event of transfer to new users. Additional free
copies are available upon request from Customer Service (Page
14).
Proprietary Notice
The information disclosed in this manual is the property
of Ferno-Washington, Inc., Wilmington, Ohio, USA. Ferno-
Washington, Inc., reserves all patent rights, proprietary design
rights, manufacturing rights, reproduction use rights, and sales
use rights thereto, and to any article disclosed therein except
to the extent those rights are expressly granted to others or
where not applicable to vendor proprietary parts.

Users' Manual Models 441, 443, & 444
© Ferno-Washington, Inc. 234-1830-01 November 1996 3
TABLE OF CONTENTS
Page
Safety Information ........................................................................................................4
Learning about the Splint ..........................................................................................5
Operator Considerations ............................................................................................7
Using the Splint..............................................................................................................8
Parts and Service .........................................................................................................11
Limited Warranty .........................................................................................................12
Customer Service ........................................................................................................12
Training Record ............................................................................................................13
Maintenance Record ..................................................................................................13

Models 441, 443, & 444 Users' Manual
4 © Ferno-Washington, Inc. 234-1830-01 November 1996
1.1 Safety Alerts
Safety alerts identify hazards to avoid. The fol-
lowing safety alerts appear in this manual:
SECTION 1 SAFETY INFORMATION
Improper use can cause serious injury.
Use the splint only as described in this
manual.
Improper maintenance can cause serious
injury. Maintain the splint as described
in this manual.
Using improper parts and service can
cause serious injury. Use only Ferno-ap-
proved parts and service.
1.2 Bloodborne Disease Notice
OSHA requires employers to protect workers
from workplace exposure to bloodborne dis-
eases like HIV-1 and hepatitis. To reduce the risk
of exposure when using the splint, follow the
maintenance instructions in this manual.
For more information, contact:
U.S. Department of Labor, OSHA
Office of Public Affairs, Room N-3647
200 Constitution Ave., N.W.
Washington, DC 20210

Users' Manual Models 441, 443, & 444
© Ferno-Washington, Inc. 234-1830-01 November 1996 5
2.2 General Specications
Measurements are rounded to whole numbers. For detailed specications contact Ferno Customer
Service (page 13).
Model 443 (Pediatric) Splint
Length (Min.) ................. 31 in..............79 cm
Length (Max.) ................ 46 in............117 cm
Width ............................... 8 in............. 20 cm
Height (Min.)....................2 in................5 cm
Height (Max.)...................8 in..............20 cm
Weight .............................3 lb................1 kg
Ferno reserves the right to change specifications without notice.
Model 444 (Adult) Splint
Length (Min.) ................. 35 in..............89 cm
Length (Max.) ................ 54 in............137 cm
Width ............................... 9 in............. 23 cm
Height (Min.)....................3 in................8 cm
Height (Max.)...................9 in..............23 cm
Weight .............................5 lb................2 kg
2.1 Product Description
Model 441 is a combination kit containing a Model
443 pediatric splint and a Model 444 adult splint.
Fernotrac™Splints (splints) are traction splints de-
signed to immobilize and provide traction for a
patient's leg.
Each splint features adjustable length, adjustable leg
straps, an ankle wrap, a thigh pad, and a heel stand.
SECTION 2 LEARNING ABOUT THE SPLINT
The splints are for professional use only. Two opera-
tors are required to apply the splint.

Models 441, 443, & 444 Users' Manual
6 © Ferno-Washington, Inc. 234-1830-01 November 1996
2.3 Components
Ratchet Strap
Traction-release Ring
Traction Knob Ankle Wrap
Hip Restraint
Thigh Pad
Leg
Strap 4
Leg
Strap 3
Leg
Strap 2
Leg
Strap 1
Lock Collar (2)
Carrying Case
S-hook
Heel Stand
Fastening Strip
Stand-release Ring D-ring
Traction Strap
Splint
2.4 Attaching the Leg Straps
Four leg straps are included with the splint. These
straps are labeled 1 through 4 with instructions as
to their position.
Attach the leg straps to the splint. Wrap the nylon
webbing strap around the metal frame of the splint,
using the velcro to fasten the strap to the splint.
Locate strap 1 at the ankle end of the splint,
followed by straps 2 and 3 in the center, and
strap 4 at the thigh end of the splint.

Users' Manual Models 441, 443, & 444
© Ferno-Washington, Inc. 234-1830-01 November 1996 7
The heel stand elevates the injured leg.
To unfold the heel stand, pull the stand-release
ring, and pull down the heel stand. Release the
heel stand-release ring and make certain the heel
stand is locked into place.
To fold the heel stand, pull the stand-release ring,
and fold up the heel stand.
2.5 Adjustable Length
The overall length of the splint is adjustable to t
each patient's leg.
To adjust the length of the splint, loosen the lock
collars by turning them counterclockwise. Pull or
push the splint to the appropriate length. Tight-
en the lock collars by turning them clockwise.
2.6 Heel Stand
3.1 Skills
qOperators should have a working knowledge of emergency patient-handling procedures.
qOperators should have the ability to assist the patient.
qOperators should have a complete understanding of the procedures described in this manual.
3.2 Training
qTrainees should follow a training plan approved by the EMS training officer.
qTrainees should read this manual.
qTrainees should practice using the splint before using with a patient.
Test each trainee's understanding of the splint.
Keep training records. A convenient form is provided on page 13.
SECTION 3 OPERATOR CONSIDERATIONS
Lock Collar (2)
Stand-release
Ring

Models 441, 443, & 444 Users' Manual
8 © Ferno-Washington, Inc. 234-1830-01 November 1996
Slide the ankle wrap under the ankle of the in-
jured leg. The traction strap will extend below
the foot.
Align the bottom edge of the ankle wrap with the
top of the heel.
Adjust the ankle wrap so the foot is centered on
the wrap and the ends of the traction strap are
aligned with the ankle bones.
Wrap the ankle wrap around the patient's ankle,
and secure it with the fastening strip. If neces-
sary, adjust the traction strap to center the D-ring
on the traction strap.
If the ankle wrap is too wide for the ankle to cen-
ter between the ends of the traction strap, fold
the ankle wrap. If the ankle wrap slides off the
patient's ankle and foot, place additional padding
(such as 4" X 4" dressing) around the ankle, and
reapply the ankle wrap.
D-ring
4.1 Adjust the Splint
Place the splint alongside the patient's unin-
jured leg and adjust the splint to the appropriate
length. The patient's heel should be three to four
inches above the heel stand bracket.
Slide the leg straps along the splint until they are
evenly spaced, then unfasten them.
Unfold the heel stand by pulling the heel-stand
release ring and unfolding the stand. After
releasing the heel-stand release ring, check to
make sure the heel stand is locked into place.
4.2 Apply the Ankle Wrap
Follow your normal protocol for splinting a fracture.
One operator should support the injured leg while
the other applies the splint.
SECTION 4 USING THE SPLINT
Improper use can cause serious injury.
Use the splint only as described in this
manual.
Traction Strap

Users' Manual Models 441, 443, & 444
© Ferno-Washington, Inc. 234-1830-01 November 1996 9
Re-position and fasten leg straps 1 through 4,
making certain no leg strap covers any part of
the injury.
Transfer the patient to a back-board and ambu-
lance in preparation of transporting the patient.
Consult your EMT training textbook regarding immo-
bilizing the splinted patient on a back-board before
moving.
4.4 Remove the Splint
When the appropriate medical authority agrees, re-
move the splint from the patient's leg.
Unfasten the leg straps and support the foot and
ankle.
Grasp the traction strap above the d-ring to keep the
leg stable when the traction is released. Release the
4.3 Apply the Splint
While continuing to support the injured leg, slide
the splint under the injured leg until the thigh pad
rests against the lower pelvic bone. Fasten the
hip strap.
Pull the traction-release ring to loosen the
ratchet strap. Bring the S-hook over the top of
the splint. Attach the S-hook to the D-ring.
Turn the traction knob to apply traction. Check
with your medical advisor to determine the
amount of traction to apply to the leg.
Make sure the leg strap 1 is directly under the
ankle, then release the ankle, allowing it to rest
on the leg straps.

Models 441, 443, & 444 Users' Manual
10 © Ferno-Washington, Inc. 234-1830-01 November 1996
4.7 Cleaning the Splint
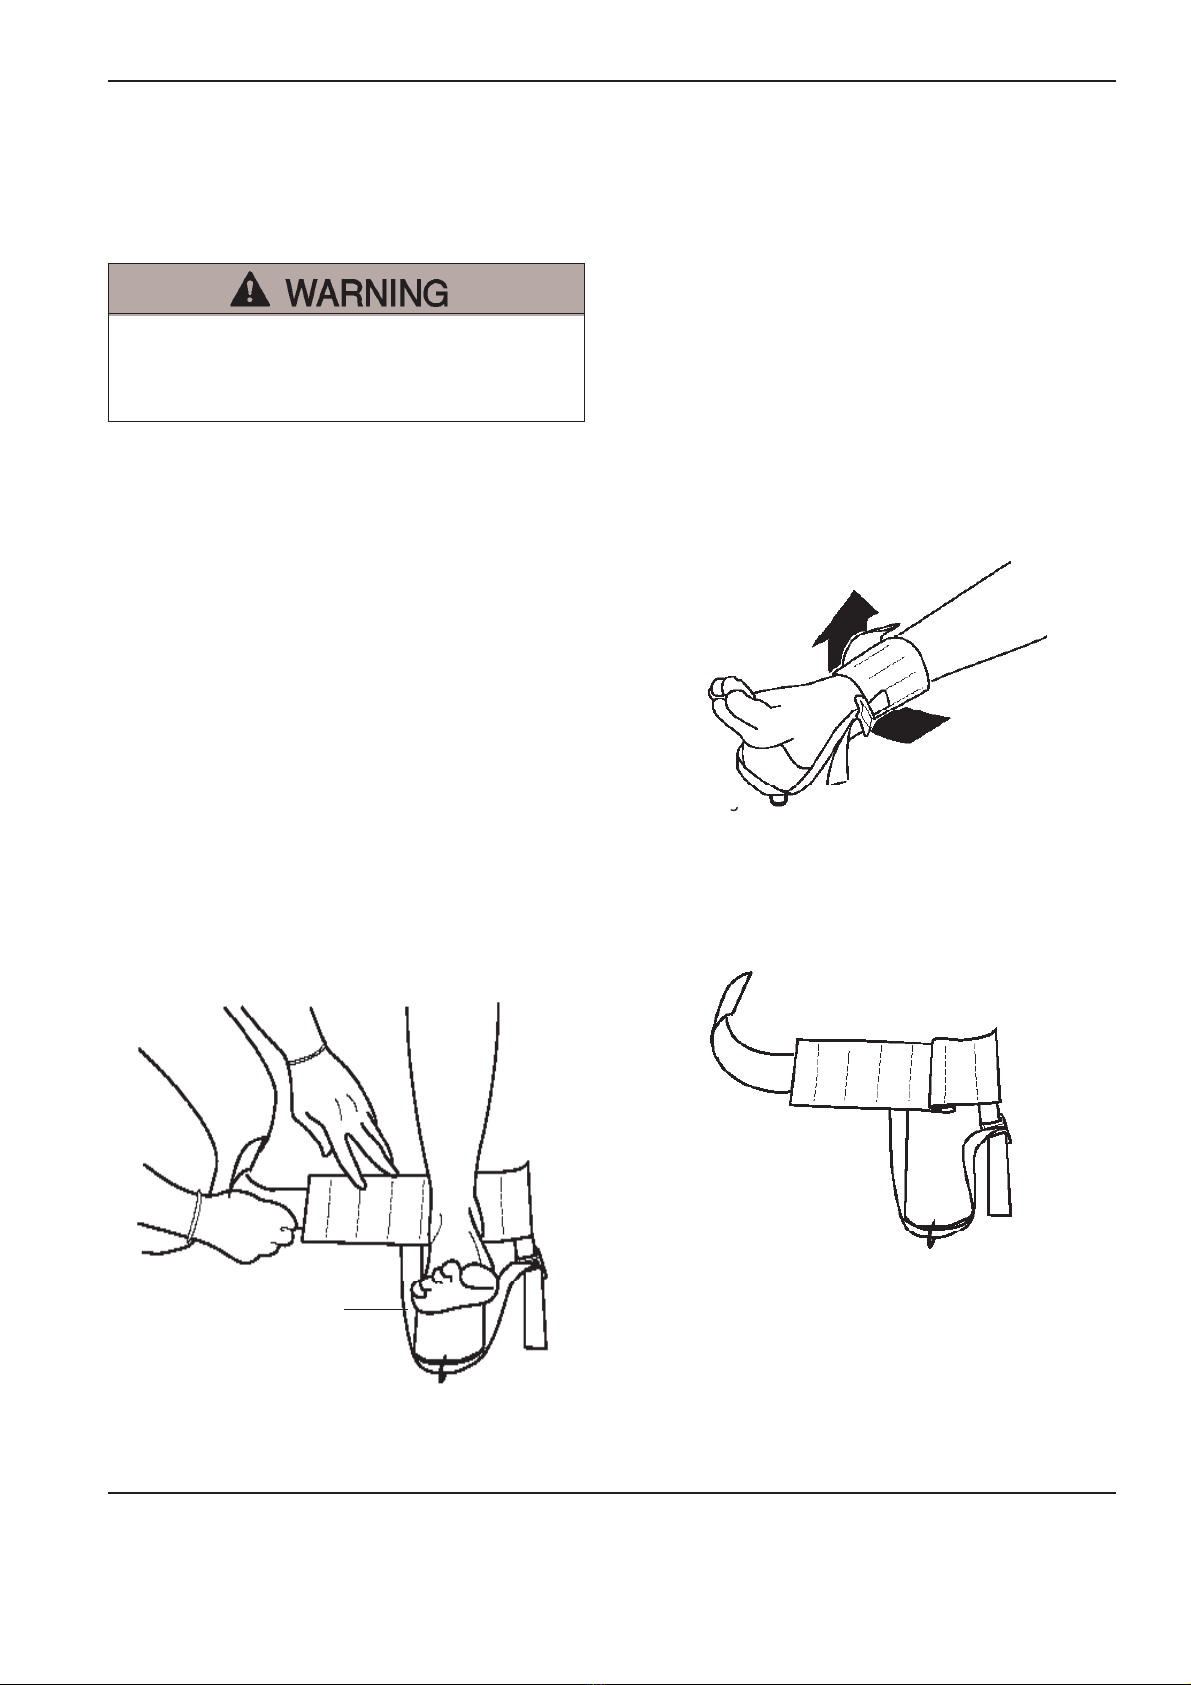
Remove the leg straps and ankle wrap and place them
in a mesh laundry bag. Machine wash them on cold/
cold using the delicate cycle and a mild detergent.
Allow them to air dry.
Clean metal surfaces of the splint with warm water
and a mild detergent. Use a stiff-bristled brush if
necessary. Rinse the detergent o with warm water.
Towel dry the splint or allow it to air dry.
4.6 Disinfecting the Splint
Wipe all surfaces with disinfectant (Bloodborne Dis-
ease Notice, page 4). Follow the disinfectant man-
ufacturer's directions for use. As you wipe it down,
check the splint for obvious damage and excessive
wear. Rinse all surfaces with warm water. Towel dry
the splint.
4.8 Inspecting the Splint
Have your service technician or an EMSAR®ser-
vice technician follow the instructions in Using
the Splint and check the following:
q Are all components present and in good condi-
tion?
q Are all nuts, bolts, and knobs securely in
place?
q Are the leg straps in good condition (free of
fraying and cuts)?
q Do the leg straps fasten and unfasten prop-
erly?
q Does the traction system work properly?
q Does the heel stand fold and unfold properly?
q Do the lock collars work properly?
If the splint does not pass the inspection, keep
the splint out of service and see Parts and Ser-
vice (page 11). When the splint has passed the
4.5 Maintenance Schedule
Set up and follow a maintenance schedule to insure
the long life of this splint.
Follow the maintenance schedule below as a mini-
mum.
Improper maintenance can cause
serious injury. Maintain the splint as de-
scribed in this manual.
traction by pulling the traction-release ring. Unhook
the s-hook from the d-ring.
Gently slide the splint from under the patient's leg.
Wipe down the splint with disinfectant.
If the splint is visibly dirty or you suspect exposure to
body uids, clean and disinfect it immediately after
the ambulance call.
When using a maintenance product, follow the
manufacturer's directions and read the manufac-
turer's material safety data sheet.
Contact Ferno Customer Service to order Ferno
cleaners and disinfectants (page 12).
Keep maintenance records. Use the convenient
form on page 13.
Disinfect (see 4.6)
Clean (see 4.7)
Inspect (see 4.8)
Each
Use
•
As
Needed
•
•
Each
Month
Maintenance
•

Users' Manual Models 441, 443, & 444
© Ferno-Washington, Inc. 234-1830-01 November 1996 11
SECTION 5 PARTS AND SERVICE
5.1 Parts
To order parts, contact Ferno Customer Service (page 13).
Model 443 (Ped.) Description
039-0207 ...................Thigh Pad
039-0219 ...................Hip Restraint
039-0220 ...................Leg Strap 4
039-0221 ...................Leg Strap 3
039-0222 ...................Leg Strap 2
039-0223 ...................Leg Strap 1
039-0213 ...................Ratchet Strap
090-3527 ...................Traction-release Ring (Pin
& Spring)
090-3528 ...................Traction Knob (Knob and
Shaft)
090-352 .....................Ratchet Reel
039-0224 ...................Carrying Case
039-0215 ...................Ankle Wrap
Model 444 (Adult) Description
5.2 Service
EMSAR®is the only agent authorized by Ferno to
manage, service, and repair Ferno products.
EMSARfactory-trained technicians use Ferno-
approved parts and repair procedures.
EMSARhas a franchise location serving you.
Phone or fax for details.
Using improper parts and service can
cause serious injury. Use only Ferno-ap-
proved parts and service.
®
1-800-73-EMSAR (Phone)
937-383-1051 (Fax)
039-0207 ...................Thigh Pad
039-0208 ...................Hip Restraint
039-0209 ...................Leg Strap 4
039-0210 ...................Leg Strap 3
039-0211....................Leg Strap 2
039-0212 ...................Leg Strap 1
039-0213 ...................Ratchet Strap
090-3527 ...................Traction-release Ring (Pin
& Spring)
090-3528 ...................Traction Knob (Knob and
Shaft)
090-3529 ...................Ratchet Reel
039-0216 ...................Carrying Case
039-0215 ...................Ankle Wrap
..................................

Models 441, 443, & 444 Users' Manual
12 © Ferno-Washington, Inc. 234-1830-01 November 1996
6.1 Limited Warranty Summary
Ferno-Washington, Inc. (Ferno), warrants the products we manufacture to be free from defects in material and workmanship
for one year except as follows:
(A) External nishes (gelcoat, decals, paint, etc.) are warranted for 90 days.
(B) Soft goods (webbing, vinyl, fabric, foam, etc.) are warranted for 90 days.
(C) Repairs and services are warranted for 90 days or until the end of the time period(s) above, whichever
comes last.
This limited warranty applies when you use and care for the product properly. If the product is not used and cared for properly,
the warranty is void. The warranty period begins the day the product is shipped from Ferno or the day you receive it if you
have proof of the delivery date. Shipping charges are not covered by the limited warranty. We are not liable for shipping
damages or damages sustained through using the product.
6.2 Limited Warranty Obligation
If a product or part is proven to be defective, Ferno will repair or replace it. At our option, we will refund the product's
purchase price. The purchaser accepts these terms in lieu of all damages.
This is a summary of the limited warranty. The actual terms and conditions of the limited warranty, and the
limitations of liability and disclaimers, are available upon request by calling 800-733-3766 or 937-382-1451.
SECTION 6 LIMITED WARRANTY
Customer service and support are important as-
pects of each Fernoproduct.
For assistance, contact Ferno Customer Service:
Ferno-Washington, Inc.
Attn: Ferno Customer Service
70 Weil Way
Wilmington, Ohio 45177-9371
Telephone....... 800-73-FERNO
937-382-1451
Fax.....................937-382-1191
SECTION 7 CUSTOMER SERVICE
Serial #

Users' Manual Models 441, 443, & 444
© Ferno-Washington, Inc. 234-1830-01 November 1996 13
MAINTENANCE RECORD
TRAINING RECORD
Date Name Description
DescriptionDate By

Models 441, 443, & 444 Users' Manual
14 © Ferno-Washington, Inc. 234-1830-01 November 1996
NOTES

Users' Manual Models 441, 443, & 444
© Ferno-Washington, Inc. 234-1830-01 November 1996 15
A
Adjust the Splint ..........................................8
Apply the Ankle Wrap..................................8
Attaching the Leg Straps.............................6
B
Bloodborne Disease Notice.........................4
C
Cleaning the Splint....................................10
Components................................................6
Customer Service......................................12
D
Disclaimer....................................................2
Disinfecting the Splint................................10
H
Heel Stand...................................................7
I
Inspecting the Splint..................................10
L
Length, Adjustable.......................................7
M
Maintenance Schedule..............................10
P
Parts..........................................................11
Place the Splint ...........................................9
Product Description.....................................5
R
Remove the Splint.......................................9
S
Safety Alerts................................................4
Skills............................................................7
Specifications..............................................5
T
Training........................................................7
INDEX
This manual suits for next models
2
Table of contents