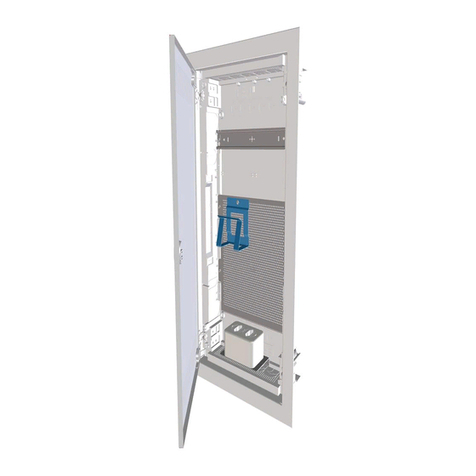
ferroamp ESS Power Case User manual

Installation manual
ESS Power Case
Rev A01

Table of contents
ENGLISH ......................................................................................................................................................................................................................................... 1
1Introduction........................................................................................................................................................................................................................ 1
1.1 Included items .......................................................................................................................................................................... 1
1.2 Warnings and recommendations ........................................................................................................................................... 1
1.3 Explanation of safety notices ................................................................................................................................................. 1
1.4 Dimensions................................................................................................................................................................................ 1
1.5 Bottom connections................................................................................................................................................................. 2
1.6 Internal components & connections..................................................................................................................................... 2
2Installation.......................................................................................................................................................................................................................... 3
2.1 Placement.................................................................................................................................................................................. 3
2.1 ESS Battery connection ........................................................................................................................................................... 5
2.2 Connection of SSO:s (1-3)....................................................................................................................................................... 6
2.3 DC nanogrid connection .......................................................................................................................................................... 7
2.4 Connection overview ............................................................................................................................................................... 7
2.5 Install ESO Modules................................................................................................................................................................. 8
2.6 Assembly finish......................................................................................................................................................................... 9
3Commissioning –Start up ............................................................................................................................................................................................ 9
Revision history
Date
Revision
2022.05.02
A01 - First release
PN: PD10008, Rev: A01, Copyright Ferroamp Elektronik AB 2022. Document subject to change without prior notice.
Verify that you have the latest version of this manual on our website. www.ferroamp.com/downloads

1
ENGLISH
1Introduction
In this booklet you will find installation instructions for your ESS
Power Case. Please read the instructions carefully to ensure that
no unnecessary errors occur.
Depending on the power configuration of the ESS System you will
install the system with 1 or 2 ESO Modules (ordered separately).
1.1 Included items
The following articles are included upon delivery of a ESS Power
Case:
Article
Amount
ESS Power Case
1
Mounting rod ESO Module
2
Mounting Bracket ESO Module
1
Warning sticker (En/Swe)
1/1
Warranty leaflet
1
1.2 Warnings and recommendations
RECOMMENDATION! Read through the manual before installation.
RECOMMENDATION! Only use this product according to the
instructions supplied to avoid any danger.
WARNING! The electrical installations shall be conducted by
authorized personnel and in accordance with local and national
electrical standards and safety measures.
WARNING! You are not allowed to connect units to the DC nanogrid
when it is energized.
WARNING! Risk of electrical shock/arc if the product is not used
according to the instructions in the manual.
WARNING! Do not use the product if you suspect the product is
damaged. Let it be inspected by qualified personnel before use.
WARNING! Do not use the product if the housing has been
tampered with or not intact, for example during repair, do not
touch exposed parts.
NOTE! The warranty does not apply if the product has been
modified, tampered with, or not installed in accordance with this
manual.
1.3 Explanation of safety notices
1.4 Dimensions
All dimensions are in mm if nothing else is specified.
The flash symbol in an equilateral triangle warns
of dangerous voltage.
The exclamation mark in an equilateral triangle is
intended to warn the user that negligence of this
information can be life threatening!
The exclamation mark in a circle is intended to
inform the user that neglect of this information
may be associated with bodily injury and / or
damage to the product.

2
1.5 Bottom connections
1. External ground connection (PE)
2. RJ45 cable grommet (CAN)
3. Cable gland M32 (Ø 13-21mm)
4. Multi grommet (2 x Ø 4-8mm, 2 x Ø 9-12mm)
5. Multi grommet (2 x Ø 4-8mm, 2 x Ø 9-12mm)
1.6 Internal components & connections

3
2Installation
The installation section will take you step by step through the
process of installing a ESS Power Case.
NOTE! Ferroamp does not take responsibility for damages on the
product caused by incorrect or careless installation.
NOTE! We recommend that you use end terminals for all
connection points that have multi-threaded conductors.
2.1 Placement
NOTE! Ferroamp does not take responsibility for installations
where the following stated criteria are not met.
NOTE! Make sure that the ESS Power Case and the ESS Battery are
positioned close enough for the premade battery cables to reach.
Make sure that the chosen location for installation is in line with
the following criteria:
•Indoor environment protected from rain and direct
sunlight.
•Ambient temperatures must not fall below 0 °C and
not exceed 45 °C.
•The environment must be non-condensing, relative
humidity below 95%.
•Have free space around the ESS Power Case
according to the following figures:
•Do not work alone. In an emergency, someone
else's presence may be necessary!
•The electrical installation must comply with
national / local laws and regulations,
appropriate standards and applicable
requirements from recognized organizations.
•
The electrical installation must be carried out
by a qualified installer and in accordance with
the applicable electrical standard.
•
Ensure that the location of the ESS Power
Case never is an obstacle to an emergency
evacuation path. In accordance with national
and local laws.

4
1. To remove the front cover by first unscrew the two side
thumbscrews (1 & 2), slide the front up (3) and lift it off (4).
Finish with unscrewing the PE-cable from the baseplate (5).
2. To access the distribution panel, unscrew the two slotted
screws in the bottom front (2) and the top (3) then lift of the
poke protection:
3. Mount the base plate on the wall, see dimensions for position
of mounting holes (mm):

5
2.1 ESS Battery connection
1. Cut of the ring terminals from the premade battery cables
included with the ESS Battery Controller.
2. Poke holes in the multi grommets and feed Bat+, Bat- and PE
cables through the smaller grommets.
3. Attach isolated ferrules and connect to the cables to the
following terminals:
4. Make sure that all terminals are tightened to 2.5 Nm, use a
torque wrench.
5. Remove the cable grommet for the RJ45 cable, poke a hole,
cut it open along one side and attach it around the
communication cable.
6. Connect the communication cable from the ESS Battery to
the outer port, “CAN 2”:
7. The ESS Battery is now connected!

6
2.2 Connection of SSO:s (1-3)
If you do not have any SSOs you can skip this section.
NOTE! To calculate correct cable dimensions you can use
Ferroamp’s online cable calculator, available at
www.ferroamp.com under the support section.
1. Feed the SSO cable through one of the larger grommets:
2. Feed through ~40 cm of cable for and peel of ~35 cm of
isolation.
3. Connect to the following terminals:
4. Make sure that all terminals are tightened to 2.5 Nm, use a
torque wrench.
5. If you have 2 or 3 SSOs just repeat the steps above for each
SSO.

7
2.3 DC nanogrid connection
NOTE! To calculate correct cable dimensions you can use
Ferroamp’s online cable calculator, available at
www.ferroamp.com under the support section.
1. Depending on the cable diameter used for the DC link, feed
the cable through the M32 cable gland or one of the larger
grommets.
2. Peel of the cable isolation according to instruction in section
2.2.
3. Connect the DC nanogrid cable (L+, L- & PE) to the following
terminals.
4. Make sure that all terminals are tightened to 2.5 Nm, use a
torque wrench.
2.4 Connection overview
1. Verify the correct polarity of all connected cables.
2. Control that all terminals are fastened with 2.5 Nm.
3. The key holes seen in the image below can be used to secure
the cables with extra cable ties if needed.
•Make sure that the DC nanogrid is connected
to correct terminals.

8
2.5 Install ESO Modules
The ESS Power Case can be configured with either 1 or 2 ESO
Modules depending on the power configuration of the ESS
System.
1. Unpack the ESO Module and remove the pre-installed
connector (if it has one), the back connector will not be needed
for the installation. To remove the connector unscrew the two
screws then pull off the connector.
2. Align the ESO module against the back plate. Look from the
side to ensure that the connectors are aligned.
3. When alignment of the connector is good gently lower the
ESO module in place, one module at the time:
a. 1 x ESO Module:
b. 2 x ESO Module
4. Secure the ESO Modules with the mounting bracket as seen in
the images above.

9
2.6 Assembly finish
1. Mount the poke protection and re-attach the PE-cable to the
base plate.
2. Attach the warning sticker on the poke protection.
3. Commission the system, see section 3.
4. Re-attach the PE cable to the baseplate before mounting the
front cover.
3Commissioning –Start up
NOTE! If this is the first time starting up the EnergyHub system
you need to follow the commissioning guide included with the
EnergyHub (available at www.ferroamp.com ).
1. Turn on the EnergyHub.
2. Close the breaker on the ESS Power Case.
3. Close the breaker on the ESS Battery and press the start
button for 5 seconds until it rings.
4. When the system is on the battery will calibrate during the
first 24 hours. During this time, you should set the charge
reference to 1 kW in the system configuration
(www.portal.ferroamp.com).
5. After the calibration has finished you can configure the
battery in the system configuration after you desired use
case.

Electricity.
Reinvented.
Table of contents
Other ferroamp Power Distribution Unit manuals
ferroamp
ferroamp SSO User manual
ferroamp
ferroamp Power Distribution 15 User manual
ferroamp
ferroamp Power Distribution 8 User manual
ferroamp
ferroamp EnergyHub XL Single 21 kW User manual

ferroamp
ferroamp EnergyHub XL User manual
ferroamp
ferroamp EnergyHub User manual
ferroamp
ferroamp Power Distribution 5 User manual
Popular Power Distribution Unit manuals by other brands

ABB
ABB RELION 650 SERIES Applications manual
Compaq
Compaq 207590-B21 - Power Distribution Unit Strip Quick install guide

EuroLite
EuroLite SAB-16XS user manual
LEGRAND
LEGRAND Mosaic 775 40 quick start guide

Ilsco
Ilsco SpecPRO CRM 26 Series quick start guide
Allen-Bradley
Allen-Bradley 140G2-K H Series manual


