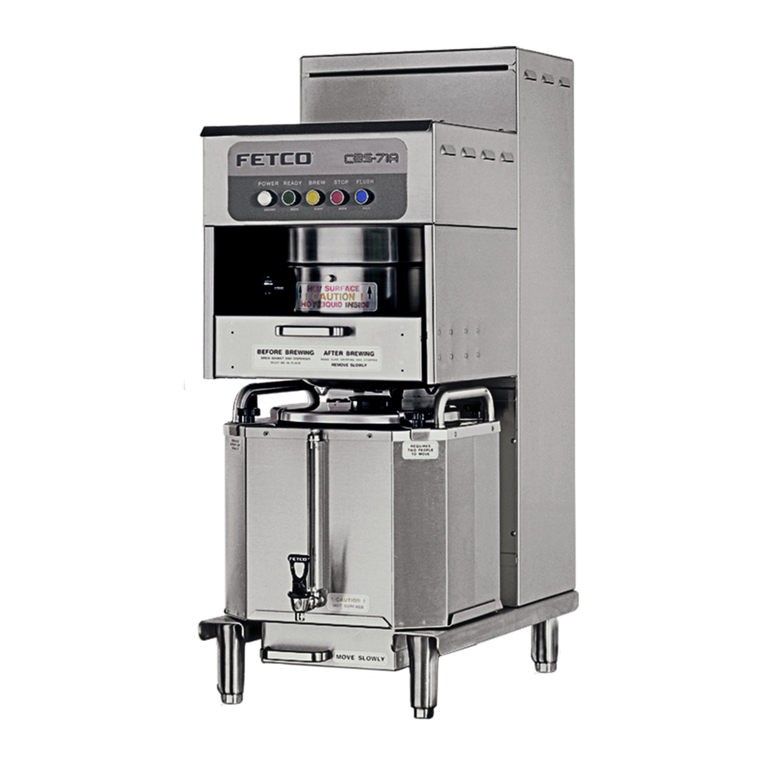
Fetco TBS-V Specifications

www.fetco.com
User’s Guide and Operator Instructions
TBS-V Iced Tea Brewer
FETCO Commercial Beverage Equipment
Left single shown with D-0xx 5 gallon Iced Tea Dispenser Right dual shown with D-064 3 gallon Iced Tea Dispenser
Contact Information
FETCO®
Food Equipment Technologies Company
600 Rose Road
Lake Zurich • IL • 60047-1560 • USA
© 2018-2019 Food Equipment Technologies Company
Internet: www.fetco.com
Phone: (800) 338-2699 (US & Canada)
(847) 719-3000
Fax: (847) 719-3001
Email: sales@fetco.com
techsupport@fetco.com
TBS-V Simple One Touch Iced Tea Brewer P180 Rev.:001 January2019
fetco.com

2
Table Of Contents
Rough-in Drawings........................................................ 3
INSTALLATION GUIDE ................................................ 3
START UP INSTRUCTIONS ........................................ 4
PROGRAMMING ADJUSTMENTS............................... 6
CALIBRATIONS............................................................ 7
TABLE OF AUTHORITIES For TBS-V Programming... 8
LIST OF ERROR CODES FOR TBS-V.........................9
FOR OPERATOR SAFETY...........................................9
REPLACEMENT PARTS LIST TBS-V ........................11
TBS-V BREW BASKET PARTS LIST .........................14
WIRING DIAGRAM TBS V ..........................................15
Specifications Model: TBS-V simple touch iced tea brewer with automatic dilution
Description & Features:
• Easy to use settings
• Usable with three to five gallon dispensers.
• Adjustable batch sizes. Adjustable dilution volumes Ships preset for 3 gallon batch size
• User adjustable volumes are set by timer for brew, dilution delay, and dilution time
• Dual dispenser model uses brew basket position to detect & select dispenser position.
• Factory set to brew at temperature, or user adjustable to start at any temperature (between170°F-207°F)
Electrical Configurations
Configuration Code
Voltage Heater kW Amps Electrical Connection
SKU No.
Dispenser
T002111 SINGLE 100-120 Volts 120V/1680W 1.1–1.68 11-14 NEMA 5-15P plug
T002112 SINGLE 100-120 Volts 120V/1680W 1.1–1.68 11-14
NEMA 5-20P plug
T002121 DUAL 100-120 Volts 120V/1680W 1.1–1.68 11-14 NEMA 5-15P plug
T002122 DUAL 100-120 Volts 120V/1680W 1.1–1.68 11-14
NEMA 5-20P plug
NOTE: Cord and plug are factory installed denotes plug acceptable for Canada
Weights and Capacities
Height Width Depth
Water tank
capacity
Empty
Weight
Filled
Weight
Shipping
Weight
Shipping Dimensions
19 in
483mm
7 5/8 in
194 mm
19 in
470 mm
1.6 gallon
6.0 L
33 lb.
15 kg
46 lb.
20.8 kg
57 lb
25.9 kg
24” x 15” x 38”
591 x 268 X 943mm
Brew Capacity 8 brews per hour [3 gallon brew @1 gallon concentrate/2 gallon dilution]
Coffee Filter 15” X 5 ½ ” – Standard FETCO # F001
Flow Rate
1½ gallon per minute, cold water supply only
Water Supply
Pressure
Unit is factory calibrated to a non-fluctuating water supply at 45 psi
Hardness
Optimal water hardness between 125-250TDS
Water Connection 3/8” Tube Y connector NOTE! Importantplease connect both fill and dilution valve inlets
Total Brew Cycle 5 minutes,+35 seconds
CONTROLS DEFAULT VALUE RANGE
Total Brew Time
Hot Brew Time
Dilution Delay
Dilution
5 min:35sec
215sec (1 gal.)
30sec
110sec (2 gal.)
To be set by user from the ranges shown below
0-325 sec
0-500 sec
0-220 sec
! NOTE:Volumes are controlled by timer
Tank Temperature 200°F / 93° C
170°F –207°F / 77° C – 97° C (User adjustable)
(2° F/1° C Hysteresis)
Units F° (Fahrenheit) C° Celsius/ F° Fahrenheit
See pages 6-7 for how to adjust controls for temperature, brew volume, units - and all other settings
G
W
G
W
NEMA
PLUG CONFIGURATION
NEMA 5-15P
NEMA 5-20P

3
Installation Guide
(For Qualified Service Technicians Only)
General:
1. If not installed correctly by qualified personnel, the brewer will not operate properly, and damage may result
2. Utilize only qualified beverage equipment service technicians for service and installation.
3. Always have an empty dispenser under spray head of all brewing equipment-including when at idle
4. Damages resulting from improper installation are not covered by the warranty and will void the warranty.
Below are the key points to consider before installation:
Electrical:
1. All CBS—Series brewers require an electrical ground. Installation without grounding is dangerous.
2. Verify electrical outlets, voltages, circuits, and circuit breaker access before attaching equipment.
3. Plug the unit into the appropriate 15 or 20 amp circuit. Use a dedicated circuit for brewing equipment.
4. An electrical diagram is located in the User’s Guide and online at www.fetco.com.
5. The installation must comply with applicable federal, state, and local codes having jurisdiction at your
location. Check with your local inspectors to determine what codes will apply.
Plumbing:
1. This unit has two water connections, each must be connected to the water supply.
One connection is the water inlet for brew, the other is for dilution. Both must be plumbed.
2. North America: All installations must comply with applicable federal, state, or local plumbing codes
3. All Others: The water and waste piping and connections shall comply with the International Plumbing Code
2003, International Code Council (ICC), or to the Uniform Plumbing Code 2003 (IAPMO).
4. Use an inline water filter for all beverage equipment.
5. Install the filter unit after a water shutoff valve and in a position to facilitate filter replacement.
6. The water line and newly installed filter cartage must be flushed thoroughly prior to connecting it to the
brewer to prevent debris from contaminating the machine.
7. Verify that the water line will provide a flow rate of at least 1½gpm/(5.7lpm) per minute and the water
pressure is between 20-75 psig (138-517kPa) before making any connections.
8. Use a wrench on the factory fitting when connecting the incoming water line. This will reduce stress on the
internal connections and reduce the possibility of leaks developing after the install has been completed
9. Install a backflow prevention device. Most municipalities require a recognized backflow preventer.
Usable on all hot beverage and cold beverage equipment is a WATTS® SD-2 or SD-3.
WATTS spring loaded double check valve models are accepted by most zoning authorities.
The check valve should be as close to the water supply inlet of the beverage equipment as possible.
Rough-in Drawings
Front View Side View Back View

4
START UP INSTRUCTIONS
FETCO® TBS-V Iced Tea Brewer
CAUTION – This brewer must be manually filled with water before startup.
DO NOT operate this brewer until the hot water tank is filled with water
Damage to the heating element or brewer will result if started when dry.
To start up this TBS-V iced tea brewer:
1. Place brewer on a solid, level counter top, near an electrical outlet and water main.
2. Carefully level brewer. Use a bubble level and check both side-to-side & front-to-back
3. Connect both brewer inlets to water main. The “Y” connector provided accepts 3/8” tubing.
Turn water “ON”
Do not plug in the power cord at this time.
First: Fill the new iced tea brewer with water for the one time “initial” fill
4. Insert the empty brew basket into the brew rails of the brewer.
5. Place an empty dispenser under the brew basket.
6. Plug the power cord into an electrical outlet (power switch-“OFF”!)
7. PUSH AND HOLD “START/STOP” BUTTON ON FRONT PANEL-
THEN: TURN POWER SWITCH “ON”
…NOTElight ring on “START/STOP” button will rapidly flash a WHITE
LED
See illustration below…
8. Press “START/STOP” button to begin initial tank fill.
The start-up fill cycle will run for 5 minutes until time out.
NOTElight ring on “START/STOP” button will glow a steady RED LED.
Tank is full when water flows from the brew basket. The excess indicates that the tank is full.
9. Press “STOP” to stop manual tank fill.
10. Recycle power by turning “OFF”, then, “ON”. Brewer will now heat and be ready to brew.
Notes:
-If water does not flow from the brew basket, the tank is not full. Water must flow out of the brew basket
-Press the “START/STOP” button again to repeat the cycle until water flows from brew basket.
Next, press the “START/STOP” button to stop filling.
-Allow the brewer to heat up to full temperature. This may take up to 30 minutes.
NOTElight ring on “START/STOP” button will be darkened
-When heated, the light ring on “START/STOP” button will glow with a steady WHITE LED.
-Slight dripping from the brew basket is normal as the tank heats up.
-Always leave an empty container under the brew basket
Brewer is ready when the light ring on “START/STOP” button glows with a steady WHITE LED
LIGHT RING DEFINITIONS
NEW BREWER
START UP
Flashing White
Start up for first fill
Steady Red
Filling for first fill (5 min.)
Steady White
Ready to brew
BREWER
IN REGULAR USE
Steady Red
Brew in progress
May press “STOP” to cancel brew
Fast Red Blink
No brew basket in place
Off
Not ready to brew
Slow White Blink
READYwith Brew at Temp “OFF”
(Hot water tank temp. >170ªF)
1)First: Press
Start/Stop Button
2) Next, Switch
power “ON”
READY
START
POWER
STOP
BREW
Switch
Light ring
3/8” tube“Y” connector manifold
Connect both inlets to TBS-V
“hand-tighten” only.
Insert cleanly cut 3/8” rigid tubing

5
Instructions: for brew operation-fast brew
Setup is simple!
1-Connect unit to water and plug in to electrical utility
See Page 3
2-If brewer is new: see Start New Unit (on page 4) and heat
The Start button light ring will glow steady WHITE
TBS-V is “Ready To Brew” with factory set defaults
3-Add paper and loose tea to brew basket.
The Specialty Tea guidelines are 3 oz. per 3 gal. finished Iced Tea.
4- Set brew basket handle for the position of the dispenser
(right/left for DUAL: center for single-follow label on basket)
5-Place clean, empty, dispenser under brew basket
(D-064 Gallon Iced Tea Dispenser recommended)
6-Press start button shown below to start brew
-Note: “READY “is satisfied
Brew operation is simple. A single pushbutton-STARTS THE BREW
Before Starting Brew:
The brew basket has filter paper
and tea. Brew basket handle is
oriented to the RIGHT
Dilution Assembly
Clean, empty and open dispenser is
under RIGHT side, and is
positioned for dilution assembly.
NOTE: it is very important that a
dispenser is under the brew basket
With Power ON
and Brewer is filled and heated.
Brewer is
ready to brew when light ring glows WHITE
Add filter paper and tea
For dual model: a
lign brew basket handle left or right
side
to select side to brew the batch
For single model
-align to center only
Align clean
-empty dispenser on brewing side
Press START
Brew completes in about 6 minutes
Two position brew basket -Position of the brew basket handle left or right sets brew side (Dual model only)
Dual Model Only
Brew basket handle—LEFT
(For left hand dispenser placement)
Dual Model Only
Brew basket handle— RIGHT
(For right hand dispenser placement)
Single Model Only
Brew basket handle-CENTER
(Position dispenser in center)
READY
START
POWER
STOP
BREW
Switch
Light ring
RIGHT
CENTER

6
Programming Adjustments
See bottom of page 7 for how to access programming.
-Advance through the SETTINGS by pressing the START button.
-Advance through the PROGRAMMING range by pressing the black button on the control board.
-SAVE settings by holding down the START button for five seconds. Settings not SAVED will be lost on startup
SETTINGS
Right & Left Side 1-3
Programming
Items
Factory set
Default
Programming Range
[Increment]
Notes
(R&L)1Brew Time
Seconds
215
0-325 [5 sec]
Brew volume is set by timer
(R&L)2Dilution Time
Seconds
90
0-220 [5 sec]
Dilution volume is set by timer
(R&L)3Dilution Delay Seconds 30 0-500 [5 sec]
Pausing option to manually
add ingredients to hot brew
[cane sugar, flavoring syrup]
SET
User Control Settings
Programming
Items
Factory set
Default
Programming Range
[Increment]
Notes
C1 Tank Temp.
Degrees F
(Option: Deg. C)
200°F
170-207 deg.
(77 deg. C-97 deg.C)
See chart to correct for high
altitude
C2 Brew at Temp. Yes or No “Yes”
Brew at tank
temperature
“NO”:is not recommended:
may make brews inconstant
A
On/Off
OFF
Turn “ON” to enter ADVANCED
(NOTE! Enter ADVANCED Menu from the SET menu by setting the “A” icon to “ON”
ADAVANCED
User Control Settings
Programming
Items
Factory set
Default
Programming Range
[Increment]
Notes
A On/Off OFF Turn “ON” to enter ADVANCED
A1 Units of Meas. Temperature °F °F or °C [Switchable Units]
A2 Firmware version
Displays
firmware version
0.02
May be updated For diagnostics
A3 Restore Factory
Settings Reset to default Completely overwrites all user
settings
!THESE CHANGES TAKE
EFFECT WHEN ADVANCING
TO NEXT ITEM!
TO SAVE SETTINGS: 1) Press & Hold START Button 5 seconds. Display will show “STR” when saved
2)Recycle power by turning “OFF”, then “ON”.
A
On/Off
Turn to OFF to exit ADVANCED and return to SET menu-
d
On/Off
OFF
Turn “ON” to enter Diagnostics
DIAGNOSTICS
Service Settings
Menu Item Function
d
On/Off (Toggle to “ON” to enter
DIAGNOSTICS)
NOTE!
DIAGNOSTICS can only be accessed from the ADVANCED menu
D1
Current tank temperature
Displays tank temperature
D2
temperature probe millivolt reading
(only for servicing)
D3
Brew Basket sensor
Indicates left or right position
D4
Heater test-activates heater for 10 seconds
(only for servicing) For safety: have tank filled)
D5
Brew Valve (fill-valve) test
Opens brew valve for full flow. Have dispenser under brew basket
D6
(Right) dilution valve test
Opens dilution valve for full flow. Have dispenser under brew basket
D7 (Left) dilution valve test
Opens left dilution valve for full flow. LEFT On DUAL model only
Have dispenser under brew basket
d
On/Off
Toggle to “OFF” to exit DIAGNOSTICS and return to ADVANCED Menu
BREW AT TEMPERATURE DEFINITONS
BREW AT TEMP: Yes
(DEFAULT: FACTORY PROGRAMMED INTO BREWER)
This allows the “BREW START” to be active only if the hot water tank is at
the selected temperature. If tank temperature is below setpoint, the
brewer will wait until the proper temperature is reached. The START
button will be dark after brew is pressed until hot water tank is at setpoint
IMPORTANT: ALWAYS have dispenser(s) under the brew baskets when
in the BREW AT TEMP mode.
BREW AT TEMP: OFF Allows brewing at any temperature above 179°F/82°C. (Not recommended)
READY
START
POWER
STOP
BREW
Light ring will be dim if
below setpoint

7
Calibrations
-Set the volumes for the brew & dilution valves to adjust for taste, profile and for over/under potting.
Brew volume and Dilution volume can be individually adjusted by user
-Set volumes and brew water temperature on the control board.
-The volumes are set by timers that control how long the brew and dilution valves are open.
-!These adjustments can expose the operator to high voltage and hot water and surfaces.!
-Unplug machine when servicing and use great care around hot surfaces.
There are two parts of the iced tea brewing cycle: BREW with HOT water and DILUTION with COLD water.
The brewer default ratio is 1 to 2 . Brew is approximately 1 gallon, Dilution is approximately 2 gallons
Brew cycle is 3min.: 35sec. shown in PROGRAMMING as 215 seconds.
Dilution cycle is 1min:50 sec shown in PROGRAMMING as 110 seconds.
1) MEASURE THE FLOW RATE:
MEASURE FOR BREW VOLUME
-Place an empty 3gal dispenser under empty brew basket.
-Press START button and wait the 215 seconds [3min. 35sec.] for brew cycle to complete
Immediately press START again to STOP the dilution cycle from starting
-Measure and record this volume. This is the Brew Volume. Default is 1 gallon
MEASURE FOR DILUTION VOLUME
-Empty dispenser and replace it under brew basket and press START to brew. Allow to complete
-Measure and record this volume. Default is 3 gallons. This is the total brew and dilution volume.
SUBTRACT THE TWO VOLUMES TO OBTAIN DILUTION VOLUME
-Subtract the First Brew Volume from Second Brew Volume to obtain DILUTION VOLUME
-Raise and lower flow rates as desired by setting times-in seconds in PROGRAMMING MODE
2) ADJUST THE FLOW RATES
-Using the chart on the following page: Enter programming and set up or down.
Remember to SAVE by holding START button 5 seconds.
3) MEASURE THE BREW WATER TEMPERATURE
With brewer filled- and ready to brew (light ring in start button glows with WHITE LED)
Enter SETTINGS mode, scroll by pushing START button to C1 and press black button on control board.
Board will display tank temperature on the control board
4) ADJUST THE HOT WATER TANK TEMPERATURE
Hold down black button to scroll through the temperature range (170°F-207°F) and stop at new setting
SAVE the new temperature setting by holding START button 5 seconds-then turn brewer OFF then ON.
Turn off power & remove cover
To access programming
:
Turn off power
Remove front access cover
-
Locate control board through open front access.
And
Simultaneously:
-
Press and hold down black (S1) button on board
AND
-
Toggle the power switch-to “ON”
Scroll to parameter by pressing the Start/Stop button
Advance setting by pressing Black (S1) button
Save by holding down Start/Stop b
utton 5 seconds
LED will display STORE
Locate control board
through open front
access

8
Table of Authorities for TBS-V Programming
Display
Description
Default
Min
Max
Increment
Right Batch
Parameters
r-1
Brew Time (R)
215
0
325
5
r-2
Dilution Time (R)
110
0
220
5
r-3
Dilution Delay (R)
30
0
500
5
Left Batch
Parameters
L-1
Brew Time (L )
215
0
325
5
L-2
Dilution Time (L )
110
0
220
5
L-3
Dilution Delay (L)
30
0
500
5
Configuration.
C-1
Tank Set Point Temperature
200
170
207
1
C-2
Brew At Temp
Yes
No
Yes
1
A
Advance Settings
Advanced
Settings
&
Diagnostics
A-1
Temperature Unit (F/C)
Deg F
Deg F
Deg C
1
A-2
Firmware Version
A-3
Restore Factory Settings
No
No
Yes
1
D
Diagnostics
Off
Off
On
1
Diagnostics
D-1
Current Tank Temperature
D-2
Temperature (ADC)
D-3
Sensors (Brew basket)
D-4
Heater Test (Activates Heater for 10 secs)
D-5
Fill Valve(Brew) Test
D-6
Dilution Valve Test (R)
D-7
Dilution Valve Test (L)
D-8
LED on, 7 Segment Display
D
Diagnostics
D-1
Current Tank Temperature
TBS-V Programming Specifications
FUNCTION PARAMETER MINIMUM DEFAULT MAXIMUM
BREW
VOLUME (L)
1.0 L
3.8 L
6.5 L
DRIP DELAY
SECONDS
30 S
90 S
600 S
DILUTION
VOLUME (L)
0.0 L
7.6 L
15.0 L
DILUTION SEQUENCE
BEFORE-DURING-AFTER (B/D/A)
AFTER
DILUTION DELAY
SECONDS
0 S
60 S
720 S
FILL/BREW TEST/CAL
PRESS AND HOLD (1 MIN FOR CAL)
TEST
FILL/BREW FLOW RATE
RECORD F/B FLOW RATE (LPM)
0.50 (LPM)
X.XX (LPM)
2.50 (LPM)
LEFT DILUTION TEST/CAL
PRESS AND HOLD (1 MIN FOR CAL)
TEST
LEFT DILUTION FLOW RATE
RECORD F/B FLOW RATE (LPM)
0.50 (LPM)
X.XX (LPM)
2.50 (LPM)
RIGHT DILUTION TEST/CAL
PRESS AND HOLD (1 MIN FOR CAL)
TEST
RIGHT DILUTION FLOW RATE
RECORD F/B FLOW RATE (LPM)
0.50 (LPM)
X.XX (LPM)
2.50 (LPM)
TEMPERATURE UNITS
°F OR °C (YES/NO)
°F
TANK TEMPERATURE
TEMPERATURE RANGE
180°F
200°F
207°F
BREW @ TEMP
YES/NO
YES
Note: To save new setings-aways
1) Press & Hold START Button 5 seconds. Display will show “STR” when saved
2) Then recycle power by turning “OFF”, then “ON”.

9
List of Error Codes for TBS-V
Designs, materials, specifications, physical dimensions, firmware and software protocol for equipment or replacement parts are subject to review and change by FETCO without notice
FOR OPERATOR SAFETY
This appliance is for commercial use only. Commercial cooking equipment may be unsafe for household use.
This appliance is intended for stationary indoor use. Installation and service by professional personnel only.
Brewing water is 200°F! Do not move a commercial coffee brewer once it is installed due to spillage.
Brewer is designed for brewing 3 gallons or 11 liters of finished iced tea.
WARNING-brew basket contents are hot-use care! Allow brew to complete, usually 5½ minutes.
Do not immerse the brewer in water or any other liquid.
Equipment exposed to flood and contaminated must not be used due to electrical and food safety.
Do not operate if unit has been submerged or saturated with water.
Flashes RED LED
Start Button*
Code
7-segment control
board display
Description Possible Cause
1 Flash
-then 2 sec.pause 1
Software Error :
Setup corrupted (Settings set to Factory default)
2 Flashes
-then 2 sec.pause 2
Software Error : Flash
checksum(CRC) error
Contact Service
Unit can't recovered, need re-
programming
3 Flashes
-then 2 sec.pause 3
On the control board :
LED4(PROG) & LED5
flash fast
Software Error : Fatal
software crash
Software crash for uknown
reason. Re-cycle power may
help)
4 Flashes
-then 2 sec.pause 50
Short in temperature probe Short in temperature probe
5 Flashes
-then 2 sec.pause 51
Open Temperature probe Temperature 0 deg C
6 Flashes
-then 2 sec.pause 201
Heater Open
Temperature change of 2.8C(5F)
in 30 minutes since Heater
turned ON.
7 Flashes
-then 2 sec.pause 255
Keyboard (Stuck Key)
Key stuck for >20 seconds
DISABLED during Initial fill :
Diagnostics : D4-D8
Time extended to 2 minutes
FAST FLASH
For 3 sec,
then
return to READY
START BUTTON
flashes RED
then resets to WHITE-
READY
Will not iniate brew
when ready’
INSERT BREW BASKET
Brew basket must be in place
*NOTE :RED LED flashes X times (depend on above error code) and then PAUSE 2 seconds
-When READY, WHITE LED flashes slow (ON : 1s, OFF : 0.2s)
-Heater error (201) is disabled during the brew
-When brewing, Display solid RED (instead of blinking WHITE) to
indicate brew is running and it can be stopped
-Control board LED5-“heartbeat” slowly dims/brightens when normal
How to
Clear
Error
Codes
1)CLEAR FAULT
2)Make repairs as required
THEN
Toggle ON/OFF switch to clear.
Error codes must be cleared!

10
Replacement Parts Drawing TBS-V Dual and Single
Drawing 1101.00515.00

11
Replacement Parts List TBS-V
REF
QTY
PART NO
DESCRIPTION
Parts List: TBS-V, 1689 W/120VAC; Drawing 1101.00515.00
1
1
1111.00092.00
WELDMENT BODY COMPLETE, TBS-V
2
1
1112.00508.00
WELDMENT, BASE, TBS-V, DOUBLE
3
4
1082.00023.00
SCREW, #8-32 X 3/8 TRUSS HD PHIL., MACHINE
4
9
1083.00011.00
WASHER, #8 SCREW SIZE, INTERNAL TOOTH LOCK
5
9
1084.00006.00
NUT, 8-32 18-8 HEX MACHINE SCREW
6
4
1073.00021.00
FOOT, RUBBER, 1/4-20
7
1
1057.00074.00
SOLENOID VALVE FILL VALVE SINGLE AND DUAL MODELS
8
4
1082.00010.00
SCREW, PAN HD. PHIL. MACH., M4x10 ZINC-PLATED
9
2
1102.00243.00
ADAPTER ASSY, 3/4" BSP x 1/4" NPT x 3/8" TUBE
10
1
1102.00404.00
VALVE ASSEMBLY DILUTION-DUAL MODEL ONLY
10
1
1057.00043.00
VALVE ASSEMBLY DILUTION-SINGLE MODEL ONLY
11
1
1058.00024.00
SWITCH, POWER, DOUBLE POLE, 16A, 125/250 VAC
12
1
1086.00008.00
CONNECTOR, CLAMP, NON-METALLIC CABLE, 3/4"
13
1
1065.00009.00
GROUND LUG CONNECTOR, 14-2 AWG, ALUMINUM
14
1
1044.00012.00
LABEL GROUND, CE
15
1
1112.00246.00
WELDMENT BRACKET TERMINAL BLOCK, 3 POLE
16
1
1052.00025.00
PLATE, MARKING #BS1016E
17
1
1052.00022.00
EUROSTRIP HE10 TERM. BLOCK, 3 POLE, 50AMP, 18-8 AWG
18
2
1082.00082.00
SCREW, PHILLIP HD., 8-32 THREAD
19
8
1081.00006.00
SPACER, 6MM OD x 3.2MM ID x 5MM LG, Z/P
20
1
1052.00001.00
POWER SUPPLY, 90-264VAC/24VDC, 1.8A
21
8
1029.00012.00
SPACER, .25" HEX X 1" LG, FEM #4-40 THREAD
22
1
1051.00043.00
CONTROL BOARD, TBS V
23
1
1102.00397.00
ASSEMBLY, SWITCH PANEL, TBS-V
24
1
1046.00031.00
LABEL, SPRAY HEAD WARNING, 1.5" X 5.0"
25
1
1102.00196.00
ASSEMBLY, FAUCET DILUTION, DUAL MODEL ONLY
25
1
1102.00395.00
ASSEMBLY, FAUCET DILUTION, SINGLE MODEL ONLY
26
2
1082.00058.00
SCREW, # 8-32 X 5/8, FLAT HD, PH, 18-8 SS
27
2
1025.00127.00
TUBE, 5/8"OD X 3/8"ID 26.00"LG
28
6
1086.00003.00
UNICLAMP, 15.9 HOSE OD CLAMP
29
1
1104.00157.00
TANK ASSEMBLY, TBS-V, 1370W/120VAC
30
1
1025.00038.00
TUBE, 5/8"OD X 3/8"ID X 20"LG, DRAIN
31
1
1024.00102.00
VENT TUBE, TBS-V
32
1
1003.00354.00
TANK BRACKET, TBS-V
33
2
1084.00051.00
NUT, HEX LOCKWASHER, #8-32, 18-8 ST. STL.
34
1
1112.00519.00
WELDMENT, SPRAY CUTTER TUBE FITTING, TBS - V
35
2
1102.00113.00
SWITCH, REED, ASSEMBLY
36
4
1029.00006.00
NUT, FINGER KNURLED, #4-40
37
2
1086.00047.00
CAP PLUG, PANEL, 15/32 ID x 5/8 OD, TBS-2111
38
11
1084.00011.00
NUT, CLIP ON (J-NUT), #6-32, 22-20 GA., BLK-PH FINISH
39
1
1001.00379.00
COVER PLATE, FRONT, TBS-V
40
11
1082.00017.00
SCREW, TRUSS HD. PHIL. MACHINE, # 6-32 X 1/2 LG.
41
1
1001.00384.00
COVER PLATE, TOP, TBS-V
42
1
1046.00035.00
LABEL, WARNING "TO REDUCE RISK OF ELECTRIC SHOCK OR FIRE"
43
1
1063.00016.00
POWER CORD, 120VAC W/NEMA 5-15P PLUG
44
1
1005.00030.00
WELDING, DOME SPRAY CUTTER, 6 HOLES (Ø.078), TBS-V
45
1
B013000G2
BREW BASKET ASS'Y ROUND, DUAL MODEL ONLY
45
1
B020000G2
BREW BASKET ASS'Y SQUARE, SINGLE MODEL ONLY
46
1
1401.00163.00
WIRING DIAGRAM, TBS-V, 120V HEATER, UL
47
1
1084.00041.00.
HEX NUT, 7/16-20 x 1/8" THK
48
1
1086.00009.00
CLAMP, 3/4" MAX TUBE OD FLOW CONTROL
49
1
1402.00101.00
WIRE HARNESS, TBS-V, UL
1
1102.00424.00
“Y” CONNECTOR-PLUMBING INSTALLATION MANIFOLD
1
1085.00012.00
DESCALING SPRING
BOLDED Text shows TBS-V Dual/Single parts selection

12
TBS-V Hot Water Tank Parts List
Tank Drain
The water tank must be drained before maintenance procedures, and when the unit is to be relocated or shipped
1.Disconnect power to unit.
2.Move the unit near a sink or obtain a container large enough to hold four gallons of water and a hose clamp.
Note that the tank may holds 1.6 gallons and that the drain line will be clamped to empty the container.
3.Remove the tank cover and allow the tank to cool to a safe temperature
4.The tank drain is located on the back of the unit. Turn the drain plug one-quarter turn in either direction
5.Pull the plug out far enough to expose the silicone tube
6.Using pliers loosen the hose clamp and move it back over the tube.
7.Crimp the tube an inch or two away from the drain plug to prevent water from flowing.
8.Use the other hand to pull the drain plug out of the tube.
9.Release the crimped tube and allow the water to flow into the sink or container.
Hot Water Tank Capacity1.6 gallon 6.0 L
OPEN
Leave open for use
PINCH SHUT
To drain tank & service brewer
AI!
COMPLETE TANK TOP ASSY, TBS-V, 1680W/120VAC
Part Number 1102.00396.00

13
LIMING
To prevent liming problems in tank fittings:
1) Remove spray head and clean it with any beverage service delimer or vinegar, rinse and wipe dry
2) Then insert deliming spring all the way into the tank.
-When inserted into tank properly, no more than ten inches of the spring should be visible at the
spray head fitting. Saw back and forth five or six times. This will keep fittings open and clear of lime.
-In hard water areas this should be done every day. This process takes approximately one minute.
-In all areas the spray head should be cleaned at least once a week.
NOTE: If bad liming has already occurred, a deliming service may be required for the hot water tank
Replacement Parts List for TBS-V Hot Water Tank
REF
QTY
PART NO
DESCRIPTION
Hot Water Tank Parts List: TBS-V, 1689 W/120VAC
1
1
1114.00158.00
WELDMENT, TANK COVER, TBS-V
2
1
1107.00041.00
HEATER ASS'Y., IMMERSION, 1680W/120VAC, TBS-V
3
1
1024.00062.00
GROMMET, SHORT, SILICONE, LEVEL AND TEMP PROBE
4
1
1102.00161.00
PROBE ASSEMBLY, TEMP. AND LLC, 8" LONG
5
1
1024.00051.00
GROMMET, SILICONE, BLANK
6
1
1024.00092.00
GROMMET FOR BREW TUBE, SILICONE, CBS-2121
7
1
1003.00005.00
BRACKET, ONE SHOT THERMOSTAT
8
1
1053.00004.00
THERMOSTAT, SINGLE SHOT, 25A
9
2
1083.00009.00
WASHER, #6 SCREW , INTL TOOTH LOCKWASHER
10
2
1084.00010.00
NUT, HEX, #6-32, UNDERSIZED, ZINC PLATED
11
1
1044.00004.00
LABEL, DANGER, HIGH VOLTAGE
12
1
1114.00156.00
WELDMENT, TANK BODY, TBS-V
13
1
1023.00166.00
FITTING, COLD WATER INLET, GROMMET DESIGN
14
1
1024.00050.00
GROMMET, SILICONE, 11.4mm ID
15
2
1081.00042.00
STANDOFF, 1/4" HEX
16
1
1052.00056.00
RELAY, SOLID STATE, PANEL MTG. EL100D5 05
17
1
1003.00006.00
BRACKET, HEAT SINK
18
1
1022.00110.00
INSULATION TANK TBS-V
19
1
1024.00084.00
GASKET, HOT WATER TANK, CBS-2121
Not
Shown
8
1084.00051.00
NUT, HEX LOCKWASHER, #8-32, 18-8 ST. STL.
Warning label on back of unit 1046.00049.00
Chart to correct for boiling point for altitude
Tank water temperature. .
Altitude (ft.)
Suggested
Setting(°F)
Boiling
point (° F)
0
200
212.0
500
200
211.1
1000
200
210.2
2000
200
208.4
2500
200
207.5
3000
200
206.6
3500
197
205.7
4000
195
204.8
4500
194
203.9
5000
194
203.0
5500
193
202.0
6000
192
201.1
6500
191
200.2
7000
190
199.3
7500
188
198.3
8000
187
197.4

14
Notes: added power recycle to save settings and square/round brewbasket illustration notes
TBS-V Brew Basket Parts List
TBS-V has two brew basket types: Square type for TBS-V Single Round type for TBS-V Dual brewer
Ref#
Qty
Part Number
Description
1
1
1023.00289.00
BREW BASKET, 16" X 6"SQUARE-SINGLE BREWER ONLY
1
1
1023.00182.00
BREW BASKET, ROUND-DUAL BREWER ONLY
2 1 1024.00060.00 STRAINER, SILICONE
3*
1
1023.00185.00
ORIFICE, SET OF 7 SEE BELOW*
4
1
1023.00179.00
NUT, BREW BASKET ORIFICE HOLDER
5 1 1023.00191.00 PLUG, BB HANDLE, GREEN
NS
1
B020000G2
Complete SQUARE TBS-V Brew basket
For SINGLE brewer only
NS
1
B013000G2
Complete ROUND TBS-V Brew basket
For DUAL brewer only
* Reference #3 orifice set size
Orifice inserts for brew basket
0.094 is factory installed
0.094 11:30 minutes: seconds
0.094 is DEFAULT-and is factory installed on brew basket
0.062 24:30 minutes: seconds
0.078 17:30 minutes: seconds
0.086 15:30 minutes: seconds
0.104 10:30 minutes: seconds
0.125 8:10 minutes: seconds
0.280 1:20 minutes: seconds
Round ty pe f or
TBS-V Dual brewer
Square ty pe f or
TBS-V Single brewer

15
Wiring Diagram TBS V
SSR

End of section notes
N
Table of contents
Other Fetco Kitchen Appliance manuals
Popular Kitchen Appliance manuals by other brands

classbach
classbach C-KM 4002 instruction manual

Scarlett
Scarlett SC-410 instruction manual

Pro-Line Boats
Pro-Line Boats VS-D2 user manual

Kenwood
Kenwood HFP30 Instructions for use

Tricity Bendix
Tricity Bendix SIE326 Operating and installation instructions

Pinnacle Wholesalers
Pinnacle Wholesalers SUPO910 Installation and operation manual