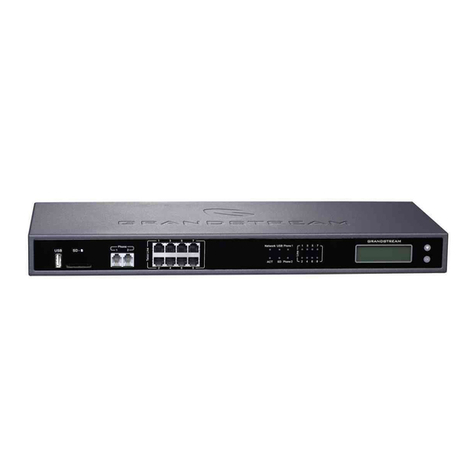
Fiberme FCM630A User manual

FIBERME COMMUNICATIONS LLC
1749 Old Meadow Rd.
Suite 401 – McLean,
VA 22102, USA
www.berme.com
For Certication, Warranty and RMA information, please visit
www.berme.com
FCM630A
IP PBX Appliance
Quick Installation Guide

Content
English..............................................................................1
简体中文..........................................................................7
Español............................................................................13
Français...........................................................................19
Deutsch...........................................................................25
Italiano............................................................................31
Русскй.............................................................................37
Português........................................................................43
Polski...............................................................................49

~1~ ~2~
The FCM630A is not pre-congured to support or carry
emergency calls to any type of hospital, law enforcement
agency, medical care unit (“Emergency Service(s)”) or
any other kind of Emergency Service. You must make ad-
ditional arrangements to access Emergency Services. It
is your responsibility to purchase SIP-compliant Internet
telephone service, properly congure the FCM630A to
use that service, and periodically test your conguration to
conrm that it works as you expect. If you do not do so, it is
your responsibility to purchase traditional wireless or land-
line telephone services to access Emergency Services.
FIBERME DOES NOT PROVIDE CONNECTIONS TO
EMERGENCY SERVICES VIA THE FCM630A. NEITHER
FIBERME NOR ITS OFFICERS, EMPLOYEES OR AF-
FILIATES MAY BE HELD LIABLE FOR ANY CLAIM, DAM-
AGE, OR LOSS, AND YOU HEREBY WAIVE ANY AND
ALL SUCH CLAIMS OR CAUSES OF ACTION ARISING
FROM OR RELATING TO YOUR INABILITY TO USE THE
FCM630A TO CONTACT EMERGENCY SERVICES, AND
YOUR FAILURE TO MAKE ADDITIONAL ARRANGE-
MENTS TO ACCESS EMERGENCY SERVICES IN AC-
CORDANCE WITH THE IMMEDIATELY PRECEDING
PARAGRAPH.
EN
PACKAGE CONTENTS:
OVERVIEW:
• Do not attempt to open, disassemble, or modify the device.
• Do not use a third party power adapter.
• Do not expose this device to temperatures outside the range of 32 -
113ºF / 0 ~ 45ºC for operating or 14 - 140ºF / -10 ~ 60ºC for storage.
• Do not expose this device to environment outside of the following hu-
midity range: 10-90% RH (non-condensing).
• Do not power cycle the device during system boot up or rmware
upgrade. You may corrupt rmware images and cause the unit to mal-
function.
FCM630A 1x Ethernet Cable
1x 12V Power adapter
PRECAUTIONS:
12V
FCM630A is an innovative IP PBX appliance designed for small to me-
dium business. Powered by an advanced hardware platform with robust
system resources, the FCM630A oers a highly versatile state-of-the-art
Unied Communication (UC) solution for converged voice, video, data,
fax and video surveillance application needs. Incorporating industry-
leading features and performance, the FCM630A oers quick setup, easy
deployment and unrivaled reliability all at an unprecedented price point.
1x Quick Installation Guide
The GNU GPL license terms are incorporated into the de-
vice rmware and can be accessed via the Web user inter-
face of the device at my_device_ip/gpl_license. It can also
be accessed here: http://www.berme.com/legal/open-
source-software
To obtain a CD with GPL source code information please
submit a written request to info@berme.com Rack mounting
(sold separately)

~3~ ~4~
HARDWARE INSTALLATION:
Wall Installation:
1. Before formally installing the expansion screws, clarify the specic location of
the expansion screws and make a mark.
2. Pay attention to the following points when drilling: First, the drill bit model (ap-
erture) used for drilling refers to the maximum diameter of the expansion tube
equipped with the expansion screw; second, the drilling depth refers to the
length of the expansion tube, slightly deeper than 5~10mm .
3. After the expansion tube is inserted into the punched hole, it can be tapped
lightly with a hammer to make the expansion tube and the wall at.
4. Fix the equipment well and x the self-tapping screw in the expansion tube.
Schematic Diagram of Wall-mounted Installation:
FCM630A can be installed on the desktop or on the wall, and can be installed in
a cabinet on a pallet. Please refer to the following steps for correct installation.
Self-tapping Screw Specications:
Expansion Screw Specications:
Rack Installation:
Just x the device on a standard rack.
*30.00 +0.5
-0.5
2.50±0.2
*M4-16T(4.0 +0.1
-0 )
R0.30
This size measures the
side with no opening
Punch: JMB-40B
Use line: 1018
Rolling diameter: Φ3.25MM
Dental plate: M4-16T

~5~ ~6~
CONNECTING FCM630A:
1. Connect one end of an RJ-45 Ethernet cable into the WAN port of the FC-
M630A.
2. Connect the other end of the Ethernet cable into the uplink port of an Ethernet
switch/hub.
3. Connect the 12V DC power adapter into the 12V DC power jack on the back
of the FCM630A. Insert the main plug of the power adapter into a surge-pro-
tected power outlet.
4. Wait for the FCM630A to boot up. The front LCD display will show the FCM’s
hardware information when the boot process is completed.
5. Once the FCM630A is successfully connected to network via WAN port, press-
ing the “Home“ button will allow you to get the IP address as well as other
information.
USING THE FCM630A LCD MENU:
1. Press “Settings“ key to start browsing menu options.
2. Press “Navigation Key” to browse dierent menu options. Press “OK” to select
an entry.
3. In the menu option, select “Back” to go back to previous menu.
4. The LCD will return to default display after being idle in menu for longer than
30 seconds.
CONFIGURING THE FCM630A VIA WEB
GUI:
1. Connect the computer to the same network as the FCM630A.
2. Ensure the FCM630A is properly powered on then press the “Home“ button to
displays the IP address and other information on the LCD screen.
3. Open a web browser on the computer and enter the displayed IP address into
the search bar in the following format: http(s)://ipaddress:portnumber
4. Enter admin’s username and password to access the conguration menu.
(The factory default username is “admin” while the default random password
can be found on the sticker at the back of the unit).
5. For more detailed information on how to congure SIP extensions, SIP trunks,
and other system settings via the web UI, please download the FCM630A user
manual here: https://www.berme.com/products/
Refer to online documents and FAQ for more detailed information:
https://www.berme.com/products/
DC 12V WAN port
LAN port
Reset
Heartbeat port
Ground
SD Card slot USB port
FCM630A Front view
FCM630A Rear view

~7~ ~8~
FCM630A不预设对医院,执法机构,医疗中心
(急救服务)以及各种紧急服务的紧急通话服务。
用户必须自行设定紧急通话功能。用户必须自
行购买SIP兼容的网络电话服务,正确的设定
FCM630A使用该服务,并定期测试您的配置以
确保FCM630A如预期工作,否则请购买传统无
线或有线电话服务来拨打紧急通话。
FIBERME 公司的FCM630A不支持紧急通话服
务。FIBERME公司、其管理者和员工以及其相
关机构对此所造成的任何索赔、损失或者损害
都不负有任何法律追究责任。在此,您将无权
对任何以及所有由于无法通过FCM630A拨打紧
急电话以及没有遵照前段文字描述而造成紧急
通话失败的事件提出诉讼。
ZH
设备包装清单:
产品概览:
1. 请不要拆卸或修改该设备;
2. 请不要使用第三方的电源适配器;
3. 请不要在超出0至45摄氏度的环境下使用该设备,请不要在超出-10至60摄氏
度 的环境下存储该设备;
4. 请不要将设备暴露在超出相对湿度10-90%范围外的环境下;
5. 请不要在设备启动未完成的时候或设备的软件升级过程中断开电源。如上所述
的操作会导致设备本身的程序损坏,进而造成设备无法启动。
网线 (1根)
电源适配器 (1个)
注意事项:
FCM630A是一款功能丰富、兼具创新的IP PBX设备。它采用先进的硬件平台,运
用强健的系统资源,为用户提供了集语音、视频、数据、传真和监控设备需求的
统一解决方案。FCM630A融合了工业界领先的功能,安装部署方便,运行稳定可
靠,性价比高,是中小型企业理想的选择。
快速安装手册(1本)
GNU GPL许可条款已包含在设备固件中,可以通过设
备的Web用户界面 my_device_ip/gpl_license 进行访问。
也可以通过以下链接访问:http://www.fiberme.com/le-
gal/open-source-software
如果需要包含GPL源代码信息的CD,请发邮件到
[email protected] 提交请求 。
机架组件
(分开出售)
FCM630A
12V

~9~ ~10~
硬件安装:
挂墙安装:
1. 在正式安装膨胀螺丝前,明确使用膨胀螺丝的具体位置,并且做好标记。
2. 打孔时要注意以下几点:一是打孔所用的钻头型号(孔径)参考膨胀螺丝所配
备的膨胀管的最大直径,二是打孔深度参考膨胀管的长度,略深5~10mm。
3. 膨胀管塞进打好的孔内后,可以使用锤子轻轻敲击,使得膨胀管与墙面处于持
平的状态。
4. 将设备固定好,自攻螺丝固定在膨胀管中即可。
挂墙安装示意图:
FCM630A可以安装在桌面或挂墙安装,可搭配机柜托盘上机柜安
装,请参阅以下步骤进行正确的安装。
自攻螺丝规格:
膨胀螺丝规格:
机架安装:
将设备固定在标准机架上即可。
*30.00 +0.5
-0.5
2.50±0.2
*M4-16T(4.0 +0.1
-0 )
R0.30
冲头:JMB-40B
用线:1018
辗造径:Φ3.25MM
牙板:M4-16T
此尺寸测量无开口的一侧

~11~ ~12~
连接FCM630A:
1. 用网线连接FCM630A的WAN端口;
2. 将网线的另一端连接集线器或交换机上行链接的RJ-45网络接口;
3. 用12V电源适配器连接FCM630A电源接口和交流电源插座;
4. 等待设备启动。启动完成后,FCM630A的LCD上将会显示设备硬件信
息;
5. 等待设备网络连接完成。连接成功后,FCM630A的WAN端口LED指示灯将会
显示绿色,按下“主界面”按钮将使您获得IP地址以及其他信息。
使用FCM630A菜单按键:
1. 按“设置菜单”键开始浏览菜单;
2. 向下滑动导航键浏览菜单各选项,按“OK”选择菜单选项;
3. 按“返回”键返回上一级菜单;
4. 在菜单中空闲停留30秒后,LCD将会回到主界面显示。
通过网络界面配置FCM630A:
1. 将电脑与FCM630A连接至同一网络;
2. FCM630A正常启动并成功连接网络后,在LCD上确认FCM630A的IP地址;
3. 将FCM630A的IP地址以下列格式输入在电脑的网络浏览器上:http(s)://IP地
址:端口 ;
4. 输入管理员用户名和密码登入管理界面(管理员用户名的缺省值为:admin; 缺
省密码为随机值,写于FCM630A机体的贴纸上)。
5. 登录后,用户可以在网络界面下配置SIP账号、SIP中继、系统设定等。欲
获取更多详细信息,请在如下链接下载FCM630A用户手册:https://www.
fiberme.com/contact-us/
12V电源 WAN端口
LAN端口
重置
心跳端口
接地端
SD卡插槽 USB端口
FCM630A主机背面
FCM630A主机正面

~13~ ~14~
El FCM630A no viene pre congurado ni tiene acceso a infor-
mación de ningún tipo de servicio de llamadas de emergencia,
hospitales, servicios policiales, unidades de cuidados médicos
o cualquier otro tipo de servicio de socorro. Usted deberá hacer
las coordinaciones necesarias para poder acceder a estos ser-
vicios. Será su responsabilidad, el contratar el servicio de tele-
fonía por internet compatible con el protocolo SIP, congurar
apropiadamente el teléfono FCM630A para usar dicho servicio y
periódicamente, probar su conguración para conrmar su fun-
cionamiento de acuerdo a sus expectativas. Si usted decide no
hacerlo, será su responsabilidad comprar servicios de telefonía
tradicional, ya sea por línea ja o inalámbrica para poder ac-
ceder a los servicios de emergencia.
FIBERME NO PROVEE CONEXIONES CON NINGUN SERVI-
CIO DE EMERGENCIA MEDIANTE EL FCM630A. NI FIBERME
NI SUS DIRECTORES, EMPLEADOS O AFILIADOS, PUEDEN
SER SUJETOS REPONSABLES POR NINGUN RECLAMO,
DAÑO O PERDIDA. POR LO TANTO, POR LA MEDIANTE,
USTED RENUNCIA A SU DERECHO DE RECLAMO O DE-
NUNCIA QUE PUEDA SURGIR DEBIDO A LAS LIMITACIONES
EN EL USO DEL FCM630A PARA CONTACTAR A LOS SERVI-
CIOS DE EMERGENCIA, ASI COMO A SU NEGLIGENCIA DE
REALIZAR LAS COORDINACIONES NECESARIAS PARA AC-
CEDER A TODOS LOS SERVICIOS DE EMERGENCIA, MEN-
CIONADOS EL PARRAFO PRECEDENTE.
ES
CONTENIDO DEL PAQUETE:
INFORMACIÓN GENERAL:
• No abrir, desarmar o intentar modicar este equipo.
• No use adaptadores de corriente distintos al suministrado.
• No exponga este dispositivo a temperaturas fuera del rango de 0 °C a +45 °C en
funcionamiento y -10 °C a +60 °C en almacenadas.
• No exponga este dispositivo ambientes fuera del siguiente rango de humedad:
10-90% RH (Sin condensación).
• Por favor NO apague el FCM630A durante el arranque o durante la actualización
del rmware. La interrupción de la actualización del rmware puede causar mal
funcionamiento del equipo.
1x Cable de Red
1x Adaptador de Ali-
mentación de 12V
PRECAUCIONES:
El FCM630A es un innovador dispositivo IP PBX diseñado para pequeñas y me-
dianas empresas. Potenciado con una avanzada plataforma de hardware y un
robusto sistema de recursos. El FCM630A ofrece una gran versatilidad, líder en
Comunicaciones Unicadas (UC), para soluciones convergentes de voz, video,
datos, video vigilancia. La incorporación de funciones y características líderes de
la industria hacen que el FCM630A ofrezca una conguración rápida, facilidad y
conabilidad de implementación, con un precio sin precedentes.
1x Guía de instalación
rápida
Bandeja para Rack
(Se vende por separado)
Los términos de licencia GNU GPL son incorporados en el rm-
ware del dispositivo y puede ser accedido a través de la interfaz
de usuario Web del dispositivo en ip_de_mi_dispositivo/gpl_li-
cense. También puede ser accedido aquí: http://www.berme.
com/legal/open-source-software
Para obtener un CD con la información del código fuente GPL,
por favor, remita una solicitud escrita a info@berme.com
FCM630A
12V

~15~ ~16~
INSTALACIÓN DE HARDWARE:
Instalación en Pared:
Diagrama Esquematico de la Instalación en Pared:
Los FCM630A se pueden instalar en el escritorio o en la pared, por favor consulte
los siguientes pasos para la instalación apropiada.
Especicaciones del Tornillo de Rosca:
Especicaciones del Tornillo de Expansión:
Instalación en Rack:
Para la instalación en rack, solo necesitas jar el dispositivo en un rack estándar.
*30.00 +0.5
-0.5
2.50±0.2
*M4-16T(4.0 +0.1
-0 )
R0.30
1. Antes de instalar los tornillos de expansión, dena la ubicación especíca de
los tornillos de expansión y márquelos.
2. Por favor, preste atención a los siguientes puntos al taladrar: Primero, el mod-
elo de broca (apertura) utilizado para taladrar debe ser referente al diámetro
máximo del tubo de expansión equipado con los tornillos de expansión; se-
gundo, la profundidad de perforación se rige por el tamaño del tubo de expan-
sión, y un poco más profundo entre 5~10mm.
3. Luego de que el tubo de expansión es insertado en el agujero perforado, este
puede ser ligeramente golpeado con un martillo para hacer que el tubo de
expansión y la pared estén planos.
4. Fije bien el equipamiento y ajuste el tornillo de rosca en el tubo de expansión.
Punzón: JMB-40B
Utilice la línea: 1018
Diámetro de rodadura:
Φ3.25MM
Placa dental: M4-16T
Este tamaño mide el lado
sin apertura.

~17~ ~18~
CONECTANDO EL FCM630A:
1. Conecte un extremo de un cable Ethernet RJ-45 en el puerto WAN del FC-
M630A.
2. Conecte el otro extremo del cable Ethernet RJ-45 en el puerto de enlace de
un switch/hub.
3. Conecte el adaptador de alimentación de 12V DC en el conector de aliment-
ación de 12 V DC en la parte posterior de la FCM630A. Inserte el enchufe
principal del adaptador de alimentación a una toma de corriente protegida
contra sobretensión.
4. Espere a que el FCM630A inicie. La pantalla LCD en la parte frontal mostrará
la información de hardware cuando el proceso de arranque comienza.
5. Una vez que el FCM630A se haya conectado correctamente a la red a través
del puerto WAN, presionar el botón “Inicio” le permitirá obtener la dirección IP
y otra información.
USO DEL MENÚ POR TECLADO DEL FCM630A:
1. Pulse el botón “Ajustes” para comenzar a navegar por las opciones del menú.
2. Pulse el botón “Teclas de Navegación” para navegar por las diferentes opcio-
nes del menú. Pulse el botón “OK” para seleccionar una entrada.
3. En la opción del menú, seleccione “Volver” para regresar al menú anterior.
4. La pantalla LCD volverá a la pantalla por defecto (de inicio) después de estar
inactiva durante más de 30 segundos.
CONFIGURACION DEL FCM630A ATRAVEZ DE
LA INTERFAZ WEB DE USUARIO:
1. Conecte un ordenador a la misma red que el FCM630A
2. Asegúrese de que el FCM630A está correctamente encendido y muestra su
dirección IP en la pantalla LCD.
3. Abra un navegador web en el ordenador y escriba la dirección URL del FC-
M630A en el siguiente formato: http(s)://Direccion-IP:Puerto
4. Introduzca el nombre de usuario y la contraseña para iniciar sesión. (El nom-
bre de usuario de administrador predeterminado es “admin” y la contraseña
aleatoria predeterminada puede ser encontrada en la etiqueta del FCM630A).
5. Para la información detallada de las conguraciones de extensiones SIP, tron-
cos SIP y todos los ajustes del sistema a través de la interfaz Web GUI, por
favor descargue el manual de usuario FCM630A desde aquí: https://www.-
berme.com/products/
DC 12V Puerto WAN
Puerto LAN
Puerto de monitoreo
Tierra
Puerto USB
FCM630A Panel Frontal
FCM630A Panel Posterior
Resetear
Ranura de tarjeta SD

~19~ ~20~
Le FCM630A n’est pas préconguré pour prendre en charge
ou de procéder les appels d’urgence à tout type d’hôpital,
d’application de la loi, ou unité de soins médicaux (“Service
(s) d’urgence”) ou tout autre type de service d’urgence. Vous
devez faire des arrangements pour l’accès aux services
d’urgence. C’est votre responsabilité d’acheter un service té-
léphonique Internet compatible SIP, congurer correctement
le FCM630A à utiliser ce service et, périodiquement, de tes-
ter votre conguration an de conrmer qu’il fonctionne com-
me prévu. Si vous ne le faites pas, c’est votre responsabilité
d’acheter un accès au service téléphonique traditionnel sans
l ou laire an d’accéder aux services d’urgence.
FIBERME NE FOURNIT AUCUNE CONNEXION AUX SER-
VICES D’URGENCE VIA LE FCM630A NI FIBERME, NI
SES DIRIGEANTS, EMPLOYES OU FILIALES PEUVENT
ETRE TENUS RESPONSABLE POUR TOUTE RECLAMA-
TION OU CAUSE D’ACTION DECOULANT OU RELATIF
A VOTRE INCAPACITE D’UTILISER LE FCM630A POUR
CONTACTER LES SERVICES D’URGENCE ET VOTRE
ECHEC DE FAIRE DES ARRANGEMENTS SUPPLEMEN-
TAIRES POUR ACCEDER AUX SERVICES D’URGENCE
EN CONFORMITE AVEC LE PARAGRAPHE PRECEDENT.
FR
CONTENU DU PACK:
PRESENTATION:
• Ne pas tenter d’ouvrir, de désassembler, ou demodier le dispositif.
• Ne pas utiliser un adaptateur d’alimentation tiers.
• Ne pas exposer cet appareil à des températures hors de la plage de 0 °C à
+45 °C en opération ou -10 °C à +60 °C en stockage.
• Ne pas exposer cet appareil à un environnement avec humidité hors de la plage
de 10-90% RH (sans condensation).
• Veuillez ne pas éteindre le FCM630A pendant le démarrage du système ou la
mise à jour du rmware. Cela risque de rompre l’image du rmware et en con
séquence rendre l’unité inutilisable.
1x Câble Ethernet
1x 12V Adaptateur
Secteur
PRECAUTIONS:
FCM630A est une appliance IP PBX innovatrice conçue pour les petites et moy-
ennes entreprises. Doté d’une plateforme matérielle avancée et de ressources
système robustes, FCM630A ore une grande souplesse, et l’état-de-l’art de la
solution des communications uniées (UC) pour une convergence de la voix, vi-
déo, données fax et les besoins des applications de vidéo surveillance. Intégration
des fonctionnalités et performances leaders de l’industrie, le FCM630A ore une
installation rapide, un déploiement facile et une connectivité sans rival, tout cela à
un prix sans précédent.
1x Guide d’installation
rapide
Support Rack
(se vend séparément)
Les termes de la licence GNU GPL sont incorporés dans le mi-
crologiciel du périphérique et sont accessibles via l’interface
utilisateur Web du périphérique à l’adresse my_device_ip/
gpl_license. Vous pouvez également y accéder ici: http://
www.berme.com/legal/open-source-software
Pour obtenir un CD contenant les informations du code source
GPL, veuillez envoyer une demande écrite à
info@berme.com.
FCM630A
12V

~21~ ~22~
INSTALLATION DU MATÉRIEL:
Installation sur le Mur:
Schéma de principe de l’installation murale:
FCM630A peut être installé sur le bureau ou xé au mur, veuillez se référer aux
étapes suivantes pour l’installation appropriée.
Spécications des Vis Autotaraudeuses:
Spécications des Vis d’Expansion:
Installation en Rack :
Pour l’installation en rack, il vous sut de xer l’appareil sur un rack standard.
*30.00 +0.5
-0.5
2.50±0.2
*M4-16T(4.0 +0.1
-0 )
R0.30
1. Avant d’installer formellement les vis d’expansion, dénissez l’emplacement
spécique des vis d’expansion et marquez-le.
2. Veuillez faire attention aux points suivants lors du perçage : Tout d’abord, le
modèle de foret (ouverture) utilisé pour le perçage se réfère au diamètre maxi-
mum du tube d’expansion équipé de la vis d’expansion ; Deuxièmement, la
profondeur de forage fait référence à la longueur du tube d’expansion, légère-
ment plus profonde que 5 ~ 10 mm.
3. Une fois le tube d’expansion inséré dans le trou percé, il peut être tapoté
légèrement avec un marteau pour rendre le tube d’expansion et le mur plats.
4. Bien xer l’équipement et xer la vis autotaraudeuse dans le tube d’expansion.
Poinçon : JMB-40B
Utiliser la ligne : 1018
Diamètre de roulement:
Φ3.25MM
Plaque dentaire : M4-16T
Cette taille mesure le côté
sans ouverture

~23~ ~24~
CONNECTER LE FCM630A:
1. Branchez une extrémité d’un câble Ethernet RJ-45 dans le port WAN de le
FCM630A.
2. Branchez l’autre extrémité du câble Ethernet dans le port de liaison montante
d’un commutateur / concentrateur Ethernet.
3. Branchez l’adaptateur d’alimentation 12V DC dans la prise de courant à
l’arrière de le FCM630A. Insérez la prise de l’adaptateur secteur sur une prise
électrique protégée contre les surtensions.
4. Attendez que le FCM630A démarre. L’écran LCD à l’avant achera ses infor-
mations matériel lorsque le processus de démarrage est terminé.
5. Une fois que le FCM630A est correctement connecté au réseau via le port
WAN, appuyer sur le bouton «Accueil» vous permettra d’obtenir l’adresse IP
ainsi que d’autres informations.
UTILISATION DU MENU LCD DU FCM630A:
1. Appuyez sur “Options” pour commencer à parcourir les options du menu.
2. Appuyez sur “Touches de navigation” pour parcourir les diérentes options du
menu. Appuyez sur “OK” pour sélectionner une entrée.
3. Dans le menu, sélectionnez “Retour” pour revenir au menu précédent.
4. L’écran LCD revient à l’achage par défaut après avoir été inactif dans le
menu pendant plus de 30 secondes.
CONFIGURATION DU FCM630A VIA
L’INTERFACE WEB:
1. Connectez l’ordinateur au même réseau que le FCM630A.
2. S’assurer que le FCM630A est bien sous tension et ache son adresse IP
dans l’écran LCD.
3. Ouvrez un navigateur Web sur l’ordinateur et entrez l’URL de l’interface web
dans le format suivant: http(s)://IP-Address:Port
4. La page de connexion apparaîtra (voir la gure ci-dessous). Entrez le nom
d’utilisateur de l’administrateur, par défaut “admin” et le mot de passe aléatoire
unique est imprimé sur l’autocollant.
5. Pour des informations détaillées concernant la conguration des extensions
SIP, Trunks SIP et tous les autres paramètres du système via l’ interface Web,
Veuillez télécharger le manuel d’utilisation de le FCM630A à partir d’ici: https://
www.berme.com/products/
DC 12V Port WAN
Port LAN
Réinitialisation
Port Heartbeat
Mise à Terre
Port Carte SD Port USB
Panneau Frontal FCM630A
Panneau Arrière FCM630A

~25~ ~26~
Das FCM630A ist nicht für die Durchführung von Notrufen an
Krankhäuser, Strafverfolgungsbehörden, medizinische Pe-
geeinrichtungen (“Notdienste”) oder jegliche andere Form von
Notdiensten ausgerichtet. Sie müssen zusätzliche Einstellun-
gen vornehmen, um Zugang zu Notdiensten zu erhalten. Es
liegt an Ihnen, einen SIP-kompatiblen Internettelefoniedienst
zu erwerben, das FCM630A korrekt für die Nutzung dieses
Dienstes zu kongurieren und die Kongurierung regelmäßig
auf ihre Funktionstüchtigkeit zu testen. Andernfalls liegt es an
Ihnen, herkömmliche Drahtlos oder Festnetztelefoniedienste
zu erwerben, um Zugang zu Notdiensten zu erhalten.
FIBERME BIETET ÜBER DAS FCM630A KEINE VERBIND-
UNG ZU NOTRUFEN AN. WEDER DAS UNTERNEHMEN
FIBERME NOCH SEINE FUNKTIONÄRE, ANGESTELLTEN
ODER PARTNER KÖNNEN FÜR FORDERUNGEN,
SCHADEN ODER VERLUSTE HAFTBAR GEMACHT
WERDEN. SIE VERZICHTEN HIERMIT AUF JEGLICHE UND
ALLE SOLCHE FORDERUNGEN ODER RECHTLICHEN
SCHRITTE, DIE DURCH DIE UNMÖGLICHKEIT, ÜBER DAS
FCM630A NOTRUFE ZU NUTZEN, SOWIE DURCH IHR
VERSÄUMNIS, DIE GEMÄß DEM VORHERGEHENDEN
PARAGRAPH NOTWENDIGEN ZUSÄTZLICHEN EINSTEL-
LUNGEN FÜR DEN ZUGANG ZU NOTRUFEN VORZUNE-
HMEN, VERURSACHT WERDEN KÖNNEN.
DE
PACKUNGSINHALT:
ÜBERSICHT:
• Versuchen Sie nicht, das Gerät zu önen, zu zerlegen oder zu modizieren.
• Verwenden Sie keine Netzteile von anderen Herstellern.
• Das Gerät darf nicht bei Temperaturen jenseits von 0 °C bis +45 °C betrieben
oder gelagert werden von -10 °C bis +60 °C.
• Die Luftfeuchtigkeit muss innerhalb des folgenden Bereichs liegen: 10-90% rel.
Luftfeuchtigkeit (nichtkondensierend).
• Schalten Sie das FCM630A beim Systemstart oder bei der Firmware-Aktualisier
ung NICHT aus und wieder ein. Andernfalls können Firmware-Bilder beschädigt
werden und es könnten Funktionsstörungen am Gerät auftreten.
1x Ethernet-Kabel
1x 12V Netzteil
VORSICHTSMAßNAHMEN:
Das FCM630A ist eine innovative IP-Telefonanlagen-Appliance für kleine bis mit-
tlere Unternehmen. Das FCM630A verfügt über eine moderne Hardwareplattform
mit leistungsfähigen Systemressourcen und bietet eine sehr vielseitige Unied
Communication-Lösung auf dem aktuellen Stand der Technik, die die Anforderun-
gen von konvergenten Sprach-, Video-, Daten-, Fax- und Videoüberwachungsan-
wendungen erfüllt. Durch branchenführende Leistungsmerkmale und Leistung
bietet das FCM630A schnelle Einrichtung, einfache Implementierung und uner-
reichte Zuverlässigkeit zu einem konkurrenzlosen Preis.
1x Schnellinstallation-
sanleitung
Zwischenboden
(nicht im Lieferumfang enthalten)
Die GNU GPL Lizenz ist in der Gerätesoftware hinterlegt und
kann über die Web-Schnittstelle unter my_device_ip/gpl_li-
cense (Endgerät_ip/gpl_Lizenz aufgerufen werden.
Die Lizenz ist ebenfalls abrufbar unter http://www.berme.
com/legal/open-source-software. Um eine CD mit der Lizenz
zu erhalten, senden Sie uns bitte eine Email an
info@berme.com.
FCM630A
12V

~27~ ~28~
HARDWARE-INSTALLATION:
Wandmontage:
Diagramm zur Wandmontage:
FCM630A kann frei (Desktop) oder an der Wand (Wandmontage) installiert
werden. Beide Varianten sind nachfolgend beschrieben.
Schraubenspezikation:
Dübel Spezikation:
Rack Installation:
Das Gerät kann einfach in ein Standard Rack montiert werden.
*30.00 +0.5
-0.5
2.50±0.2
*M4-16T(4.0 +0.1
-0 )
R0.30
1. Markieren Sie die Bohrlöcher für die Dübel anhand der Montagelöcher in der
Wandhalterung.
2. Beachten Sie, dass der Bohrer zu den gewählten Dübeln passt, ebenso, dass
die gewählten Schrauben in Länge und Durchmesser sowohl in die Dübel als
auch in die Montagelöcher der Wandhalterung passen.
3. Beachten Sie, dass der Dübel in der gesamten Länge in das Bohrloch passt.
4. Befestigen Sie anschließend die Telefonanlage mit den gewählten Schrauben..
Pons: JMB-40B
Gebruik lijn: 1018
Rollende diameter:
Φ3.25MM
Tandplaat: M4-16T
Deze maat meet de zijkant
zonder opening

~29~ ~30~
FCM630A ANSCHLIESSEN:
1. Stecken Sie ein Ende eines RJ-45-Ethernet-Kabels in den Anschluss WAN des
FCM630A.
2. Stecken Sie das andere Ende des Ethernet-Kabels in den Uplink-Anschluss
eines Ethernet-Switch/Hubs.
3. Schließen Sie das 12-VDC-Netzteil an den 12-VDC-Stromversorgungsa
schluss auf der Rückseite des FCM630A an. Stecken Sie den Netzstecker des
Netzteils in eine Steckdose mit Überspannungsschutz.
4. Warten Sie, bis das FCM630A gestartet wurde. Nach dem Startvorgang werden
die Hardwareinformationen auf dem LCD auf der Vorderseite angezeigt.
5. Sobald das FCM630A ordnungsgemäß mit dem Netzwerk verbunden wurde,
können Sie durch Drücken der Taste “Home“ die IP-Adresse sowie weitere
Informationen abrufen.
VERWENDUNG DES FCM630A-TASTENFELD-
MENÜS:
1. Drücken Sie die “Menü” oder OK, um durch die Menüoptionen zu navi-gieren.
2. Drücken Sie die “Navigationstasten”, um zu anderen Menüoptionen zu wech-
seln. Drücken Sie OK, um einen Eintrag auszuwählen.
3. Wählen Sie in der Menüoption “Zurück”, um zum vorherigen Menü zu wecseln.
4. Bei mehr als 30 Sekunden ohne Aktivität wird auf dem LCD wieder die Stan-
dardanzeige angezeigt.
KONFIGURIEREN DES FCM630A ÜBER DIE
WEB-GUI:
1. Schließen Sie den Computer an dasselbe Netzwerk an wie das FCM630A.
2. Vergewissern Sie sich, dass das FCM630A eingeschaltet ist und die IP-Adres-
se im LCD angezeigt wird.
3. Önen Sie auf dem Computer einen Webbrowser und geben Sie die URL für
die Web-GUI im folgenden Format ein: http(s)://IP-Adresse:Port
4. Geben Sie Benutzername und Passwort ein. Der voreingestellte Administra-
tor-Benutzername lautet “admin”, das Zufallspasswort bendet sich auf dem
Produktaufkleber auf der Rückseite der FCM630A.
5. Ausführliche Informationen zum Kongurieren der SIP-Nebenstellen, SIP-Lei-
tungen und allen anderen Systemeinstellungen über die Web-GUI nden Sie
im FCM630A-Benutzerhandbuch, das Sie hier herunter-laden können: https://
www.berme.com/products/
DC 12V
LAN-Anschluss
Reset
Heartbeat-
Anschluss
Erdung
SD Card slot USB-Anschluss
Vorderansicht FCM630A
Rückansicht FCM630A
WAN-Anschluss

~31~ ~32~
FCM630A non è precongurato per supportare o eettuare
chiamate di emergenza a qualsiasi tipo di ospedale, strut-
tura giudiziaria, unità di assistenza medica (“Servizi di emer-
genza”) o a qualsiasi altro tipo di servizio di emergenza. È
necessario eettuare accordi supplementari per accedere
ai Servizi di emergenza. È a Vostra esclusiva responsabilità
acquistare servizi di telefonia internet conformi con SIP, con-
gurare FCM630A correttamente per usare tale servizio ed
eettuare test periodici della congurazione per assicurarsi
che funzioni in modo idoneo. Se non si eettua ciò, è Vostra
responsabilità acquistare servizi telefonici ssi o wireless tra-
dizionali per accedere ai Servizi di emergenza.
FIBERME NON FORNISCE COLLEGAMENTI AI SERVIZI
DI EMERGENZA ATTRAVERSO FCM630A. NÈ F I -
BERME NÈ I SUOI RESPONSABILI, DIPENDENTI O AF-
FILIATI POSSONO ESSERE RITENUTI RESPONSABILI DI
QUALSIASI RECLAMO, DANNO O PERDITA, E DI QUAL-
SIASI AZIONE LEGALE DERIVANTE DA TALI RECLAMI O
CAUSE IN RELAZIONE ALL’IMPOSSIBILITÀ DI USARE IL
FCM630A PER CHIAMATE AI SERVIZI O DI STRINGERE
ACCORDI SUPPLEMENTARI PER ACCEDERE AI SER-
VIZI DI EMERGENZA IN CONFORMITÀ AL PARAGRAFO
PRECEDENTE.
IT
CONTENUTO DELLA CONFEZIONE:
PANORAMICA:
1x Cavo Ethernet
1x 12V Alimentatore
PRECAUZIONI:
FCM630A è un’innovativa appliance per IP PBX pensata per le piccole
e medie imprese. Supportata da un’avanzata piattaforma hardware con
solide risorse di sistema, l’appliance FCM630A ore una soluzione UC
(Unied Communication) all’avanguardia e altamente versatile per le
esigenze di applicazioni voce, video, fax dati e di videosorveglianza con-
vergenti. Con funzionalità e prestazioni all’avanguardia nel settore, FC-
M630A garantisce una congurazione rapida, una semplice distribuzione
e un’adabilità senza eguali, il tutto a un prezzo mai visto prima.
1x Guida di installazione
rapida
Supporto per montaggio a rack
(Venduto separatamente)
I termini della licenza GNU GPL sono incorporati nel rmware
del dispositivo e sono accessibili tramite l’interfaccia utente
Web del dispositivo a: ip_dispositivo/gpl_license. È anche
possibile accedervi all’indirizzo: http://www.berme.com/egal/
open-source-software
Per ottenere un CD con informazioni sul codice sorgente
GPL, si prega di inviare una richiesta scritta a info@berme.
com
• Non tentare di aprire, smontare o modicare il dispositivo.
• Non utilizzare un adattatore di alimentazione di terzi.
• Non esporre il dispositivo a temperature non incluse nell’intervallo da 0 °C a
+45 °C per l’operatività o da -10 °C a +60 °C per l’immagazzinaggio.
• Non esporre il dispositivo ad ambienti non inclusi nel seguente intervallo di
umidità: 10 - 90 % di umidità relativa (senza condensa)
• NON spegnere e riaccendere il FCM630A durante l’avvio del sistema o
l’aggiornamento del rmware. Si possono corrompere le immagini del rmware
e causare problemi di funzionamento.
FCM630A
12V

~33~ ~34~
INSTALLAZIONE DELL’HARDWARE:
Installazione a Parete:
Schema di Montaggio:
FCM630A possono essere installati su scrivania o a muro. Fare riferimento ai
passi seguenti per la corretta installazione.
Speciche delle Viti Autolettanti:
Speciche della Vite con Tassello:
Installazione a Rack :
Per l’installazione a rack, bisogna acorare il dispositivo ad un armadio rack stan-
dard.
*30.00 +0.5
-0.5
2.50±0.2
*M4-16T(4.0 +0.1
-0 )
R0.30
1. Prima di instllare i tasselli di ssaggio, tracciare la posizione dei tasselli con
un segno.
2. Per piacere fare atenzione ai successivi punti mentre si usa il trapano: per
prima cosa il modello della punta del trapano deve essere uguale al diametro
massimo del tassello equipaggiato con la vite. Inoltre, la profondità del buco
sul muro deve essere leggermente più profonda di 5-10mm rispetto alla lun-
hezza del tassello.
3. Una volta che il tassello è stato inserito nella fessura, può essere inserito con
l’aiuto di un martello per aderire perfettamente alla supercie del muro.
4. Fissare il tutto con cura e avvitare la vite nel tassello di espansione.
Punzone: JMB-40B
Usa linea: 1018
Diametro di rotolamento:
3.25MM
Piastra dentale: M4-16T
Questa taglia misura il lato
senza apertura

~35~ ~36~
CONNESSIONE DEL FCM630A:
1. Collegare un’estremità di un cavo Ethernet RJ-45 alla porta WAN di FCM630A.
2. Collegare l’altra estremità del cavo Ethernet alla porta di uplink di uno switch/
un hub Ethernet.
3. Collegare l’adattatore di alimentazione CC a 12 V alla presa di alimentazione
CC a 12 V sulla parte posteriore di FCM630A. Inserire la spina principale dell’
adattatore di alimentazione in una presa di corrente protetta contro le sovra-
tensioni.
4. Attendere l’avvio di FCM630A. Quando il processo di avvio sarà comple-
tato, sul display LCD anteriore verranno visualizzate le informazioni relative
all’hardware.
5. Una volta che FCM630A è stato correttamente collegato alla rete tramite la
porta WAN, premendo il pulsante “Home” sarà possibile ottenere l’indirizzo IP
e altre informazioni.
UTILIZZO DEL MENU DEL TASTIERINO DI
FCM630A:
1. Premere il tasto “Impostazioni” per iniziare a scorrere le opzioni del menu.
2. Premere “Tasti di navigazione” per scorrere le diverse opzioni del menu. Pre-
mere “OK” per selezionare una voce.
3. Nell’opzione di menu, selezionare “Indietro” per tornare al menu precedente.
4. Il display LCD tornerà alla visualizzazione predenita dopo un periodo di intiv-
ità nel menu di più di 30 secondi.
CONFIGURAZIONE DI FCM630A TRAMITE IN-
TERFACCIA UTENTE GRAFICA WEB:
1. Collegare il computer alla stessa rete di FCM630A.
2. Assicurarsi che FCM630A sia alimentato correttamente e visualizzi l’indirizzo
IP sul display LCD.
3. Aprire un browser Web sul computer e immettere l’URL dell’interfaccia utente
graca Web nel formato: http(s)://Indirizzo-IP:Porta
4. Immettere nome utente e password per accedere. (Lo username di default
dell’amministratore è “admin” e la password casuale di default può essere tro-
vata sull’etichetta del FCM630A).
5. Per informazioni dettagliate su come congurare le estensioni SIP, i trunk SIP
e tutte le altre impostazioni di sistema tramite l’interfaccia utente graca Web,
scaricare qui il manuale utente di FCM630A: https://www.berme.com/prod-
ucts/
CC a 12V Porta WAN
Porta LAN
Ripristina
Porta Heartbeat
Messa a terra
Slot per SD Card Porta USB
FCM630A Vista frontale
FCM630A Retrovisore
Other manuals for FCM630A
3
Table of contents
Languages:
Other Fiberme PBX manuals