WARNING: never expose eyes or skin to UVC light from any source. Looking directly at the UVC light may cause permanent eye damage or
blindness. Never operate the UV-Aire™ AirPurifying System out of the plenum. Avoid touching the glass portion of the lamp with your hands.
Page 5 of 8
16. Verify that all electrical connections are tight and that the lamp and bracket is secure.
17. Replace all access panels and other items that may have been removed during the installation, such as
electrical box covers, etc.
18. Verify that the Safety Viewport is securely fastened in the hole drilled through the Safety Label.
WARNING: BEFORE RESTORING POWER TO THE HVAC SYSTEM OR THE TRANSFORMER POWER SOURCE,
VERIFY THAT NO OPENINGS EXIST THROUGH WHICH UVC RAYS FROM THE LAMP MAY ESCAPE. VERIFY
THAT ALL ACCESS PANELS AND DUCTWORK ETC. HAVE BEEN REPLACED AND SEALED IF NECESSARY, AND
THAT THE SAFETY VIEW PORT IS SECURELY FASTENED IN PLACE.
19. Restore power to the HVAC system and the transformer power source. Look through the Safety
Viewport to verify that the lamp is lit.
BRACKET MOUNT INSTALLATION THROUGH A-COIL DELTA PLATE OR PLENUM
If the lamp is to be mounted externally on the plenum or an air duct, or if the lamp is
to be mounted through a delta plate (covers the end of A-coil in certain air handler
designs), follow these steps for installation:
1. Separate the lamp mounting portion of the Lamp Bracket from the remainder
of the lamp bracket (see Figure 4), by bending back and forth or cut with snips or
hacksaw.
2. Attach the shield to the separated bracket, on the side opposite from
the lamp mounting studs (see Figure 5), if it is to be used, using the supplied
#8-32 self-threading screws.
3. Attach the lamp to the lamp bracket. Loosen the clamp bracket nut, inserting the
lamp through the hole, swivel the clamp bracket fully back over the flange of the
lamp base, and retighten the clamp bracket nut. (See Figure 5)
WARNING: DO NOT use the supplied wingnut if the lamp bracket is installed
externally on a duct or surface not internal to an air handler or duct system! For
safety, a hand tool is required to remove the lamp if the installation is not internal
as described.
4. Mark the location for the lamp, and cut a 2” round hole (1” hole if the shield
is not used) in the mounting surface, using care to avoid damage to equipment or concealed wiring. If the
lamp is to be mounted on duct board, fabricate a mounting surface by cutting a 6” x 6” square of suitable
sheet metal. Cut the hole for the lamp in the sheet metal and the duct board, and tape the sheet metal
securely to the duct board using mastic-backed metal tape.
5. Insert the lamp through the hole, orient the bracket such that the shield is in
proper position, and secure the bracket to the mounting surface using three of the
supplied sheet-metal screws, or other appropriate fasteners.
6. If mounting through the exterior of a plenum or air duct, use metal duct sealing
tape (not included) to tape around the edges of the mounting bracket, to prevent
UVC rays from escaping and prevent duct leakage.
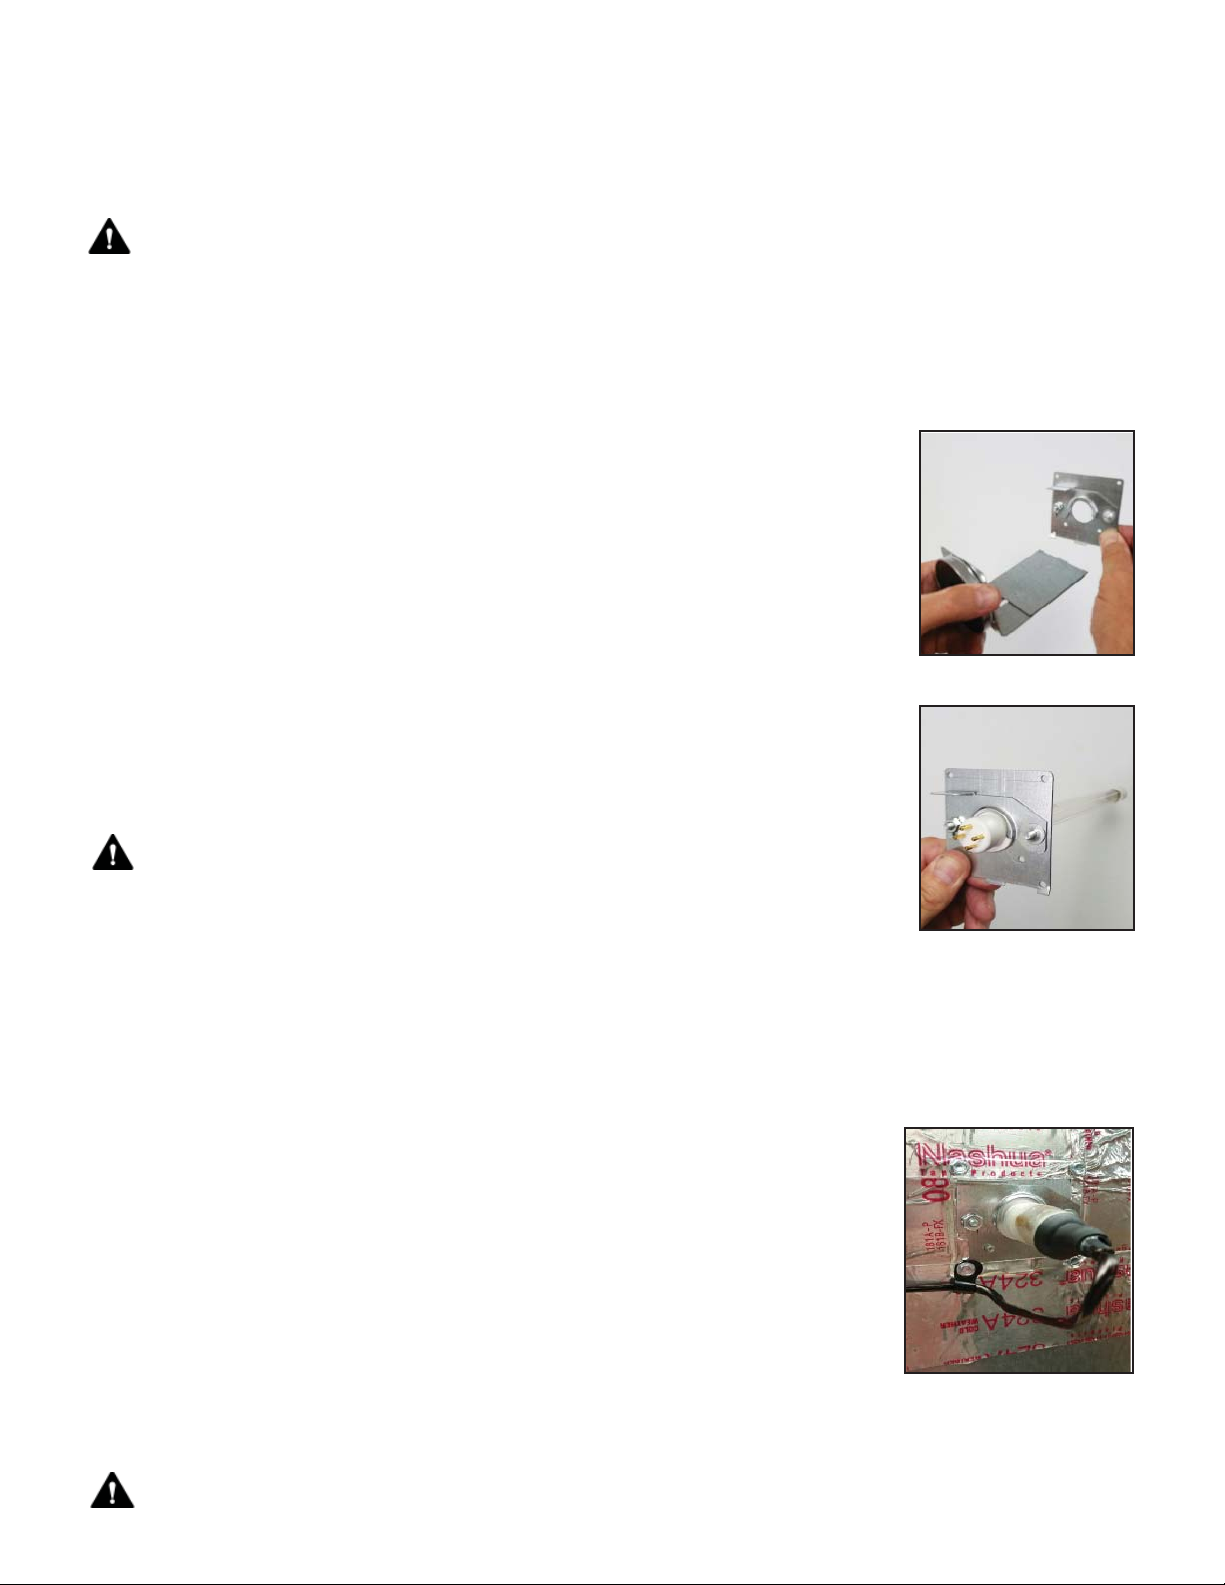
7. Position the supplied cable clamp on the lamp cable such that the clamp hole
is aligned with the fourth hole in the bracket, and loosely install the fourth
screw or fastener through the clamp and bracket, into the mounting surface
(see Figure 6).
Figure 4
Figure 5
Figure 6
P/N 78010015000 RevB 02/18


