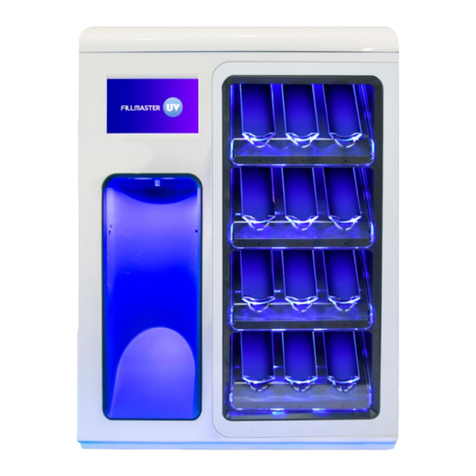
Fillmaster Systems 3400 User manual

Digital Fillmaster
Install Guide

2
Congratulations on your purchase
of the Digital Fillmaster!
The Digital Fillmaster 3400 and 3600 models will help your
pharmacy reconstitute medications with accuracy and
speed. The dispenser’s straightforward operation will allow
you to integrate the Digital Fillmaster seamlessly into your
pharmacy’s workow, leaving your staff more time to
interact with customers.
The Digital Fillmaster provides the security of knowing that
your pharmacy is preparing reconstituted medications with
extreme accuracy, and when paired with our Water
Purication System, the highest quality water. You’ll save
time and money, and your customers will receive the best
in quality and service. For further ease of use, the Digital
Fillmaster 3400 can be upgraded to the 3600 by adding the
Script Scanner.
Using the Script Scanner will make your Digital Fillmaster
even more efcient. Simply scan the barcode printed on the
product label, and the scanner will register the reconstitution
volume to dispense. The Script Scanner is pre-programmed
with a database including most reconstituted antibiotics
and a feature that enables the Script Scanner to “learn”
new NDC codes. The Script Scanner allows you to ll
prescriptions accurately, efciently, and faster than ever.
If you have any questions or concerns regarding your new
system, our Customer Service Department is available
Monday-Friday 8am-6pm EST and after hours for
emergencies.
Please call us at 888-284-7873

3
Digital Fillmaster Dispenser Installation
Install the Digital Fillmaster after you have reached step 5.6 of the Water Purication System
installation instructions (page XX).
The installation will need to be completed in four parts:
•Part One: Mounting the Dispenser
•Part Two: Connecting Digital Fillmaster to Water Purication System
•Part Three: Installing the Battery
•Part Four: Activating the System (refer to page XX)
NOTE: All four parts MUST be completed before using the Digital Fillmaster for the rst time.
Part One: Mounting the Dispenser
Install the dispenser less than 50 feet away from the Water Purication System. For an easy way
to measure, use the extra tubing from Section 5 to measure from the Water Purication System to
the desired mounting location.
Tools Needed:
• Drill with 1/8” bit
Parts Needed:
• Digital Fillmaster dispenser
• Three screws (provided)
Dispenser Installation Steps:
1. Determine a location to mount the dispenser. The location
should be less than 50 feet from the Water Purication System.
2. Insert the three screws provided in the mounting holes located
at the top (2) and at the bottom of the unit (1), and mount on
the wall using the drill.
3. Continue to Part Two: Connecting Digital Fillmaster to
WaterPuricationSystem.

4
PartTwo:ConnectingDigitalFillmastertoWaterPuricationSystem
Use the following steps to connect the dispenser to the Water Purication System. The same steps
are listed in Section 5 of the Water Purication System installation instructions (page XX-XX).
Tools Needed:
• Tube cutters
• Drill
Parts Needed:
• White ¼” tubing
• ZeroBac lter
• Shut-off valve
• ¼” elbow
• Mounting clip
• Screw
Connection Steps:
1. Take the end of the white ¼” tubing and cut two smaller pieces of tubing. The rst
should be about two inches long and the second should be ve or more inches long.
2. Attach a shut-off valve to the end of the white ¼” tubing coming from the “OUT”
port of the DI lter. Make sure the valve is in the off position (perpendicular to
tubing).
3. Attach the smaller piece of tubing between the other end of the shut-off valve and
the “IN” port of the ZeroBac lter.
4. Take the longer piece of cut tubing and attach the ¼” elbow to one end.
5. Attach the open end of the longer second piece of cut tubing to the open port of the
ZeroBac lter. Attach the end of the tubing with the ¼” elbow to the inlet of the
dispenser.
6. Use the drill to install a mounting clip on the wall to hold the ZeroBac lter in place
once you have determined where the lter will lie.
7. Continue to Part Three: Installing the Battery.

5
Part Three: Installing the Battery
The Digital Fillmaster ships with the battery removed.
The battery should not be installed until the Fillmaster
has been connected to the Water Purication System
and mounted on the wall in accordance with the
installation steps. The average life of the battery is
approximately nine months to one year under normal
use. The Digital Fillmaster will notify you when it is
time to order a new battery.
NOTE: Before inserting the battery for the rst time, make sure you have a cup under the
dispensing tip to catch any water that might come out. If the unit begins to dispense water
when the battery is inserted, press START key immediately.
1. Place a container under the Digital Fillmaster’s dispensing tip to catch any water
that may dispense during initial power up of unit.
2. Remove the top cover of the Fillmaster unit by sliding it up. Align the battery with the
connection slot on the dispenser. If the battery is in a position that would prevent the
cover from being put back on, it is backwards.
3. Push down rmly and squarely, inserting the battery card edge into the slot. When it
is in place, the Fillmaster will power on and begin its startup routine. Press the
START key on the keypad to reset the machine.
4. Slide the cover back on, concealing the battery.
5. Continue to Section6oftheWaterPuricationSystemInstallationsteps
(page XX) to nish activating the system.

6
Note: The system will make a hissing, gurgling noise when filtering water. After a
few cycles this noise should dissipate.
Congratulations! You now have an endless supply of USP-quality
water, freeing you from buying bottled water and performing manual
reconstitution. With the proper care, your FillPure/Fillmaster system
will be an essential part of your pharmacy for years to come.
Setup for First Use
Normal Startup
After installing the battery, press the START key to begin startup. No user interaction is required,
but you should observe the following:
•The System Power light will flash to indicate that the battery is functioning properly and
in good condition.
• The Service Required light will flash to indicate that the water line pressure is adequate
and various performance checks have been completed successfully.
•You will see startup messages displayed. When startup is successfully completed, you
will see “Select Key Enter Amount” displayed on the Fillmaster screen. This is the main
screen.
• If the Filtration System light remains illuminated after startup, call Fillmaster Technical
Support at 800-884-5771 for assistance.

Script Scanner Installation (3600 Model Only)
Install the Digital Fillmaster dispenser before installing
the Script Scanner. No tools are required to install the
scanner. The scanner plugs into the port located on
the right side of the Digital Fillmaster.
1. Make sure the Digital Fillmaster has been
installed according to the instructions in
this manual.
2. Remove the tape backing at the base of
the Script Scanner.
3. Align the Script Scanner with the Fillmaster dispenser so that the scanner’s
window is visible when looking at the dispenser’s keypad.
4. Align the jack on the scanner with the hook-up port on the dispenser.
5. Gently plug the jack into the dispenser’s port. You will hear a click when it is
properly connected.
6. Press the START key to use.

PART 2
DIGITAL FILLMASTER MANUAL OPERATION

8
Digital Fillmaster Manual Operation
Once the Digital Fillmaster has been installed and startup has successfully been completed, the unit
is ready for day-to-day operation. Use the following steps to dispense water manually without the
use of the Script Scanner.
1. The display will read “Select Key Enter Amount”. Enter the desired amount of water
in milliliters. For amounts less than 100 ml, you must press ENTER to move to the
conrmation screen.
2. After entering water quantity, the display will read “SelectKeyConrmingxxxml”,
where xxx represents the amount entered in the previous screen. Press DISPENSE to
accept or CANCEL to clear.
3. The screen will show the progress of the ll. On lls over 30 ml, one half of the water
will be dispensed. The display will read “SelectKeyPauseforMixing” and the Digital
Fillmaster will pause to allow you to mix the medication.
4. Mix the medication and press DISPENSE to continue ll after mixing is completed.
5. When you have completed the ll, the display will read “FillCompleteDispensedxxx
ml”.
NOTE: If you do not hit DISPENSE to complete the second half of the ll within twenty seconds, the
Fillmaster will beep and go into sleep mode. When the machine is restarted, it will ask you to nish
the last ll. You may change the length of time the Fillmaster waits to enter sleep mode. Refer to the
Program Menus section for instructions.

Digital Fillmaster Operation with Script Scanner (3600 Model Only)
Use the Script Scanner to scan the medication’s barcode instead of manually entering the amount
of water needed.
1. To use the Script Scanner, press SCAN. Hold the bottle with the barcode facing the scanner’s
window. Once the label has been scanned, the screen will display the name of the drug, the
strength, bottle size, and quantity for reconstitution.
NOTE: If the drug is not in the database, the display will read, “Not Found. Add New Code?” Refer
to the Adding Prescriptions with Script Scanner section for help.
2. Press DISPENSE to accept or CANCEL to clear.
3. After pressing DISPENSE the screen will show the progress of the ll. On lls over 30 ml, one
half of the water will be dispensed. The display will read “SelectKeyPauseforMixing”, and the
Digital Fillmaster will pause to allow you to mix the medication.
4. Mix the medication and press DISPENSE to complete ll after mixing is completed.
5. When you have completed the ll, the display will read “FillCompleteDispensedxxxml”.
NOTE: If you do not hit DISPENSE to complete the second half of the ll within twenty seconds, the
Fillmaster will beep and go into sleep mode. When the machine is restarted, it will ask you to nish
the last ll. You may change the length of time the Fillmaster waits to enter sleep mode. Refer to the
Program Menus section for instructions.
Tips for Successful Scanning
• Hold the bottle approximately 6-9 inches from the scanner
• The NDC (National Drug Code) barcode should be held parallel to the window on the scanner.
• When scanning the barcode, move the bottle side to side in front of the scanner window. It may
be helpful to hold a blank piece of paper in front of the window to see where the red light from
the scanner is directed.
If you have any questions or concerns regarding your new system, our Customer Service
Department is available Monday-Friday 8am-6pm EST and after hours for emergencies.
Please call us at 800-884-5771.

Program Menus
Access the program menus by pressing the PROGRAM key on the keypad when you are at the “Select
Key Enter Amount” prompt. Each time you press the program key, you will advance to the next set of
program options
Press PROGRAM once and the display will read:
1. Reports
2. Software Rev
1. Reports – Press 1 to enter the Reports submenu. This displays the amount of the last fill and the
total number of fills to date. Press CANCEL to escape.
2. Software Rev – Press 2 to display the software revision number. You will need this information if
you contact Fillmaster Technical Support.
Press PROGRAM twice and the display will read:
1. Support
2. Serial Number
1. Support – Press 1 to display the phone number for Fillmaster technical support. Press CANCEL to
escape.
2. Serial Number – This submenu is now obsolete. Do not use.
Press PROGRAM three times and the display will read:
1. Purge
2. Power Supply
1. Purge – Press 1 to open the valve on your unit for approximately three seconds to purge the air
from the line. Place a container under the dispensing tip to catch water during the process.
2. Power Supply – Press 2 to display the battery’s power level. The battery’s remaining power supply
will be displayed on a gauge from empty to full.
Press PROGRAM four times and the display will read:
1. Calibrate
2. Clear B/C Mem
1. Calibrate – Press 1 to display the system’s water calibration setting. See calibration instructions in
Dispenser Care and Maintenance (page X) section of this manual.
2. Clear B/C Menu – Press 2 to clear ALL of the drugs that you have added to the database with the
Script Scanner. The unit will ask you to confirm three times before it clears the memory.
Press PROGRAM five times and the display will read:
1. Speaker
2. Mix Time Out
1. Speaker – Press 1 to turn the speaker on or off. The display will tell you the current setting. To
change, press ENTER, and the new setting will be displayed. Press ENTER to accept.
2. Mix Time Out – Press 2 to change the length of time the Fillmaster pauses to allow you to mix the
medication. The default setting is 20 seconds, and this can be increased to a maximum of 99 seconds.
Enter the new length of time and press ENTER to accept or CANCEL to escape.

Press PROGRAM six times and the display will read:
1. Defaults
2. Speed Key PRGM
1. Defaults – Press 1 to reset the Fillmaster to factory defaults. This includes: speaker volume ON,
clear last fill information, and mix timeout 20 seconds. Press ENTER to accept or CANCEL to escape.
2. Speed Key PRGM – Press 2 to program speed keys for your most frequently filled prescriptions. The
screen will read “Enter Key to Program (1-3)”. Enter which key you wish to program (1, 2, or 3). The
display will then prompt “Enter Water Amount (_)”. Enter the amount in milliliters you wish to
program, and press ENTER. The screen will confirm with “Key #N is xxx ml”.
Press PROGRAM seven times and the display will read:
1. Set Time
2. Repeat Fill
1. Set Time – Press 1 to set the time. Enter the current time and press ENTER.
2. Repeat Fill – Press 2 to turn the “Repeat Fill?” prompt on or off. When this prompt is on, the
Fillmaster will automatically display a prompt after each fill asking if you would like to repeat the
same fill.
Press PROGRAM eight times and the display will read:
1. Scan First
1. Scan First – Press 1 to turn the Scan First feature on or off. When the Scan First feature is on, the
scanner will turn on as soon as the dispenser is powered on so that you will not need to press the
SCAN button on the keyboard.

10
Adding Prescriptions Using Script Scanner Feature (3600 Model Only)
The Script Scanner feature allows the Fillmaster 3600 to “learn” new prescriptions. If you scan a
drug and it is not in the Script Scanner database, you can add it yourself.
1. The screen will read, “Not Found. Add New Code?” To continue, press ENTER.
2. The screen will read “NAME Scroll 1=UP 2=DN”. Press 1to scroll up through the list
of drug names and 2 to scroll down. When the name you want appears, press
ENTER. If the name you want is not found, use “CUSTOM 1” or “CUSTOM 2”.
3. Next the screen will read “STRENGTH Scroll 1=UP 2=DN”. Press 1 to scroll up
through the list of drug strengths and 2 to scroll down. When the strength you want
appears, press ENTER. If the strength you want is not found, use “N/A”.
4. Next the screen will read “BOTTLE SIZE Scroll 1=UP 2=DN”. Press 1to scroll up
through the list of bottle sizes and 2 to scroll down. When the bottle size you want
appears, press ENTER. If the bottle size you want is not found, use “N/A”.
5. Next the screen will read “Water Amt Enter Amount”. Use the keypad to enter the
amount of water suggested by the manufacturer on the prescription label. Press
ENTER to continue.
6. The display will show the information you have entered as it will be stored in the
memory. Be sure to look over the information carefully to prevent any errors. If the
information is correct, press ENTER.
a. If you do not wish to enter this information, press CANCEL, and you will be
taken back to “NAME Scroll 1=UP 2=DN” to re-enter the information.
b. To return to the main screen, press CANCEL again.
NOTE: You may add up to 10 prescriptions to the database. Refer to the instructions in the Program
Menus section of this guide to clear the custom barcode memory. When the battery is replaced, all
saved prescriptions will be automatically erased.

11
Using Speed Keys
To further increase efciency and ease of use of the Digital
Fillmaster, there are three speed keys that can be
programmed. These keys allow the user to quickly dispense
a preset amount. These keys should be used for the three
amounts most commonly dispensed. They can also make
lling larger orders for the same prescription much easier.
NOTE: Instructions for programming the speed keys can
be found in the Program Menus section of this manual.
1. Press the START key. The display will read “Select Key Enter Amount”. Press 0.
2. The display will now read “Enter Speed Key”. Enter the speed key number you wish
to use (1, 2, or 3).
3. The display will conrm the amount to be dispensed. To accept, press DISPENSE or
CANCEL to clear.

12
Battery Maintenance
Checking Battery Levels
Check the battery level regularly to ensure the dispenser has adequate power supply. If
contacting Fillmaster Technical Support, you may also be asked to check the
dispenser’s power level.
To check the remaining power supply:
1. Press the PROGRAM key three times.
2. Press 2 to select Power Supply.
3. The screen will display the battery level on a gauge between empty and full. If the
gauge shows that the battery is half-full or less, call Fillmaster Technical Support at
800-884-5771 to order a replacement.
Battery Replacement
Under normal conditions, the life of the Fillmaster battery is approximately nine months
to one year. When the battery supply is low, the System Power light will illuminate. Call
Technical Support at 800-884-5771 to order a replacement battery.
To install the new battery:
1. Power off the Digital Fillmaster and remove the top cover. Remove the old battery
by lifting it straight up and out. You may need to gently wiggle the battery from
side to side.
2. Align the battery connector with the connection slot on the top of dispenser and
press firmly straight down.
3. Dispose of the old battery following your state’s requirements for the disposal of D-
cell batteries.
4. After replacing the battery, check the dispenser’s calibration and re-calibrate if
needed. When this is complete, reset the system by pressing START.
Be aware of the important information printed on the front of the battery pack:
•Phone number to order a replacement battery
•Version number – refers to the database loaded on to the battery pack
•Date – refers to the date the battery was produced.
NOTE: If your dispenser is not functioning properly and the battery is older than nine
months, the battery will need to be replaced.
•A reminder to power off before replacing battery
NOTE: All prescriptions that you have manually added to the Script Scanner
database will automatically be erased when the battery is replaced.

Error Messages and Notifications
Your Digital Fillmaster dispenser continually monitors operating conditions and may display one of the
following messages during operation. For troubleshooting assistance, our Technical Support department
is available Monday-Friday 8am-6pm EST and after-hours for emergencies. Please call us at 800-884-
5771.
1. No Water Detected
The screen will read “No Water” if the dispenser detects an inaccurate dispense or no water in the
feed line. The service light on the front of the unit will also illuminate.
Possible fixes:
•Check the power level (Press PROGRAM three times and press 2 for Power Supply). If the
battery is at half or less, replace the battery.
•Remove the top cover and check the date printed on the battery label. If the battery is a
year old or older, replace the battery.
•Check that the valve on the line going to the dispenser, the valve on the tank, and the valve
on the cold-water line are all open.
2. Unfinished Fill
The screen will read “Unfinished Fill” if the dispenser detects an incomplete fill. On fills over 30 ml,
the Fillmaster will pause halfway through the fill process to allow you to mix the prescription before
continuing. The unit is preset to wait 20 seconds for you to dispense the second half of the fill. If you
do not dispense the second half within 20 seconds, the dispenser will enter sleep mode. When you
press START again, you will see this error message. Complete the unfinished fill by pressing
DISPENSE and the unit is ready for normal operation.
3. Low Power Supply
The System Power light will illuminate if the remaining battery supply is low. Call Fillmaster
Technical Support immediately at 800-884-5771 to order a new battery.
4. Scanner not Present
The screen will read “Scanner not Present” if you attempt to use the SCAN feature without a Script
Scanner installed.
5. Service Required
The Service Required light will illuminate if the Fillmaster detects incorrect function. If the battery is
half full or less, or at least a year old, replace the battery. Make sure that all of the valves are open.
Contact Technical Support for further assistance.

Troubleshooting
If you experience any of the following issues with your Fillmaster system, please take a
moment to complete the following quick troubleshooting steps. If you are unable to resolve
the issue, call Technical Support at 800-884-5771. A technical support agent will help you
complete further troubleshooting to diagnose and repair the issue.
Issue: Inaccurate dispense (Over-fill or under-fill)
•Calibrate the dispenser (Instructions on page X)
•Check the battery supply and the date printed on the battery. If the
battery is half-full or less, or at least a year old, order a new battery.
Issue: No water to the air gap faucet and dispenser
•Check that all of the valves are on and parallel to the tubing
•Check if there is water at the main sink. If there is not, you may need to
contact a plumber.
•Check the battery supply and the date printed on the battery. If the
battery is half-full or less, or at least a year old, order a new battery.
Issue: Water leaking from the small hole on the air gap faucet
1. Follow the cold-water line to the angle stop valve. Turn the water
supply off at the angle stop valve by turning the blue valve
perpendicular to the tubing.
2. Locate the red 3/8" tube that runs from the air gap faucet to the drain
pipe. Remove the tubing by pushing in the blue collect while pulling
the tubing out. Use a paper clip to clean out the clog inside the drain
pipe and 3/8” tubing while wearing gloves.
3. Using a skinny pen or paperclip, poke it through the blue collet into the
main drain pipe, if you are unable to poke into the drain the blue
collect may not be lined up with the drilled hole. Turn the black saddle,
poking gently with the pen until it matches up with the drilled hole.
Then push the red drain tube firmly into the collet.

How to Resolve a Leaking Tubing Connection
For any serious leaks, please call the technical support line for assistance. If you have a small leak in the
tubing or near a connection, the following steps can be taken.
1. Locate the shut-off valve that is between the cold water line and the the leak. Turn it to the off
or closed position (see image to right). The valve handle should be perpendicular to the tubing.
2. Remove the tubing or elbow by pushing the collet in, and at the same time, pull out the tubing
or elbow (see image below). The fitting will not release the tubing or elbow unless you are
holding the collet in.
NOTE: Using tools other than a collet separator or your hands can cause damage to the fittings. It is
recommended that these instructions should only be completed by hand.
3. Once the tubing is removed, verify the tubing is not damaged at the end where it inserts. Tubing
should have a clean straight cut and have a circular shape at the tip. A box cutter or tube cutter
can be used to make a fresh straight cut.
4. Reinsert the tubing firmly.
5. Turn the water back on and examine for leaks. If the leak is still present, repeat steps, making
sure the tubing is pushed all the way into the connection and there is enough slack on the
tubing so that the line is not stressed and tugging on the tube.
NOTE: If you are unable to stop the leak please call technical support 800-884-5771.
Replacing the Fillmaster 1000e, 3400, or 3600 Dispenser
NOTE: The first step in replacing your dispenser is to make sure the main water line that feeds the
system is turned off.
1. Once the main feed water has been shut off, turn off the tank valve under the sink or the shut
off valve next to the dispenser.
2. Purge the dispenser by pressing the Program button 3 times, then press #1, and then Enter. (Be
sure to have a cup under the spout to catch any water)
3. Disconnect the elbow from the old dispenser by pushing the white collet in while pulling the
tubing out.
4. Point the tube with elbow attached into the sink or a trash can. Turn the blue valve connected
to this tubing to the ON position and let the water run for 20 to 30 seconds. Turn the valve back
off and continue to the next step below.
5. Take out the 3 screws from old dispenser and remove the dispenser from the wall.
6. Put up the new dispenser using same 3 screws. Reconnect the elbow and tubing to the new
dispenser. Turn the valves from step 1 back on, then turn the main water back on, and begin to
purge the dispenser until you get a steady stream of water with no air.
7. Calibrate the new dispenser (instructions on page X).

Other manuals for 3400
1
This manual suits for next models
1
Table of contents
Other Fillmaster Systems Laboratory Equipment manuals
