FILTERMIST AX Series Instruction Manual

Installation and Maintenance
AX10 | AX20 | AX30

Mounting the unit
2
General information
A Filtermist AX unit is an oil mist collector that use centrifugal impaction to remove
or reclaim oil mist, coolant, fume and steam from manufacturing operations. This
manual describes how to install and maintain your Filtermist AX unit. Please read
all instructions before commencing any installation or maintenance work. Original
instructions are in English, all other languages are translations of this.
1.Isolation from any power supply shall either be visible (visible break in the power
supply circuits) or the isolation device is actuated to the off position and physically
locked off.
2. The unit must not be operated without the case fitted.
3. At least 120 seconds must be allowed for the inner drum to stop rotating
before the case is removed.
4.Oil leaks can be a hazard. The complete Filtermist AX system should be checked
regularly for possible oil leaks. Daily visual checks of both unit and extraction duct
are recommended.
5.Contact with oils, coolants etc. can cause skin diseases. Avoid contact with skin
and eyes and wear PVC, neoprene or nitrile gloves, safety glasses and overalls when
cleaning or working on the filter.
6. The unit is to be used on wet applications only, e.g. oil, emulsion, coolant.
7. The unit is not to be used on flammable, explosive, corrosive or dry applications,
e.g dust, smoke, acid.
8. The unit is intended for indoor use only.
Warning

Mounting the unit
3
Installation information
Always try to position the Filtermist unit as far as practically possible from the
cutting area of the machine so that mist is drawn away from the operator’s
working area.
Direct mount to machine tool - vertical
WARNING! Always ensure that the machine tool can support the weight
of the Filtermist unit (see the table on page 9).
Remove 4 x insert screws in
base of unit.
Fit 4 x case studs (supplied
with unit 8Nm).
Fit foam collar seal around
inlet spigot (supplied with
unit).
.
Cut extraction hole in
machine enclosure.
Drill 4 x case stud fixing
holes (see table on page 15
for hole size and case stud
hole PCD).
Cut hole for oil return tube
(if required).

Mounting the unit
4
Fit oil return tube and position tube to drain oil back
to machine enclosure, sump or collection vessel.
Position unit and secure.
IMPORTANT! There must be no kinks or ‘U’ bends in the return tube. The
end of the tube must not be submerged.

Electrical Connection
5
Standard Filtermist motors are wound for low & high voltage and operate on
50Hz & 60Hz as shown in the table below. A connection diagram can be found
inside the motor terminal box. The motors must be connected via a 3-phase,
direct-on-line starter and isolator with suitable thermal overloads or via an
independent supply in the machine control panel.
On start-up the motor will draw current in excess of that shown on the motor
plate. Ensure that appropriate fuses are used.
IMPORTANT! The internal drum of the unit must spin in the direction
indicated by the red arrow on the warning label and must run
continuously. To correct the rotation, swap any two supply wires. It
must not be wired to switch on and off with the machine cycle. The
Filtermist unit can only be started by using the control device provided
for that purpose. This also applies when restarting the machinery after a
stoppage.

Electrical Connection
6
Recommended Overload Setting and Terminal Connection. Overloads to be set no
higher than 125% of the motors full load current.
IMPORTANT! Please note that for 230/240v, 50Hz applications, special motors are
required. For more information, contact your supplier.

Electrical Connection
7
Isolator
The unit can be supplied with an isolator and
switch complete with motor protection overload if
requested. The overload starter must be selected to
suit different sized units or voltages and current
ratings (see table on page 10). Speak to your local
Filtermist distributor for more information.
If an isolator is not requested, the motors must be connected via a direct – online
starter and isolator with suitable thermal overloads or via an independent supply
from control panel with relevant protection. The Filtermist unit must be provided
with a clearly identified, readily accessible electrical isolation point providing all-
pole disconnection which has the facility for lock-off, and positioned between
0.60 and 1.7m above the working surface.

Electrical Connection
8
IMPORTANT! Ensure when connecting power to the unit that excess
electrical cable is NOT wrapped around the motor.

Installation Data
9
Further Installation Data

Maintenance Information
10
Every 1000 Hours Running Time (Use Filter Kit 4 - see
page 14)
Undo safety latch and clips. Separate top and bottom
of case.
Remove old seal.
IMPORTANT! Damaged
drums should be
replaced
Clean area where top and
bottom of case join &
clean drain hole.
Remove old drum pads,
clean inside of drum and
inspect drum for signs of
damage.
Fit new drum pads
Fit new seal Check inlet grille is clear Re-assemble unit.
IMPORTANT! Ensure
safety latch and clip
are securely fastened.

Maintenance Information
11
Every 2000 Hours Running Time (Use Spares Kit 5 -
see page 14)
Undo safety latch and clips. Separate top and bottom
of case.
Remove old seal.
Clean area where top and
bottom of case join &
clean drain hole.
Remove drum. Remove old drum pads.
Clean inside and outside of
drum
Fit new drum pads Remove motor mounting
nuts

Maintenance Information
12
Withdraw motor from
housing
Remove old motor mounts
and replace with new
mounts. Tighten mounts
to 8Nm
Remove old silencer and fit
new silencer
Refit motor
IMPORTANT! Fit new
motor mounting nuts &
tighten (5Nm AX10 or
8Nm AX20 and AX30).
IMPORTANT! Ensure
shaft and drum hub are
clean and free from
debris before re-fitting
the drum. Tighten taper
collar bolt to 8Nm.
Fit new seal Check inlet grille is clear
Re-assemble unit
IMPORTANT! Ensure
safety latch and clip are
securely fastened.

Maintenance Information
13
Clean the swarf arrestor
(where fitted)
Check oil return hose for
damage or blockage
IMPORTANT NOTE
In more arduous conditions e.g. grinding or cast iron machining; the units should
be checked and cleaned on a more frequent basis, according to duty.
Contact your FILTERMIST supplier for details of maintenance plans and spares kits.
IMPORTANT! – Use only genuine FILTERMIST spares – use of unauthorised spares
will invalidate the warranty.

Maintenance Information
14
3

Declaration of Conformity
15

Filtermist Limited
Telford 54 Business Park
Telford
Shropshire
TF3 3AL
England
Tel: +44 (0)1952 290500
Email: [email protected]
www.filtermist.com
www.filtermist.cn
20-218-10-089 March 2023 Rev 1
Other manuals for AX Series
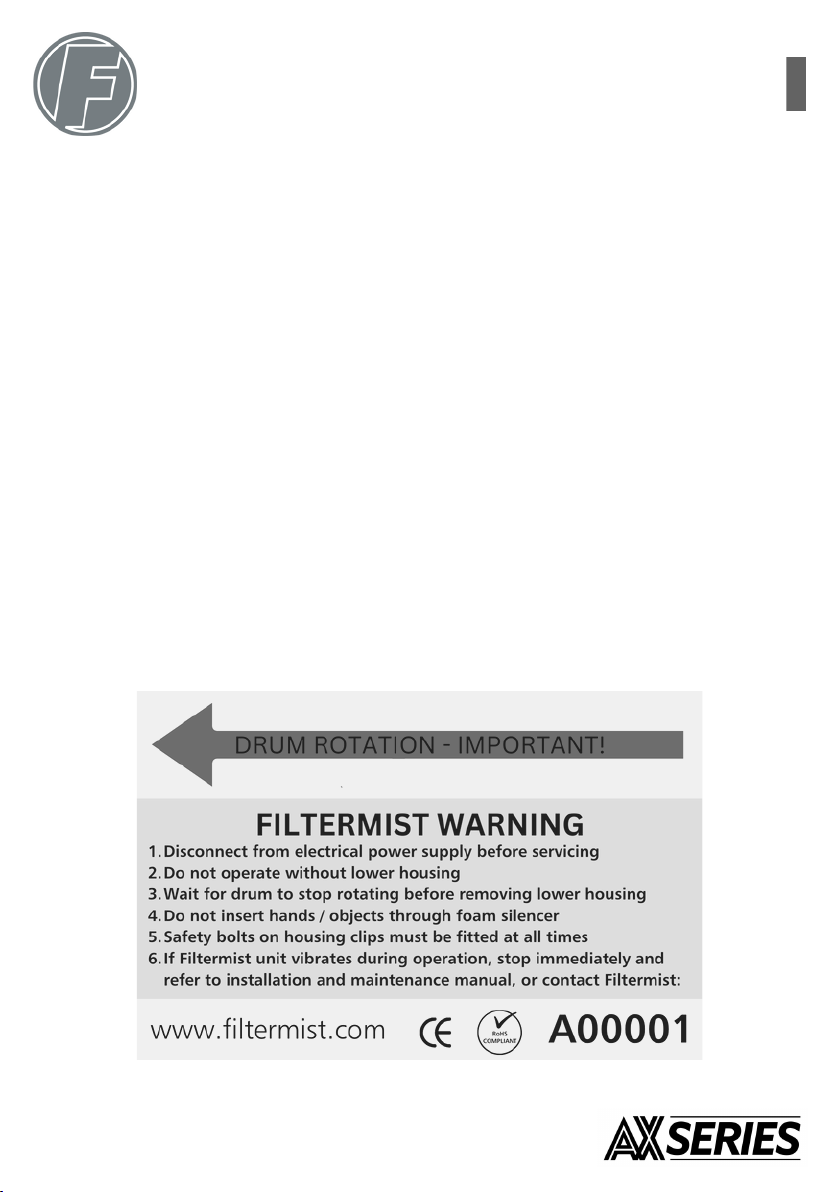
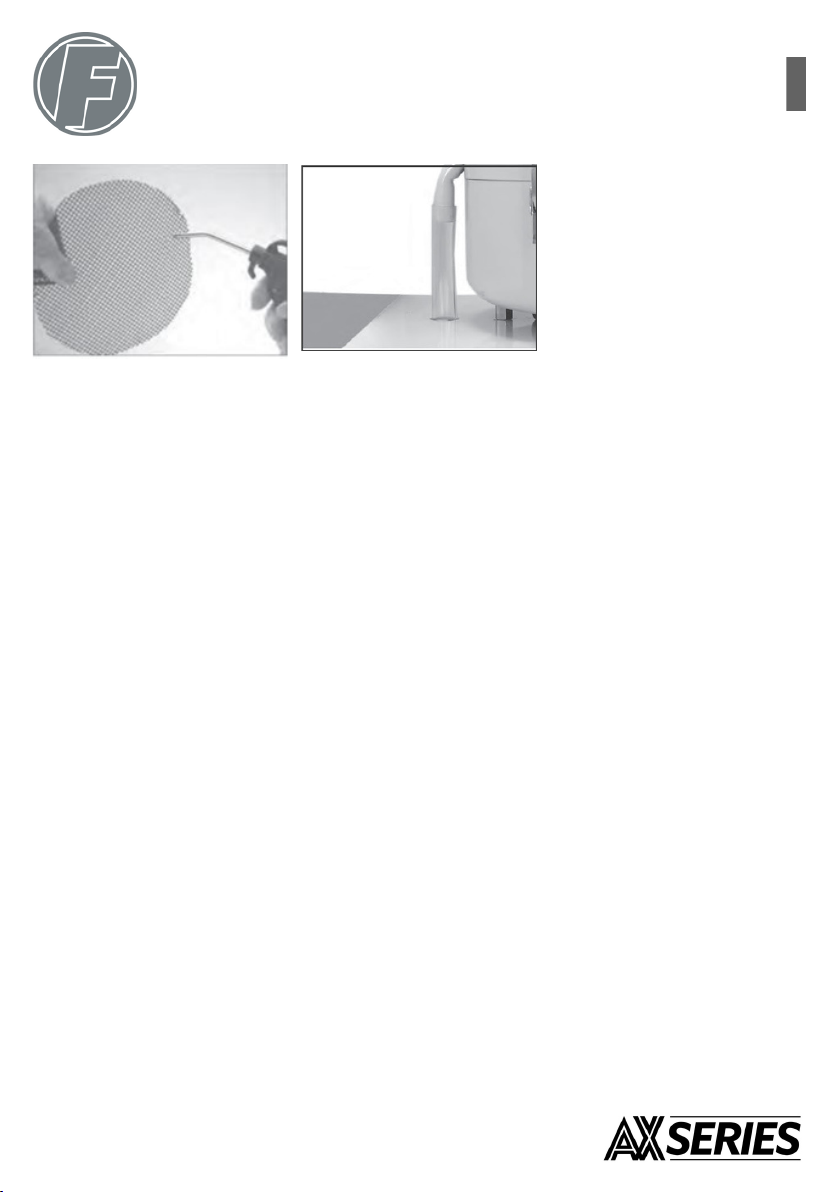
1
This manual suits for next models
3
Table of contents
Popular Industrial Equipment manuals by other brands

Chore-Time
Chore-Time 108 FLEX-AUGER installation instructions

Vestil
Vestil VST-4-Y Use and maintenance instructions

molex
molex FineAdjust APPLICATOR Operation manual

Eco
Eco SR30V installation guide

BGU
BGU HRZ Kombi Anbau user manual

RINGSPANN
RINGSPANN Brake HW 145 FHM Installation and operating instructions