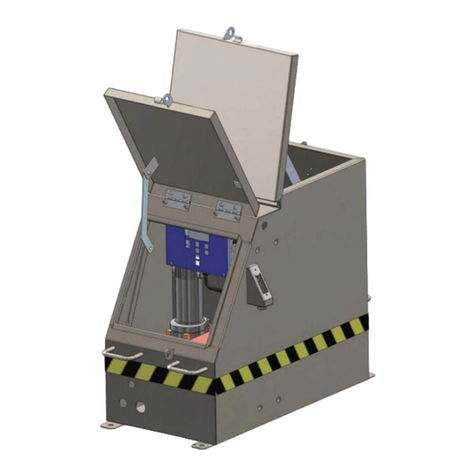
LB Foster PROTECTOR IV TOR Trackside User manual

www.lbfoster.com
TOP OF RAIL
PROTECTOR® IV TRACKSIDE
FRICTION MANAGEMENT SYSTEM
Installation,
Operation and
Maintenance Manual
for
TOP OF RAIL


For customer service contact the appropriate oce listed below:
United States:
415 Holiday Drive Pittsburgh, PA 15220 USA
Telephone: 412.928.3400 Facsimile: 412.920.3510
E-mail: FrictionMgmtSales@lbfoster.com
Canada:
172 Boul. Brunswick Pointe-Claire, Quebec H9R 5P9 Canada
Tél/Phone: + 1 514.695.8500 x236 Téléc/Fax: + 1 514.695.8110
E-mail: CanadaSales@lbfoster.com
Europe:
Stamford Street Sheeld S9 2TL United Kingdom
Telephone: +44-(0)114.256.2225 Facsimile: +44-(0)114.261.7826
E-mail: UKsales@lbfoster.com
PROTECTOR® IV TOR
200/25 Tank Layout
US Patent Number
D495,974

Thank you for purchasing the
PROTECTOR IV TOR Trackside
Friction Management System. The
PROTECTOR IV TOR system is part
of L.B. Foster’s family of friction
management products designed to
improve conditions at the wheel/
rail interface. We are condent in
our product’s ability to perform and
are committed to providing the
level of product quality, innovative
engineering and customer support
that you have come to expect from us.
The purpose of the PROTECTOR IV
TOR trackside friction management
system is to control friction to an
intermediate level on the railhead
in order to reduce rail wear and the
onset of corrugations, reduce wheel
WELCOME
noise and limit the initiation of rolling
contact fatigue (RCF) and gauge
corner cracking (GCC).This is achieved
by distributing a friction modier,
KELTRACK to the top of the railhead.
KELTRACK is a water-based, liquid
friction modier with ‘positive’friction
characteristics. It is applied directly
to the top of the rail and distributed
along the rail by the wheels. When
the water in the liquid solution
evaporates, a thin dry lm remains
that provides friction management
benets. KELTRACK establishes an
intermediate co-ecient of friction
(µ=0.35) and therefore has no
detrimental eect on braking or
traction.
PROTECTOR IV 800/100 Tank Layout

Section 1.1
SAFETY FIRST
There are no special hazards or potential risks regarding this equipment that
cannot be made safe by good working practice.
Lifting
Only unload units onto at and stable ground taking care to keeping the
tank upright. Use mechanical lifting equipment beneath the tank or chains
secured to the four lifting handles. The tanks are equipped with a single-point
lifting strap. Ensure that the tank doors are fastened and locked in place during
moving. Never lift a partially full or full tank using the handles.
NEVER VENTURE BENEATH A TANK BEING LIFTED.
Note: Tank handles are provided for a minimum of four people to manually
maneuver the tank with the hopper empty. Ensure the tank handles are not
used in any other circumstances.
Live Rail Working
None of the equipment is to be mounted on a conductor or power rail. It
is advised that power be isolated (o) for installation and removal. Only
appropriate insulated tools should be used.
AC Power Supply
Ensure AC power source is isolated before connecting line to the power
switch in the tank. Turn power switch to OFF before touching any electrical
connections or working in the tank.
Batteries
Ensure batteries are DISCONNECTED before touching electrical connections
or working in the tank. Do not cause shorting between the battery terminals.
For operator safety, the batteries are sealed with no free acid and classied as
‘non-spillable.’
SHORTING BATTERY TERMINALS WILL CAUSE SPARKS AND CAN
RESULT IN BURNS.
Digital Control Box
Ensure digital control box is switched OFF before working in tank.
INTRODUCTION

Section 1.2
INTRODUCTION
TOOLS REQUIRED
The PROTECTOR IV unit comes equipped with an Allen wrench tool (for
use on the pump mounting bolts). This tool is required for installation and
maintenance of the pump.
Along with the supplied tool, the PROTECTOR IV unit can be installed and
maintained with a minimum number of other tools. Ensure the following
list of tools are available during the installation process (tools for the metric
equivalents are in brackets):
1. Pick and ballast fork
2. Large and medium size adjustable wrench
3. Medium pipe wrench
4. ½” drive reversible ratchet
5. 1” open-end wrench for sensor cable wall connector
6. 10mm open-end wrench or socket for battery terminal
7. /” (15 mm) socket or open-end wrench to mount sensor to bracket
8. Slot and Phillips screwdrivers
9. Wire strippers and crimpers
10. Pliers or channel locks
11. For wiping bar and sensor bracket:
» 0 -250 ft.-lbs. (0-350 N-m) torque wrench
» 1 /” (30 mm) wrench or socket
» Hammer (minimum weight 3 lb. (1 kg))

Section 2.1
The following section is intended to provide a general overview of the
operation of the PROTECTOR IV with a brief description of key components.
Digital Control Box
The Digital Control Box (DCB) is the heart of PROTECTOR IV’s control system.
It provides excellent adjustability of the amount of friction modier that is
pumped from the tank to the bars. It also provides integrity checks for verifying
the electronic controls and motor(s) are working properly. The LCD screen at
the top of the box displays all of the information for the operator.
PROTECTOR IV Digital Control Box (DCB)
Pump
A double gear pump is coupled to the electric motor. The pump/motor
assembly distributes the friction modier to the rails.
Motor
The 12v DC electric motor receives power from the DCB to activate the pump.
Power Requirements
All PROTECTOR IVs are powered by a 12v deep-cycle battery. The unit is
congured with a solar panel but can also be powered by AC if ordered with an
AC/DC voltage convertor.
BASIC SYSTEMS AND COMPONENTS
A BATTERY IS AN EXPLOSION HAZARD BATTERIES CONTAIN
CORROSIVE MATERIALS AND PRESENT A SAFETY HAZARD.

Section 2.2
DC Powered Units
DC PROTECTOR IVs are powered using the provided solar panel. Supply
requirements are 12v DC nominal. Voltages in excess of 14.5v DC can cause
permanent damage to electronic controls. The solar panel charge controller
ensures the batteries are not over charged.
AC Powered Units
Units operating with AC power are equipped with an AC/DC converter
to produce DC power to maintain the battery condition. The power supply
requires 95-135v AC or 200-250v AC, 50-60Hz, single phase AC. Power is to be
supplied by the customer. The trickle charge to the battery is typically 13.8v DC.
Solar Panel
Every new PROTECTOR IV shipped with a solar package contains the following
basic components:
» Solar panel with Lexan Vandal
Guard and the voltage regulator
mounted inside the clean hands
section.
» Solar panel cable wired to the
panel at the factory.
» Solar panel pole kit (if ordered).
Typical Solar Panel Arrangement
BASIC SYSTEMS AND COMPONENTS

Section 2.3
BASIC SYSTEMS AND COMPONENTS
Smart Wheel Sensor
PROTECTOR IV assemblies are equipped with a bi-directional smart wheel
sensor as standard. This can be congured for one way operation if required.
The sensor detects the passage of each train and sends a signal to the DCB.
The sensor primarily consists of a small but very strong magnet connected to
the control circuitry. When a metal object, such as a wheel, enters the sensor’s
magnetic eld a signal is generated and is sent through the control circuit. The
magnet itself is encased within the body of the sensor block, surrounded by a
protective plastic casing.
There is a short length of
cable attached to the sensor
with a pigtail connection. This
mates to a length of cable
feeding directly to the DCB.
The wheel sensor is delivered
with a bracket designed for
mounting to the rail, and
shims to adjust the sensor
height.
Tank
The tank is designed with two separate sections; the materials section that
contains the friction modier and the components section. The tank body
should be secured to a base to ensure its stability and for drainage. Typically,
tanks are mounted to wooden ties or sleepers or a concrete pad.
Distribution Hoses
The distribution hoses are used to distribute the friction modier from the
tank to the rails. The hoses can be installed once the tank and the distribution
bars are in place on the rails.
Bars
The bars are designed to distribute KELTRACK to the top of the rail. When
applied properly the material distributed to the top of rail will dry and leave
behind a ne lm on the track. This will extend the rail and wheel life, reduce
noise, improve tracking through curves and oer a means to control wear at
specic sections of track.
Smart Wheel Sensor
with Fully Fitted Sensor Bracket

Section 3.1
Proper site selection for the PROTECTOR IV is one of the most important
considerationsassociatedwithachievingeectivefrictionmanagementmaterial
distribution. When selecting a site for installation, optimal performance of the
unit depends upon attaining as many of the following general considerations
as possible:
INSTALLATION AND MAINTENANCE OF THE PROTECTOR IV SYSTEM
REQUIRES PERSONNEL TO BE ON-TRACK, INCLUDING BETWEEN THE
RAILS. PRECAUTIONS MUST BE TAKEN TO ENSURE THAT THERE WILL
BE NO TRAFFIC WHILE DOING THIS WORK.
1. It should be positioned on level stable ballast. The base can be made from
either cut wooden sleepers (supplied if required) or a concrete pad. Embed
the base in the ballast and ax the cabinet to the base, lag screws are
provided for a timber base.
2. Locate the unit as close to the curve in the track as possible. Avoid locating
the unit inside a curve. This is particularly important if noise reduction is
the primary goal.
IT IS NOT RECOMMENDED TO INSTALL A UNIT IN A CURVE, AS IT MAY
AFFECT TRACK OPERATIONS.
DO NOT INSTALLTOR BARS CLOSERTHAN 60 ft. (60.5 m)TO AN INSULATED
JOINT. THIS WILL MINIMIZE ANY POTENTIAL FRICTION MODIFIER BUILD-
UP AT THE JOINT WHICH COULD AFFECT SIGNALING.
3. In areas with multiple curves, select a site in a short tangent section of track
between curves. At this location the friction modier material is carried in
both directions and into adjacent curves.
4. Select a site where there is no pronounced railhead wear and railhead is
in excellent condition. If transposed or relay rail with material ow on the
eld side is present, the ow should be ground o at the unit site, before
attempting to install the wiping bars.
5. Select a site where the tie conditions are good and install the unit as close
to zero grade as possible. Installing the unit in a location where the tank
outlet is lower than the track will reduce eciency.
6. Select a site that provides access to the unit for regular maintenance and
relling.
SITE SELECTION

Section 3.2
SITE SELECTION
7. Install the tank far enough from the track to safely clear the operation
of ballast regulators, snow plows, and other track equipment, but close
enough to allow the supply hose to be shortened for maximum eciency.
8. Select a site where power source can be easily routed to the unit. Be sure
the length and size of the power cable does not cause an unacceptable
line loss. In remote locations with no AC power availability, the solar panel
option is recommended.
Note: Outside AC electrical currents from overhead power wires, third rail power
or signal system power sources can interfere with the wheel sensor detection
capabilities.
9. Avoid selecting a site where trains routinely slow down or come to a
complete stop.
10. Site selection should be in an area which will discourage acts of vandalism.
11. The friction modier works best where both the rails and wheels are clean.

Section 4.1
Solar Panel Location and Installation
As you consider solar panel mounting options, be sure that the nal
conguration positions the panel to a Southern exposure in the Northern
Hemisphere and Northern exposure in the Southern Hemisphere. This will
ensure the most consistent exposure to sunlight through the course of a day.
The panel should be unobstructed, so that it receives direct sunlight during
daylight hours all year long.
The standard units are DC powered and charged by a solar panel. This
supplies power to either one or two 12v batteries depending on the number of
pumps. Brackets can be supplied so the solar panel can be mounted to a pole
attached to the tank, or a pole can be
supplied that will allow the panel to
be erected away from the tank if this
will provide better sunlight.
Solar Panel
Solar Panel Mounted to Tank Solar Panel Mounted Away from Tank
ELECTRICAL POWER SOLAR PANEL

Section 4.2
ELECTRICAL POWER SOLAR PANEL
Solar Panel Adjustment – NORTH AMERICA
The pivot arrangement included with the solar panel’s mounting bracket
provides an adjustment for the angle of the panel. To gain maximum eciency
and output from the solar panel; the tilt angle is based upon the latitude of the
location. Panels should always face south (see below).
Using the table below you can determine the optimal angle for your solar
panel. The panel tilt is the latitude +10º. This will optimize the panel’s ability to
collect the sun’s energy. Use the angle gauge on the mounting bracket to set
the desired angle (see picture on next page) or alternatively, use the distance
from the pole to the base of the panel, also included in this table.
Optimum Angle for Sunlight
Site Tilt Base
Latitude
(degrees)
Angle
(degrees)
Distance
(inches)
Distance
(millimeters)
35 45 17 ¾ 451
36 46 17 ½ 444
37 47 17 / 437
38 48 16 / 430
39 49 16 / 423
40 50 16 / 416
41 51 16 / 409
42 52 15 / 402
43 53 15 / 395
44 54 15 ¼ 388
45 55 15 381
Solar Panel Outline

Section 4.3
Solar Panel – Tank Mounted Assembly Instruction
1. Before beginning the assembly ensure the side of the tank hangs over the
tie.
2. Assemble the pole into one piece and mount the solar panel to the pole.
Use four bolts to help position the pole’s clamp blocks to the tank. These
bolts must be /" -16 NC x 1-¼" threads and be approximately 10” long.
3. Using the studs, position two of the clamp block halves at their mounting
locations top and bottom. Screw the four studs into the tapped holes in the
tank body to properly locate the clamp blocks and help hold their position
during this assembly.
4. Raise the assembled pole and solar panel into the vertical position against
the tank and into the clamp block halves.
5. Turn the solar panel so that it is facing south.
6. Position the second pair of clamp block halves, sliding them over the studs
and against the back halves. Remove one stud at a time, replacing them
with the provided Allen head bolts and lock washers. The solar panel pole
kit includes an Allen wrench for tightening these four bolts.
Solar Panel – Away from Tank Assembly Instruction
Locate the panel so that the supplied cable (35 ft. / 10.7 meter long) will reach
the tank. Do not use a longer cable than the one supplied, as longer lengths will
result in a voltage drop which may not allow the system to operate properly. If
longer lengths are necessary, please contact us.
ELECTRICAL POWER SOLAR PANEL

Section 4.4
ELECTRICAL POWER SOLAR PANEL
Gauge on the Solar Panel Mounting Bracket used to Adjust the Angle
Solar Panel Wiring
EXERCISE EXTREME CARE WHEN HANDLING THE SOLAR PANEL AND
WORKING WITH SOLAR PANEL WIRING. FAILURE TO DO SO MAY
RESULT IN EQUIPMENT DAMAGE OR BODILY INJURY.
The 35 ft. (10.7 meter) long power cable is factory installed to the solar
panel at the junction box with spade terminals. The wall connector nut of the
junction box is tightened securely, causing the bushing to grip the cable rmly,
so a liquid tight seal is formed. Secure the cable to the panel-mounting pole as
required.
Electrical Connections
Connect the solar panel to the PROTECTOR IV battery as follows:
1. Remove any cover you have placed over the panel and peel away the
protective panel guard protection.
2. Perform the following tests before beginning installation:
a) Using a voltmeter capable of reading 25v DC, check the panel output
between the battery (+) and (-) in the junction box or at the end of
the cable. If the panel output exceeds 15v DC, check regulator wiring
for proper connections, as shown in troubleshooting. Replace the
regulator if defective.
b) Check the battery’s voltage. If the voltage is below 11.5v DC, the
PROTECTOR IV will not function properly and the battery will need to
be charged.

Section 4.5
ELECTRICAL POWER SOLAR PANEL
Solar Charge Controller
Solar panel charge controller in use on the PROTECTOR IV, which is located
inside the clean hands section of the tank.
The wires should be attached as follows:
PV+ Positive lead from solar panel
BAT+ Positive lead from battery
Vset Not used
COM- Negative lead from battery or solar panel
COM- Negative lead from battery or solar panel
Photovoltaic Charge Controller
Note: Charge battery through solar panel output until battery voltage
exceeds 12v DC.
BEFORE PROCEEDING, MAKE SURE THE SOLAR PANEL IS
COVERED TO ELIMINATE ELECTRICAL POTENTIAL AND TO AVOID
SHOCK HAZARD DURING THE NEXT PHASE OF ASSEMBLY.
3. Attach ring terminals to the solar panel cable wires, connecting the red
wire to the positive battery terminal and the black wire to the negative
battery terminal.
ENSURE RED WIRE IS CONNECTED TO THE POSITIVE (+) AND BLACK
WIRE IS CONNECTED TO THE NEGATIVE (-) TERMINAL OF THE BATTERY.
CROSSED WIRES WILL CAUSE EQUIPMENT DAMAGE.

Section 4.6
ELECTRICAL POWER AC POWER
AC Electrical Power and Battery Charger Connections
1. Remove the bolts on the battery terminals using a 10mm socket or wrench.
Look at battery and charger safety precautions. Be careful not to short the
battery terminals with a tool.
2. Through the terminal bolt, connect the ring terminals of red wire from the
charger and from the control box power harness to the positive battery
terminal (+) and in the same manner connect the black wires to the
negative battery terminal (-).
3. A qualied electrician must wire the units through the junction box and onto
the on/o disconnect box according to local regulations.
ALL WIRING MUST COMPLY WITH LOCAL AND NATIONAL
ELECTRICAL CODES. USE ONLY THE WIRE SIZES SPECIFIED IN THE
INSTALLATION INSTRUCTIONS. WE RECOMMEND HAVING THE
INSTALLATION WIRED BY A CERTIFIED ELECTRICIAN.
ENSURE POWER SUPPLY CABLE GAUGE IS PROPERLY SIZED TO
ALLOW FOR REQUIRED POWER LEVELS GIVEN THE DISTANCE FROM
THE ORIGINAL SOURCE.

Section 5.1
Conguration at Track
Top of rail distribution bars should be installed in a position that agrees with
the site selection criteria mentioned previously in this manual. The common
conguration at track for PROTECTOR IV units is on both rails of a single track
with uni-directional trac. The set up described here is shown below.
The top of rail wiping bars assembly can be installed in a four bar
conguration, as shown above.This provides required friction modier for areas
with continuous curvature, high trac and other factors requiring a maximum
of friction modier. The installation time required depends on the installer’s
familiarity with components and labor available to complete the task.
Other Congurations
» Two bars with single pump with distribution in center.
» Two bars with double pump and supply hoses routed from tank to bars.
4-Bar Conguration
A PASSING TRAIN CAN DAMAGE IMPROPERLY INSTALLED COMPONENTS.
ALLOW SUFFICIENT TRACK TIME TO FULLY COMPLETE INSTALLATION.
TOR INSTALLATION

Section 5.2
Install the MC-4TR® wiping bars as follows:
1. Ensure selected tank location is such that the friction modier supply
hose(s) can be routed from tank and where rail is in good condition.
2. To conrm clamp locations mate with existing cribs, lay out wiping bars on
eld-side of rail.
3. Ensure bars mounted on the same rail are located at a distance of 56 ½”
(143 cm) between centers.
Note: Based on a 36” (91 cm) wheel diameter, the 56 ½” (143 cm) spacing allows
bars to distribute material uniformly over opposing sections of each wheel's
circumference. If track conditions do not permit a 56 ½” (143 cm) distance to
be respected, install bars closer together but maintain at least one bar length
in between.
4. Ensure inlet elbows clear rail hardware. On smaller rail sizes, it is best to
attach the wiping bar supply hose (and adapter where necessary) before
assembling to rail. The piping adapter is used to gain additional clearance
with track hardware.
5. Loosely assemble wiping bars to mounting clamps.
6. Clean dirt and scale from rail in appropriate areas.
7. With a pick and ballast fork, remove ballast from selected cribs for
installation of rail clamps.
8. Lay wiping bar assemblies adjacent to selected mounting locations.
9. Ensure mounting clamps are square to rail and fasten them to the base of
rail. As the “J” bolt nuts are being tightened using a hammer, occasionally
tap clamp blocks driving the “V” slot on to the rail base. Torque mounting
bolts to approximately 200-250 ft-lbs (340 N-m).
10. When clamps are secured tighten the safety nuts.
11. Position wiping bar assemblies on top of rail clamp blocks and against rail.
12. Adjust the wiping bar height as follows:
a) Mount the TOR bar such that the tip of the seal is not higher than the top
of the railhead (shown in the "MC-4TR Wiping Bar Installation" gure). A
simple level can be used to help establish this position.
TOR INSTALLATION

Section 5.3
MC-4TR Wiping Bar Installation
DO NOT STORE EXTRA SPACERS UNDER THE HEAD OF MOUNTING BOLTS.
b) Remove or add spacers between TOR clamps and wiping bar mounting
feet.
c) Adjust blade height until the inner (thin) blade is just at top of the side of
railhead. Store excess spacers in clean hands section of the tank.
Note: With newer rail, or where the radius has been ground on the top of the
railhead, the curvature of the railhead allows the end of the seal to be located
onto the railhead and still be below the TOR.
This helps the ow of friction modier from the bar to the contact patch
without risk of damage to keep the seal below top of rail, the required lower bar
mounting draws the seal end away from the contact patch.
13. Secure the mounting bolts to the clamp blocks tightening the right bolt
rst to ensure the top of rail wiping bars is pushed securely against the rail.
14. Occasionally tap the outside edge of the mounting foot with a hammer
during tightening to insure TOR wiping bars remain tight to the rail.
15. Torque mounting bolts to approximately 200-250 ft-lbs (340 N-m).
ML Top of Rail Wiping Bars
The installation of ML TOR distribution bars should be carried out using the
same instructions as the MC-4TR TOR distribution bars. The drawing below
illustrates how the installed bar should be assembled.
TOR INSTALLATION
Table of contents
Other LB Foster Industrial Equipment manuals
Popular Industrial Equipment manuals by other brands
Bosch
Bosch Rexroth HQ 2/C-H Assembly instructions
Rodix
Rodix FEEDER CUBE FC-40 Plus Series Adjustments and Set Up

Siemens
Siemens MFI Technical manual

Stepp
Stepp SRM Operation, maintenance and parts manual

Palazzetti
Palazzetti TERMOPALEX HWT Use and maintenance manual

CommScope
CommScope 864 FDH RESKIN KIT installation instructions
