Page 3
Testing the Sprayer
NOTE: It is VERY important for to test your sprayer with plain water
before actual spraying is attempted. This will enable you to check for
leaks without the possibility of losing any expensive chemicals.
Fill the tank about 1/2 full with plain water. When you are ready to
spray, turn the boom valve to the “on” position. This will start solution
spraying from the tips of the boom. The pressure will decrease
slightly when the boom is spraying. Adjust the pressure by turning
the “ON/OFF” valve lever on the bypass line valve.
Read the operating instructions and initially begin spraying by closing
the ‘bypass’ valve and opening the boom line valve. This will enable
the air in the line to be eliminated (purged) through all the tips, while
building pressure. When everything tests all right (no leaks and good
pressure), add the desired chemicals to the mixture and water
combination and start your spraying operation. Adjust the pressure
and spray as you did in the testing procedure.
Conditions of weather and terrain must be considered when setting
the sprayer. Do not spray on windy days. Protective clothing must be
worn in some cases
Be sure to read the chemical label(s) before application!
Calibration
Chemical labels may show application rates in gallons per acre,
gallons per 1000 square feet or gallons per 100 square feet. You will
note that the tip chart shows all 3 of these rating systems.
Once you know how much you are going to spray, then determine
(from the tip chart) the spraying pressure (PSI), and the spraying
speed (MPH).
Determining the proper speed of the pulling vehicle can be done by
marking off 100, 200 & 300 feet. The speed chart indicates the
number of seconds it takes to travel the distances. Set the throttle
and with a running start, travel the distances. Adjust the throttle until
you travel the distances in the number of seconds indicated by the
speed chart. Once you have reached the throttle setting needed,
mark the throttle location so you can stop and go again, returning to
the same speed.
Add water and proper amount of chemical to the tank and drive to the
starting place for spraying.
Using the Boom Nozzles
Four things must be considered before spraying with the boom.
How much chemical must be mixed in the tank.
Rate of spray (gallons per acre to be sprayed).
What pressure (p.s.i.) will be used.
Speed traveled (mph) while spraying.
Refer to the chemical label to determine your chemical mixture
See the tip chart to determine the pressure to be used. The chart
will also show the speed used when spraying.
Operation
Always fill the tank 1/2 full with water first and then add the chemical
slowly, mixing as you pour the chemical into the tank and then fill the
rest of the way. You may use the bypass in order to mix the chemical
and water.
Activate the handgun by squeezing the handle lever
Rotating the adjustable nozzle tip on the handgun will change
the tip pattern from a straight stream to a cone pattern (fine mist)
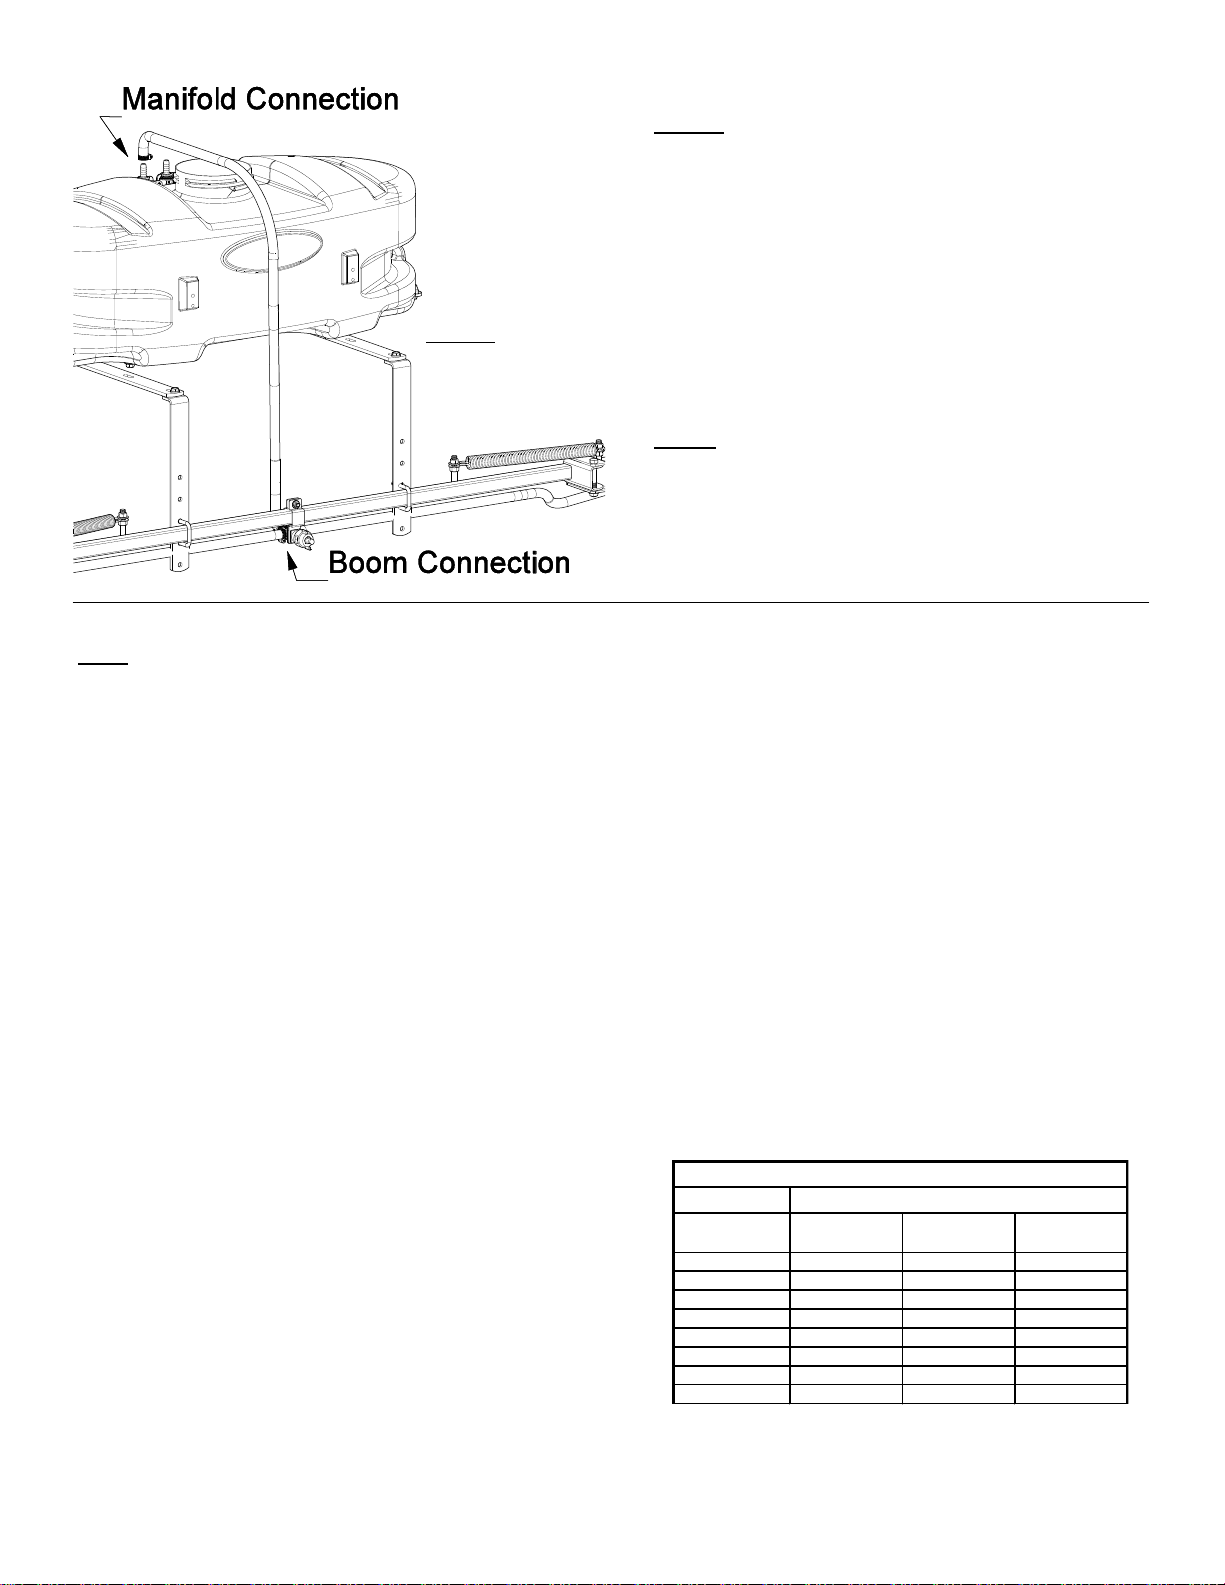
Step 5
Aer your boom is aached to the boom mount brackets,
locate the 48” hose and the (2) hose clamps.
Place the hose clamps over each end of the hose loosely.
Route the hose under or over the unit to the back end of
the sprayer. Slip the ends of the hose over the hose barb on
the manifold and the ‘CROSS’ ng on the nozzle harness.
Use a twisng moon, if necessary, to get the hose fully
onto each barb. Bring the hose clamps to the connecon
points and ghten securely.
NOTE:
Make sure this boom feeder hose does not end up on
the ‘outside’ of the spray wand hose (if applicable),
otherwise unwrapping the spray wand hose from
around the tank may be difficult.
Step 5
Speed in M.P.H.
(Miles Per Hour)
Time Required in seconds to travel a distance of