Fisher Bioblock Scientific Wheaton Biostir User manual


2004 Wheaton Science Products 2 P/N 50083244
Specifications subject to change without prior notice
WARRANTY
Wheaton Science Products warrants this product to be free from defects in
material and workmanship for a period of two (2) years from the date of
shipment. Belts in the four place Biostirand Micro-Stirare warranted for one
(1) year from the date of shipment. If repair or adjustment is necessary within the
warranty period and has not been the result of mishandling or abuse, the unit
may be returned prepaid, provided that return authorization has been obtained.
Wheaton Science Products will correct the defect or adjust the unit at no charge.
Items returned for repair or adjustment should be packed very carefully to
prevent damage and should also be insured against carrier damage. Should the
unit arrive damaged as a result of transit, a claim will need to be made against
the carrier. The shipping carton should not be discarded but retained until
inspection by a representative of the carrier is made.
Wheaton Science Products will repair or adjust out of warranty products at a
nominal charge.

2004 Wheaton Science Products 3 P/N 50083244
Specifications subject to change without prior notice
GENERAL SAFETY INSTRUCTIONS
NOTE: EVEN THE SAFEST EQUIPMENT CAN CAUSE INJURY IF THE USER IS CARELESS.
1. KNOW YOUR INSTRUMENT - Read the operating manual carefully. Learn the equipment's
application and limitations.
2. GROUND ALL EQUIPMENT - If electrical, this instrument is equipped with a grounding type
plug. The green/yellow conductor in the cord is the grounding wire and should never be
connected to a live terminal.
3. AVOID DANGEROUS ENVIRONMENT - Electrical instruments designed to process liquids
must be operated with extreme caution. If liquid comes in contact with internal electrical
components or wires, fire or electrical shock may occur. Adequate surrounding work space
should be provided during use. Do not operate electrical instrumentation in a combustible
atmosphere.
4. WORK SURFACE - Keep well lighted. Be certain the work surface is clean, level and sturdy
enough to support the weight of the unit, particularly if it is to be filled with liquid.
5. WEAR PROPER APPAREL - Do not wear loose clothing, neckties or jewelry that might get
caught in moving parts. Non-slip footwear is recommended. Wear protective hair covering to
contain long hair.
6. WEAR SAFETY GOGGLES - Wear safety goggles at all times. Everyday eyeglasses only
have impact resistant lenses, they are NOT safety glasses.
7. DON'T OVERREACH - Keep proper footing and balance at all times.
8. MAINTAIN INSTRUMENT WITH CARE - Keep screws tight and unit clean. Check periodically
for worn or damaged parts. Inspect the plug and cord before each use. Do not operate this
instrument if there are signs of damage.
9. AVOID ACCIDENTAL START UP - If electrical, always make sure the switch is in the "OFF"
position before plugging instrument into outlet.
10. DISCONNECT INSTRUMENT - Always disconnect the instrument from the power source
before servicing.
11. DO NOT BLOCK COOLING VENTS IF PROVIDED
12. DO NOT OPERATE THIS EQUIPMENT IN ANY MANNER NOT SPECIFIED IN THIS
MANUAL
13. KEEP THE OPERATING MANUAL FOR THE INSTRUMENT IN A SAFE PLACE NEAR
THE INSTRUMENT FOR QUICK AND EASY REFERENCE.
14. IT IS RECOMMENDED THAT A FIRE EXTINGUISHER ALWAYS BE LOCATED IN AREAS
WHERE ELECTRICAL INSTRUMENTS ARE BEING USED.
WSP-305
2004 Wheaton Science Products 4 P/N 50083244
Specifications subject to change without prior notice
SAFETY SYMBOLS USED IN THIS MANUAL
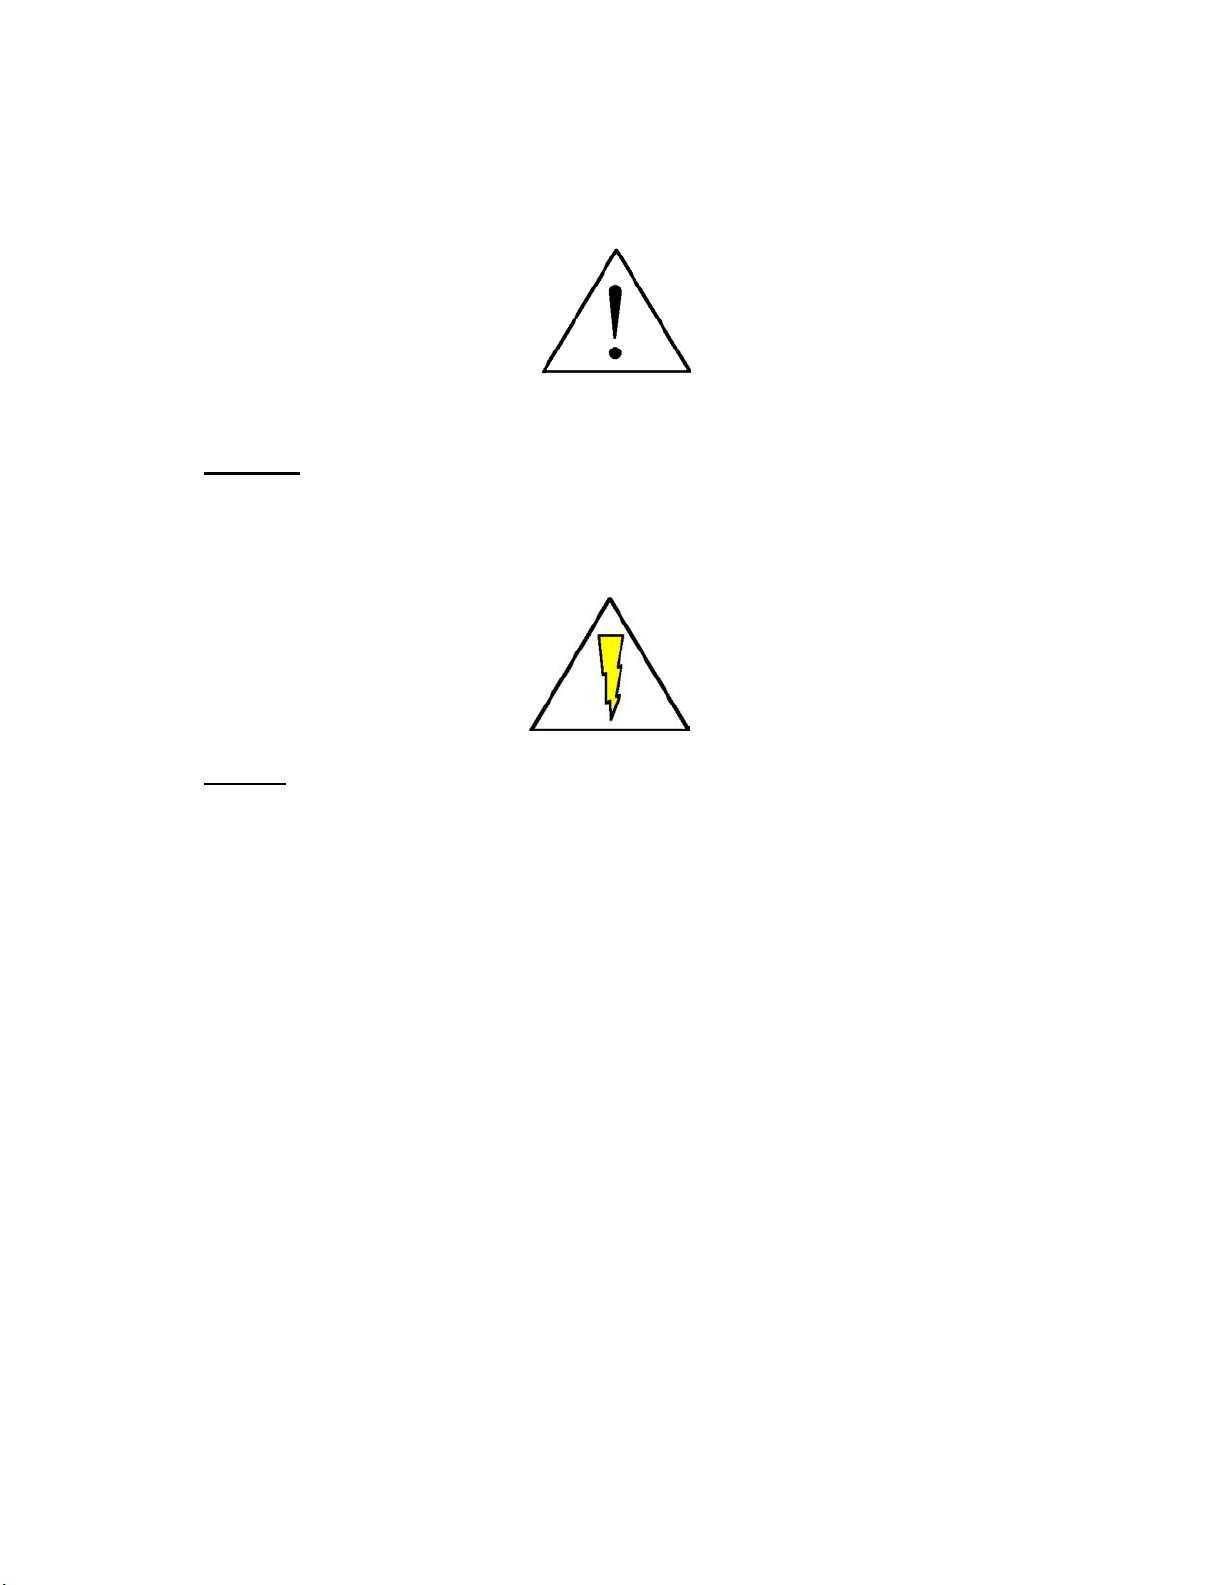
A Warning symbol indicates attention to an operation, which can cause
operator injury, improper function of or damage to the equipment and
possible problems with the process.
A Danger symbol indicates attention to an operation, which could cause
electrocution or severe injury or death.

2004 Wheaton Science Products 5 P/N 50083244
Specifications subject to change without prior notice
TABLE OF CONTENTS
Biostir®
1.0 SPECIFICATIONS
2.0 INTRODUCTION
3.0 SAFETY CONSIDERATIONS
4.0 MAJOR COMPONENT IDENTIFICATION
5.0 INITIAL INSPECTION
5.1 INSTALLATION
5.2 INPUT POWER REQUIREMENTS
5.3 POWER CORD SET
6.0 UNIT SETUP AND OPERATION
6.1 KEYPAD AND DISPLAY
6.2 VESSEL PLACEMENT
6.3 BASIC CONSTANT SPEED STIRRING
6.4 CYCLE STIRRING
6.5 TWO SPEED STIRRING
6.6 COMBINATION CYCLE AND TWO SPEED STIRRING
6.7 STIRRER STATE IN CASE OF POWER INTERRUPTION
7.0 DRY CONTACT RELAY FUNCTIONS
8.0 REMOTE CONTROL OPERATION
9.0 MAINTENANCE AND TROUBLESHOOTING
9.1 GUIDELINES ON SURFACE CLEANING
9.2 FOUR PLACE BELT REPLACEMENT AND TENSIONING
9.3 MOTOR REPLACEMENT
9.4 DISPLAY BOARD REPLACEMENT
9.5 TROUBLESHOOTING
9.6 FUSE REPLACEMENT
BIOSTIR- PARTS LISTS AND ILLUSTRATIONS
FIG A LINE CORD AND FUSE - REMOVAL AND INSTALLATION
FIG B MAIN UNIT ASSEMBLY SINGLE PLACE
FIG C MAIN UNIT ASSEMBLY FOUR PLACE
FIG D MAIN UNIT WIRING DIAGRAM
FIG E REMOTE UNIT ASSEMBLY

2004 Wheaton Science Products 6 P/N 50083244
Specifications subject to change without prior notice
1.0 SPECIFICATIONS – BIOSTIR
OPERATING VOLTAGE: 200-240 VAC 50/60 Hz
POWER CONSUMPTION: 15 Watts
FUSES: (2) 5 X 20mm 1.25AT 250V
POLLUTION DEGREE: Class 2
ENVIRONMENTAL:
Operating temperature: 15 °C to 40 °C
Humidity: 80% up to 31°C.
50% at 40°C.
Altitude limit 2000 meters
OVERALL DIMENSIONS:
Single Place: 3.6” H x 8.0” W x 9.8” D
9.2 H x 20.3 W x 24.9 D cm
Four Place: 4.0” H x 15.5” W x 17.5” D
10.2 H x 39.4 W x 44.5 D cm
WEIGHT:
Single Place: 4.5 lbs. (1.9kg)
Four Place: 10 lbs. (4.5kg)
OPERATING SPEED: 150-1200 RPM
OPERATING TORQUE: 3ozin.
CYCLE TIME RANGE: 1-1079 minutes, 1 min.
resolution
NUMBER OF CYCLES: 32
DRY CONTACT RELAY: Normally Closed, Open on
alarm. 250V @1/8 amps.
REMOTE CONTROL: Full Duplex RS485 proprietary
protocol. Optional Remote
Control Available.
USB v2.0 compliant

2004 Wheaton Science Products 7 P/N 50083244
Specifications subject to change without prior notice
2.0 INTRODUCTION
The latest line of Wheaton Biostirmagnetic stirrers answers the call to many
modern laboratory needs. Features include wide speed ranges, increased
torque, easy user interface, and remote control options allow the Biostirto cover
a wide range of applications. A new addition of interval and two speed stirring
modes adds to the versatility of the unit.
All Biostirunits feature slow stirring speeds. Because of its slow speed range
and gentle start / stop features, the Biostiris particularly well suited for tissue
culture applications where microcarriers are in use.
The Biostirutilizes a brushless motor and powerful magnet for increased
efficiency and positive magnetic coupling over the entire speed range. Reduced
power consumption through the use of microprocessor based electronics helps
eliminate heat transfer to the medium being stirred. The unit is housed in an
enamel finished aluminum cabinet, which is both durable and stain resistant.
3.0 SAFETY CONSIDERATIONS
WARNING ! IMPROPER GROUNDING CAN RESULT IN ELECTRICAL SHOCK. IN THE
EVENT OF A SHORT CIRCUIT, GROUNDING REDUCES THE RISK OF SHOCK. THIS
INSTRUMENT MUST BE GROUNDED.
1. This instrument is equipped with a cord having a grounding wire and an
appropriate grounding plug. The plug must be used with an outlet that has
been installed and grounded in accordance with all local codes and
ordinances. The outlet must have the same configuration as the plug. DO
NOT USE AN ADAPTER.
2. Do not modify the line cord that has been provided. If it does not fit the
available outlet, contact your nearest Wheaton Science Products (WSP)
distributor for the proper line cord for your area.
2004 Wheaton Science Products 8 P/N 50083244
Specifications subject to change without prior notice
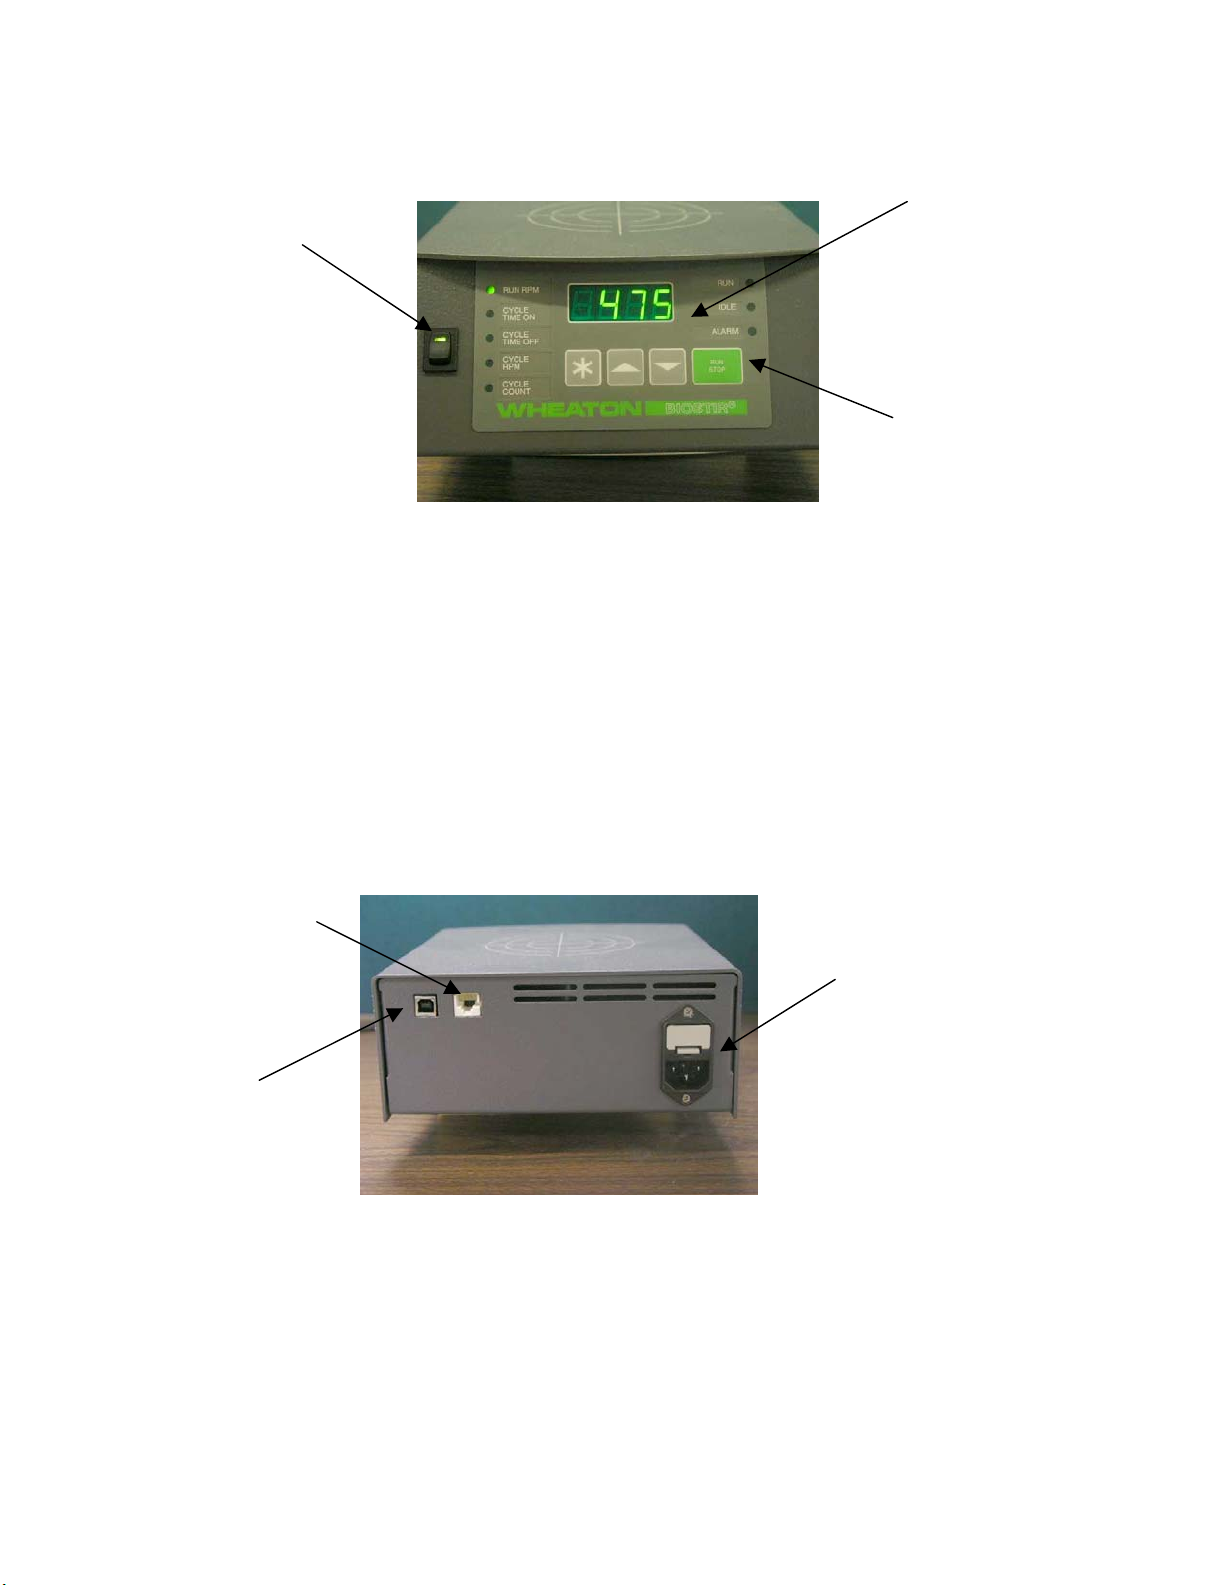
4.0 MAJOR COMPONENT IDENTIFICATION
FRONT OF UNIT
1. Display –When the unit is running, the display shows the current operating
status of the unit, including operating speeds and cycle times. While the unit
is idle, the display shows entered data from the keypad and remote
communications status.
2. Keypad – When unit is idle, the keypad is used to program the unit in several
different modes. While the unit is running, the keypad can be used to toggle
the display to show current operating status of the unit.
3. Power Switch – The mains power switch illuminates when the unit is on and
power is applied.
REAR OF THE UNIT
1. Power Entry Module - Location of the line cord entry and fuse(s) drawer.
2. RS-485 Interface Connection - Allows remote control of the unit via an
optional remote control unit and contains the remote alarm relay dry contacts.
3. USB Interface Connection – Allows remote control of the unit via a PC USB
port.
1
2
3
2
1
3

2004 Wheaton Science Products 9 P/N 50083244
Specifications subject to change without prior notice
5.0 INITIAL INSPECTION
When you receive your new Biostir, inspect it for any obvious damage that may
have occurred during shipment. If any damage is found, notify the carrier at
once. Warranty information is shown in the front of this manual. Check to
confirm that there are no broken switches, displays or missing parts, and that the
unit is not dented or scratched.
5.1 Installation
Install the unit where there will be adequate room for the unit to operate. Provide
enough clearance around the unit to maintain safety. Install the unit on a level
surface to make sure vessels don’t slide off the top.
5.2 Input Power Requirements
This equipment is designed to operate from a 200-240V single-phase AC power
source at 47 to 63 Hz. The line voltage / fuse label located on the upper rear of
the unit shows the nominal input voltage set for the unit at the factory.
5.3 Power Cord Set
This unit has been shipped from the factory with a power line cord that has a plug
appropriate for your area. If the wrong power cord has been shipped for your
particular application, contact your nearest Wheaton Science Products (WSP)
dealer for the proper cord. The Biostirhas been equipped with a 3-wire
grounding type power cord. The unit is only grounded when it is plugged into an
appropriate receptacle. Do not operate the unit without adequate grounding
protection.
2004 Wheaton Science Products 10 P/N 50083244
Specifications subject to change without prior notice
6.0 UNIT SETUP AND OPERATION
The Biostirslow speed stirrer can be configured in several different modes to
allow for simple constant speed stirring, to advanced interval and two speed
stirring for the most demanding applications.
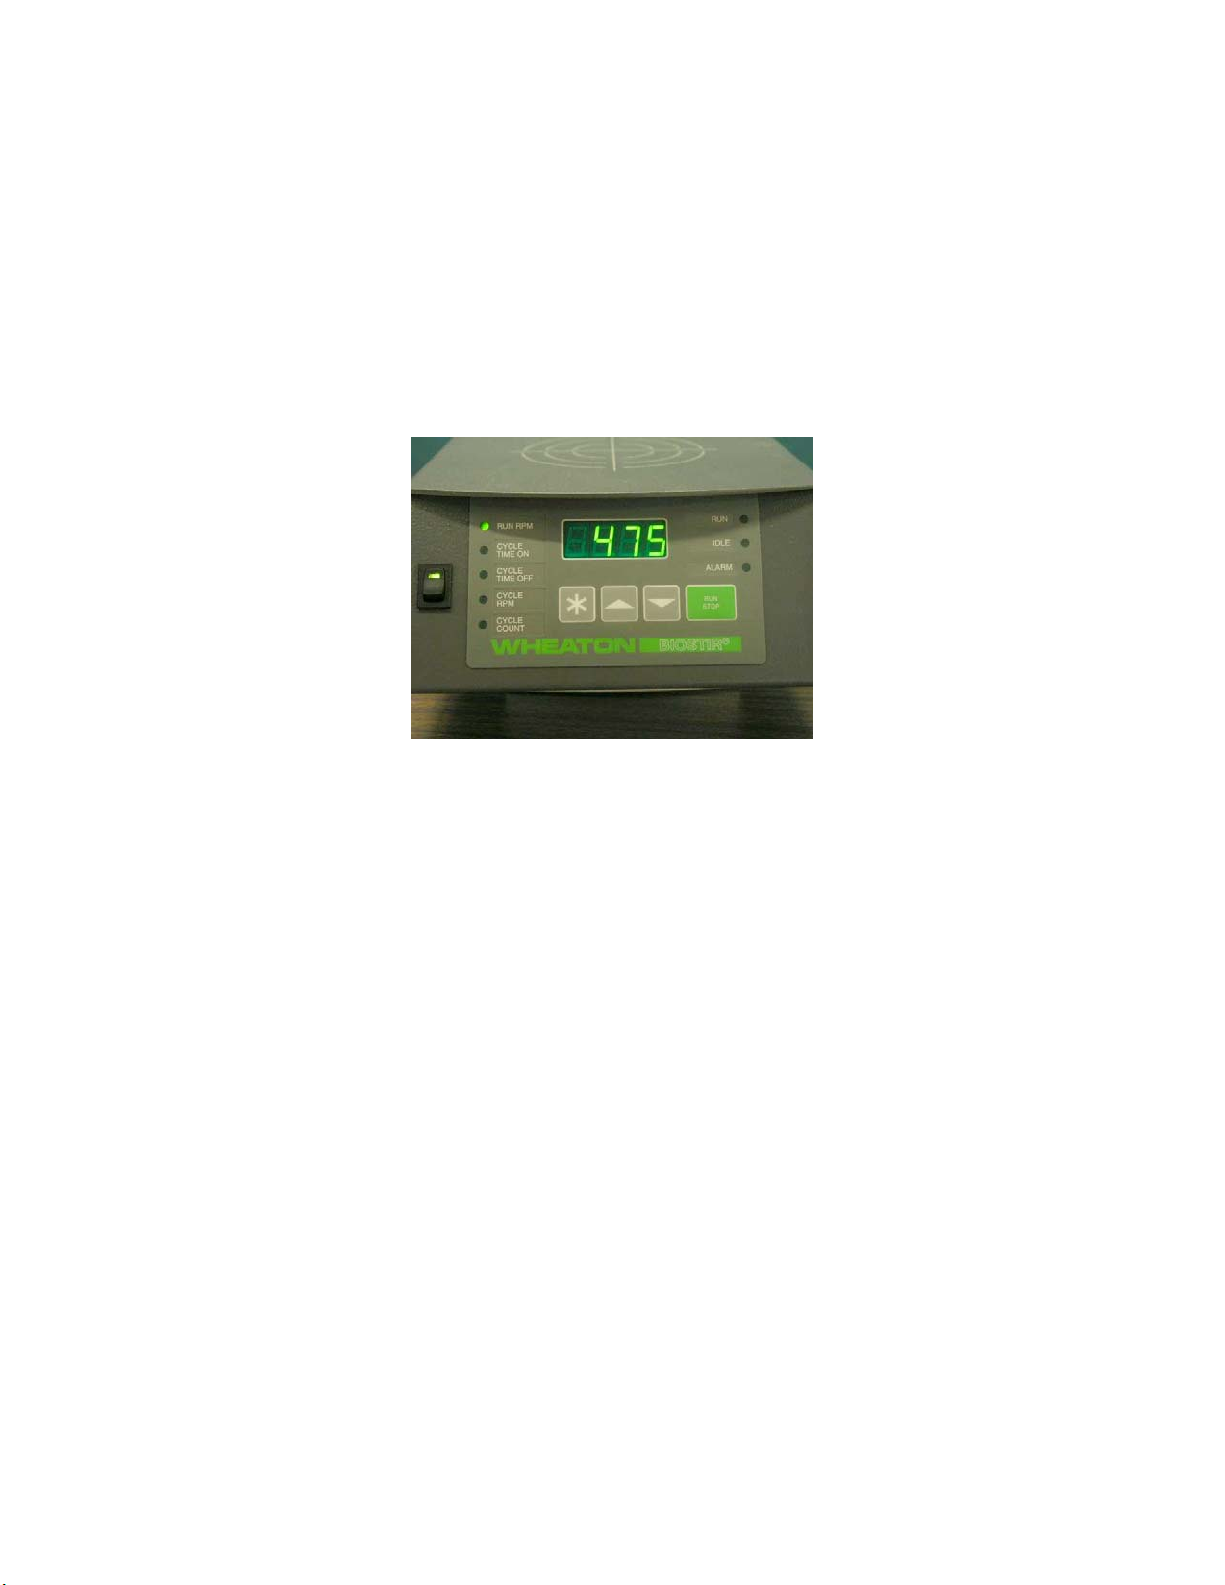
6.1 Keypad and Display
The Biostirkeypad and display provide useful information to the setup and
performance of the unit. LED indicators on each side of the main display guide
the user through the setup and operation of the unit. A description of the LED
indicators is below:
RUN RPM – Indicates the primary programmed constant stirring speed.
CYCLE TIME ON (0 – 1079 minutes) - Indicates the programmed running time
of the stirrer. This can be used to set a repetitive run and idle time, or can be
used to set a two stage-stirring mode with an initial timed running speed, and
then a second final running speed.
CYCLE TIME OFF (0 – 1079 minutes) - Indicates the programmed idle time of
the stirrer. This is used to set the idle time during a repetitive run and idle time
mode of stirring.
CYCLE RPM – Indicates the programmed initial running speed of the unit. This
can be used to set a two stage-stirring mode with an initial timed running speed,
and then a constant final running speed.
CYCLE COUNT (0-32 cycles) – Indicates the programmed number of cycles for
repetitive run and idle cycle stirring.
RUN – Indicates that the unit is running and is performing properly. The RUN
LED will remain lit even while the unit is in a programmed idle mode. The RUN
LED turns off when the unit is stopped, or is being programmed from the kepad.
REMOTE – Indicates that the unit is being controlled from a remote location.
ALARM – Indicates a problem with the unit. Consult the troubleshooting section
of this manual to help correct any alarm conditions.

2004 Wheaton Science Products 11 P/N 50083244
Specifications subject to change without prior notice
6.2 Vessel Placement
Make sure the vessel is centered on the “target” area on the top of the stirrer. A
vessel that is not centered may cause uneven stirring, resulting in less than
optimum results.

2004 Wheaton Science Products 12 P/N 50083244
Specifications subject to change without prior notice
6.3 Basic Constant Speed Stirring
The Biostiris capable of basic stirring as well as advanced stirring modes for
demanding applications. To run in basic constant-speed stirring mode, set the
unit as follows:
IF THE UNIT IS RUNNING, OR AUTOMATICALLY STARTS WHEN POWER IS
APPLIED:
•Press the RUN / STOP Button.
The unit will ramp down to a stop, the RUN light will go OFF, and will now accept
programming from the keypad.
•Press the ∗key until the RUN RPM light turns on.
•Use the UP and DOWN arrow keys to set the desired running speed.

2004 Wheaton Science Products 13 P/N 50083244
Specifications subject to change without prior notice
•Press the ∗key until the CYCLE TIME ON light turns on.
•Use the DOWN arrow key to make sure the CYCLE TIME ON is set to ZERO.
•Press the ∗key until the RUN RPM light turns on again.

2004 Wheaton Science Products 14 P/N 50083244
Specifications subject to change without prior notice
•Press RUN / STOP to start the unit running at the set constant speed. The
RUN light will blink while the unit is ramping to the set speed. The RUN light
will light constant once the set speed is achieved, indicating the unit is
working properly.
•Pressing the UP and DOWN keys during constant speed running will change
the set speed of the unit.
•To stop the unit, press the RUN/STOP button. The RUN light will blink while
the unit ramps down, and then go off when the unit stops.

2004 Wheaton Science Products 15 P/N 50083244
Specifications subject to change without prior notice
6.4 Cycle Stirring
The Biostir® can be set to run in cycle stirring mode, where the unit will run a set
number of alternating stirring and idle times.
This type of stirring may be especially helpful in cell culture applications during
initial seeding where cells need a set idle time during the stirrer / growth cycle.
Both running times and idle times can be independently adjusted.
Below is a typical cycle stirring profile, showing the unit ramping up to a set
speed (A), running for a set time (B), then ramping down to a set idle time (C).
This cycle is repeated for a set number of times and then returns to a constant
speed (D).
A stirring cycle consists of one running period and one idle period as shown
above.
IF THE UNIT IS RUNNING, OR AUTOMATICALLY STARTS WHEN POWER IS
APPLIED:
•Press the RUN / STOP Key. The unit will ramp down and stop and the RUN
light will go out.
•Press the ∗key until the RUN RPM light turns on.
•Use the UP and DOWN arrow keys to set the final running speed of the unit
(D).

2004 Wheaton Science Products 16 P/N 50083244
Specifications subject to change without prior notice
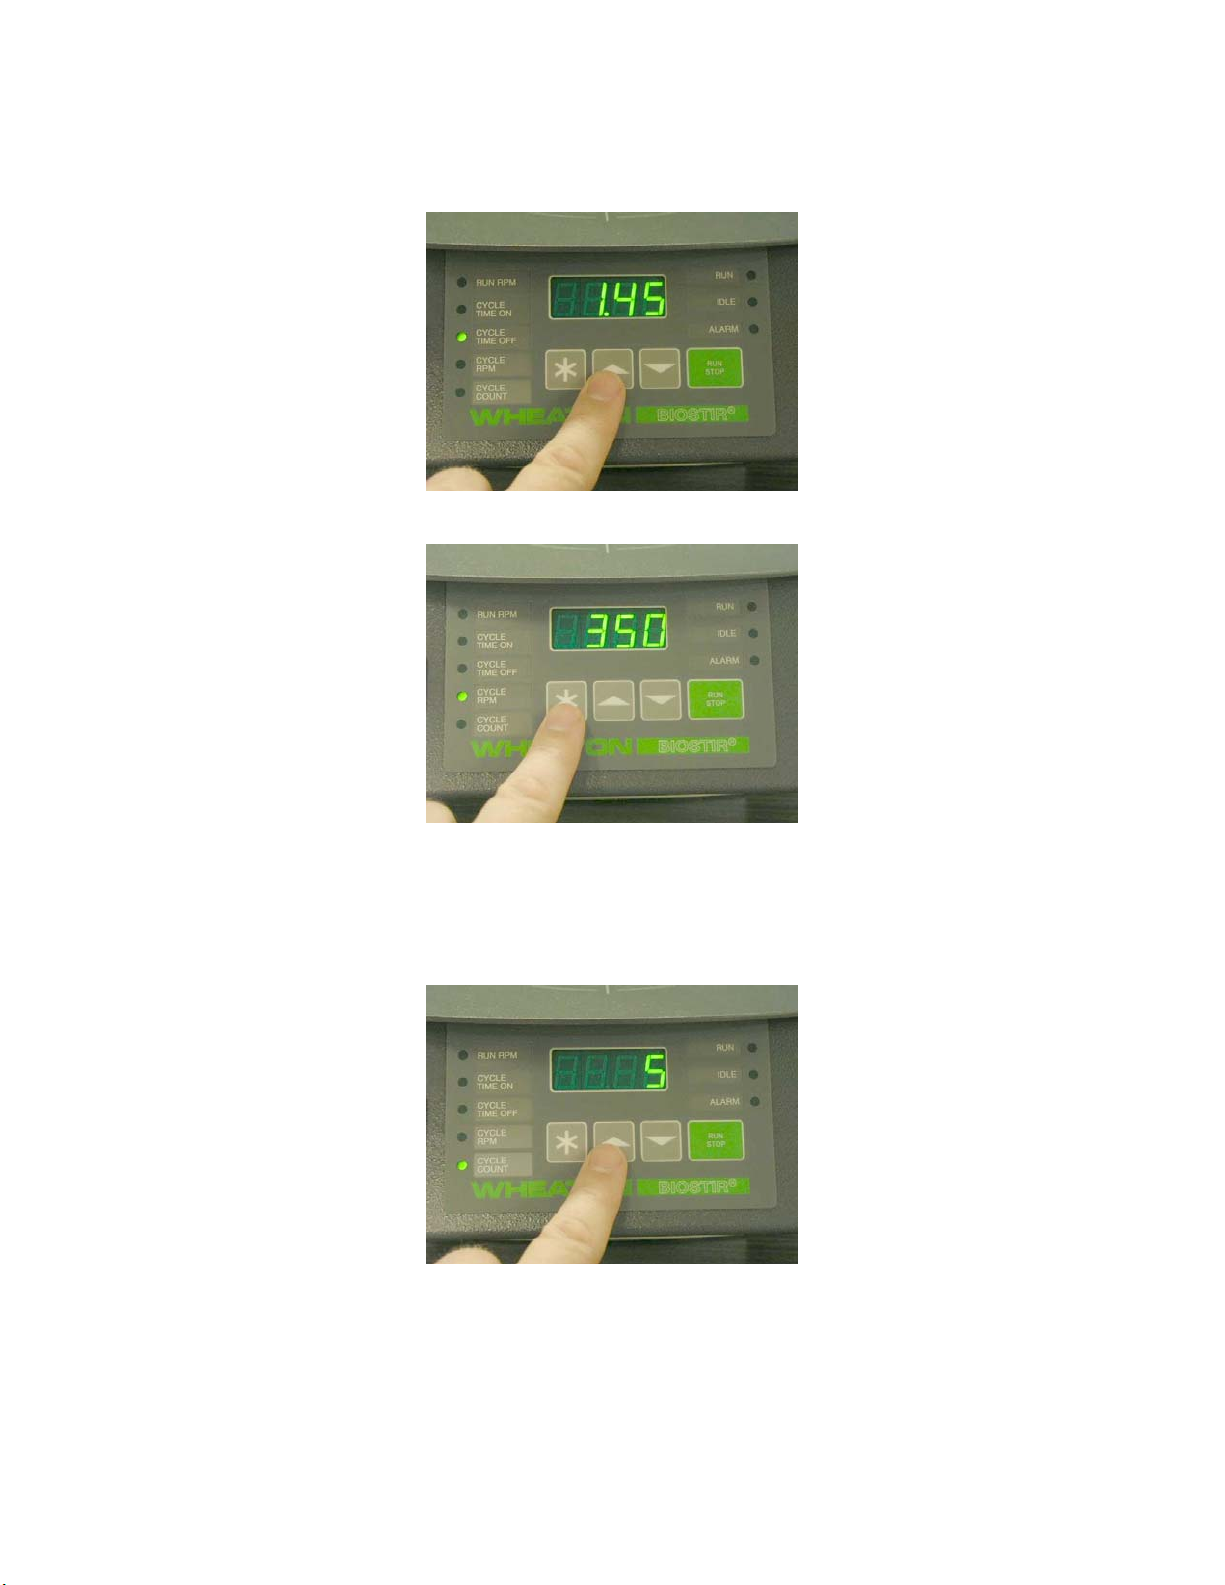
•Press the ∗key until the CYCLE TIME ON light turns on.
•Use the UP and DOWN arrow keys to set the cycle ON time (B) in hours and
minutes (hh.mm). The example below shows the setting at 1hr and 10 min.
•Press the ∗key until the CYCLE TIME OFF light turns on.
2004 Wheaton Science Products 17 P/N 50083244
Specifications subject to change without prior notice
•Use the UP and DOWN arrow keys to set the cycle idle time (C) in hours and
minutes (hh.mm). The example below shows the setting at 1hr and 45 min.
•Press the ∗key until the CYCLE RPM light turns on.
•Use the UP and DOWN arrow keys to set the CYCLE RPM (A) to the same
speed as the RUN RPM speed (D).
•Press the ∗key until the CYCLE COUNT light turns on.
•Use the UP and DOWN arrow keys to set the number of cycles.
2004 Wheaton Science Products 18 P/N 50083244
Specifications subject to change without prior notice
•Press RUN/STOP to start the unit. The RUN LED will blink until the unit
attains full set speed.
•During the CYCLE ON time, the CYCLE ON light and the CYCLE RPM light
will alternately blink, and display the remaining CYCLE ON time, and the set
CYCLE RUN speed.
•Once the CYCLE ON time counts down to ZERO, the unit RUN light will blink
as the unit ramps down to a stop.
•When in the CYCLE OFF time, the CYCLE TIME OFF light and CYCLE
COUNT lights alternately blink, showing the remaining CYCLE OFF time, and
remaining cycles to be run.
•Once the cycles are complete, the unit will run at its set final RUN RPM
speed.
6.5 Two Speed Stirring
The Biostir® can be set to run in two speed stirring mode, where the unit will run
at a set stirring speed for a programmed time, and then run at a final constant
speed after that.
This type of stirring may be especially helpful in cell culture applications during
initial seeding where cells may need a slow stirring time to reach maturity, and
then a faster running speed for the remainder of the growth time.
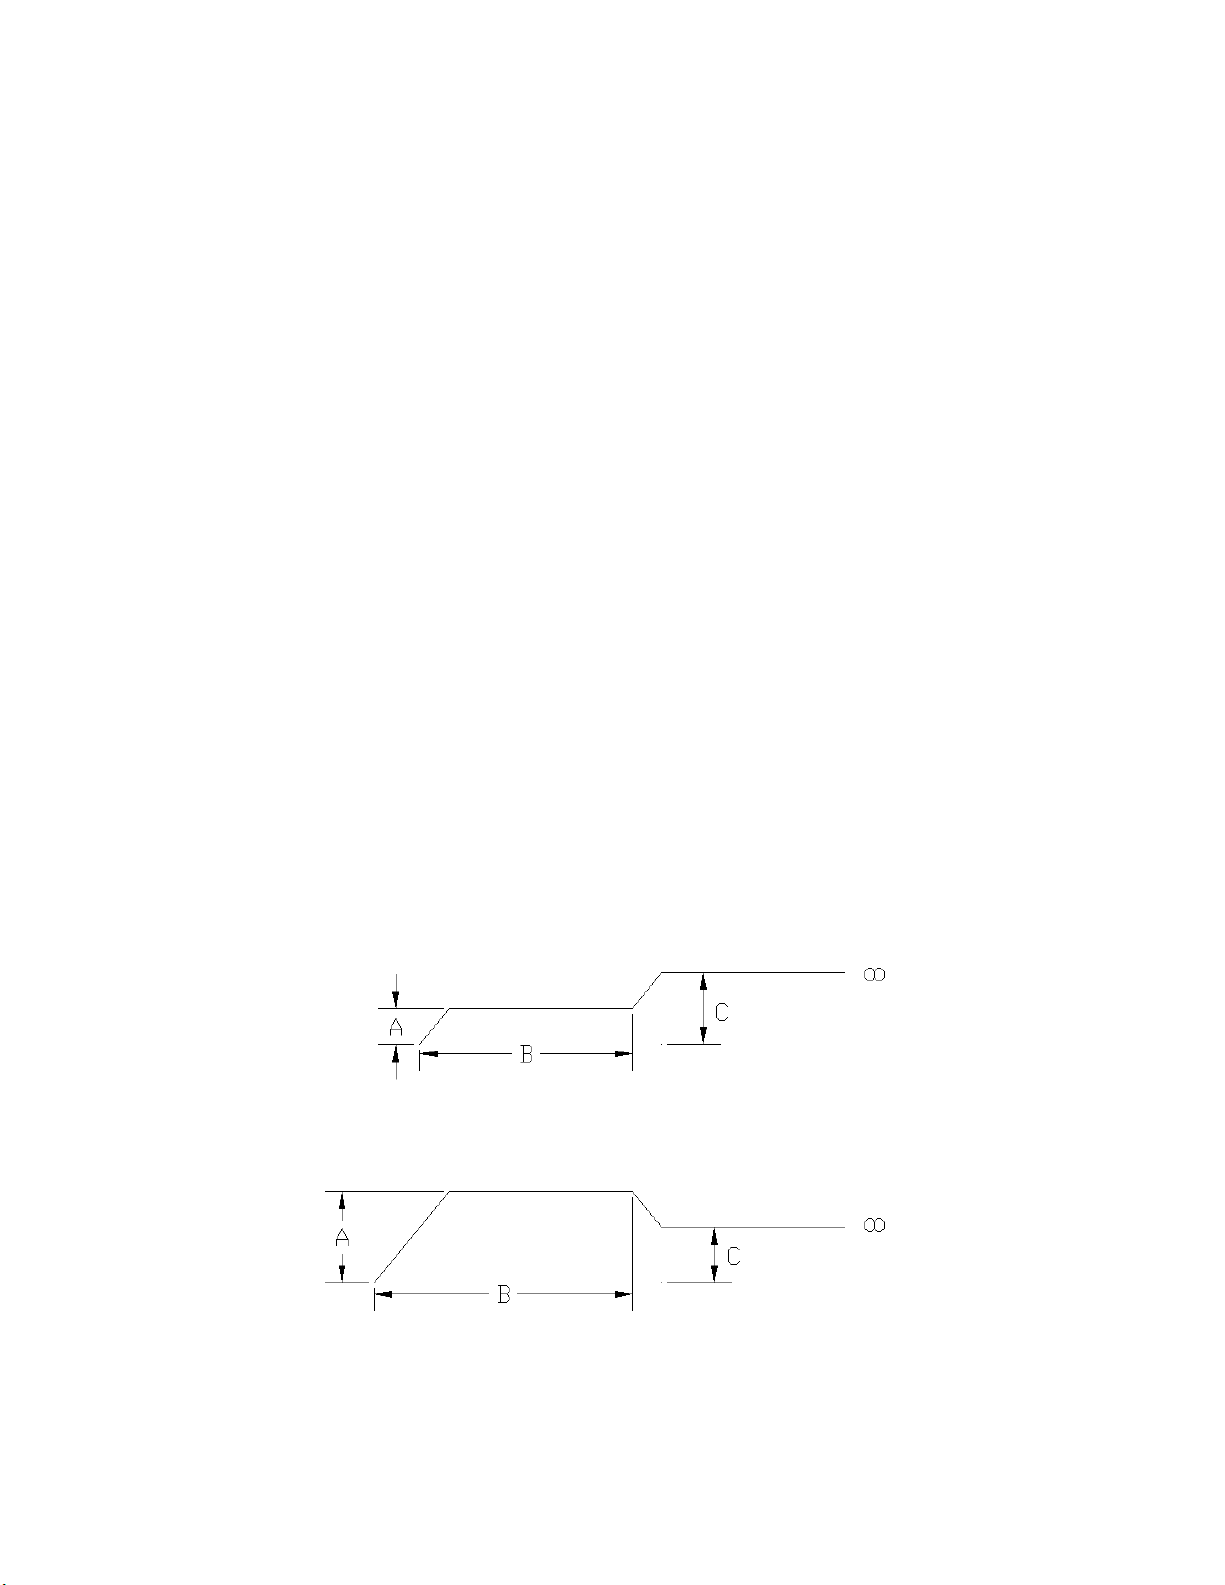
Below are typical cycle stirring profiles, showing an initial stirring speed for a set
time, and then the unit ramping to a final constant speed. The upper profile
shows the unit ramping to a higher speed, while the lower profile shows the unit
ramping to a slower speed.

2004 Wheaton Science Products 19 P/N 50083244
Specifications subject to change without prior notice
IF THE UNIT IS RUNNING, OR AUTOMATICALLY STARTS WHEN POWER IS
APPLIED:
•Press the RUN / STOP Key.
•Press the ∗key until the RUN RPM light turns on.
•Use the UP and DOWN arrow keys to set the FINAL running speed (C) of the
unit.
•Press the ∗key until the CYCLE TIME ON light turns on.
•Use the UP and DOWN arrow keys to set the initial running time,(B) in hours
and minutes (hh.mm).
•Press the ∗key until the CYCLE TIME OFF light turns on.
•Use the DOWN arrow keys to set the CYCLE TIME OFF time to ZERO.

2004 Wheaton Science Products 20 P/N 50083244
Specifications subject to change without prior notice
•Press the ∗key until the CYCLE RPM light turns on.
•Use the UP and DOWN arrow keys to set the INITIAL running speed of the
unit (A).
•Press RUN / STOP to start the unit running in two speed stirring mode. The
RUN light will BLINK until the unit reaches full set speed.
•While the unit is running during the initial stirring time (B), the CYCLE RPM
and CYCLE TIME ON time lights will alternately blink to show remaining initial
stirring time, and initial stirring speed (A).
•Once the initial stirring time (B) expires, the unit will revert to the final running
speed (C).
6.6 Combination Cycle and Two Speed Stirring
The Biostir® can be set to run in a combination cycle and two speed stirring
mode, where an advanced stirring profile is needed for demanding applications.
Below, is a typical combination cycle and two speed stirring profiles, showing a
running cycle pattern at an initial stirring speed (A), and then the unit ramping to
a final programmed constant speed (D). The upper profile shows the unit
ramping to a higher speed, while the lower profile shows the unit ramping to a
slower speed.
Table of contents
Popular Laboratory Equipment manuals by other brands

TSI Instruments
TSI Instruments 3772 Operation and service manual

Thermo Scientific
Thermo Scientific Labofuge 200 Operating lnstructions

Agilent Technologies
Agilent Technologies InfinityLab LC Series user manual

BioCision
BioCision XT Starter Instructions for use

Rigol
Rigol DSG5000 Series user guide

Mclane
Mclane PPS user manual


