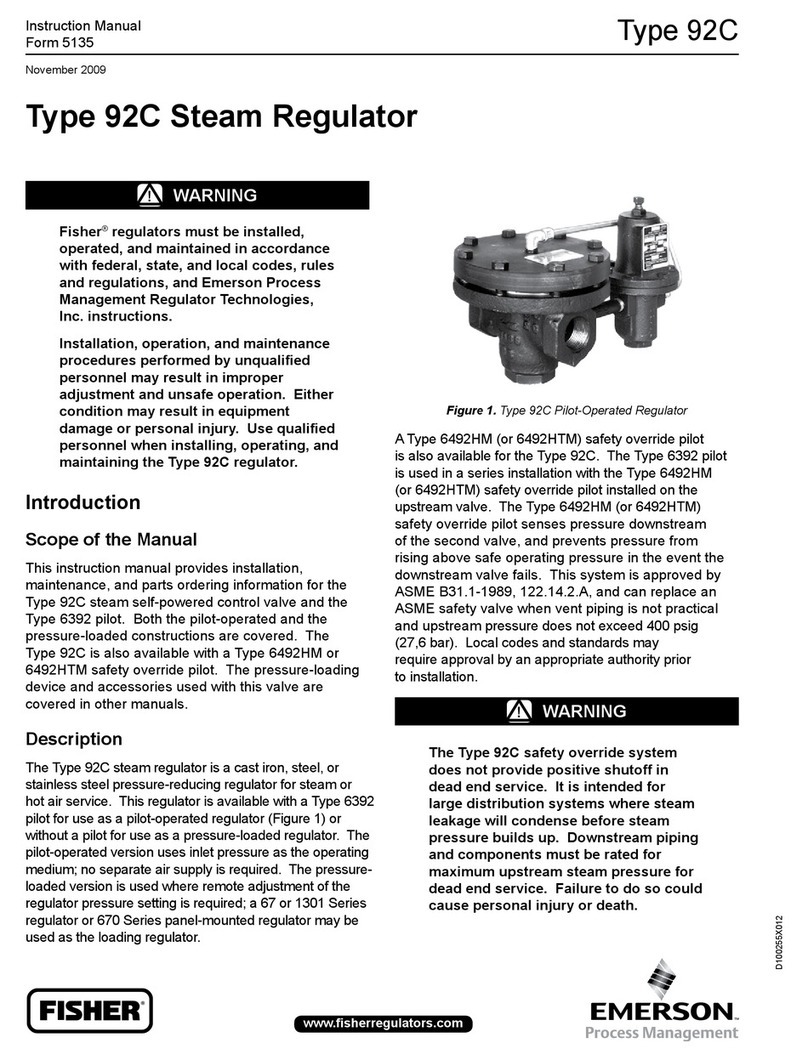
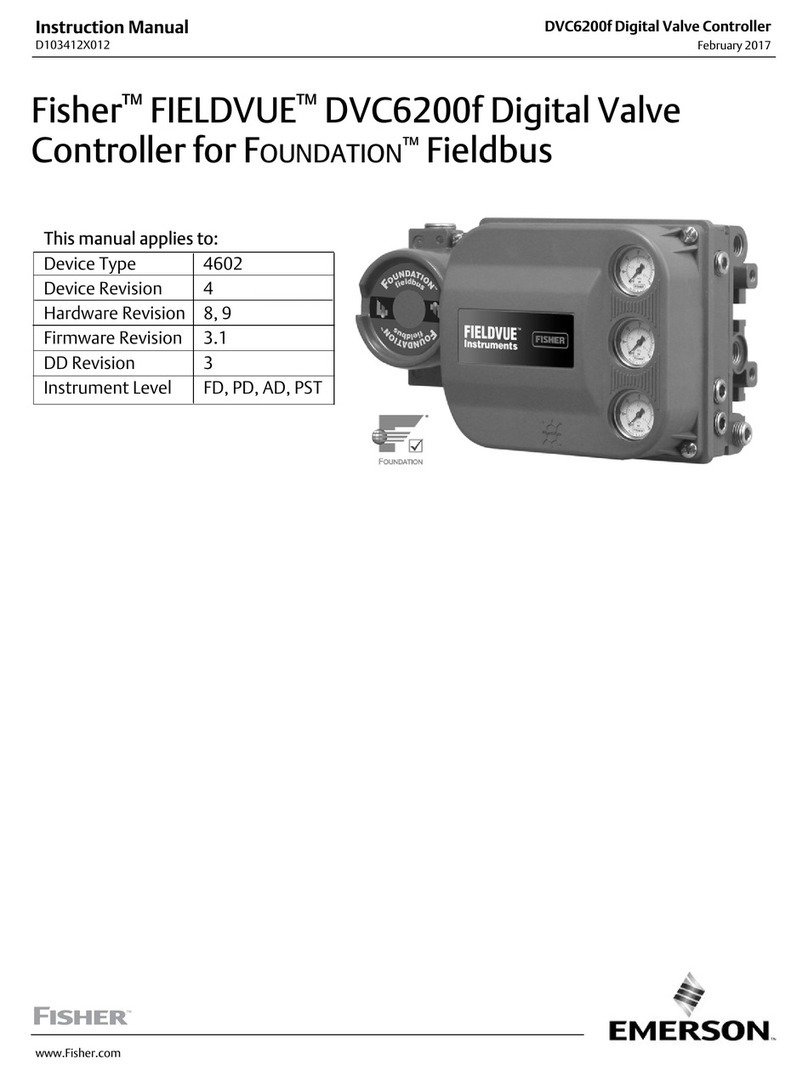
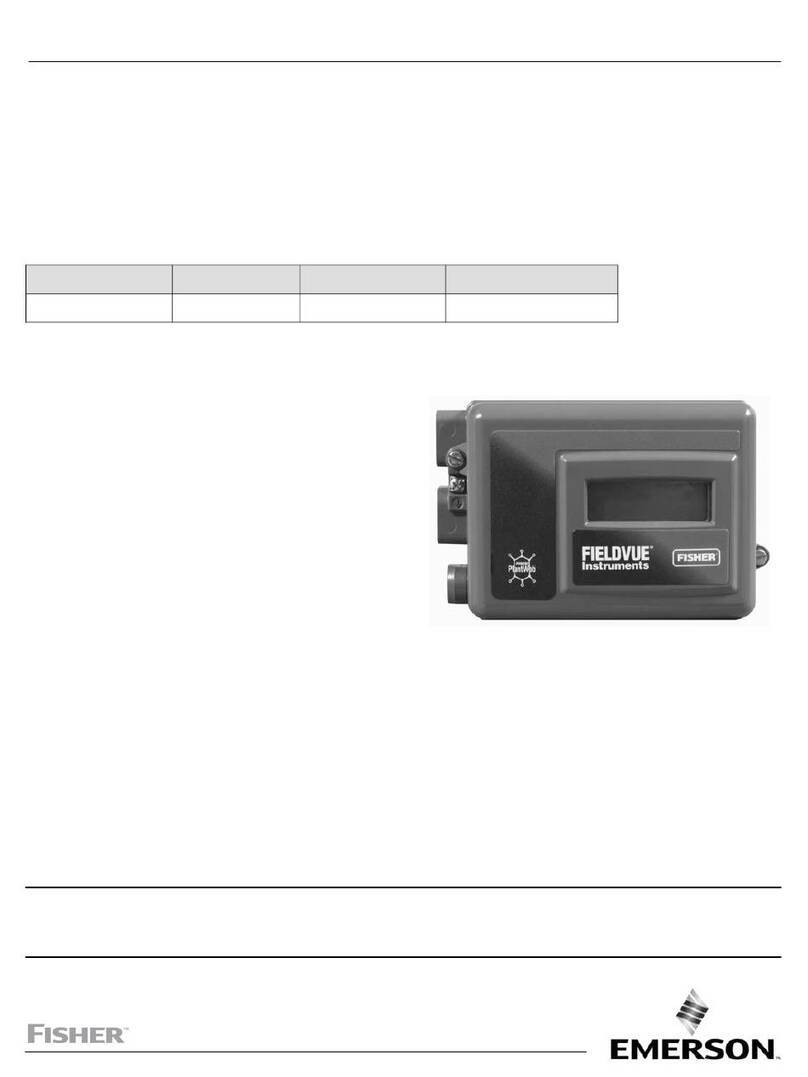
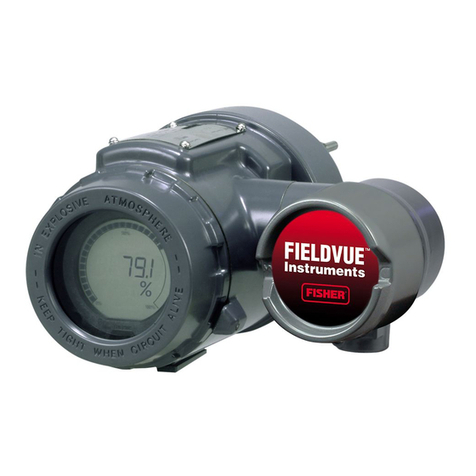
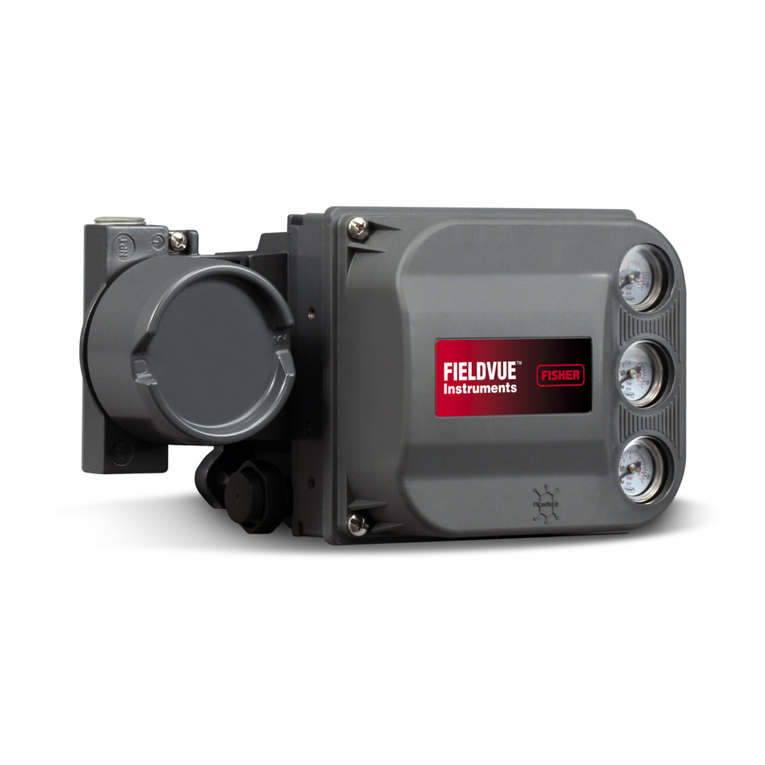
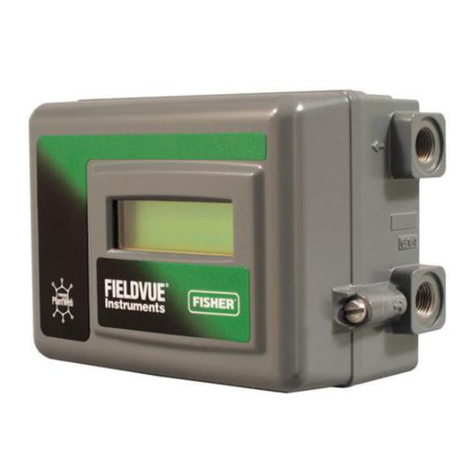
Fisher Fieldvue DVC5010 User manual

!"#$% &'#" ()#*+
,$"-.//.-#0$
,$#-#./ 1+-)2 .$* 3./#45.-#0$
6.#$-+$.$7+
12+7#8#7.-#0$" .$* 9+/.-+* :07);+$-"
!"#$%%% &'()'*
<)#7=>1-.5- ()#*+
?05; @ABA
C0D+;4+5 EFFF
+,-.!"/-!!"#$%%% &'()'*
!)0)123 "234' #561(533'(*
751'
89)* 0:);' <(54);'* )6*123321)56= )6)1)23
*'1:< 26; >23)?(21)56= 26; @2)61'A
626>' )6B5(@21)56 B5( 19' !"#$%%% &'A
()'* ;)0)123 "234' >561(533'(*C &'' 19'
+,-.!"/- !"#$%%% &'()'* !)0)123
"234' #561(533'( ,6*1(:>1)56 D26:23 A
+5(@ $EE$= 242)32?3' B(5@ F5:( +)*9'(
('<('*'6121)4' 5( *23'* 5BB)>'= B5( 2;;)A
1)5623 )6B5(@21)56= 5( 4)*)1 5:( G'?*)1'
21 GGGC+,-.!"/-C>5@C
!"#$%
"
!"#$ %&#'( )**+#($ ,-.
/012333 4(5#($
6-'(+ 782 9:;!
1-<<&=#>),-5
/(?#>(
;(?#$#-=
@#5<A)5(
;(?#$#-=
9)5'A)5(
;(?#$#-=
/(?#>( /($>5#*,#-=
;(?#$#-=
B C 2 B )=' D
?05 *+-.#/" "++ 2.%+ E>E
H
I
E
J
$

!"#$%%% &'()'*
#
##
#,6*123321)56 26; ,6)1)23 &'1:< #9'>K .)*1
,$"-5);+$- 7055+7-/G ;0)$-+* 0$ -'+ .7-).-05H 1++ #$"-.//.-#0$
#$"-5)7-#0$" 250D#*+* I#-' -'+ ;0)$-#$% =#-H
?++*4.7= /#$=.%+ 2502+5/G 70$$+7-+*H 1++ #$"-.//.-#0$ #$"-5)7-#0$"
250D#*+* I#-' -'+ ;0)$-#$% =#-H
9+%)/.-05 7055+7-/G ;0)$-+*H J+5805; 0$+ 08 -'+ 5+%)/.-05 ;0)$-#$%
2507+*)5+" 0$ 2.%+ B>EH
K#5 ")22/G 70$$+7-+* .$* .- 2502+5 25+"")5+H 30$$+7- ")22/G ." *+"75#4+* 0$
2.%+ B>BH K/"0 "++ "2+7#8#7.-#0$" 0$ 2.%+ @>EH
,$"-5);+$- 0)-2)- 70$$+7-+* -0 -'+ .7-).-05H 30$$+7- #$"-5);+$- 0)-2)- ."
*+"75#4+* 0$ 2.%+ B>BH
30$*)#- 2502+5/G #$"-.//+*L #8 $+7+"".5GH 9+8+5 -0 /07./ .$* $.-#0$./ +/+7-5#7./
70*+"H
$
$
$
$
$
D5:61)60
L6':@21)> #566'>1)56* 26; M)( &:<<3F
-3'>1()>23 #566'>1)56*
$
$M002 I#5#$% 2502+5/G 70$$+7-+* -0 -'+ MNNJ O .$* >> -+5;#$./" #$ -'+ -+5;#$./ 40PH
30$$+7- /002 I#5#$% ." *+"75#4+* 0$ 2.%+ B>QH
&'(#()* +$#,- )'. /)*(01)#("'
,$#-#./ "+-)2 70;2/+-+H J+5805; ,$#-#./ 1+-)2 2507+*)5+ 0$ 2.%+ Q>EH
3./#45.-#0$ 70;2/+-+H J+5805; K)-0 3./#45.-+ &5.D+/ 2507+*)5+ 0$ 2.%+ Q>RH
?#$./ 70$-50/ +/+;+$- 7055+7-/G 5+"20$*" -0 . "+-20#$- 7'.$%+ .$* #" "-.4/+H ,8
$+7+"".5GL 2+5805; 1-.4#/#S#$% 05 N2-#;#S#$% T./D+ 9+"20$"+ 0$ 2.%+ Q>RH
$
$
$
&'2#)**)#("'
?#$./ 70$-50/ +/+;+$- #" 5+.*G -0 4+ 2/.7+* 0$ /#$+

!"#$%%% &'()'*
#
6-'(+ 782 1-<*),#E#+#,F
!"#$%%% &'()'* D5;'3 IN$
!'4)>'
O'4
+)(@G2('
O'4
D'@5(F
D5;:3' PD?Q !! O'4
EHB@ Q
Q A RUV R
&1(5K' R:1<:1
E :0$+
B 9.;2 N2+$
Q 9.;2 3/0"+*
R 9.;2 -0 &.5%+-
@ 1-+2 -0 &.5%+-
A1-02
R63)6'
E 6.#$ 6+$) W1+-)2X
B K$./0% ,$
QJ5+""
R &5.D+/
@ :5#D+ 1%/
A ,$"-5);+$- 1-.-)"
&'3B 8'*1 &9:1;5G6
E :0$+
B C0 ?5++ &#;+ ?.#/
Q 9K6 ?.#/
R 35#-#7./ CT6 ?.#/
@ &+;2 1+$"05 ?.#/
A &D/ 1+$"05 ?.#/
Y :5#D+ 3)55+$- ?.#/
#23)?(21'
E K$./0% ,$
B K)-0 3./#4 &5.D+/
Q 6.$ 3./#4 &5.D+/
R J5+"")5+
@ 9+"-05+ 3./#4
A 3./#4 M07
Y &D/ 1+$"05 K*Z)"-
M3'(1*
E &5.D+/ K/+5-"
B &5.D+/ :+D K/+5-
Q &5.D+/ K77); K/+5-
R 3G7/+ 30)$- K/+5-
@ :5#D+ K/+5- [$.4
A 6#"7 K/+5-"
Y K/+5- 9+705*
D'2*:('; "2(
E K$./% ,$ !$#-"\9$%
B &D/ 5.$%+ ]#%'
Q &D/ 9.$%+ M0I
R J5+"")5+ !$#-"
@ &+;2 !$#-"
S'6'(23
E ]K9& &.%
B 6+"".%+
Q :+"75#2-05
R:.-+
@ T./D+ 1+5#./ C);
A ,$"- 1+5#./ C);
Y J0//#$% K**5+""
D5;'
E ,$"-5);+$- 60*+
B 30$-50/ 60*+
Q 9+"-.5- 3-5/ 60*+
R 9+"-.5-
@^)5"-
M:15 &'1:<
E 1+-)2 _#S.5*
B K)-0 3./#4 &5.D+/
Q 1-.4#/#S+\N2-#;#S+
D)6 R<'6T#35*'
E 6#$ N2+$#$% &#;+
B 6#$ 3/0"#$% &#;+
D)*> M3'(1*
E K)P ,$ K/5- [$.4
B K)P ,$ K/5- 1-.-+
!'4)>' ,6B5(@21)56
E ]K9& !$#D 9+D
B :+D#7+ 9+D
Q ?#5;I.5+ 9+D
R ].5*I.5+ 9+D
@ ,$"- M+D+/
A J5+"")5+ 1+$"05
Y :+D#7+ ,:
.)@)1* U #:15BB*
E &D/ M#;#- ]#%'
B &D/ M#;#- M0I
Q &D/ 3)-088 ]#%'
R &D/ 3)-088 M0I
8(24'3 M3'(1*
E &D/ ]#\M0 [$.4
B &D/ ]]\MM [$.4
Q &D/ K/+5- ]# J-
R &D/ K/+5- M0 J-
@ &D/ K/+5- ]#]# J-
A &D/ K/+5- M0M0 J-
Y&D/K/5-:^
8(24'3 !'4 M3'(1
E &D/ :+D K/5- [$.4
B &D/ :+D K/5- J-
Q &D/ :+D &#;+
"2()2?3'*
EK)P,$
B &+;2
Q 3G7/ 30)$-
R &D/ K7);
@ ?5++ &#;+
A 30;2+$".-+* 30)$-"
D2)6 D'6: P&'1:<Q
E ,$#-#./ 1+-)2
B :+-.#/+* 1+-)2
Q :#"2/.G
R 3./#45.-+
@ 1-50=+ N)-2)-
,6*1(:@'61 &121:*
E :0$+
B T./D+ K/+5-"
Q ?.#/)5+ K/+5-"
R K/+5- 9+705*
@ N2+5.-#0$./ 1-.-)"
,6)1)23 &'1:<
E K)-0 1+-)2
B 6.$)./ 1+-)2
!'12)3'; &'1:<
E 60*+
B J50-+7-#0$
Q (+$+5./
R K7-).-05 ,$80
@ 6+.")5+* T.5
A 9+"20$"+ 30$-50/
Y K/+5-"
V 1+/8 &+"- 1')-*0I$
!)*<32F
E T.5#.4/+"
B :+D#7+ ,$805;.-#0$
Q BY@ :: 9+D
M>1:215( ,6B5
E ,$"- 1)22/G J5+""
B ?++*4.7= 30$$+7-#0$
Q `+50 3-5/ 1#%$./
R &D/ 1+$"05 60-#0$
@ T./D+ 1-G/+
60*+/ BY@ ]K9& 30;;)$#7.-05 6+$) 1-5)7-)5+ 805
:+D#7+ :+"75#2-#0$ 9+D#"#0$" Q .$* R
D5;'3 IN$ VMO8 #5@@:6)>215( D'6: &1(:>1:(' B5( +,-.!"/- !"#$%%%
V51 W'F
E ,$"-5);+$- 60*+
B 30$-50/ 60*+
Q J50-+7-#0$
R 1-.4#/#S+\N2-#;#S+
VMO8 #5@@:6)>215(
E N88/#$+
B N$/#$+
Q ?5+a)+$7G :+D#7+
R !-#/#-G
D26:23 &'1:<
E ,$"-5);+$- 60*+
B 30$-50/ 60*+
Q ?++*4.7= 30$$+7-#0$
R ,$"- 1)22/G J5+""
@ `+50 3-5/ 1#%$./
A &D/ 1+$"05 60-#0$
Y &D/ 3)-088 M0I
V &)$#$% 1+-
F K)-0 3./#4 &5.D+/
O'*<56*' #561(53
E &)$#$% 1+-
B ,$2)- 3'.5
Q ,$2)- ?#/-+5 &#;+
R :G$ ^G2."" [$.4
@ M#;#-" U 3)-088"
A 6#$ N2+$\3/0"+
D26 #23)? 8(24'3
E K$./0% 3./#4 K*Z
B :#%#-./ 3./#4 K*Z
W:+D#7+ :+"75#2-#0$ W::X 9+D#"#0$" Q .$* RX
C0-+"b
?)$7-#0$ .D.#/.4/+ 0$/G 0$ *+D#7+ *+"75#2-#0$
5+D R
&'#" ;+$) #" .D.#/.4/+ 4G 25+""#$% -'+ /+8-
.550I =+G 850; -'+ 25+D#0)" ;+$)H
QH E>E>E #$*#7.-+" 8."->=+G "+a)+$7+ -0 5+.7' ;+$)
HAH
HAHAH
HAHAI
HAI
HAIAH
HAIAE
HAIAJ
HAIA$
HAIAX
HAIAN
HAIAY
HAE
HAJ
HA$
HAJAE
HAIAXA$
HAIAXAX
HAIANAH
HAIANAI
HAIANAE
HAIANAJ
HAIANAX
HAEAH
HAEAI
H
X
I
I
H
8(24'3 M>>:@ M3'(1
E &D/ K7); K/5- [$.4
B &D/ K7); K/5- J-
Q &D/ K7); :^
R &D/ K7);
#F>3' #5:61 M3'(1
E 3G7/ 3$- K/5- [$.4
B 3G7/ 30)$- K#5- J-
Q 3G7/ 30)$- :^
R 3G7/ 30)$-
Z:(*1
E ^)5"- [$.4/+
B ^)5"- 30;;.$*
HAIAHA$
H
,6<:1 #92(
E ,$2)- 3'.5
B :+8#$+
3)"-0; 3'.5
HAIAXAI
HAIANAN
M3'(1 O'>5(;
E :#"2/.G 9+705*
B 3/+.5 9+705*
Q ,$"- :.-+ U &#;+
R 9+705* (50)2 [$.4
+R..R[ 8V,& LM8V 8R
L-O+ROD ,7,8,M. &-8/L
+R..R[ 8V,& LM8V 8R
",-[ DR!-. IN$ M7!
!"#$%%% ,7+RODM8,R7
H
EB QR @
K
^
3
:
[
?
(
]
,
A
H

!"#$%%% &'()'*
##
6-'(+ 782 9:;! 1-<<&=#>),-5 @)$,GH(F 4(I&(=>(
+:6>1)56T"2()2?3' +2*1AAW'F
&'\:'6>'
#55(;)A
621'*PHQ +:6>1)56T"2()2?3' +2*1AAW'F
&'\:'6>'
#55(;)A
621'*PHQ
K$./0% ,$2)- BE>[ J5+"")5+L N)-2)- QE>[
K$./0% ,$2)- !$#-" .$* 9.$%+ 30$8#%)5.-#0$ E>B>@>E R>[ J5+"")5+ !$#-" E>B>@>R R>[
K)-0 1+-)2 E>E>E R>K J50-+7-#0$ ]0- c+G>Q E>^
K)P#/#.5G ,$2)- E>Q>E>E @>] 9+"-.5- E>B>E>R R>3
K)P#/#.5G ,$2)- K/+5- [$.4/+ E>B>Y>@>E @>( 9+"-.5- 30$-50/ 60*+ E>B>E>Q R>3
3./#45.-+ E>R B>[ 1+/8 &+"- 1')-*0I$ E>B>V R>(
3./#45.-+L K$./0% ,$ H E>R>E Q>] 1+-)2 _#S.5* E>E>E>E R>K
3./#45.-+ &5.D+/ WK)-0X E>R>B Q>] 1-.4#/#S+\N2-#;#S+ ]0- c+G>R E>^
3./#45.-+L &5.D+/ W6.$)./X E>R>Q R>] 1-50=+ N)-2)- E>@ Q>,
3./#45.-+L J5+"")5+ E>R>R Q>] 1)22/G J5+"")5+L ,$"-5);+$- E>B>R>E R>:
3./#45.-#0$ M07.-#0$ E>R>A Q>] &.% E>B>Q>E R>3
3./#45.-#0$L 9+"-05+ E>R>@ Q>] &+;2+5.-)5+L ,$-+5$./ E>Q>E>B @>]
30;2+$".-+* 30)$-" E>Q>E>A @>] &+;2+5.-)5+ !$#-" E>B>@>@ R>[
30$-50/ 60*+ ]0- c+G>B E>^ &5.D+/ RE>[
3G7/+ 30)$- E>B>Y>R>R @>] &5.D+/ K77);)/.-05 E>B>Y>Q>R A>?
3G7/+ 30)$-+5 K/+5- [$.4/+ E>B>Y>R>E A>( &5.D+/ K77);)/.-05 K/+5- [$.4/+ E>B>Y>Q>E A>?
3G7/+ 30)$-+5 K/+5- J0#$- E>B>Y>R>B A>( &5.D+/ K77);)/.-05 K/+5- J0#$- E>B>Y>Q>B A>?
3G7/+ 30)$-+5 :+.*4.$* E>B>Y>R>Q A>( &5.D+/ K77);)/.-05 :+.*4.$* E>B>Y>Q>Q A>?
:.-+ E>B>Q>R R>3 &5.D+/ K/+5- ]#\M0 [$.4/+ E>B>Y>E>E A>[
:+"75#2-05 E>B>Q>Q R>3 &5.D+/ K/+5- ]#%' J0#$- E>B>Y>E>Q A>[
:+D#7+ :+"75#2-#0$ 9+D#"#0$L ]K9& 30;;)$#7.-05 E>Q>Q Q>( &5.D+/ K/+5- M0I J0#$- E>B>Y>E>R A>[
:+D#7+ ,$805;.-#0$ E>Q>B @>, &5.D+/ K/+5- ]#]#\M0M0 [$.4/+ E>B>Y>E>B A>[
:5#D+ K/+5- [$.4/+ E>B>Y>@ R>( &5.D+/ K/+5- ]#]# J0#$- E>B>Y>E>@ A>[
:5#D+ 1#%$./ @ E>? &5.D+/ K/+5- M0M0 J0#$- E>B>Y>E>A A>[
:G$.;#7 ^G2."" [$.4/+ E>B>A>R R>? &5.D+/ K/+5- :+.*4.$* E>B>Y>E>Y A>[
?++*4.7= 30$$+7-#0$ E>B>R>B R>: &5.D+/ 3)-088 ]#%' E>B>A>@>Q A>:
?#5;I.5+ 9+D#"#0$ E>Q>B>Q @>, &5.D+/ 3)-088 M0I E>B>A>@>R A>:
?5++ &#;+ E>Q>E>@ @>] &5.D+/ :+D#.-#0$ K/+5- [$.4/+ E>B>Y>B>E A>?
,$#-#./ 1+-)2 E>E Q>K &5.D+/ :+D#.-#0$ K/+5- J0#$- E>B>Y>B>B A>?
,$2)- 3'.5 E>B>A>B @>[ &5.D+/ :+D#.-#0$ &#;+ E>B>Y>B>Q A>?
,$2)- ?#/-+5 &#;+ E>B>A>Q R>? &5.D+/ M#;#- ]#%' E>B>A>@>E A>:
,$"-5);+$- M+D+/ E>Q>B>@ @>, &5.D+/ M#;#- M0I E>B>A>@>B A>:
,$"-5);+$- 60*+ ]0- c+G>E E>^ &5.D+/ 9.$%+ ]#%' E>B>@>B R>[
,$"-5);+$- 1+5#./ C);4+5 E>B>Q>A R>: &5.D+/ 9.$%+ M0I E>B>@>Q R>[
,$"-5);+$- 1-.-)" AB>? &5.D+/ 1+$"05 K*Z)"- E>R>Y Q>]
6.$)./ 1+-)2 E>E>B R>^ &5.D+/ 1+$"05 60-#0$ E>B>R>R R>:
6+"".%+ E>B>Q>B R>3 &)$#$% 1+- E>B>A>E R>[
6#$#;); 3/0"#$% &#;+ E>B>A>A>B A>: T./D+ 1+5#./ C);4+5 E>B>Q>@ R>:
6#$#;); N2+$#$% &#;+ E>B>A>A>E A>: T./D+ 1-G/+ E>B>R>@ R>:
J0//#$% K**5+"" E>B>Q>V R>: `+50 30$-50/ 1#%$./ E>B>R>Q R>:
EH 3005*#$.-+" .5+ -0 '+/2 /07.-+ -'+ #-+; 0$ -'+ ;+$) "-5)7-)5+ 0$ -'+ 25+D#0)" 2.%+H

Using This Guide
November 1999 1-1
1-1 1
Figure 1-1. Sliding-Stem Control Valve with Type
DVC5010 Digital Valve Controller
W6341 / IL
Note
Install and operate this product only if
you are qualified through training or
experience. If you have any questions
about this guide, contact your Fisher
Controls representative or sales office.
Product Description
DVC5000 Series digital valve controllers (figures 1-1
and 1-2) are communicating, microprocessor-based
current-to-pneumatic instruments. In addition to the
normal function of converting an input current signal to
a pneumatic output pressure, the DVC5000 Series
digital valve controller communicates via HART
protocol.
DVC5000 Series digital valve controllers are designed
to directly replace standard pneumatic and
electro-pneumatic valve mounted positioners.
Figure1-2. Rotary Control Valve with Type
DVC5020 Digital Valve Controller
W6164 / IL
Use of this Guide
This guide describes how to install, setup, and
calibrate DVC5000 Series digital valve controllers with
firmware Revision 6. Additional information for
installing, operating, and maintaining the DVC5000
Series digital valve controllers can be found in the
related documents listed on page 5-2.
This guide describes instrument setup and calibration
using a Rosemount Model 275 HART Communicator.
For information on using the Model 275 HART
Communicator, see the Product Manual for the HART
Communicator available from the Rosemount
Measurement Division. An abbreviated description of
HART Communicator operation is also contained in
the FIELDVUE instrument instruction manual.
You can also setup and calibrate the instrument using
an IBM compatible PC and FIELDVUE ValveLink
software or Asset Management software. For
information on using the software with a FIELDVUE
instrument, refer to the appropriate user guide.
Displaying the HART Communicator
Device Description Revision Number
Device Description (DD) revision identifies the version
of the Fisher Controls Device Description that resides
in the HART Communicator. It defines how the HART
Communicator interacts with the user and instrument.
1

DVC5000 Series
November 1999
1-2
There are two device descriptions used with firmware
revision 6 instruments: 3 and 4. Device Description
revision 3 is available in HART Communicators with
1.25 megabyte memory modules. Device Description
revision 4 is available in HART Communicators with 4
and 8 megabyte memory modules.
You can display the DD revision from the Offline or
Online menu.
Offline Menu—To see the HART Communicator
device description revision number from the Offline
menu, select Utility, Simulation, Fisher Controls, and
DVC.
Online Menu—To see the HART Communicator
device description revision number from the Online
menu, connect the HART Communicator to an
instrument connected to a source supplying a 4 to 20
mA signal. From the Online menu, select Main Menu,
Display, 275 DD Rev.
Displaying the FIELDVUE Instrument
Firmware Revision Number
To view the instrument firmware revision, connect the
HART Communicator to an instrument connected to a
source supplying a 4 to 20 mA signal. From the Online
menu, select Main Menu, Display, Device Information,
and Firmware Rev.
1

Installation
November 1999 2-1
Figure 2-1. Mounting the Type 67CFR Regulator on a DVC5000 Series Digital Valve Controller
TYPE 67CFR
O-RING
CAP SCREWS
SUPPLY CONNECTION
NOTE:APPLY LUBRICANT
1
1
E0031 / IL
2-2 2
Mounting
If ordered as part of a control valve assembly, the
factory mounts the digital valve controller on the
actuator, makes pneumatic connections to the
actuator, sets up, and calibrates the instrument. If you
purchased the digital valve controller separately, you
will need a mounting kit to mount the digital valve
controller on the actuator. See the instructions that
come with the kit for mounting information.
Mounting the Type 67CFR Filter
Regulator
A Type 67CFR filter regulator, when used with the
DVC5000 Series digital valve controllers, can be
mounted three ways.
Integral-Mounted Regulator
Refer to figure 2-1. Lubricate an O-ring and insert it in
the recess around the SUPPLY connection on the
digital valve controller. Attach the Type 67CFR filter
regulator to the side of the digital valve controller.
Thread a 1/4-inch socket-head pipe plug into the
unused outlet on the filter regulator. This is the
standard method of mounting the filter regulator.
Yoke-Mounted Regulator
Mount the filter regulator with 2 cap screws to the
pre-drilled and tapped holes in the actuator yoke.
Thread a 1/4-inch socket-head pipe plug into the
unused outlet on the filter regulator. No O-ring is
required.
Casing-Mounted Regulator
Use the separate Type 67CFR filter regulator casing
mounting bracket provided with the filter regulator.
Attach the mounting bracket to the Type 67CFR and
then attach this assembly to the actuator casing.
Thread a 1/4-inch socket-head pipe plug into the
unused outlet on the filter regulator. No O-ring is
required.
Pressure Connections
Pressure connections are shown in figure 2-2. All
pressure connections on the digital valve controller are
1/4-inch NPT female connections. Use 3/8-inch (10
mm) tubing for all pressure connections. If remote
venting is required, refer to the vent subsection.
Note
Make pressure connections to the digi-
tal valve controller using metal tubing
with at least 3/8-inch diameter.
2

DVC5000 Series
November 1999
2-2
NOTE: FOR DVC5010, IF VALVE TRAVEL EXCEEDS 2 INCHES, PLUG THE OUTPUT CONNECTION ON THE SIDE OF
THE INSTRUMENT AND USE THIS OUTPUT CONNECTION.
Figure2-2.DVC5000 Series Digital Valve Controller Typical Connections (Type DVC5010 Shown)
1/4-18 NPT
SUPPLY CONNECTION
1/2-14 NPT
CONDUIT CONNECTION
BOTH SIDES
1/4-18 NPT
OUTPUT CONNECTION
1/4-18 NPT
OUTPUT CONNECTION
(OPTIONAL)
VENT
1/4-18 NPT
SUPPLY CONNECTION
DVC5000SERIES WITH INTEGRAL
MOUNTED 67CFR FILTER/REGULATOR
TERMINAL BOX CAP
1
1
W7690 / IL
Supply Connections
WARNING
Personal injury or property damage
may occur from an uncontrolled pro-
cess if the supply medium is not
clean, dry, oil-free, or noncorrosive
gas. Industry instrument air quality
standards describe acceptable dirt,
oil, and moisture content. Due to the
variability in nature of the problems
these influences can have on pneu-
matic equipment, Fisher Controls has
no technical basis to recommend the
level of filtration equipment required
to prevent performance degradation
of pneumatic equipment. A filter or
filter regulator capable of removing
particles 40 microns in diameter
should suffice for most applications.
Use of suitable filtration equipment
and the establishment of a mainte-
nance cycle to monitor its operation
is recommended.
Supply pressure must be clean, dry air or noncorrosive
gas that meets the requirements of ISA Standard
S7.3. A Type 67CFR filter regulator, or equivalent,
may be used to filter and regulate supply air.
If you are using a Type 67CFR filter regulator, connect
the supply line to the1/4-inch NPT IN connection and
attach tubing from the output connection on the filter
regulator to the SUPPLY connection on the
instrument. If you are using an integral mounted Type
67CFR filter regulator, connect the supply to the IN
connection on the regulator.
Output Connection
A factory mounted digital valve controller has its
output piped to the supply connection on the actuator.
If mounting the digital valve controller in the field,
connect the 1/4-inch NPT digital valve controller output
connection to the pneumatic actuator input connection.
If using the Type DVC5010 on actuators with greater
than 2-inch travel, plug the output connection on the
side of the digital valve controller and use the output
connection on the back of the unit.
2

Installation
November 1999 2-3
Vent
WARNING
If a flammable, toxic, or reactive gas is
to be used as the supply pressure me-
dium, personal injury and property
damage could result from fire or ex-
plosion of accumulated gas or from
contact with toxic or reactive gas. The
digital valve controller/actuator as-
sembly does not form a gas-tight seal,
and when the assembly is in an en-
closed area, a remote vent line, ade-
quate ventilation, and necessary safe-
ty measures should be used. A re-
mote vent pipe alone cannot be relied
upon to remove all hazardous gas.
Vent line piping should comply with
local and regional codes and should
be as short as possible with adequate
inside diameter and few bends to re-
move exhaust gases to a ventilated
area.
The relay output constantly bleeds supply air into the
area under the cover. The vent opening at the back of
the housing should be left open to prevent pressure
buildup under the cover. If a remote vent is required,
the vent line must be as short as possible with a
minimum number of bends and elbows.
To connect a remote vent to Type DVC5010,
DVC5030, and DVC5040 digital valve controllers—
sliding-stem The Type DVC5040 digital valve
controller has no pipe fitting for the vent. The vent is
purged under the actuator cover. For the Type
DVC5010 and DVC5030 digital valve controllers,
remove the plastic vent. The vent connection is
1/4-inch NPT female. Typically, 3/8-inch (10 mm)
tubing is used to provide a remote vent.
To connect a remote vent to Type DVC5020 digital
valve controllers—rotary Replace the standard
mounting bracket with the vent-away mounting
bracket. Install a pipe plug in the vent-away mounting
bracket. Mount the digital valve controller on the
actuator as described in the mounting instructions
included with the mounting kit.
Electrical Connections
WARNING
To avoid personal injury or property
damage caused by fire or explosion,
remove power to the instrument be-
fore removing the terminal box cover
in an area which contains a potential-
ly explosive atmosphere or has been
classified as hazardous.
4 to 20 mA Loop Connections
The digital valve controller is normally powered by a
control system output card. The use of shielded cable
will ensure proper operation in electrically noisy
environments.
CAUTION
Do not connect the digital valve con-
troller directly to a voltage source
when implementing the point-to-point
wiring mode, or damage to the printed
wiring board assembly submodule
may result. In point-to-point wiring
mode, the digital valve controller may
only be connected to a 4–20 mA cur-
rent source.
Wire the digital valve controller as follows, refer to
figure 2-3:
1. Remove the terminal box cap.
2. Bring the field wiring into the terminal box. When
applicable, install conduit using local and national
electrical codes which apply to the application.
Note
In the next step, note that the position
of the LOOP + and – terminals is differ-
ent than in previous units.
3. Connect the control system output card positive
wire ‘‘current output’’ to the LOOP + screw terminal in
the terminal box. Connect the control system output
card negative (or return) wire to the LOOP – screw
terminal in the terminal box.
2
DVC5000 Series
November 1999
2-4
Figure 2-3. DVC5000 Series Digital Valve Controller
Terminal Box
NOTE: THIS TERMINAL BOX IS DIFFERENT THAN PREVIOUS
UNITS. NOTE CHANGE IN POSITION OF LOOP + AND – TERMINALS.
38B6470-B
E0030 / IL
SAFETY GROUND
LOOP–
LOOP+
EARTH GROUND
TALK+
TALK– 4. Connect the safety ground and the earth ground as
shown in figure 2-3. Replace and hand tighten the
terminal box cap. When the loop is ready for startup,
apply power to the control system output card.
WARNING
Personal injury or property damage
can result from the discharge of static
electricity. Connect a 14 AWG (2.08
mm2) ground strap between the digi-
tal valve controller and earth ground
when flammable or hazardous gases
are present. Refer to national and lo-
cal codes and standards for ground-
ing requirements.
To avoid static discharge from the
plastic cover, do not rub or clean the
cover with solvents. Clean with a mild
detergent and water only.
nInstallation Check List
Is the instrument correctly mounted on the actuator? If not, see installation
instructions provided with the mounting kit.
Is the feedback linkage properly connected? If not, see installation instructions
provided with the mounting kit.
Is the regulator correctly mounted? If not, perform one of the regulator mounting procedures on
page 2-1.
Is the air supply connected and at proper pressure? If not connect supply as described on page
2-2. Also see specifications on page 5-1.
Is the instrument output connected to the actuator? If not, connect instrument output as
described on page 2-2.
If necessary, is the conduit properly installed? If not, refer to local and national electrical
codes.
j
j
j
j
j
Mounting
Pneumatic Connections and Air Supply
Electrical Connections
j
jIs the loop wiring properly connected to the LOOP + and –terminals in the terminal box? If not, con-
nect loop wiring as described on page 2-3.
You are ready to perform Initial Setup and Calibration in the next section.
2

Initial Setup and Calibration
November 1999 3-1
Figure 3-1. Connecting the HART Communicator to a FIELDVUE Instrument
FIELD
CONTROLLER
I/O
1
+
––
+
HF200 SERIES
HART FILTER
FIELD INSTRUMENT
CONNECTION
2
HART
COMMUNICATION
CONNECTION
NOTE: THE POSITION OF THE TALK TERMINALS
IS DIFFERENT THAN IN PREVIOUS UNITS
HART COMMUNICATOR
CONNECTIONS
4-20 MA LOOP
CONNECTIONS
NOTE:
NOT ALL CONTROL SYSTEMS REQUIRE A HART FILTER. IF NO HART FILTER IS PRESENT, CONNECT
HART COMMUNICATOR TO CONTROL SYSTEM OUTPUT TERMINALS.
SEE FIGURE 2-3 FOR TERMINAL BOX DETAILS
1
2
38B6470-A / DOC
A6194–2 / IL
CONTROL ROOM
3-3 3
Connectingthe Model 275 HART
Communicator to the Digital Valve
Controller
The HART Communicator may be connected to the 4
to 20 mA loop wiring or directly to the digital valve
controller (see figure 3-1).
If the HART Communicator is connected directly to the
digital valve controller , attach the clip-on wires
provided with the HART Communicator to the TALK
terminals, or the LOOP + and – terminals, in the digital
valve controller terminal box (see figure 2-3).
Initial Setup
CAUTION
Changes to the instrument setup may
cause changes in the output pressure
or valve travel.
Before beginning initial setup, be sure the instrument
is correctly mounted. Refer to the installation
instructions supplied with the mounting kit.
Connect a 4–20 mA current source to the instrument.
Connect the HART Communicator to the instrument
and turn it on. For information on connecting the
HART Communicator, see Connecting the Model 275
HART Communicator to the Digital Valve Controller .
Typical Mountings
The Setup Wizard determines the required setup
information for the actuators listed in table 3-1 based
upon the actuator manufacturer and model specified.
Turn on the HART Communicator and start the Setup
Wizard by proceeding through the menu sequence
shown in figure 3-2 or enter the fast-key sequence
1-1-1-1 on the keypad. Follow the prompts on the
HART Communicator display to setup the instrument.
If the actuator on which the instrument is mounted is
not listed by the Setup Wizard, specify OTHER as the
actuator manufacturer or actuator type and go to
“Other Mounting” on page 3-3 of this guide.
During initial setup, the Setup Wizard will ask you if
you want to use factory defaults. If you select YES,
the Setup Wizard sets the setup parameters to the
values listed in table 3-2. If you select NO, the setup
parameters listed in the table remain at their previous
settings
3

DVC5000 Series
November 1999
3-2
Figure 3-2. Accessing the Setup Wizard on the Model 275 HART Communicator
From the DVC5000 online menu,
select Main Menu.
2 Detailed Setup
3 Display
4 Calibrate
5 Stroke Output
Main Menu (Setup)
From the Main Menu, select Initial
Setup.
From the Auto Setup menu, se-
lect Setup Wizard and follow the
on-line instructions.
2 Manual Setup
Initial Setup
2 Auto Calib Travel
Auto Setup
1'Setup Wizard
3 Stabilize/Optimize
From the Initial Setup menu, select
Auto Setup.
1'Initial Setup
1'Main Menu
2 Analog In12.42 mA
3 Pressure 10 psi
4 Travel 53.69%
5 Drive Sgl 58.15%
1'Auto Setup
Table3-1. Actuators Available with Setup Wizard
Manufacturer Actuator Model
Fisher Controls
513 and 513R
585C and 585CR
657 and 667
1051 or 1052
1066SR
1250 and 1250R
System 9000
Baumann All
Gulde 3024
3025
Masoneilan Camflex II
Sigma F, Minitorque
and Ball II
Neles-Jamesbury Quadra-Power II
Table 3-2. DVC5000 Series Factory Default Settings
Setup Parameter Default Setting
Analog Input Units
Input High
Input Low
mA
20.0 mA
4.0 mA
Travel Range High
Travel Range Low 100%
0%
Control Mode
Restart Control Mode
Self-Test Shutdown
Analog (RSP)
Resume Last
All Failures Disabled
Dynamic Bypass Enabled
Input Filter Time
Input Characteristic
No
0 secs
Linear
Travel Limit High
Travel Limit Low
Travel Cutoff High
Travel Cutoff Low
125%
–25%
99.5%
0.5%
Minimum Opening Time
Minimum Closing Time
Polling Address
0 secs
0 secs
0
3

Initial Setup and Calibration
November 1999 3-3
Figure 3-3. Feedback Connection for
Model 471 Sliding-Stem Actuator
CAM
ROLLER
27B6708-B
E0032 / IL
STEM
CONNECTOR
After the Setup Wizard completes the setup, press OK
to return to the Auto Setup menu. Select Auto Calib
Travel to automatically calibrate the instrument travel.
Follow the prompts on the HART Communicator
display. The calibration procedure uses the valve and
actuator stops as the 0% and 100% calibration points.
For additional information, refer to Auto Calibrate
Travel in this section.
Other Mountings
If the actuator on which the instrument is mounted is
not listed by the Setup Wizard, specify OTHER as the
actuator manufacturer or actuator type. You are then
prompted for setup parameters such as:
DActuator Type (single-acting or double-acting)
DValve Style (rotary or sliding-stem)
DFeedback Connection (Rotary - All, SStem -
Standard,SStem - Roller). For rotary valves, enter
Rotary - All. For sliding-stem valves, if the feedback
linkage consists of a connector arm, adjustment arm,
and feedback arm (as shown in figure 3-4), enter
SStem - Standard. If the feedback linkage consists of
a roller that follows a cam (as shown in figure 3-3),
enter SStem - Roller.
DOn Loss of Instrument Signal, Valve (opens
or closes) This identifies whether the valve is fully
open or fully closed when the input is 0%. If you are
unsure how to set this parameter, disconnect the
current source to the instrument. (With direct acting
digital valve controllers, disconnecting the current
source is the same as setting the output pressure to
zero.)
WARNING
If you answer YES to the prompt for
permission to move the valve, the in-
strument will move the valve through
a significant portion of its travel
range. To avoid personal injury and
property damage caused by the re-
lease of pressure or process fluid,
provide some temporary means of
control for the process.
DTravel Sensor Motion (increasing air pressure
causes the travel sensor shaft to rotate clockwise or
counterclockwise), The Setup Wizard asks if it can
move the valve to determine travel sensor motion. If
you answer yes, the instrument will stroke the valve
the full travel span to determine travel sensor motion.
If you answer No, then you must specify the rotation
for increasing air pressure: clockwise or counterclock-
wise. Determine rotation by viewing the end of the
travel sensor shaft, as shown in figure 3-4. If
increasing air pressure to the actuator causes the
shaft to turn clockwise, enter CW (clockwise). If it
causes the shaft to turn counterclockwise, enter CCW
(counterclockwise).
DInstrument Supply Pressure Range. This
adjusts the range of the instrument pressure sensor.
Supply Pressure is configured in pressure units of psi,
bar, or kPa. Select a supply pressure range that
includes the instrument supply pressure.
CAUTION
Changes to the tuning set can result in
valve/actuator instability.
DTuning Set There are eleven tuning sets to
choose from. Each tuning set provides preselected
values for the digital valve controller gain and rate
settings. Typically, tuning set C provides the slowest
response and M provides the fastest response. For
smaller actuators, use tuning set C or D. For larger
actuators , use tuning set F or G.
After the Setup Wizard completes the setup, press OK
to return to the Auto Setup menu. Select Auto Calib
Travel to automatically calibrate the instrument travel.
Follow the prompts on the HART Communicator
display. The calibration procedure uses the valve and
actuator stops as the 0% and 100% calibration points.
For additional information, refer to Auto Calibrate
Travel in this section.
3

DVC5000 Series
November 1999
3-4
A6536 / IL
Figure3-4. Crossover Point
ACTUATOR
STEM TRAVEL SENSOR SHAFT
FEEDBACK ARM
CONNECTOR ARM
ADJUSTMENT ARM
Auto Calibrate Travel
WARNING
During calibration the valve will move
full stroke. To avoid personal injury
and property damage caused by the
release of pressure or process fluid,
provide some temporary means of
control for the process.
Select Auto Calib Travel then follow the prompts on
the HART Communicator display to automatically
calibrate travel.
1. If the Feedback Connection is Sliding-Stem
Standard, the HART Communicator prompts you to
select the method of crossover adjustment: manual,
last value, or default. Manual adjustment is
recommended for initial travel calibration.
2. When prompted by the HART Communicator,
make the crossover adjustment by adjusting the
current source until the feedback arm is 90°to the
actuator stem, as shown in figure 3-4.
3. The remainder of the auto-calibration procedure is
automatic. After completing auto travel calibration, the
HART Communicator prompts you to place the
instrument In Service and verify that the travel
properly tracks the current source.
Table3-3. Auto Calibrate Travel Error Messages
Error Message Possible Problem and Remedy
Input current must
exceed 3.8 mA for
calibration.
The analog input signal to the instrument
must be greater than 3.8 mA. Adjust the
current output from the control system or the
current source to provide at least 4.0 mA.
Place Out Of Service
and ensure Calibrate
Protection is disabled
before calib.
The Instrument Mode must be Out of Service
and the Protection must be None before the
instrument can be calibrated. For information
on changing instrument mode and protection,
see Instrument Mode and Configuration
Protection in this section.
Calibration Aborted.
An end point was not
reached.
The problem may be one or the other of the
following:
1. The tuning set selected is too low and the
valve does not reach an end point in the
allotted time. Press the Hot Key, select
Stabilize/Optimize then Increase Response
(selects next higher tuning set).
2. The tuning set selected is to high, valve
operation is unstable and does not stay at an
end point for the allotted time. Press the Hot
Key, select Stabilize/Optimize then Decrease
Response (selects next lower tuning set).
Invalid travel value.
Check travel sensor
and feedback arm
adjustments, and inst
supply press. Then,
repeat Auto Calib.
Verify proper mounting by referring to the
appropriate mounting instructions.
Verify instrument supply pressure by referring
to the specifications in the appropriate
actuator instruction manual.
Verify travel sensor adjustment by performing
the appropriate Travel Sensor Adjust
procedure in the FIELDVUE DVC5000 Series
Digital Valve Controller Instruction Manual –
Form 5335.
Making the crossover adjustment with the
valve positioned at either end of its travel will
also cause this message to appear.
If the unit does not calibrate, refer to table 3-3 for error
messages and possible remedies.
If after completing auto setup and auto calibration the
valve cycles or overshoots, or is unresponsive, you
can improve operation by selecting Stabilize/Optimize
from the Auto Setup menu. For additional information,
refer to Stabilizing or Optimizing Valve Response in
this section.
Stabilizing or Optimizing Valve
Response
If after completing initial setup and auto calibration the
valve seems slightly unstable or unresponsive, you
can improve operation by pressing the Hot Key
and selecting Stabilize/Optimize, or select
Stabilize/Optimize from the Auto Setup menu.
To stabilize valve operation, select Decrease
Response. This selects the next lower tuning set (e.g.,
F to E). To make the valve more responsive, select
Increase Response. This selects the next higher
tuning set (e.g., F to G).
3

Initial Setup and Calibration
November 1999 3-5
nInitial Setup and Calibration Check List
Is Initial setup complete? If not, perform Initial Setup procedure on page
3-1.
Is calibration complete? If not, perform Auto Calibrate Travel procedure on
page 3-4.
Does the final control element correctly respond to a setpoint change and is it
stable? If not, perform Stabilizing or Optimizing Valve Response on page
3-4.
Final control element is ready to be placed on line.
j
j
j3

DVC5000 Series
November 1999
3-6
3

Maintenance
November 1999 4-1
Figure 4-1 . DVC5000 Series Digital Valve Controller Assembly
TERMINAL BOX COVER
TERMINAL BOX ASSEMBLY
HOUSING GASKET
PRINTED WIRING BOARD
ASSEMBLY
PNEUMATIC RELAY
RELAY CAP
I/P CONVERTER
MODULE BASE ASSEMBLY
PRESSURE
GAUGES
(OPTIONAL)
TRAVEL
SENSOR
ASSEMBLY
COVER
ASSEMBLY
48B9444-A
A7026-1 / IL
COVER
SCREW
SOCKET-HEAD SCREWS (4)
RETAINING CLIPS (4)
SHROUD
0-RINGS (4)
0-RING
SCREWS (4)
4-4 4
Because of the diagnostic capability of the DVC5000
Series digital valve controllers, predictive maintenance
is available through the use of FIELDVUE ValveLink
Software. Using the digital valve controller, valve and
instrument maintenance can be enhanced, thus
avoiding unnecessary maintenance. For information
on using the ValveLink software, see the FIELDVUE
ValveLink VL2000 Series Software User Guide.
Stroking the Digital Valve Controller
Output
Connect a 4–20 mA current source and the
recommended air supply (for the recommended supply
pressure, see the specifications in section 5) to the
instrument. Connect the HART Communicator to the
instrument as described in section 3 and turn it on.
From the Online menu, select Main Menu and Stroke
Output. Follow the prompts on the HART
Communicator display to ramp or step the valve
position.
Master Module Maintenance
The digital valve controller contains a master module
consisting of the I/P converter, printed wiring board
assembly, and pneumatic relay. The master module
may be easily replaced in the field without
disconnecting field wiring or tubing.
Removing the Master Module
To remove the master module, perform the following
steps. Refer to figure 4-1 for parts identification.
WARNING
To avoid personal injury or equipment
damage, turn off the supply pressure
to the digital valve controller before
attempting to remove the module
base assembly from the housing.
1. For sliding-stem applications only, a protective
shield for the feedback linkage is attached to the side
of the module base assembly. Remove this shield and
keep for reuse on the replacement module. The
replacement module will not have this protective
shield.
4

DVC5000 Series
November 1999
4-2
Figure 4-2. Printed Wiring Board Cable Connections
TERMINAL BOX
MODULE BASE
ASSEMBLY
PRINTED WIRING
BOARD ASSEMBLY
HOUSING
CABLE TO
TERMINAL BOX
W7654 / IL
CABLE TO
TRAVEL SENSOR
2. Unscrew the captive screw in the cover and
remove the cover from the module base.
3. Using a 5/16-inch hex wrench, loosen the
four-socket head screws. These screws are captive in
the module base by retaining rings.
Note
The master module is linked to the hous-
ing by two cable assemblies. Disconnect
these cable assemblies after you pull the
master module out of the housing.
4. Pull the master module straight out of the housing.
Once clear of the housing, swing the master module to
the side of the housing to gain access to the cable
assemblies.
5. The digital valve controller has two cable
assemblies, shown in figure 4-2, which connect the
master module, via the printed wiring board assembly,
to the travel sensor and the terminal box. Disconnect
these cable assemblies from the printed wiring board
assembly on the back of the master module.
CAUTION
To avoid affecting performance of the
instrument, take care not to damage
the master module gasket or guide
surface. Do not bump or damage the
bare connector pins on the printed wir-
ing board assembly.
Replacing the Master Module
To replace the master module, perform the following
steps. Refer to figure 4-1.
CAUTION
To avoid affecting performance of the
instrument, inspect the guide surface
on the module and the corresponding
seating area in the housing before
installing the module base assembly.
These surfaces must be free of dust,
dirt, scratches, and contamination.
Ensure the gasket is in good condi-
tion. Do not reuse a damaged or worn
gasket.
1. Ensure the gasket is aligned properly on the
master module.
2. Connect the terminal box connector to the printed
wiring board assembly. Orientation of the connector is
required.
3. Connect the travel sensor connector to the pwb
assembly. Orientation of the connector is required.
4. Insert the module base into the housing.
5. Insert the four socket head screws in the master
module into the housing. If not already installed, press
four retaining rings into the module base. Evenly
tighten the screws in a crisscross pattern to a final
torque of 138 lbfSin (16 NSm).
6. Insert the cover hinge tabs into the module base.
Swing the cover down into position and tighten the
cover screw.
In the next two steps, refer to figure 2-2.
7. If not already installed, screw the vent into the vent
connection on the back of the housing.
8. If not already installed, apply sealant to the pipe
plug and install it in the output connection on the back
of the housing.
4

Maintenance
November 1999 4-3
9. For sliding-stem applications only, install the
protective shield (key 102) onto the side of the
replacement module base assembly.
Submodule Maintenance
The digital valve controller’s master module contains
the following submodules: I/P converter, printed wiring
board assembly, and pneumatic relay. If problems
occur, these submodules may be removed from the
master module and replaced with new submodules.
After replacing a submodule, the master module may
be put back into service.
Note
If the printed wiring board assembly or I/P
converter submodule is replaced, calibrate
and configure the DVC5000 Series digital
valve controller to maintain accuracy
specifications. If any other submodule
was replaced, recalibration or adjustment
of the digital valve controller, master mod-
ule, or submodules is not necessary.
Exercise care when you perform mainte-
nance on the master module. Reinstall the
cover to protect the I/P converter and
gauges when servicing other submodules.
I/P Converter
Refer to figure 4-1 for part identification. The I/P
converter is located on the front of the master module.
Replacing the I/P Filter
A screen in the supply port beneath the I/P converter
serves as a secondary filter for the supply medium. To
replace this filter, perform the following procedure:
1. Remove the I/P converter and shroud as described
in the Removing the I/P Converter procedure.
2. Remove the screen from the supply port.
3. Install a new screen in the supply port as shown in
figure 4-3.
SCREEN (FILTER)
LOCATED IN I/P
CONVERTER
SUPPLY PORT
Figure4-3. I/P Filter Location
O-RING LOCATED
IN I/P CONVERTER
OUTPUT PORT
W7601 / IL
4. Inspect the O-ring in the I/P output port. if
necessary, replace it.
5. Reinstall the I/P converter and shroud as described
in the Replacing the I/P Converter procedure.
Removing the I/P Converter
1. Remove the front cover, if not already removed.
2. Refer to figure 4-4. Remove the four socket-head
screws that attach the shroud and I/P converter to the
module base.
3. Remove the shroud; then pull the I/P converter
straight out of the module base. Be careful not to
damage the two electrical leads that come out of the
base of the I/P converter.
4. Ensure that the O-ring and screen stay in the
module base and do not come out with the I/P
converter.
Replacing the I/P Converter
1. Refer to figure 4-3. Inspect the condition of the
O-ring and screen in the module base. Replace them,
if necessary. Apply sealant to the O-rings.
2. Ensure the two boots shown in figure 4-4 are
properly installed on the electrical leads.
3. Install the I/P converter straight into the module
base, taking care that the two electrical leads feed into
the guides in the module base. These guides route the
leads to the printed wiring board assembly submodule.
4. Install the shroud over the I/P converter.
5. Install the four socket-head screws and evenly
tighten them in a crisscross pattern to a final torque of
20.7 lbfSin (2 NSm).
4

DVC5000 Series
November 1999
4-4
Figure 4-4. I/P Converter
SHROUD
A7027 / IL
BOOTS
SOCKET-HEAD
SCREWS (4)
I/P CONVERTER
Printed Wiring Board Assembly
Refer to figure 4-1 for parts identification. The printed
wiring board assembly is located on the back of the
module base assembly.
Removing the Printed Wiring Board
Assembly
1. Remove the master module according to
instructions in this manual.
2. Remove three screws.
3. Lift the printed wiring board assembly straight out
of the module base.
4. Ensure that the O-ring is attached to the pressure
sensor or sensor plug after the printed wiring board
assembly has been removed from the module base.
Replacing the Printed Wiring Board
Assembly and Setting the Mode Switches
1. Apply sealant to the pressure sensor O-ring.
2. Properly orient the printed wiring board assembly
as you install it into the module base. The two
electrical leads from the I/P converter must guide into
their receptacles in the pwb assembly and the
pressure sensor or sensor plug on the printed wiring
board assembly must fit into its receptacle in the
module base.
3. Push the printed wiring board assembly into its
cavity in the module base.
4. Install and tighten three screws to a torque of 10.1
lbfSin (1 NSm).
5. Set the DIP switches on the printed wiring board
assembly according to table 4-1.
Note
Be sure the multidrop switch is set for
operation in a point-to-point loop and
the auxiliary switch is set for switch
operation, i.e., both switches down.
4
This manual suits for next models
1
Table of contents
Other Fisher Controllers manuals

Fisher
Fisher 1066 User manual

Fisher
Fisher FIELDVUE DVC6200f User manual

Fisher
Fisher 6492HTM User manual

Fisher
Fisher R622 User manual

Fisher
Fisher 2502 Series Level-Trol User manual

Fisher
Fisher FIELDVUE DLC3010 User manual

Fisher
Fisher EZR Series User manual

Fisher
Fisher L2e User manual

Fisher
Fisher 92S User manual

Fisher
Fisher 4660 User manual

Fisher
Fisher EZR User manual

Fisher
Fisher 667 User manual

Fisher
Fisher 1290 User manual

Fisher
Fisher DPR900 User manual

Fisher
Fisher 655 User manual

Fisher
Fisher 480-12 User manual

Fisher
Fisher R130/21 User manual

Fisher
Fisher MR95L User manual

Fisher
Fisher FIELDVUE DLC3010 User manual

Fisher
Fisher 64 User manual