FLAIM Systems Extinguisher V3 User manual

Copyright © 2023
aimsystems.com
info@aimsystems.com
January 2023
V3 User Manual
Check support.aimsystems.com
for the latest up-to-date content
Welcome to the FLAIM
community!
Proper skills and early response to re saves lives! FLAIM Extinguisher
immerses trainees in virtual reality, delivering a realistic simulation of a
range of re events to efciently train rst responders
1

Contents
What’s in the Case 3
Parts list 4
Input 6
Quick Start Guide 7
How to setup the system 8
How to Use FLAIM Extinguisher 11
Streaming to Monitor/TV/Projector 12
Connecting to Wi-Fi 12
FLAIM Extinguisher Lobby 13
Selecting and Running a Scenario 13
Extinguisher Tab 14
Technique Tab 14
How to update FLAIM Extinguisher 15
Localisation 16
Safety 17
Battery Charging 17
Use Conditions 18
Maintenance 18
Further Support 18
Troubleshooting 19
2
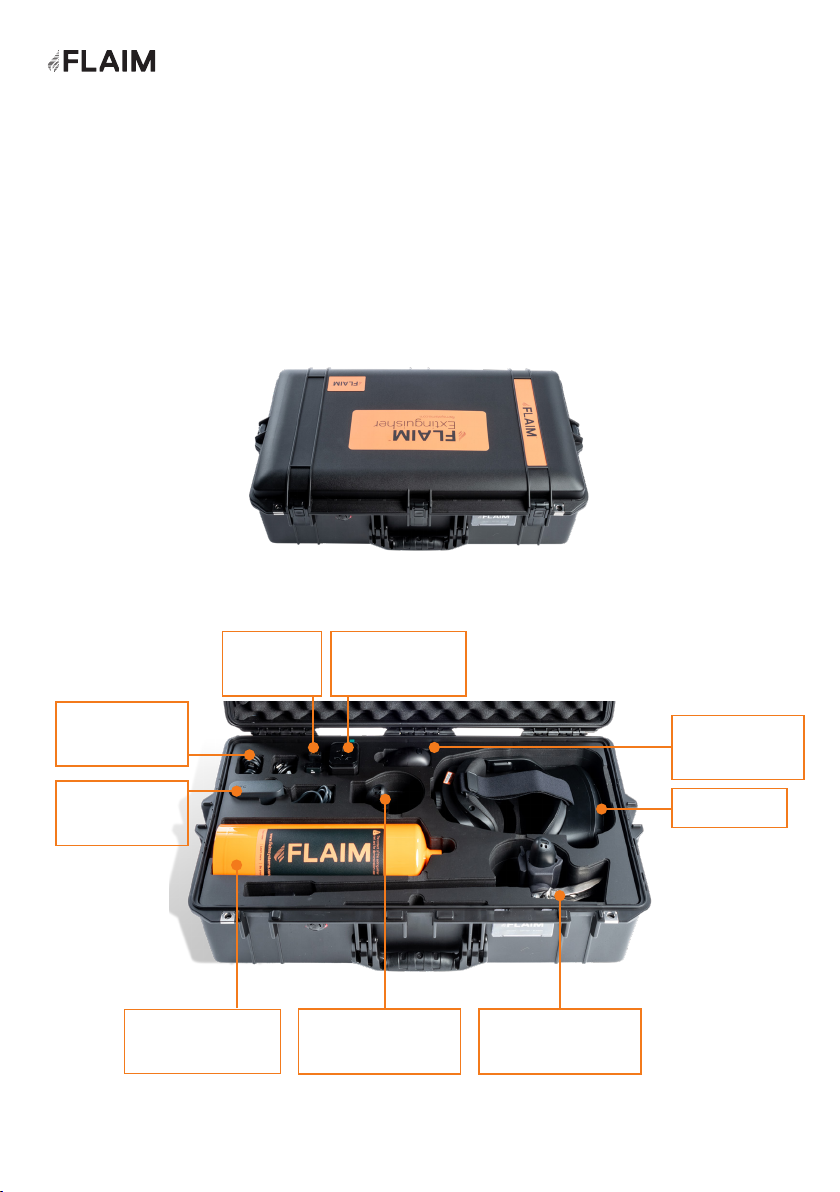
What’s in the case?
Please see below images of the individual parts that come in your FLAIM Extinguisher
case (Figure 1 and 2).
Figure 1: FLAIM Extinguisher System case
Figure 2: Inside the FLAIM Extinguisher case
FLAIM Extinguisher V3
Extinguisher
Bottle (empty)
Power and
HDMI Leads
Headset
Charger
Hose
Tracker
VR Headset
HDMI
Receiver
Trigger
Assembly
Left Controller
(do not use)
International
Adaptor
3

QTY Description Picture
1VR Headset:
HTC VIVE
Focus 3
1Headset
Battery
Additional batteries
can be purchased
separately
1Extinguisher
Bottle
1Trigger
Assembly
Houses the right
controller
QTY Description Picture
1Hose Tracker
1USB C Y
Splitter Cable
Can be used to
charge the tracker
and controller
1USB A to USB
C Cable
Can be used to
charge the tracker
or controller
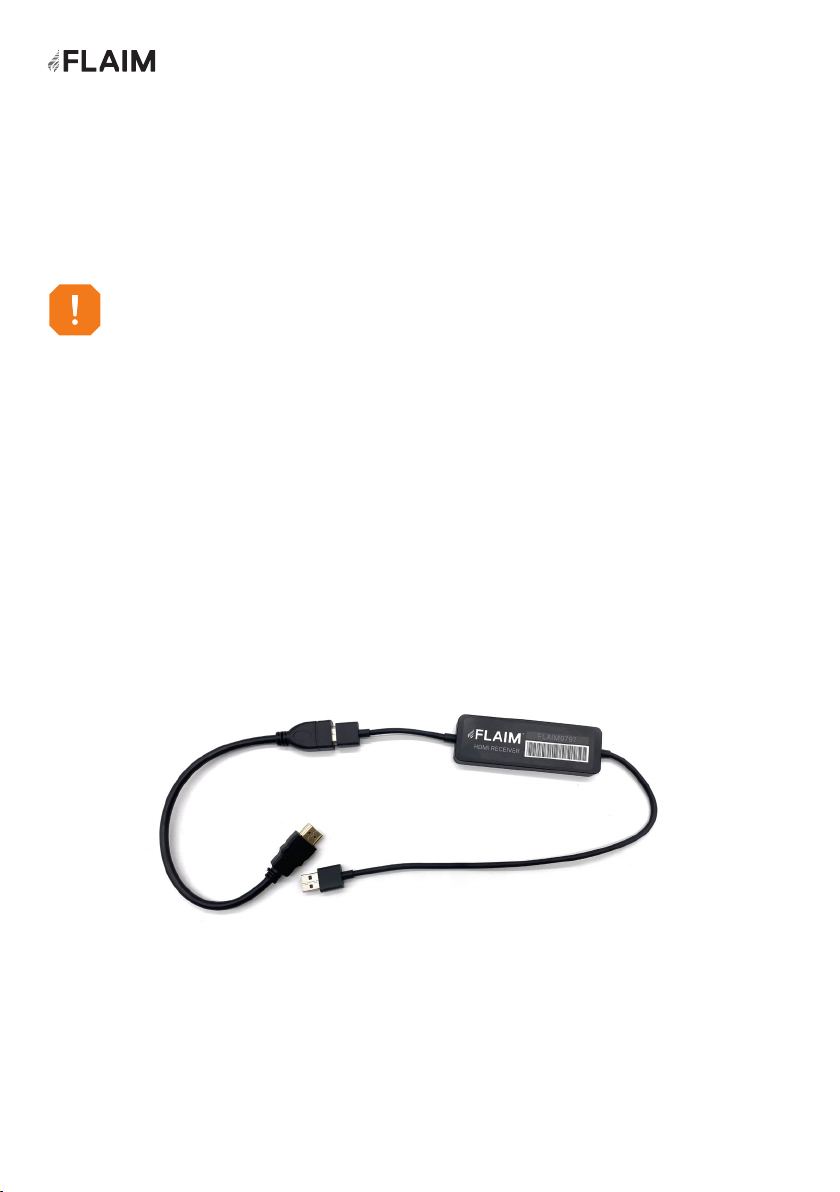
1HDMI Receiver
Parts list
4
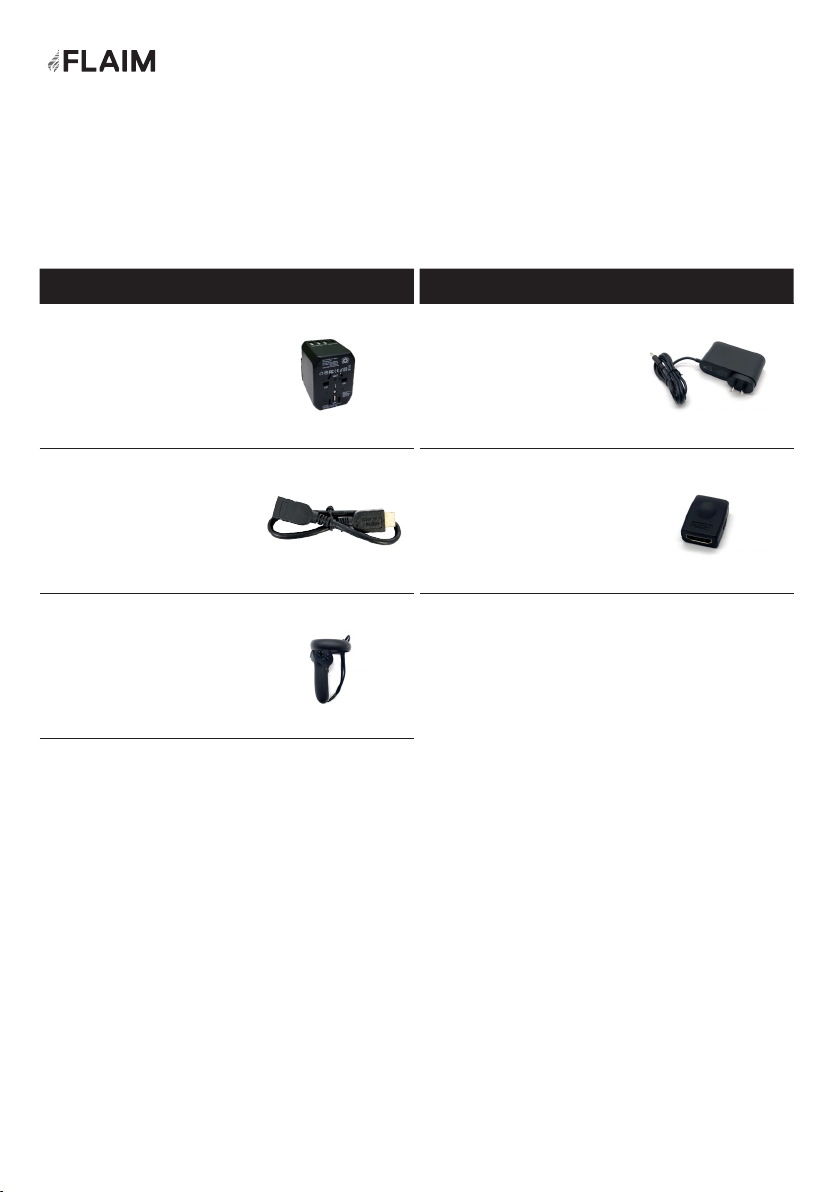
Parts list (continued)
QTY Description Picture
1International
Adaptor
For charging HTC
VIVE Focus 3
1HDMI Extension
Cable
1Left Controller
This if for future
provisions. Do not
use
QTY Description Picture
1Headset
Charger
1HDMI Female to
Female Adaptor
5

Input
Description Picture
Extinguisher Trigger
Use to activate the equipped
suppressant and interact
with lobby and scenario
items
Hose Tracker Teleport &
Interact Button
Use to interact with lobby
& scenario items and/or
teleport (when the scenario
supports it)
Headset Side
Conrm Button
Hold button to return to
lobby. Double-press the
button to toggle pass-
through mode (to view your
surroundings)
Headset Power Button
Use to turn on/off the
headset
Description Picture
Right Controller Home/
Power Button
Use to turn on the controller
& access VIVE menu
Hose Tracker
Power Button
Use to turn on the tracker
Headset Volume Controls
Use to adjust the volume
Lens Adjustment Dial
Use to adjust the lens
spacing for a better viewing
experience
Ways users can interact with the system
6
Quick Start Guide
Training instructor viewing system
How to set-up, run and get the best training experience from your FLAIM
Extinguisher training system.
The training instructor viewing system (Figure 3) receives the signal transmitted by the
FLAIM Extinguisher VR headset. It allows the training instructor and others in the room
to experience a live view of what the person can see in the virtual environment.
The training instructor viewing system consists of a HDMI receiver that connects to a
television/projector (not supplied) via a supplied HDMI cable.
Before you start, make sure you have adequate working space.
Some scenarios require the trainee to walk closer to the re to extinguish.
FLAIM recommends 4m x 4m (13ft x 13ft) minimum open clear oor area space!
Figure 3: Instructor Viewing System Connection
7
Step 2: Turn on the HDMI receiver
Step 1: Register your unit Step 3: Select the input source
1. Plug the HDMI end into the HDMI port on your
television or projector.
2. Plug the USB lead into the USB port on your
television or projector.
3. When powered, the receiver power light will
glow white (see Figure 4). The USB Power
supply delivers power to the HDMI receiver.
Some TVs/Monitors/Projectors cannot supply
enough power from their in-built USB port.
If there is no light on, it is likely that your
system cannot supply enough power from its
in-built USB port. If this occurs, please use the
included international adaptor connected to a
power outlet. You should now see a white light
on the HDMI receiver (see Figure 4).
1. You can do this by scanning the QR code
on the packaging box that your extinguisher
comes in or go to www.aimsystems.com/
register. This will assist with warranty/
support and ensure that you receive
notication of any updates and access to all
of the latest scenarios (while your unit is in
subscription).
1. Select the source on your television or
projector. You will now see the “is ready
to connect” screen (Figure 5) on your
television or projector.
Figure 4: Ensure HDMI receiver is powered (white light)
– top right
Figure 5: HDMI Receiver “is ready to connect” screen
How to setup the system
1. Remove the extinguisher bottle and
trigger assembly from the case.
2. Screw the trigger assembly onto the
bottle. Take care when assembling to
prevent cross-threading.
3. Remove the hose tracker from the case.
4. Clip the hose
tracker onto the
end of the trigger
assembly.
Orientate the hose
tracker with the
bulb facing upwards
(vertical).
Step 4: Set up the Extinguisher bottle
8
1. Remove the VR headset and headset battery from the case.
2. Take off the magnetic back pad.
3. Install the headset battery by aligning the slots, and then push to click into place.
4. Reattach the magnetic back pad.
5. Put on the VR headset by putting it over your eyes rst, and then sliding it over the back of
your head. Ensure it is tted rmly. To tighten the t for the user, the VR headset can be
adjusted at the back via the adjustment knob and on top of the head using the strap.
6. To power on the VR headset, hold down the power button for a few seconds (on the back right
side of the headset nearby the power indicator).
7. The VR headset is ON once the VIVE Focus 3 logo appears. Whenever you see the spinning
image it is important to look down at a clear oor to ensure accurate oor height calibration.
8. Adjust the headset lens spacing using the dial for better experience (if required).
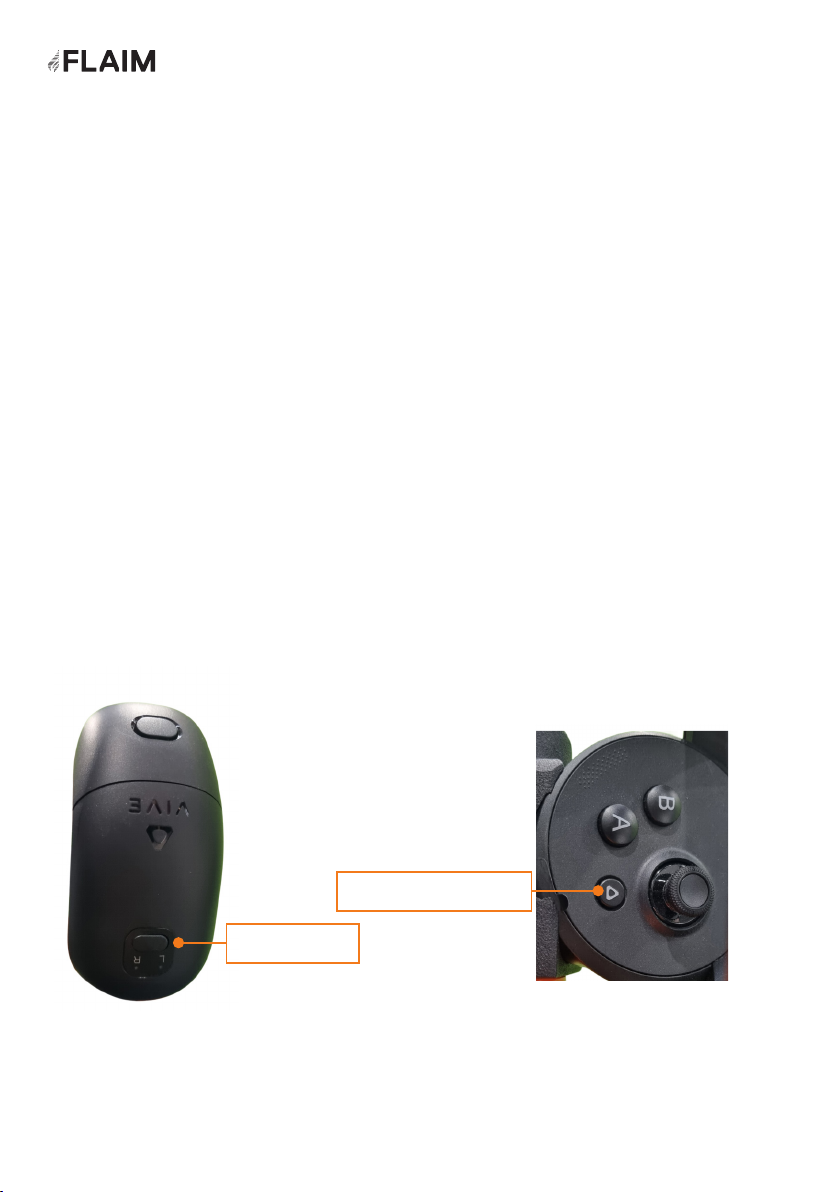
Step 6: Powering of the FLAIM Extinguisher controller tracking system
Figure 6: Hose Tracker Power Button Figure 7: Right Controller Home/Power Button
Home/Power Button
Power Button
Step 5: Set up the VR headset
1. Short press the highlighted buttons (Figure 6 and Figure 7) to wake up the hose
tracker and right controller.
9

10

How to Use FLAIM Extinguisher
Once the system is turned on the initial
FLAIM Launcher will appear within 1 minute
Getting Started
11
1. To stream to the television or projector select the
video connection button at top of screen.
2. Select the FLAIM device by clicking on its name
(eg. FLAIMXXX) and wait until the message below
shows ‘Connected’.
3. You should see “Connecting to this display” on
your television or projector. It may take 10-20
seconds to connect.
4. FLAIM Extinguisher will now be streaming to the
television or projector. It will show the VR headset view.
5. Note: It will only stream while the headset is placed on your head. The television or projector
screen will pause when the headset is removed.
6. Short press ‘Home’ button on the controller to close the overlay.
1. To connect to Wi-Fi select the Wi-Fi button at
top of screen.
2. Select Wi-Fi on the resulting overlay to open
Wi-Fi settings.
3. Select desired Wi-Fi network, enter password and
wait until the message below shows ‘Connected’.
4. Select the ‘X’ button to close the overlay.
Streaming to Monitor/TV/Projector
Figure 9: Wi-Fi Connection Button
Connecting to Wi-Fi
Figure 8: Video Connection Button
12

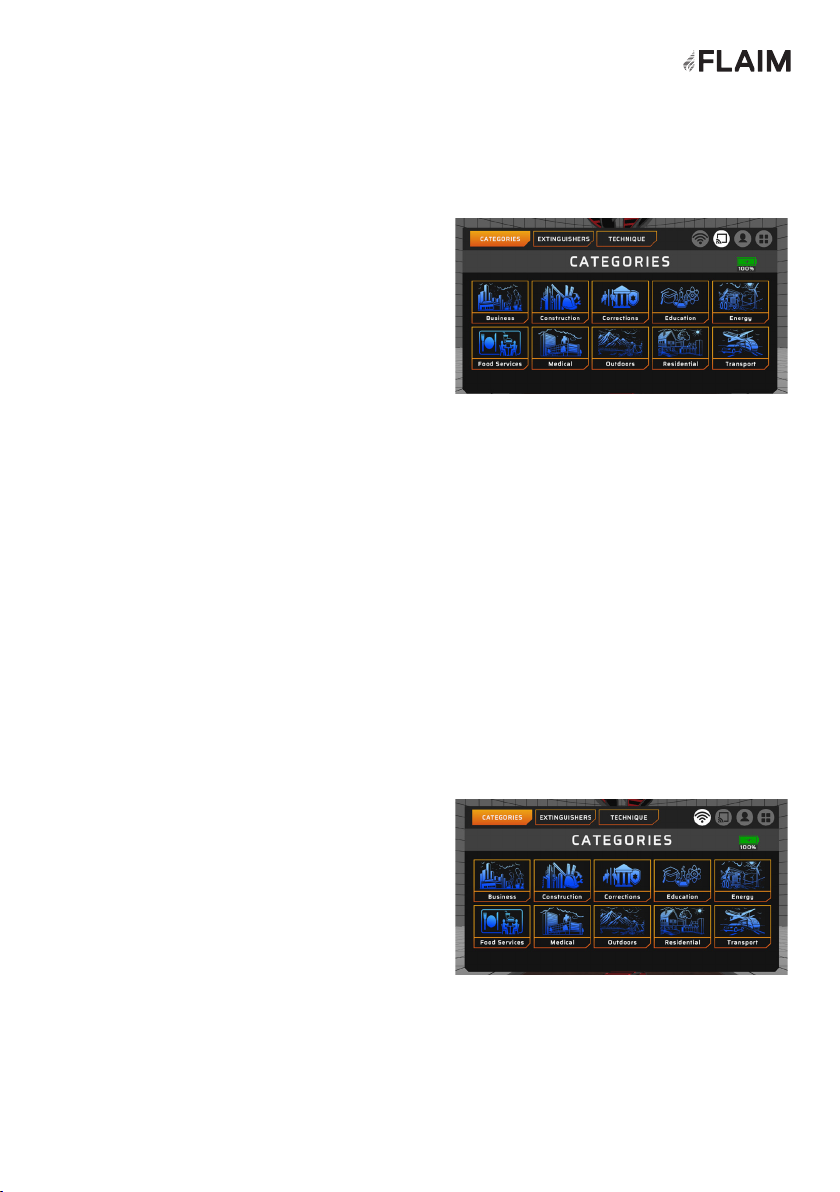
FLAIM Extinguisher Lobby
When FLAIM Extinguisher is launched you
will be taken to this screen.
1. Select CATEGORIES (Figure 10)
2. Select your preferred category
3. The chosen category will be expanded
with its selection of learning scenarios
(Figure 11)
4. Select your preferred scenario
5. You will now see a circle at your feet
(Figure 12)
6. Step into the centre, with the same
orientation as shown
7. After a brief loading time you will be in
the virtual scenario
8. Once you are in a virtual scenario, refer
to FLAIM Extinguisher’s Scenarios
Manual for more information
Figure 11: Business Category expanded to show scenarios
Figure 12: Feet circle screen
Figure 10: Categories
When selecting in and out of scenarios, you
will need to return to your origin point.
Selecting and Running a Scenario
13

Figure 14: PASS Technique - Pull
Figure 16: PASS Technique - Squeeze
Figure 15: PASS Technique - Aim
Figure 17: PASS Technique - Sweep
Figure 13: Extinguishers Tab (next to the Scenarios Tab)
Technique Tab
The Technique Tab (Figure 14) walks users through the extinguisher PASS technique. Ie:
Pull the pin, Aim at the base of the re, Squeeze the handle and Sweep from left to right.
To see the next step - switch pages using the right arrow.
Extinguishers Tab
Select the Extinguishers Tab (Figure 13) to learn
about the various types of extinguishers and
their role in re suppression.
Virtual extinguishers will appear in front of
the user. Aim the controller laser at one, it will
highlight the information about its role in re
suppression.
14

How to update
FLAIM Extinguisher
To update FLAIM Extinguisher, follow these steps:
1. Connect your device to a Wi-Fi network.
2. Open the FLAIM Launcher and check for updates on the right side of the screen.
3. If an update is available (Figure 18) click the update button. If nothing appears, then
your system is up to date or there may be an issue with your internet connection.
4. Keep your device powered on and connected to Wi-Fi while the update is being
installed.
5. Once the update is complete, launch the latest version of FLAIM Extinguisher.
Figure 18: Update Available
15
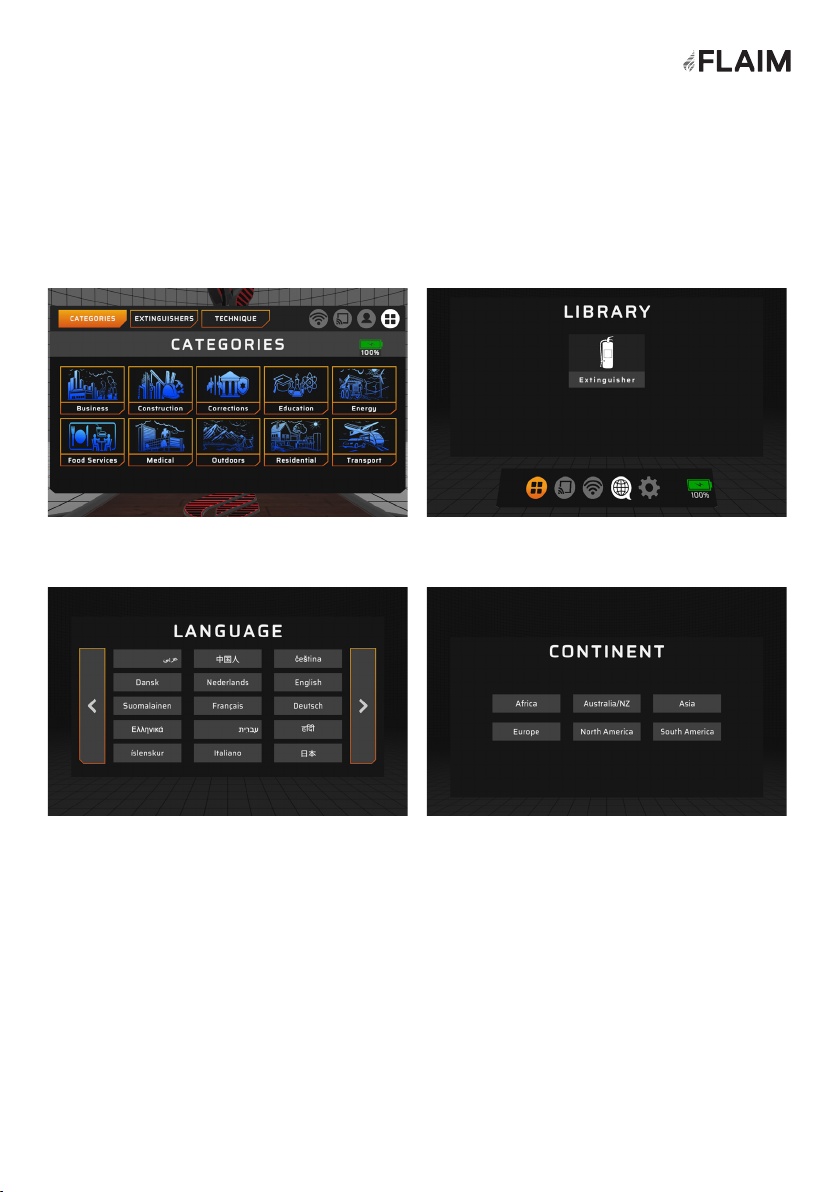
Localisation
To switch languages in FLAIM Extinguisher
1. Go to the FLAIM Launcher
3. Select your desired language
2. Select the world/localisation icon
4. Select your continent
16

Safety
Safety Advice
FLAIM Extinguisher is only to be used to train emergency services personnel and
rst responders for workforce, customer and community engagement.
FLAIM Extinguisher MUST NOT be used for operational or actual reghting or LIVE
FIRE training. Do not use in wet conditions or expose to direct water. Do not use
with reghting liquids or agent streams including gas, carbonaceous or other fuels.
Battery Charging
FLAIM Extinguisher has a battery within the headset that must be charged and
maintained for optimal usage. It is critical that the headset is checked for damage
before and after use and before and after charging.
If the headset shows signs of damage, then please contact FLAIM Systems for
advice.
The safe use of the FLAIM Extinguisher is
paramount. The following safety guidelines
should be followed to ensure that trainees and
support staff are protected at all times.
17

Use conditions
The FLAIM Extinguisher training system should be used inside or away from direct
sunlight. Direct sunlight can damage the displays inside the VR headset and will
void the warranty of the system.
Please contact FLAIM Systems for advice if you have inadvertently exposed your
headset to direct sunlight.
Maintenance
Please read the supplied HTC VIVE Focus 3 manual for care and maintenance tips.
Further Support
Thank you for choosing our FLAIM Extinguisher product to use as a part of your
training program.
For further support, please contact your local distributor or in-country agent during
business hours or email support@aimsystems.com.
18

Floor height calibration
Short press power button to make headset sleep. A second short press wakes the
headset. Whenever you see the spinning image it is important to look down at a clear
oor (e.g. away from tables and chairs) to ensure accurate oor height calibration.
Hose Tracker freezing
The tracker is optically tracked. Avoid blocking line of sight between the headset and
the tracker. Hold the hose instead of the tracker for best results.
Hose Tracker/Right Controller not tracking
If a blue light is displayed on the Controller or Tracker, hold down the power button
until the blue light turns off. Then single press the power button to turn back on. If not
resolved, restart the headset.
Controller not charging
Ensure that you are charging the Right Controller. The Left Controller should not be
used. If using the split cable make sure that the single end is plugged into the power
source and have the controller/tracker plugged into the split cable at the other end.
Alternatively use the USB A to USB C cable.
Charging the VR Headset
Charge the headset by connecting the AC adaptor to a power outlet, and then
connecting it to the headset. Charging the headset while in use is not recommended.
Shutdown
Hold down the power button on the VR headset for 5 seconds.
Volume
To adjust the volume, use the controls on the bottom left-hand side of the VR headset.
Troubleshooting
19
Table of contents
Other FLAIM Systems Safety Equipment manuals


Popular Safety Equipment manuals by other brands


Tractel
Tractel guard trac Installation, operating and maintenance manual

Westward
Westward 2MZU5 Operating instructions and parts manual

Teknoware
Teknoware Zonespot II Installation and Maintenance

Petzl
Petzl BODY TECHNICAL NOTICE

Geuther
Geuther Easy Lock 2752 Instructions for assembly and use

Panlux
Panlux FENIX FXE-9001-C instructions


