FLAIM Systems Extinguisher User manual

Copyright © 2020
September 2020
FLAIM™
Extinguisher
User Manual
flaimsystems.com
info@flaimsystems.com
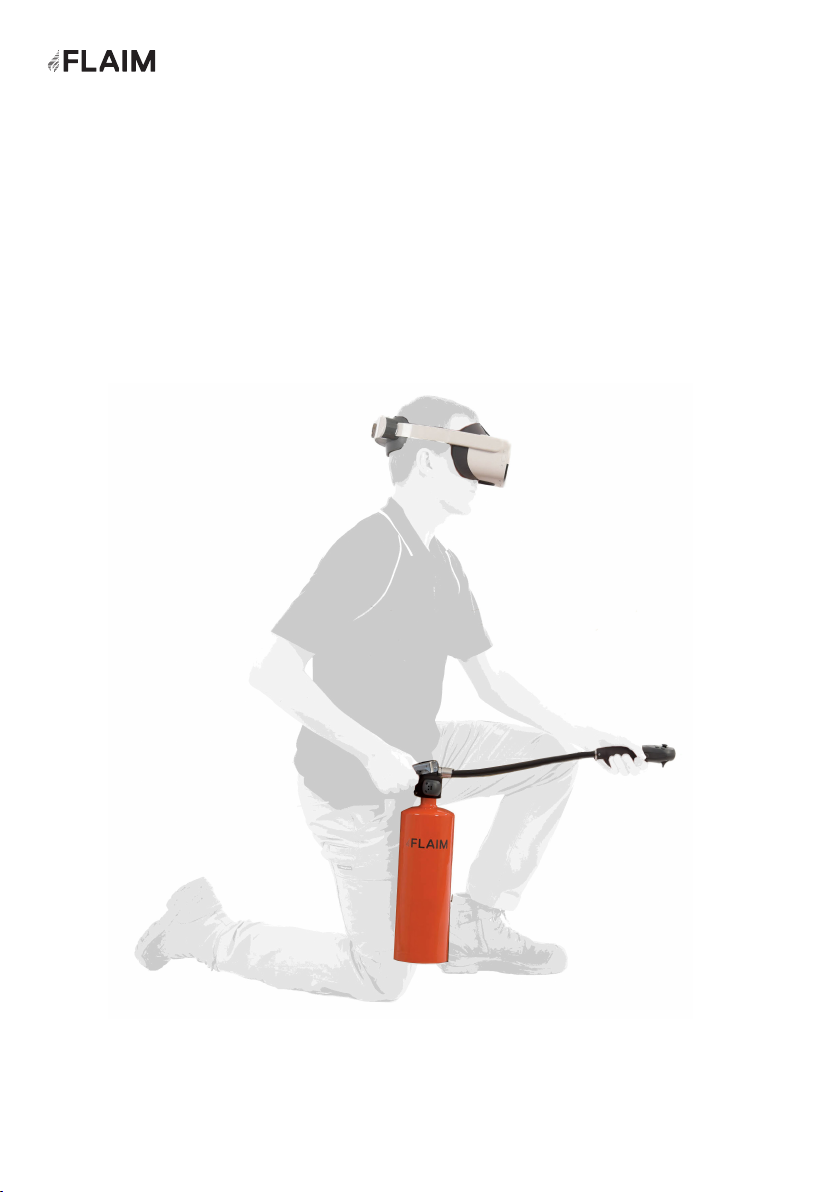
Welcome to the FLAIM
community!
Proper skills and early response to fire saves lives! FLAIM Extinguisher
immerses trainees in virtual reality, delivering a realistic simulation of a
range of fire events to efficiently train first responders
PASS
1
Contents
What’s in the Box 3
Quick Start Guide 5
Training Instructor Viewing System 5
Set-up Troubleshooting 8
How to Use Flaim Extinguisher 9
Getting Started 9
Streaming to Video Screen (Projector or Television) 10
Selecting Scenarios 11
Running Scenarios 12
Training Options 13
Extinguisher Training 13
Extinguisher Tab 13
Technique Tab 14
PASS Technique 14
Info Tab 14
Fault Finding 17
Safety 18
Battery Charging 18
Use Conditions 18
Maintenance 18
Further Support 18
2
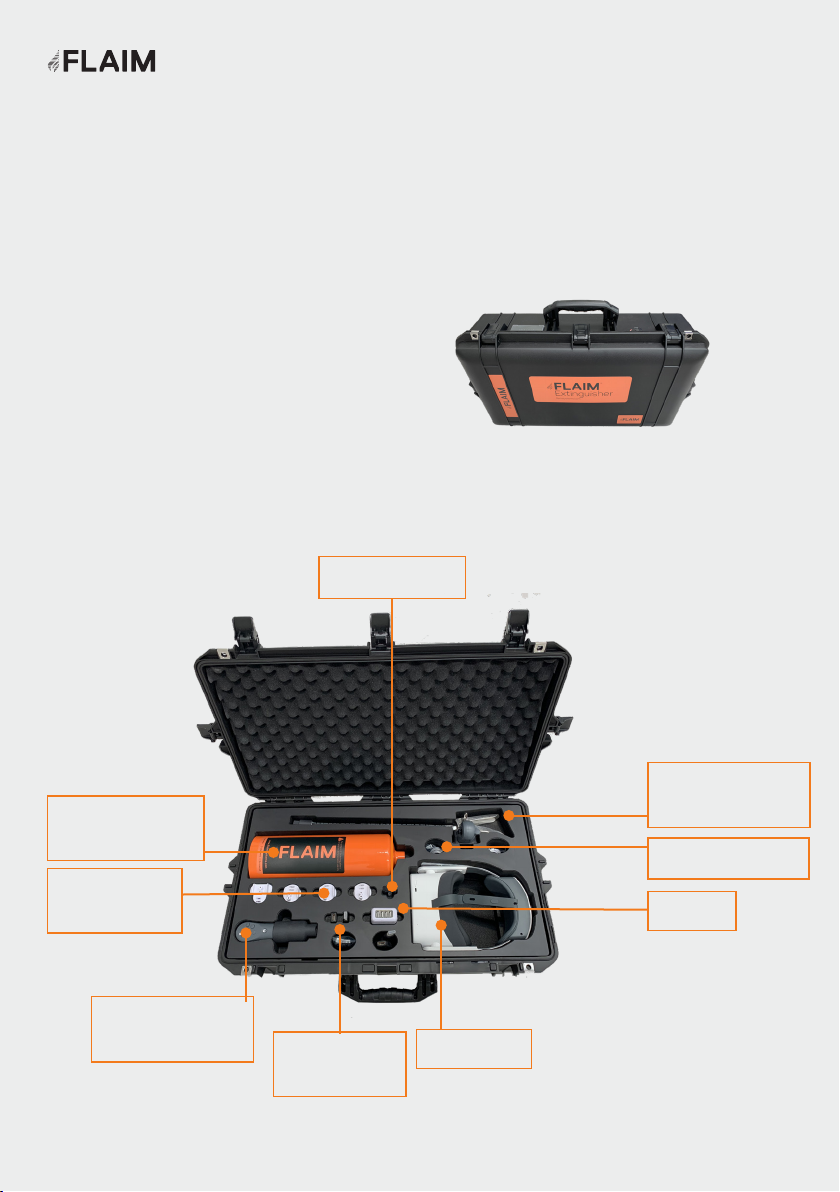
What’s in the box?
Please see below images of the individual parts that come in your FLAIM Extinguisher
box/case (Figure 1 and 2) with an explanation of what they do.
Figure 1: FLAIM Extinguisher System box (case)
Figure 2: Inside the FLAIM Extinguisher box (case)
FLAIM Extinguisher PASS
Extinguisher
Bottle (empty)
Charger
Power and
HDMI leads
VR Headset
HDMI Receiver
PASS Activation
Handle
International
adaptor x4
Charge Leads
PASS Nozzle
Controller
3
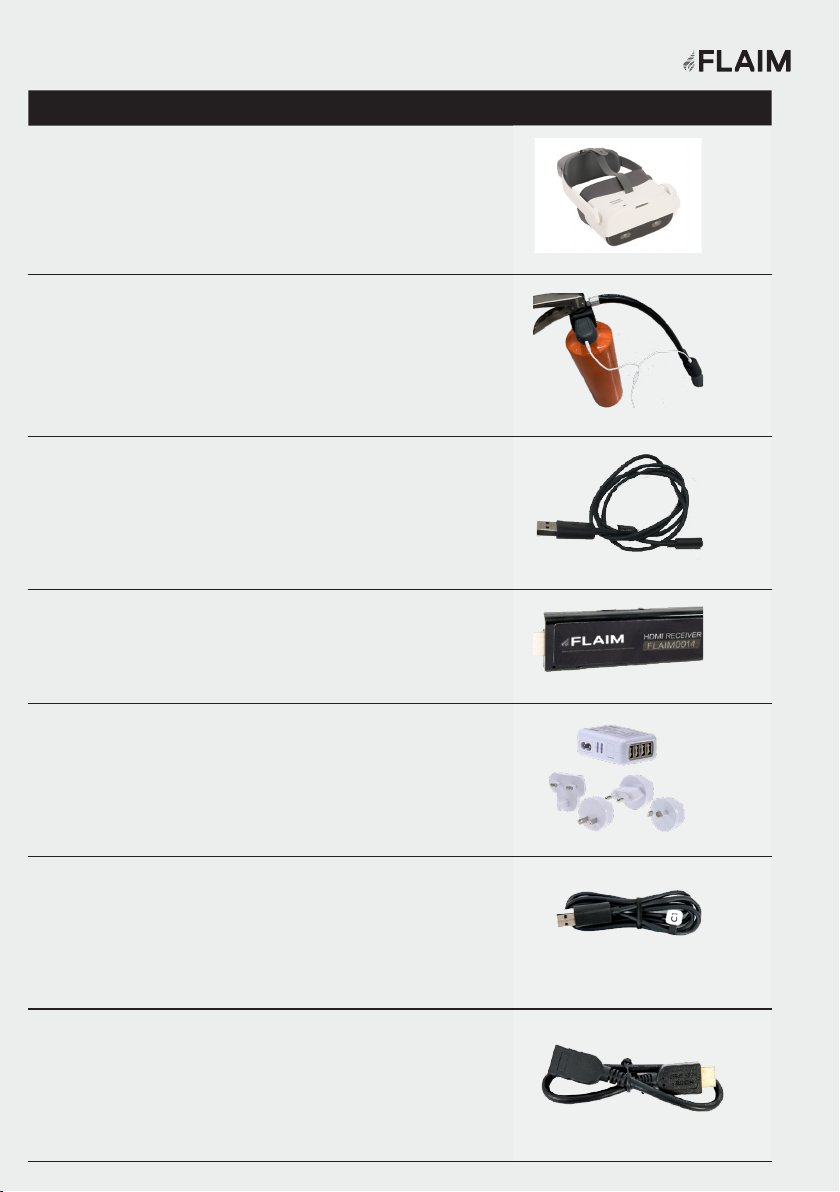
QTY Description Picture
1VR headset - Pico neo2 Head Mounted Display
1Extinguisher controller tracking
system
2Power cable for Head Mounted
Display
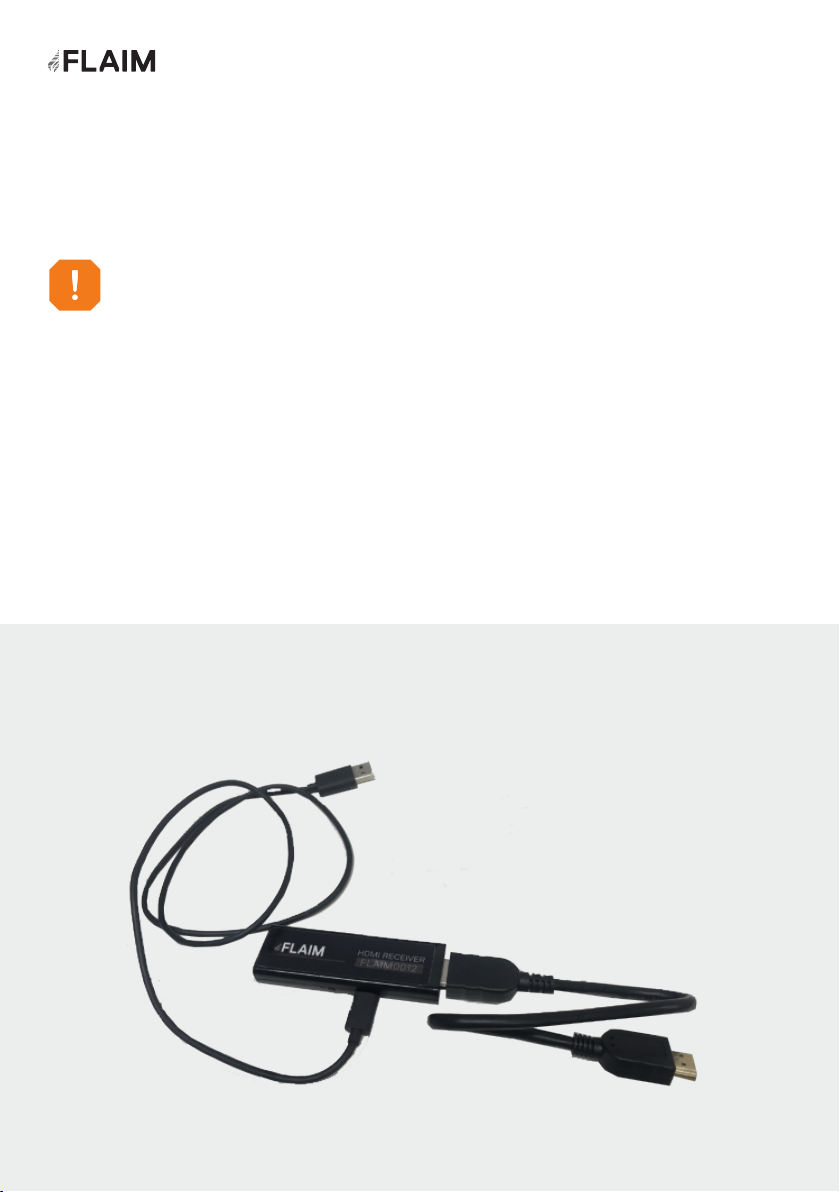
1HDMI receiver
1Charge plug (country specific)
for charging Pico neo2 Headset
1Country specific power cable and power adaptor
for HDMI receiver power supply (configuration
may vary in different countries)
1HDMI extension cable
4
Quick Start Guide
Training instructor viewing system
How to set-up, run and get the best training experience from your FLAIM
Extinguisher training system.
The training instructor viewing system (Figure 3) receives the signal transmitted by
the FLAIM Extinguisher VR headset. It allows the training instructor and others in
the room to experience a live view of what the person being trained can see in the
virtual training environment.
The training instructor viewing system consists of a HDMI receiver that connects to
a television/projector (not supplied) via a supplied HDMI cable.
Before you start, make sure you have adequate working space.
Some scenarios require the trainee to walk closer to the fire to extinguish.
FLAIM recommends 4m x 4m (13ft x 13ft) minimum open clear floor area space!
Figure 3: Instructor Viewing System Connection
5
Step 1
Step 2
1. Plug the micro USB lead into the USB port on
your television and projector.
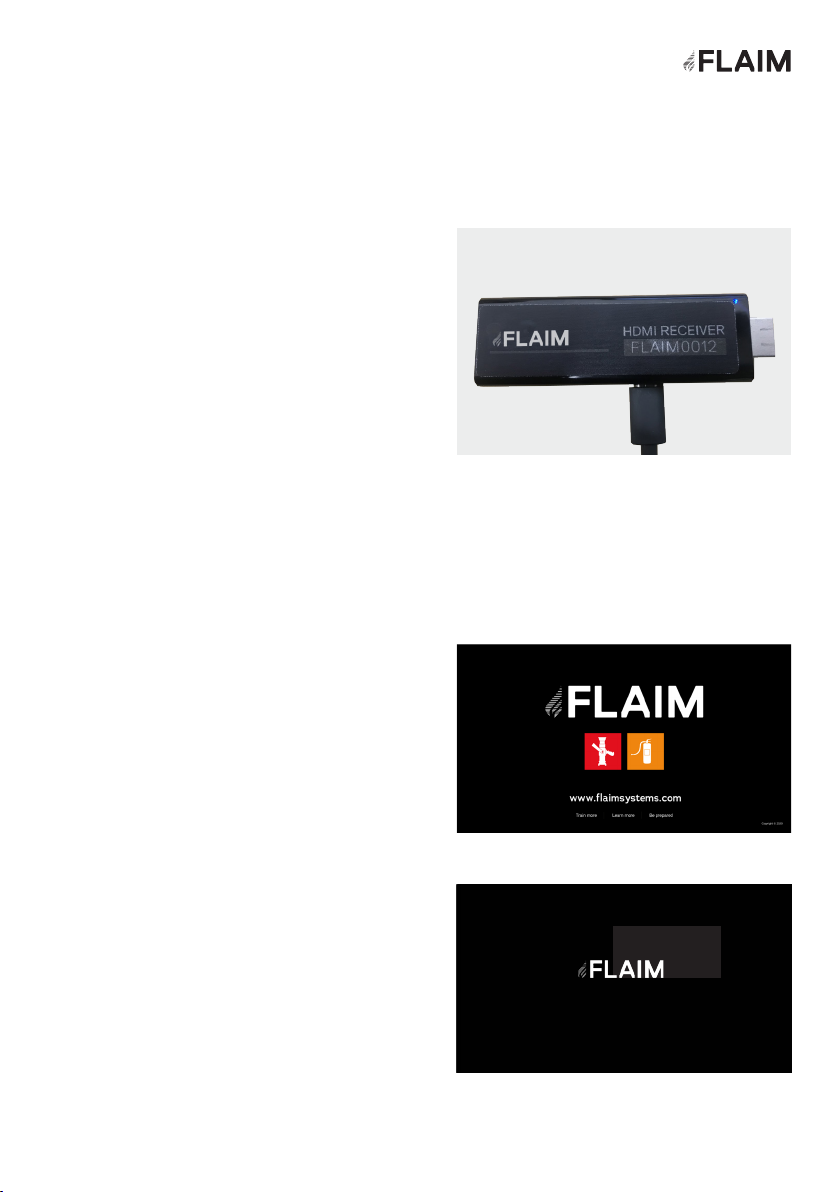
2. When powered, the receiver power light will
glow blue (see Figure 4).
The USB Power supply delivers power to
the HDMI receiver. Some TVs/Monitors/
Projectors cannot supply enough power from
their in-built USB port. If there is no light it is
likely that your system cannot supply enough
power from its in-built USB port. If this
occurs, please use the included power supply
connected to a power outlet. Retry with power
supply connected – you should now see a blue
light on the power receiver (see Figure 4).
1. Select the source – television or projector
You will now see the Ready to Connect screen
(Figure 5) on your television or projector. If
the system is inactive for five minutes or
longer a screensaver will activate (Figure 6).
Figure 4: Ensure HDMI receiver is powered
(Blue light) – top right
Figure 5: HDMI Receiver ready to connect screen
Figure 6: HDMI Receiver screensaver mode
6
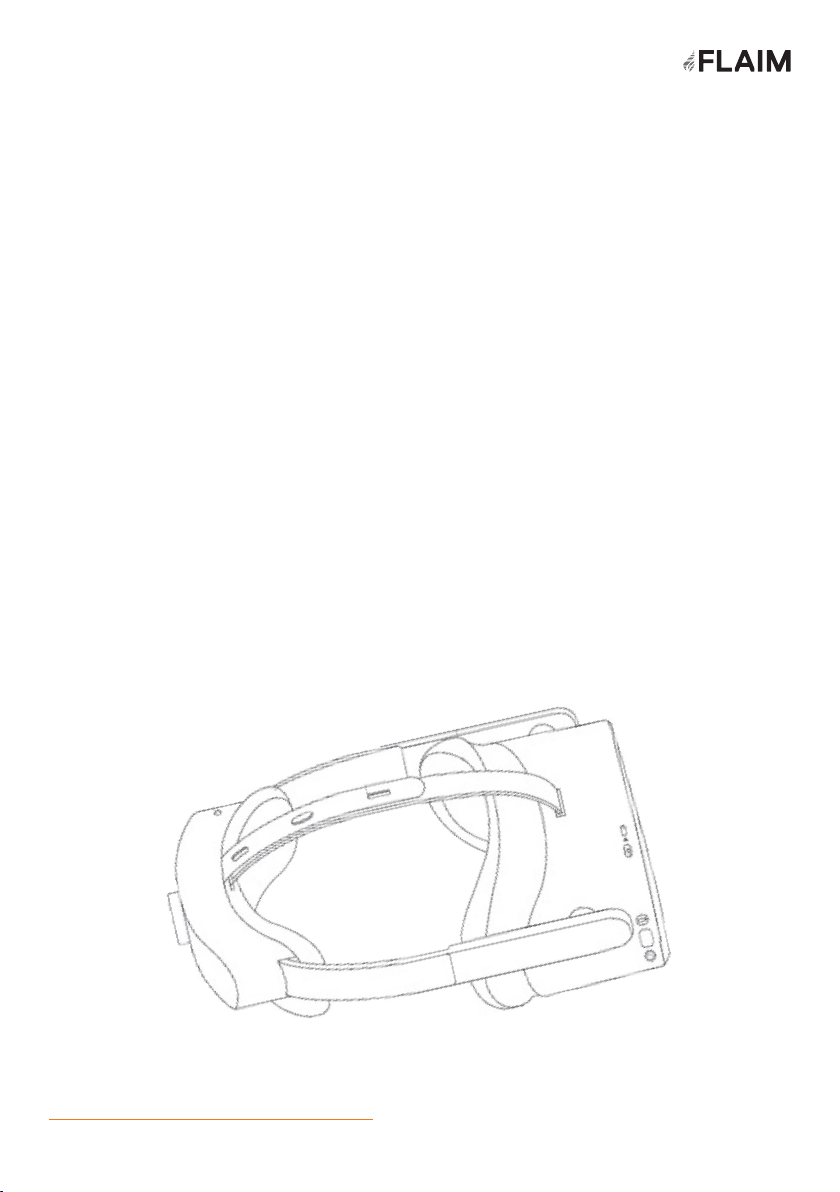
Step 3: VR headset set-up
1. Remove the VR headset - Pico neo2 Head Mounted Display from the case.
2. To power on the VR headset, hold down the power button (on the top right side of
the headset for 2 seconds).
3. Put on the VR headset. Ensure it is fitted firmly. To tighten the fit for the user,
the VR headset can be adjusted at the back via the adjustment knob and on top
of the head using the strap.
4. The VR headset is ON when you see the Pico neo2 logo.
5. The user now needs to adjust the lens on the base of the VR headset to improve
the visual clarity.
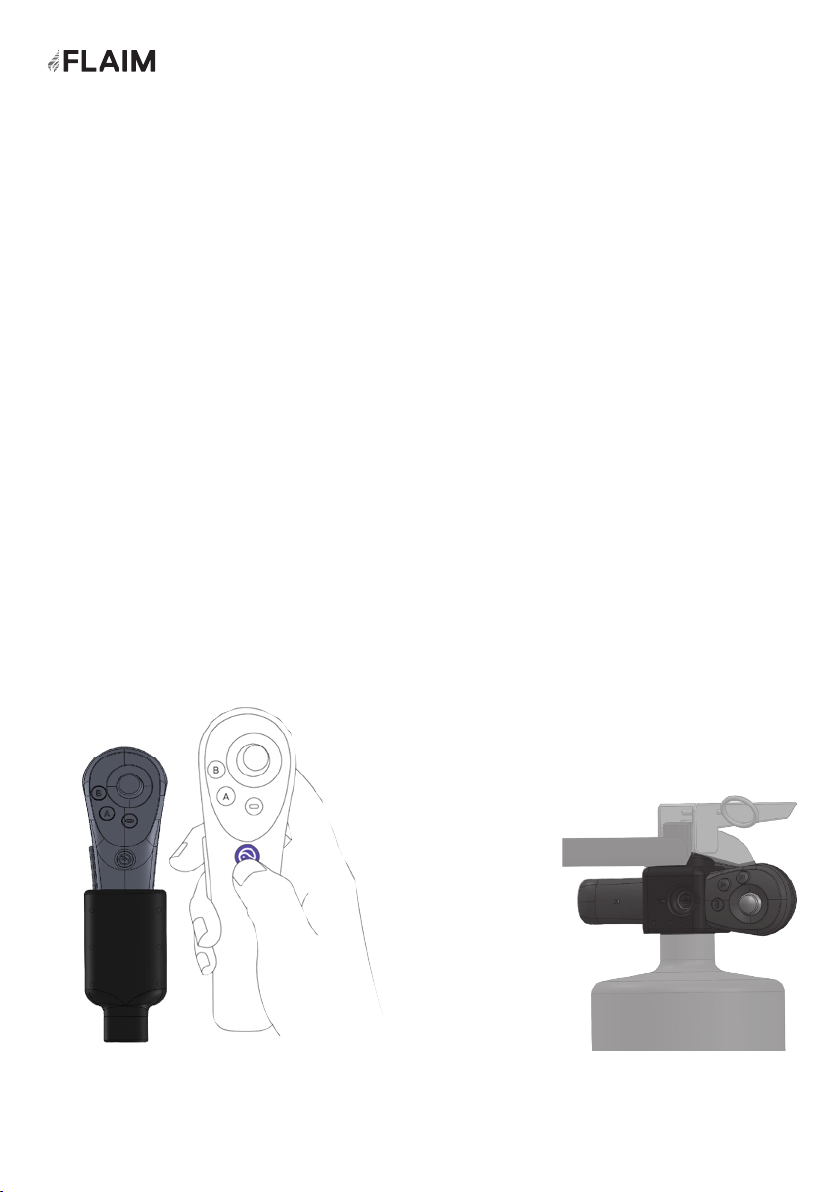
Step 4: Powering on the Extinguisher controller tracking system.
• Short press the HOME buttons (Figure 6 and Figure 7) to wake up the two
controllers.
• Long press the HOME button for 6 seconds to turn off the controllers.
• There is no requirement to shut-down, as the controllers will automatically
go into sleep mode when not in use.
Figure 6:
Controller home
button (nozzle)
Figure 7:
Controller
home button
(trigger)
7
Controller Calibration
The two extinguisher tracking controllers are pre-calibrated. There is no user need
to calibrate. If you find either of the controllers has drifted, and you cannot see the
controller from inside the headset, point the controller horizontally to the front of
your field of view, and press and hold the HOME key for more than one second to
re-center the controller.Reset with VR headset (trainee)
Screen Recentering
Wear the VR Headset and hold the ‘HOME’ button of the controller for more than 1
second to re-center the screen.
Shutdown
Hold down the power button on the VR headset for 5 seconds. A pop-up menu will
allow you to select shutdown or restart with the controller. Click away to cancel.
Volume
To adjust the volume use the controls on the bottom left-hand side of the VR
headset.
Charging the VR Headset
Plug the supplied charger cable into the USB C port on the top of the headset and
the USB end into the supplied wall plug.
Additional information available at
www.pico-interactive.com/us/faqs/FAQ_Neo2
Set-up troubleshooting
8

How to Use FLAIM
Extinguisher
Once the system is turned
on the initial Extinguisher
lobby screen will appear
within 1 minute
Getting started
9
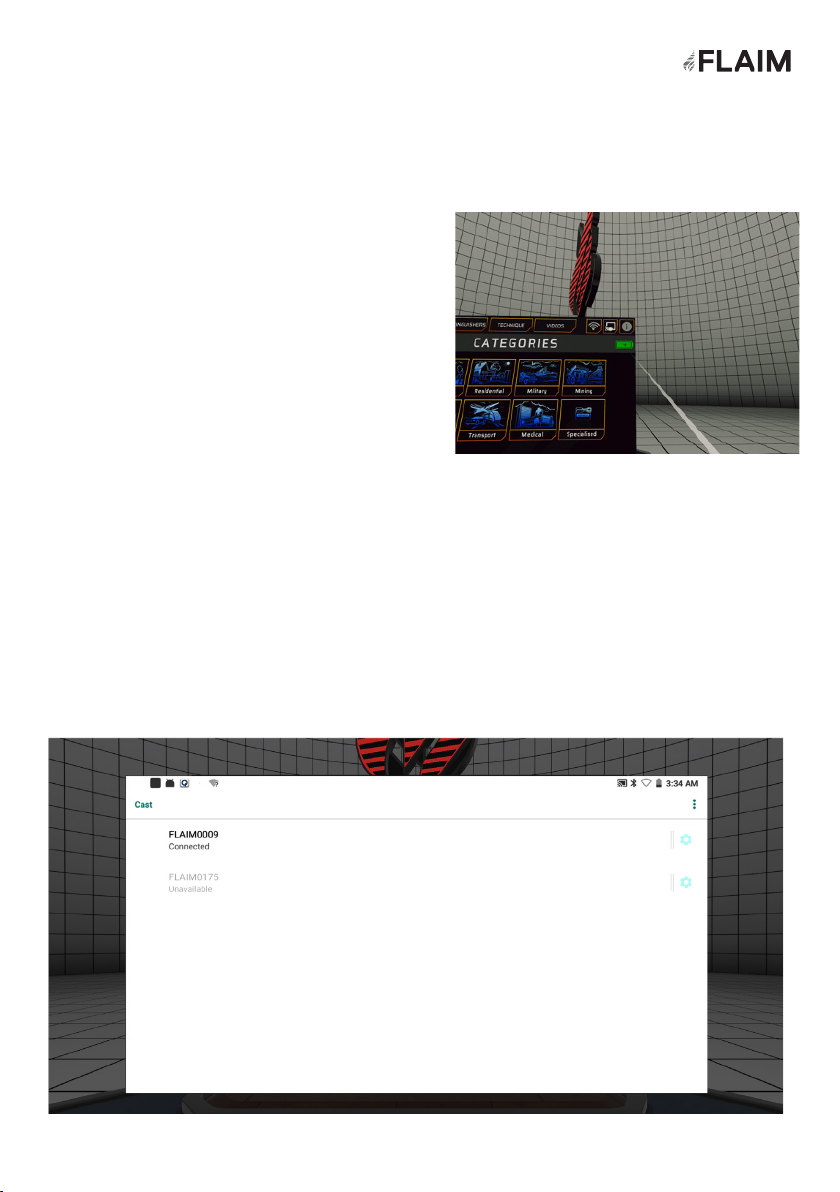
1. To stream to the television or projector select
the video connection button in the top right
top of the screen, second from right (Figure
10). This will open video streaming options on
the tablet.
2. Select the FLAIM device by clicking on
its name (eg. FlaimXXX) and wait until the
message below shows Connected.
3. You should see Connecting you now on your
television or projector. Magic is about to
happen. It may take 10-20 seconds to connect.
4. FLAIM Extinguisher will now be streaming to
the television or projector. It will show what
the VR headset view.
5. Note: It will only stream while the headset
is placed on your head, The television or
projector screen will be black when the
headset is removed.
6. Click the back button to return back to the
FLAIM Extinguisher lobby.
Streaming to Monitor/TV/Projector
Figure 9: Video Receiver Connection
Figure 8: Video Connection Button
10
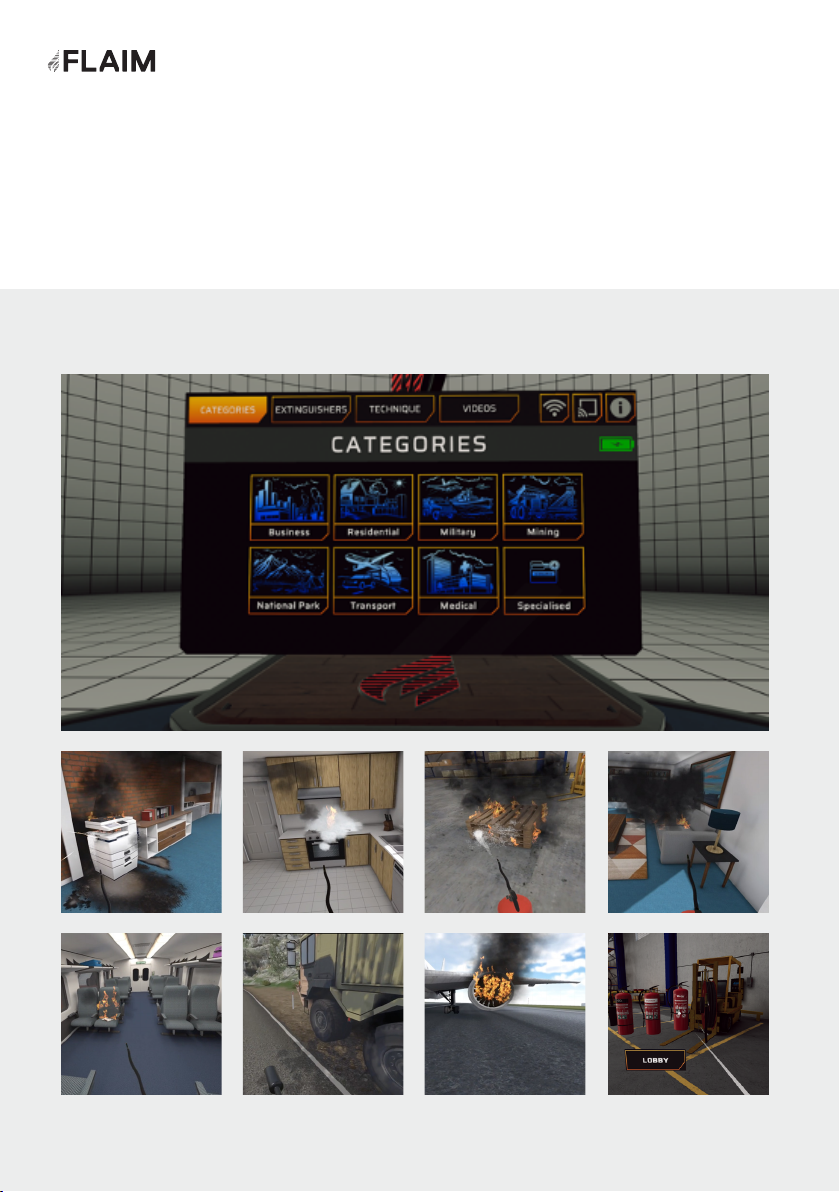
Selecting the scenario category (Figure 10)
1. Select CATEGORIES
2. Select the preferred environment category
3. Once you enter you will find a selection of learning scenarios as exampled below
Figure 10: Environments and Scenario menu
11

Running scenarios
1. Select a scenario by pointing and holding down the bottom button on the
controller.
2. You will now see a circle at your feet (Figure 11).
3. Step into the centre, with the same orientation as shown.
4. The scenario will then load and you will be in the virtual scenario.
Figure 11: Feet circle screen
When selecting in and out of scenarios, you will need to return to your origin point.
This origin point can be reset by taking the VR headset off for 4 seconds.
12

Training options
Extinguisher training
Extinguishers Tab
The FLAIM Extinguisher system has three
different training options - Extinguisher
Training, Experience, PVStop.
Option 1:
Extinguisher Training teaches users how to
use an extinguisher – giving three choices of
extinguisher type. For example: The Warehouse
Pallet scenario.
Option 2:
Experience is for observation learning. The
user will not have any extinguisher choices.
For example: The Aircraft Engine scenario.
Option 3:
PVStop teaches users how to use PVStop to
negate the electricity output of solar panels.
If you are in an Extinguisher Training scenario
(Option 1 scenarios) - extinguishers will be
located nearby (Figure 13).
To run this training option, follow the steps
below:
1. Select an extinguisher, it will then appear in
the user’s hand.
2. The user should press the trigger or
top button on the controller to use the
extinguisher.
The scenario will end when the user runs out of
suppressant or the fire is extinguished.
You will then have the option to return to lobby
or restart.
Select the Extinguishers Tab (Figure 14) to learn
about the various types of extinguishers and their
role in fire suppression.
Virtual extinguishers will appear in front of
the user. Aim the controller laser at one, it will
highlight the information about its role in fire
suppression.
Figure 12:Extinguishers in Extinguisher
Training scenarios
Figure 13:Extinguishers Tab (next to the
Scenarios Tab)
13
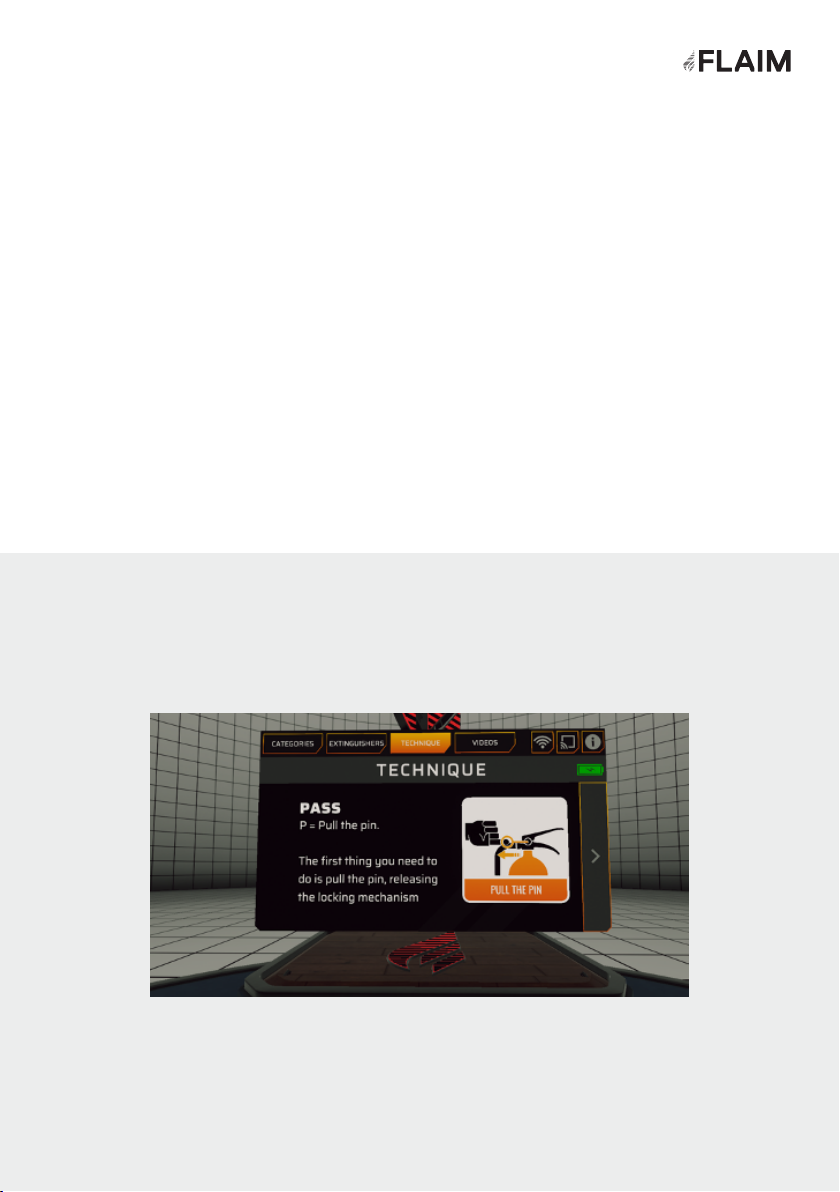
Technique Tab
Info Tab
The Technique Tab (Figure 15) walks users through the extinguisher PASS
technique. Ie: Pull the pin, Aim at the base of the fire, Squeeze the handle and Sweep
from left to right.
To see the next step - switch pages using the right arrow.
The Information (info) button is found at the top right of the screen (next to the
video connection button).
The Info button shows the current software version as well as FLAIM System’s
website address: flaimsystems.com
Technique Tab (next to the Extinguishers Tab)
Figure 14: PASS Technique - Pin
14

Figure 16: PASS Technique - Aim
Figure 15: PASS Technique - Pin
15
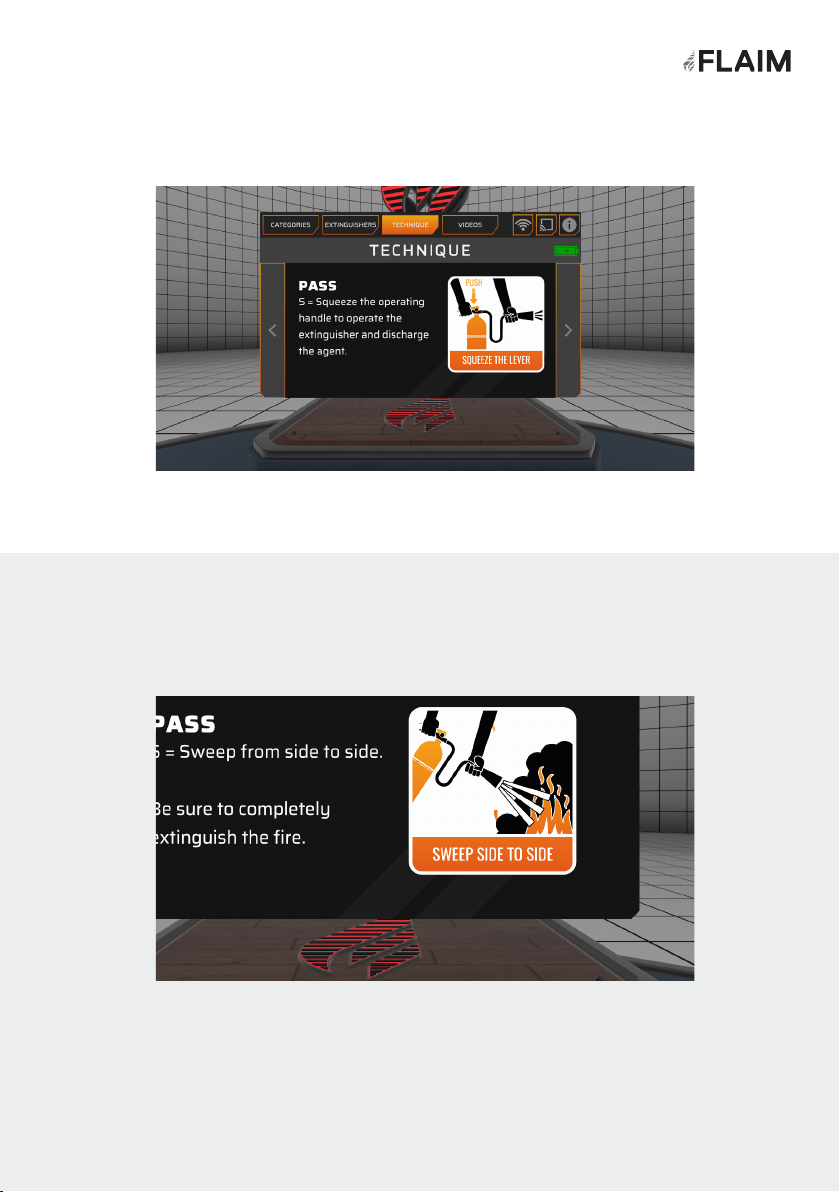
Figure 17: PASS Technique - Squeeze
Figure 18: PASS Technique - Sweep
16
Fault finding
Please see below a list of possible
faults and how you can resolve them.
Headset does not turn on 1. Using a charger and cable, please plug in the HMD and wait for about
15 seconds. Then, press the power key of HMD to check whether it can be
powered on. If it does power on, charge the HMD until the battery is full.
2. If the device does not power on, please repeat Step 1 using another
compatible cable or charger (the type used for mobile devices should be
compatible). If the device does power on, the original cable or charger is
broken and should be replaced.
3. If the device still cannot be powered on, contact FLAIM.
Controller is not tracking
No power light cannot
connect to video receiver
(tv or projector)
Tracking jumps around
or is not consistent
1. Restart the HMD and hand controller.
2. The hand controller’s battery might be low, and may need to be
replaced / charged.
Connect the USB lead to the included wall adaptor as the TV/Projector
may not supply enough power to operate the receiver
Large mirrors or windows in a training area may cause interference with
the sensory systems
FLAIM Systems maintains a support team via email at support@flaimsystems.com
and will respond within 24 hours about any further technical issues.
Fault Solution
Headset is not charging 1. Using a charger and cable, please plug in the device that will not power.
2. If the battery voltage is too low, the HMD may not be charged, so
the original charging cable needs to be continuously inserted twice for
battery activation.
I cannot connect to WiFi 1. Restart the HMD and attempt to connect to your Wi-Fi signal of choice
2. If the device cannot connect to the chosen signal, try another Wi-Fi
access point if available.
3. If the device cannot connect to WIFI, use another device to connect
with the WIFI signal to check whether the WIFI works normally.
4. Find none of the above steps resolve the problem, please contact
FLAIM.
17

Battery Charging
Safety
Use conditions
Further Support
Maintenance
Safety Advice
Safety Advice
FLAIM Extinguisher has a battery within the headset that must be charged and
maintained for optimal usage. It is critical that the headset is checked for damage
before and after use and before and after charging.
If the headset shows signs of damage, then please contact FLAIM Systems for
advice.
FLAIM Extinguisher is only to be used to train emergency services personnel and
first responders for workforce, customer and community engagement.
FLAIM Extinguisher MUST NOT be used for operational or actual firefighting or LIVE
FIRE training. Do not use in wet conditions or expose to direct water. Do not use
with firefighting liquids or agent streams including gas, carbonaceous or other fuels.
The FLAIM Extinguisher training system should be used inside or away from direct
sunlight. Direct sunlight can damage the displays inside the VR headset and will
void the warranty of the system. Please contact FLAIM Systems for advice if you
have inadvertently exposed your headset to direct sunlight.
Thank you for choosing our FLAIM Extinguisher product to use as a part of your
training program. For further support, please contact your local distributor or in-
country agent during business hours or email support@flaimsystems.com
Please read the supplied PicoNeo 2 manual for care and maintenance tips.
The safe use of the FLAIM Extinguisher
is paramount. The following safety
guidelines should be followed to ensure
that trainees and support staff are
protected at all times.
18

flaimsystems.com
info@flaimsystems.com Copyright © 2020
Other manuals for Extinguisher
2
Table of contents
Other FLAIM Systems Safety Equipment manuals


