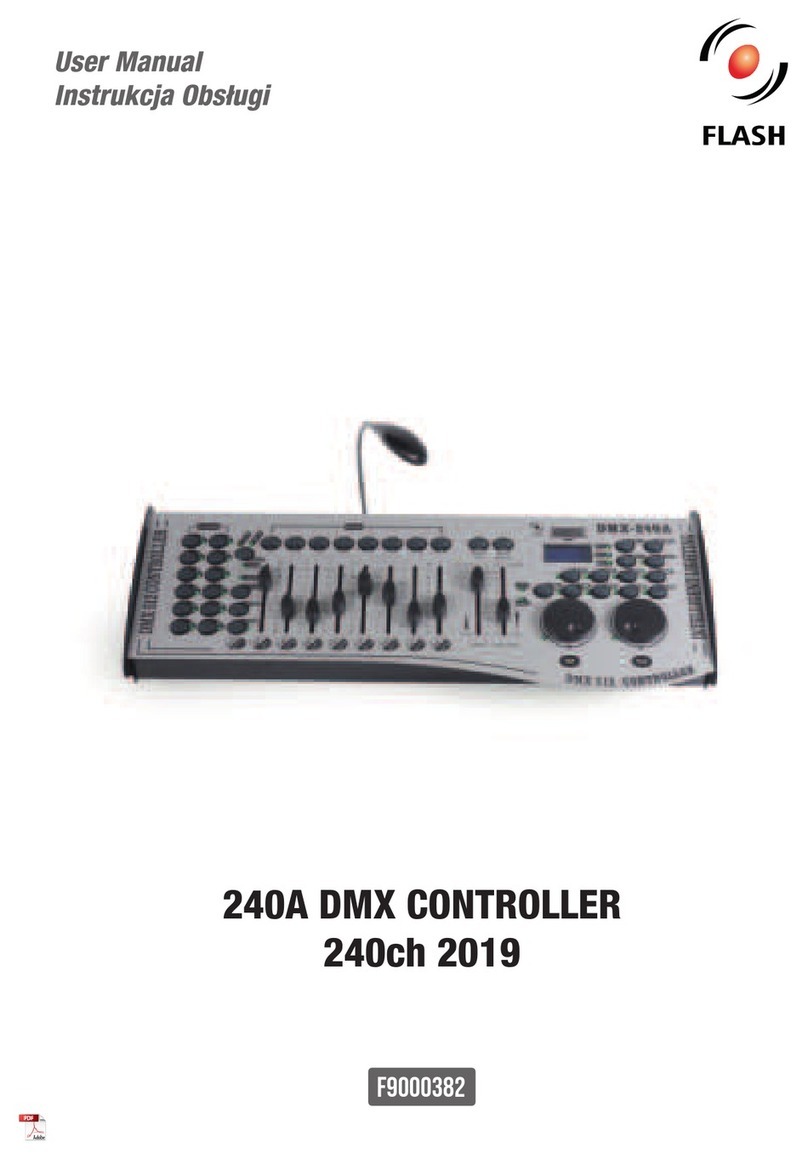
Flash F9000384 User manual

192 DMX CONTROLLER
192 CH 2019
User Manual
Instrukcja Obsługi
F9000384

User Manual •Instrukcja Obsługi
IMPORTANT!
Do not point strong light output from other fixtures
at the 192 DMX CONTROLLER 192CH 2019, as
intense illumination can damaged the parts.
2. SAFETY INFORMATION
1. INTRODUCTION
THANK YOU FOR PURCHASING 192 DMX CONTROLLER 192CH 2019. FOR SAFETY
REASONS AND TO ENSURE THE TROUBLE-FREE OPERATION, CAREFULLY READ
THE INSTRUCTIONS.
WARNING!
Figure 2.
Shield or shade the head if necessary.
Please keep this User Manual for future
another user, be sure that they also receive
this instruction booklet.
Unpack and check carefully there is no
transportation damage before using the
Before operating, ensure that the voltage
and frequency of power supply match the
It’s important to ground the yellow/green
conductor to earth in order to avoid electric
shock.
Disconnect main power before servicing
and maintenance.
only, but always by taking its base.
Maximum ambient temperature is: 40
Don’t operate it where the temperature is
higher than this.
In the event of serious operating problem,
carried out by unskilled people can lead to
damage or malfunction. Please contact the
nearest authorized technical assistance
center. Always use the same type spare
parts.
Do not connect the device to any dimmer
pack.
Do not touch any wire during operation
and there might be a hazard of electric
shock.
To prevent or reduce the risk of electrical
rain or moisture.
visibly damaged.

192 DMX CONTROLLER 192CH 2019 •Art No F9000384
4. INSTALLATION
3. PRODUCT INFORMATION
Power supply voltage: 120-230V, DC9V, 1A
Power Input: DC+9-12V
Dimension [cm]: H-7,3 W-48,2 D-13,2
192 DMX Channels
30 Banks each composed of 8 program-
mable scenes.
8 fades adjusting output level.
Built-in Microphone.
AUTO mode is controlled by TAP SYNC
and SPEED controlled.
MIDI control through MIDI interface.
4 digits LED display.
Fird digit of LED shows CHASES, the
second digit of LED shows scenes.
Weight [kg]: 2,5kg
Type of packaging: Carton Box
Make sure all necessary cables are
properly connected. Always ensure that
and slipping while operating. Always
ensure that the structure to which you
are attaching the unit is secure and is
able to support a weight of 10 times of
the unit’s weight. Also always use a safety
cable that can hold 12 times of the weight
of the touch of people and has no one pass
by or under it.
4.1 Voltage specification
3.1 Main Features
Input Voltage Total Power Frequency
120-230V 2W 50/60Hz
BANKS.
show steps or 0-255 or TIME.
Blackout master controlled by M annual
or R emonte.
CHASE programming and CHASE
running, manual control and remonte
control.
Fade Time control.
DMX polarity selects

5. OPERATION
BANK 1
00 Turn ON / Turn OFF SCENE 1
01 Turn ON / Turn OFF SCENE 2
02 Turn ON / Turn OFF SCENE 3
03 Turn ON / Turn OFF SCENE 4
04 Turn ON / Turn OFF SCENE 5
05 Turn ON / Turn OFF SCENE 6
06 Turn ON / Turn OFF SCENE 7
BANK 2
07 Turn ON / Turn OFF SCENE 8
08 Turn ON / Turn OFF SCENE 1
09 Turn ON / Turn OFF SCENE 2
10 Turn ON / Turn OFF SCENE 3
- || - - || -
BANK 15
112 Turn ON / Turn OFF SCENE 1
113 Turn ON / Turn OFF SCENE 2
114 Turn ON / Turn OFF SCENE 3
115 Turn ON / Turn OFF SCENE 4
116 Turn ON / Turn OFF SCENE 5
117 Turn ON / Turn OFF SCENE 6
118 Turn ON / Turn OFF SCENE 7
119 Turn ON / Turn OFF SCENE 8
CHASE
120 Turn ON / Turn OFF SCENE 1
121 Turn ON / Turn OFF SCENE 1
122 Turn ON / Turn OFF SCENE 2
123 Turn ON / Turn OFF SCENE 3
124 Turn ON / Turn OFF SCENE 5
125 Turn ON / Turn OFF SCENE 6
126 BLACKOUT
User Manual •Instrukcja Obsługi

12 177-192 OFF OFF
Scanners Channel Fade control LED
1 1-16 ON ON
2 17-32 ON ON
3 33-48 ON ON
4 49-64 ON ON
5 65-80 ON ON
5.1 PAGE SELECT
Press to select page A to B
1. SPEED SLIDER
Move the slider to adjust chasing speed.
2. FADE TIME SLIDER
Move the slider to adjust FADE TIME.
3. LED DISPLAY
4. BAND
Press UP or DOWN to increase or decrease
Bank, the third and fourth digit of LED
5. CHASE 1 - CHASE 6
Select desired CHASE to be programmed or
run CHASE.
6. PROGRAM
Turn the power on, it is in MANUAL RUN
mode, press PROGRAM for 2 seconds,
corresponding LED blinks, SCENE and
CHASE are ready to programmed, press
PROGRAM once more to return to RUN
mode, corresponding LED goes out.
7. MIDI/ADD
A. Press MIDI key when running, the third
channel using UP or DOWN , press MIDI
key to make programe when in PROGRAM
mode.
B. Press this key to make programe when in
PROGRAM mode.
8. AUTO/DEL
A. In RUN mode, press Auto/Del,
corresponding LED is ON, which indicates
it is AUTO RUN mode, press once more to
withdraw MUSIC mode, corresponding.
LED goes out.
B. Press this key to make S cene and chase
program when in PROGRAM mode.
9. TAP SYNC/DISPLAY
I. Press music/Bank copy, corresponding
indicator lights, scene run is engaged into
MUSIC RUN.
II. Select disired bank, rising UP or DOWN
or via MIDI signals.
III. Press music/bank copy once more to
withdraw MUSIC RUN.
4. MIDI RUN
Select bank to run scenes using MIDI
whenever it is in MANUAL RUN, AUTO
RUN, or MUSIC RUN.
3. CHASE RUN
I. CHASE RUN requires making programs,
when runing CHASE, scene will be step
auto matching.
II. CHASE RUN includes MANUAL RUN,
AUTO RUN, AUDIO RUNS, and MIDI RUN.
III. Eigher one CHASE more can be run in
the order of selection.
IV. Press CHASE, corresponding indicator
lights,which indicates it,is in CHASE RUN.
4. FADE TIME CONTROL
Move the slider to adjust FADE, Output
varies accordingly.
192 DMX CONTROLLER 192CH 2019 •Art No F9000384

User Manual •Instrukcja Obsługi
MIDI CHANNEL SETTING
1. MIDI channel setting
I. Press MIDI, the third and fourgh digits
of LED blink, selects MIDI channel setting.
II. Press MIDI one more to end MIDI
channel setting. Also you can press any
BANK NOTE NUMBER FUNCTION
I. Select desired CHASE
II. Press desired CHASE while holding
Auto/DEL
5. CLEAN ALL CHASE (ALL SCENES are
RUNNING SCENES
Turn the power on it is in MANUAL RUN mode when in PROGRAM
mode, press PROGRAM for 2 seconel PROGRAM LED goes out, it
enters MANUAL mode.
If there is not any scenes having been programmed in a bank, the
scene can’t be run, only the SCENES having been programmed are
executed.
If the fades is set to OFF,Scene will execute channel program setting.
other key except UP and DOWN or move
the fades to end MIDI channel setting.
2. MIDI RUNNING
NOTE ON: Receive NOTE ON signals to
execute corresponding function.
I. Press DOWN+Auto/Del while turning
II. Turn the power on.
1. MANUAL RUN
I. Extinguish AUTO Triggered LED and
MUSIC triggered LED.
III. Press scene to run scene.
IV. Press the SCANNER to copy to, then the
SCANNER is copied to another SCANNER.
2. AUTO RUN
I. Press AUTO/DEL, corresponding, LED is
ON.
II. Press TAP SYNC/DISPLAY. Press it
between two bressing is assigned to the
speed of AUTO RUN, the maximum limit
is 10 minutes. If there are many pressings
more than twice, the last two pressing are
designated.
III. Select desired bank, using UP or DOWN
via MIDI signals.
IV. Press Auto/DEL once more to withdraw
AUTO RUN mode.

3. MUSIC RUN
6 81-96 ON ON
7 97-112 ON ON
8 113-128 ON ON
9 129-144 ON ON
10 145-160 ON ON
11 161-176 ON ON
12 177-192 ON ON
Press desired scanner, corresponding LED
is lit, and appropriate channels is enabled
to be adjusted, when scenes are running, if
fades control is OFF, channel output level is
not controlled by the fades.
2. Scene Button
Press one scene button to run scene or to
store, and the second digit of LCD DISPLAY
showsscenes 1-8
3. Fade (1-8)
Slide the fades to adjust the output level of
4. PAGE SELECT
Press to select page A to B
1. SPEED SLIDER
Move the slider to adjust chasing speed.
2. FADE TIME SLIDER
Move the slider to adjust FADE TIME.
3. LED DISPLAY
4. BAND button (↑ or ↓ )
Press UP or DOWN to increase or
decrease Bank, the third and fourth
digit of LED DISPLAY shows BAND NO.
5. CHASE 1-CHASE 6
select desired CHASE to be programmed or
run CHASE.
192 DMX CONTROLLER 192CH 2019 •Art No F9000384
6. PROGRAM
Turn the power on, it is in MANUAL RUN
mode, press PROGRAM for 2 seconds,
corresponding LED blinks, SCENE and
CHASE are ready to be programmed, press
PROGRAM once more to return to RUN
mode, corresponding LED goes out.
7. MIDI/ADD
A. Press MIDI key when running, the third
channel using UP or DOWN, press MIDI
key to make programe when in PROGRAM
mode.
B. Press this key to make programe when in
PROGRAM mode.
8. AUTO/DEL
A. In RUN mode, press Auto/Del,
corresponding LED is ON, which indicates
it is AUTO RUN mode, press once more to
withdraw MUSIC mode, corresponding
LED goes out.
B. Press this key to make Scene and chase
program when in PROGRAM mode.

9. TAP SYNC/DISPLAY
12 177-192 OFF OFF
Scanners Channel Fade control LED
1 1-16 ON ON
2 17-32 ON ON
3 33-48 ON ON
4 49-64 ON ON
5 65-80 ON ON
I. Press music/Bank copy, corresponding
indicator lights, scene run is engaged into
MUSIC RUN.
II. Select desired bank, rising UP or DOWN
or via MIDI signals.
III. Press music/bank copy once more to
withdraw MUSIC RUN.
4. MIDI RUN
Select bank to run scenes using MIDI
whenever it is in MANUAL RUN, AUTO
RUN or MUSIC RUN.
3. CHASE RUN
I. CHASE RUN requires making programs,
when running CHASE, scene will be step
auto matching.
II. CHASE RUN includes MANUAL RUN,
AUTO RUN, AUDIO RUNS, and MIDI RUN.
III. Eigher one CHASE, more can be run in
the order of selection.
IV. Press CHASE, Corresponding indicator
light, which indicates it, is in CHASE RUN.
4. FADE TIME CONTROL
Move the slider to adjust FADE. Output
varies accordingly.
MIDI CHANNEL SETTING
1. MIDI channel setting
User Manual •Instrukcja Obsługi
I. Press MIDI, the third and fourth digits of
LED blink, select MIDI
II. Press MIDI/ADD to add a programmed
scenes.
2. SCENE EDITING
Add a STEP in CHASE. Select desired LCD
display Presses TAP SYNC/DISPLAY, the
LCD shows the CHASE and its STEP. If it
has made program till the 15th step, select
the 9th using UP or DOWN, press MIDI/
ADD, the CHASE is maintained and the
STEP turns to 10th STEP. Select desired
SCENE using UP or DOWN, Press MIDI/
REC, then the new 10th STEP is added to
SCENE, the previous 10th STEP turns to
the new 11th STEP, the previous 1th STEP
turns to the new 12th STEP, and so on.
Delete a STEP in CHASE
Select desired STEP and then press AUTO/
DEL.
For example, select the 10th STEP using
UP or DOWN, press AUTO/DEL, then 10th
STEP is deleted, the previous 11th STEP
turns to the 10th STEP, the previous 12th
STEP, and so on.
3. DELETE A CHASE.

192 DMX CONTROLLER 192CH 2019 •Art No F9000384
OSTRZEŻENIE!
WAŻNE!
Rysunek 2.
192 DMX CONTROLLER 192CH 2019. Ze
1. WPROWADZENIE
2. ZASADY BEZPIECZENSTWA
przez wykwalifikowany personel, aby
do sieci elektrycznej.
stabilnych konstrukcjach.
w dobrze wentylowanym pomieszczeniu, w

User Manual •Instrukcja Obsługi
3. PRODUCT INFORMATION
Zasilanie: 120-230V, DC9V, 1A
programowalnych scen.
Wbudowany mikrofon.
Tryb AUTO jest kontrolowany przez TAP
SYNC i kontrolowany SPEED.
Sterowanie MIDI przez interfejs MIDI.
Weight [kg]: 2,5kg
Pakowanie: Carton Box
3.1 Główne cechy
Trzecia cyfra diody LED pokazuje
CHASES, druga cyfra diody pokazuje sceny.
Trzecia i czwarta cyfra diody pokazuje
BANKI.
Druga, trzecia, czwarta cyfra diod LED
pokazuje kroki lub 0-255 lub CZAS.
Programowanie i CHASE, sterowanie
4. INSTALACJA
obok ani pod nim.
4.1 Specyfikacja zasilania
Napięcie Zasilania Pobór Mocy Częstotliwość zasilania
120-230V 2W 50/60Hz

192 DMX CONTROLLER 192CH 2019 •Art No F9000384
4. UZYTKOWANIE
BANK 1
00 Włącz / Wyłącz SCENE 1
01 Włącz / Wyłącz SCENE 2
02 Włącz / Wyłącz SCENE 3
03 Włącz / Wyłącz SCENE 4
04 Włącz / Wyłącz SCENE 5
05 Włącz / Wyłącz SCENE 6
06 Włącz / Wyłącz SCENE 7
BANK 2
07 Włącz / Wyłącz SCENE 8
08 Włącz / Wyłącz SCENE 1
09 Włącz / Wyłącz SCENE 2
10 Włącz / Wyłącz SCENE 3
- || - - || -
BANK 15
112 Włącz / Wyłącz SCENE 1
113 Włącz / Wyłącz SCENE 2
114 Włącz / Wyłącz SCENE 3
115 Włącz / Wyłącz SCENE 4
116 Włącz / Wyłącz SCENE 5
117 Włącz / Wyłącz SCENE 6
118 Włącz / Wyłącz SCENE 7
119 Włącz / Wyłącz SCENE 8
CHASE
120 Włącz / Wyłącz SCENE 1
121 Włącz / Wyłącz SCENE 1
122 Włącz / Wyłącz SCENE 2
123 Włącz / Wyłącz SCENE 3
124 Włącz / Wyłącz SCENE 5
125 Włącz / Wyłącz SCENE 6
126 BLACKOUT

12 177-192 OFF OFF
Scanners Kanał Kontrola zaniku LED
1 1-16 ON ON
2 17-32 ON ON
3 33-48 ON ON
4 49-64 ON ON
5 65-80 ON ON
User Manual •Instrukcja Obsługi
5.1 WYBÓR STRONY
1. SUWAK PRĘDKOŚCI
2. SUWAK CZASU PRZEJŚCIA
3. WYŚWIETLACZ LED
4. Przycisk BAND
5. CHASE 1 - CHASE 6
zaprogramowania lub uruchom CHASE.
6. PROGRAM
na 2 sekundy, odpowiednia dioda LED
7. MIDI / ADD
program w trybie PROGRAM.
8. AUTO / DEL
program centralny i sekwencyjny w trybie
PROGRAM.
9. TAP SYNC / DISPLAY
odpowiednie kontrolki, uruchamianie
sceny w MUSIC RUN.
4. MIDI RUN
Wybierz bank do uruchamiania scen za
RUN, AUTO RUN lub MUSIC RUN.
3. CHASE RUN
I. CHASE RUN wymaga tworzenia
dopasowywana krokowo.

192 DMX CONTROLLER 192CH 2019 •Art No F9000384
II.CHASERUNobejmujeURUCHAMIANIE
CZNE, URUCHAMIANIE AUDIO i URU-
CHAMIANIE MIDI.
CHASE RUN.
4. KONTROLA CZASU PRZEJŚCIA
BANK NOTE NUMBER FUNCTION
I. Select desired CHASE
II. Press desired CHASE while holding
Auto/DEL
5. CLEAN ALL CHASE (ALL SCENES are
SCENY
I. Press DOWN+Auto/Del while turning
II. Turn the power on.
USTAWIENIA KANAŁU MIDI
2. URUCHAMIANIE MIDI
1. URUCHOMIENIE RĘCZNE
I. Wygaszenie diody LED wyzwolonej
AUTO i diody LED wyzwolonej MUSIC.
zostanie skopiowany do innego SKANERA.
2. URUCHAMIANIE AUTOMATYCZNE
AUTOMATYCZNEGO, maksymalny limit to

User Manual •Instrukcja Obsługi
AUTOMATYCZNE.
3. MUSIC RUN
6 81-96 ON ON
7 97-112 ON ON
8 113-128 ON ON
9 129-144 ON ON
10 145-160 ON ON
11 161-176 ON ON
12 177-192 ON ON
2. Przycisk Scena
3. Zanik (1-8)
4. WYBÓR STRONY
1. SUWAK PRĘDKOŚCI
2. SUWAK CZASU PRZEJŚCIA
4. Przycisk BAND
5. CHASE 1-CHASE 6
mowania lub uruchom CHASE.
6. PROGRAM
na 2 sekundy, odpowiednia dioda LED
7. MIDI / ADD
program w trybie PROGRAM.
8. AUTO / DEL
program Scene i Chase w trybie
PROGRAM.

192 DMX CONTROLLER 192CH 2019 •Art No F9000384
9. TAP SYNC/DISPLAY
12 177-192 OFF OFF
Scanners Kanał Kontrola Zaniku LED
1 1-16 ON ON
2 17-32 ON ON
3 33-48 ON ON
4 49-64 ON ON
5 65-80 ON ON
MUSIC RUN.
MUSIC RUN.
4. MIDI RUN
Wybierz bank do uruchamiania scen za
RUN, AUTO RUN lub MUSIC RUN.
3. CHASE RUN
I. CHASE RUN wymaga zrobienia
dopasowywana krokowo.
II.CHASERUNobejmujeURUCHAMIANIE
CZNE, URUCHAMIANIE AUDIO i
URUCHA-MIANIE MIDI.
CHASE RUN.
4. KONTROLA CZASU PRZEJŚCIA
USTAWIENIA KANAŁU MIDI
zaprogramowane sceny.
2. EDYCJA SCEN
utrzymywany, a STEP przechodzi do 10.
do SCENE, poprzedni 10-ty KROK
przechodzi w nowy 11-ty KROK, poprzedni
1-szy KROK przechodzi do nowego 12-tego
KROKU i tak dalej.
AUTO / DEL.
poprzedni 11. KROK przechodzi w 10.
KROK, poprzedni 12. KROK i tak dalej.
3. USUŃ CHASE.

www.flash-butrym.pl
F9000384
Table of contents
Languages:
Other Flash Controllers manuals
Popular Controllers manuals by other brands

Smarteh
Smarteh LPC-2.CH1 user manual

Emerson
Emerson Bettis XTE3000 Installation, operation and maintenance manual

Cross Technologies
Cross Technologies 2082-141-47 instruction manual

YASKAWA
YASKAWA MOTOMAN-NX100 instruction manual

Vega
Vega VEGALOG 571 operating instructions

Belimo
Belimo NKQB24-1 quick start guide