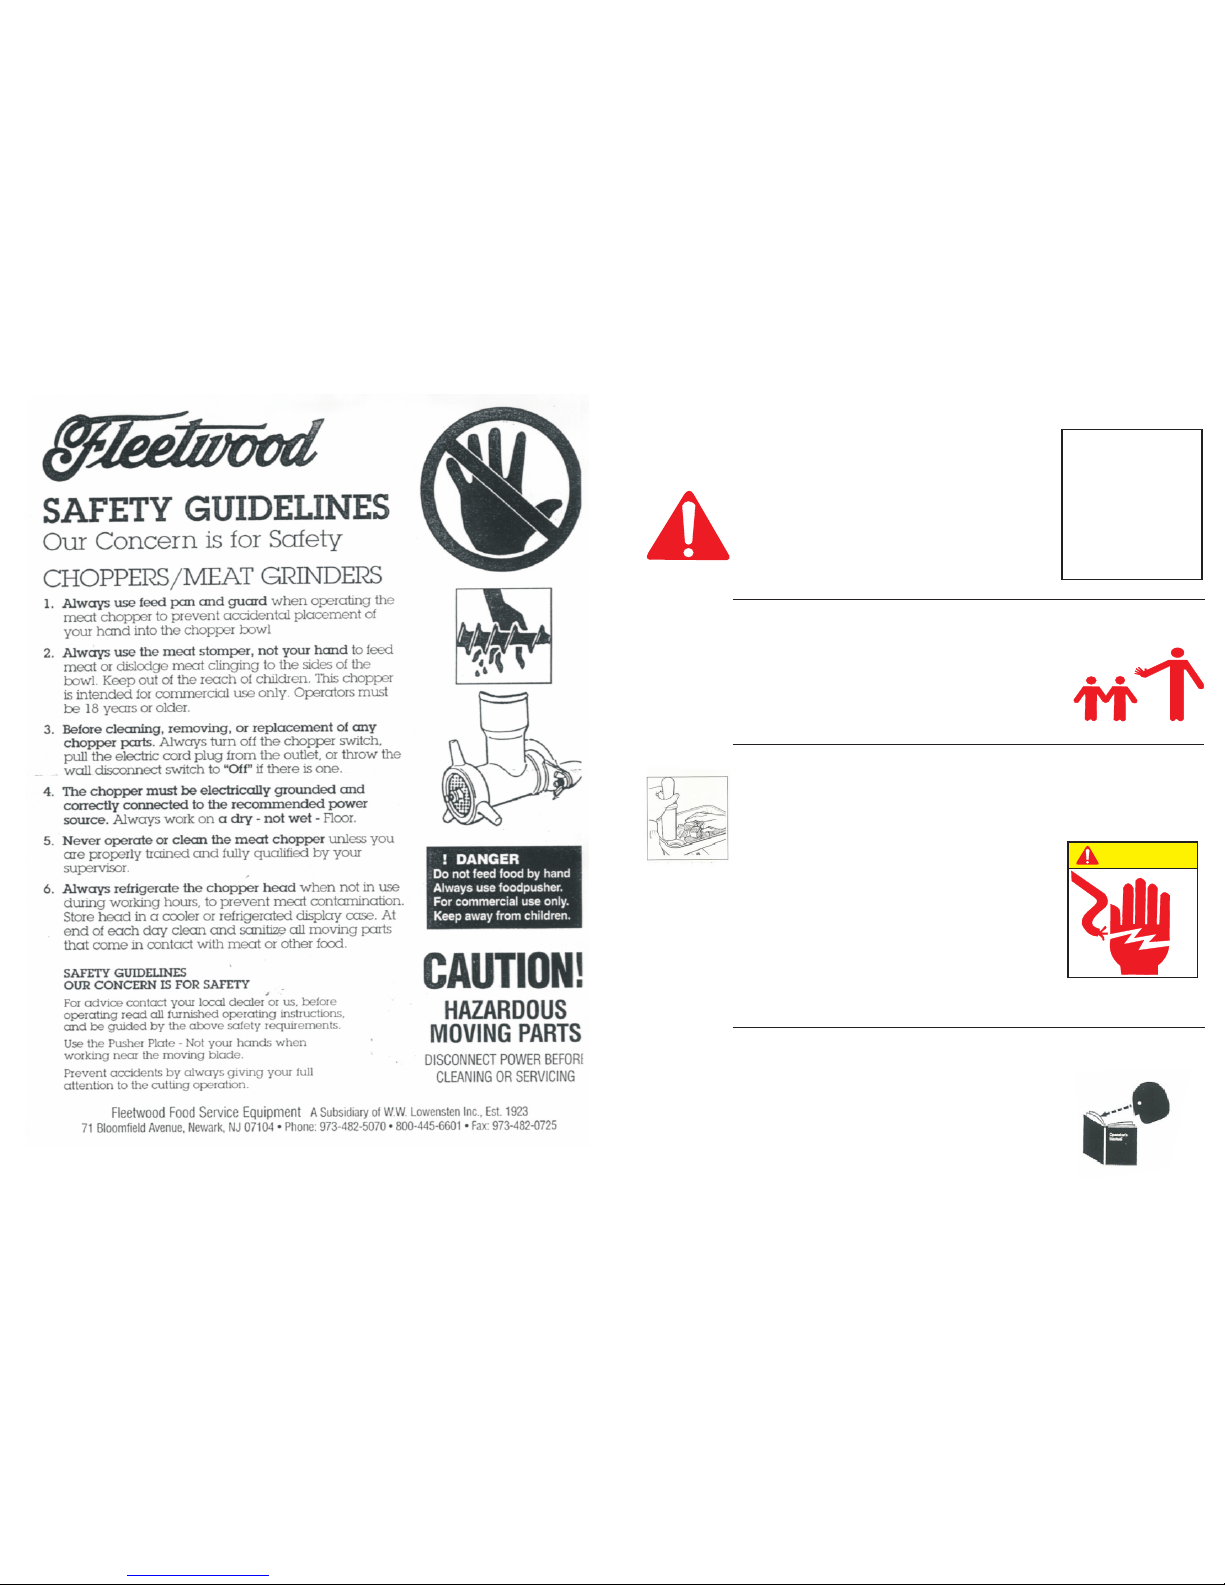
Fleetwood 22 Installation guide

USER'S OPERATING AND MAINTENANCE MANUAL
For all FLEETWOOD #8, #12, #22, #32 model meat grinders
SAFETY: READ ALL INSTRUCTIONS
Read this operator's manual before using the machine. Failure to
follow the instructions provided could result in personnel injury or
equipment damage.
KEEP OUT OF REACH OF CHILDREN
This chopper is intended for commercial use only.
Operators must be 18 years of age or older, and trained to
operate Equipment referenced in this manual.
CAUTION ! HAZARDOUS MOVING PARTS
FLEETWOOD FOOD SERVICE EQ. NEWARK N.J. 07104
36420.7-Janeiro/2009
SOLD WITHOUT HEAD.
ONE YEAR LIMITED WARRANTY
The original registered owner of this product
should contact SKYFOOD EQUIPMENT LLC at 305-868-1603 for any
warranty problems or service. SKYFOOD EQUIPMENT LLC will repair
or replace parts at our option for period of one year if unit fails to perform due
to defects in material or workmanship. Freight if required is at owner's
expense. Warranty does not include misuse or damage due to abuse as
determined by SKYFOOD EQUIPMENT LLC inspection. Units that are
70 lbs., or less are considered carry in and should be taken to an authorized
service facility.
Please read all safety instructions.
SERIAL #______________MODEL_______________
DETACH AND KEEP TOP PORTION
-------------------------------------------------------------------------------------
LIMITED WARRANTY REGISTRATION
OWNERS NAME
BUSINESS
ADDRESS
MODEL # SERIAL #
PURCHASED FROM
FILL OUT ABOVE INFORMATION AND MAIL OR FAX TO
SKYFOOD EQUIPMENT LLC:
Office: PO BOX 416702, Miami Beach, FL 33141-3230 –
Phone: 305 868 1603– Fax: 305 866 2704
Sales & Warehouse: 71 Bloomfield Ave, Newark, NJ 07104 –
Phone: 973 482 5070 – Fax: 973 482 0725
–
TOLL FREE 800 445 6601
[email protected] www.skyfood.us

9

1
WARNING
! DANGER
! WARNING
! CAUTION
RECOGNIZE SAFETY INFORMATION. When you see this symbol on your
machine or in this manual, be alert to the potential for personal injury.
Follow the recommended precautions and safe operating practices.
UNDERSTAND SIGNAL WORDS, DANGER, WARNING and CAUTION,
appear, with the safety-alert symbol in this manual and on safety labels
on the machine to identify the level of hazard seriousness.
DANGER indicates a hazard that WILL result in severe personal injury or
death.
WARNING indicates a hazard or unsafe practice which COULD result in
severe personal injury or death.
CAUTION indicates hazards or unsafe practices which COULD result in
minor personal injury or equipment damage.
READ ALL INSTRUCTIONS
Read this operator's manual before using the machine.
Failure to follow the instructions provided could result in personal injury or
equipment damage.
KEEP OUT OF REACH OF CHILDREN
This chopper is intended for commercial use only.
Operators must be 18 years of age or older.
DO NOT FEED FOOD BY HAND
Always use the foodpusher.
Always place the product to be ground on the tray.
DO NOT OPERATE IF DAMAGED
Do not operate this chopper with a damaged cord or plug, or if the
chopper has been dropped or damaged in any manner. Contact the
nearest factory-authorized service center for examination, repair or
adjustment. (Refer to the service center list included in the Owner's
Information Packet.)
Do not allow the cord to touch hot surfaces.
Do not allow the cord to hang over the edge of a table or counter.
Do not allow the cord near cutting board.
DO NOT LEAVE CHOPPER UNATTENDED.
UNPLUG CHOPPER
Set the switch to OFF and unplug the chopper from the outlet when not
in use and before cleaning or removing jams.
KEEP MACHINE AWAY FROM WATER
Do not let machine base stand in water.
Do not immerse the chopper in water or any other liquid.
ATTACHMENTS
Do not use attachments not recommended by the manufacturer.
Follow the manufacturer's instructions for use of attachments.
SAVE THESE INSTRUCTIONS
Keep this booklet in a convenient location for future reference.
8

WARNING SIGNALS
"WARNING" non indelible adhesive labels are placed on the machine.
*They must be replaced when they become difficult to read or worn.
Read these labels before operating the machine.
If replacement label is needed please contact
Fleetwood at 800-445-6601
Our concern is for your safety
27
CLEANING:
It is recommended that the machine be carefully cleaned after each time it is
operated.
1) Switch off the machine.
2) Unplug the machine.
3) Remove feed stick from intake hole.
4) Remove feed pan.
5) Un-screw locking ring and remove worm.
6) Loosen head tightening knob and remove barrel.
7) Completely clean all components with a cleansing agent approved for
kitchenware
8) CAUTION the machine is not protected against water jets. Positively do not
put machine in sink or under faucet. Short circuit or serious machine damage
may occur.
9) After removing any debris of meat, wash each component in warm water and
detergent. Rinse with warm running water, and wipe dry.
10) Wait for all components to be completely dry before re-installing.
TROUBLE SHOOTING:
2)Meat does not feed easily through cylinder head: pieces of meat being fed
are too large, cut to proper size, or knife is installed backwards, flat edges
should be facing outwards.
3)Cut meat appears to be stringy: knife and cutter plate are worn or dull,
replace with new or sharpened knife and cutter plates. Knife and plate should
always be used as set.
4)Meat appears to be mushed: Collar locking ring has been tightened too
much, loosen ring and hand tighten.
5)Motor stalls or stops while operating: Cylinder head has blockage due to
bone or gristle. UNPLUG MACHINE and turn off switch. Remove cylinder head,
disassemble and clean.
6)Motor stalls or stops while starting: Locking ring may have been over
tightened. Loosen collar and hand tighten.
7)Machine will not turn on: Check that machine is plugged inn.
FOR TECNICAL SUPPORT OR QUESTIONS ON YOUR MACHINE PLEASE
CALL 800-445-6601.

SAFETY GUIDELINES
Improper use or lack of compliance with safety regulations when
operating this machine may result in Serious injuries to hands and
fingers. It is therefore, recommended that you strictly comply with the
following safety regulations.
1)ALWAYS USE FEED PAN AND STOMPER
2) ALWAYS USE THE MEAT STOMPER, NOT YOUR HAND
to feed meat or dislodge meat clinging to sides of barrel.
3) BEFORE CLEANING, REMOVING, OR REPLACEMENT OF ANY
CHOPPER PARTS, always turn off chopper switch, pull electric cord from
outlet, or throw wall breaker to "OFF"
4) THE GRINDER MUST BE ELECTRICALLY GROUNDED AND CORRECTLY
CONNECTED TO THE RECOMMENDED POWER SOURCE.
5) NEVER OPERATE OR CLEAN THE MEAT GRINDER unless you are
properly trained, have read complete manual and fully qualified by your
supervisor.
6) MAKE SURE THAT UNAUTHORIZED AND UNTRAINED
Personnel, and in particular children, do not touch or start the machine.
7) THIS MEAT GRINDER WAS DESIGNED and built for the sole processing of all
kinds of meat. Grinding other items may cause the machine to operate incorrectly.
8) OPERATE MACHINE FROM SWITCH SIDE ONLY.
9) REMOVE ANY LOOSE clothing, bracelets, ties before operating
10) HAND OVER THIS MANUAL to any other user or successive owner of the
machine.
3
6
USE OF THE MACHINE:
Tighten ring/clampwheel until hand tight. Over tightening will cause plate and
knife to wear and possible stall motor.
* Plate when correctly installed should be protruding from end of barrel by
a minimum of 1/8"
Turn locking ring in direction indicated, until
it applies a slight pressure on the hole
plate and knife.
* Never start meat grinding / mincing before the head has been mounted
according to instructions. Never operate the machine without product, this will
cause knife and plate to over heat and burn operator if touched.
* Use only pusher feed stick / stomper provided.
OPERATION:
* Prepare meat in strips or chunks so they will easily be feed into feed hole. Place
meat in feed pan, feed the meat from the feedpan to the feed intake hole, and
push it toward the worm by use of the pusher feed stick. In order to prevent the
meat from being pressed too much, and in order to obtain and evenly ground
meat, it is recommended that the meat be fed
forward into the feed intake hole at a constant rate.
ALWAYS USE FEED STICK WHEN
FEEDING PRODUCT IN
MACHINE
The fineness to which the meat is cut is governed by the size of the holes in the
perforated chopping plate, not by tension put on feed stick pusher. If strips of meat
are cut to proper size, they will feed with very little assistance from feed stick.
When running meat through machine a second time, more speed is attained by
feeding small quantities at a time than by trying to force large amounts with the
feed stomper.
There are a full line of optional plates available for your FLEETWOOD chopper.
Optional plate sizes: 1/8", 3/16", 1/4", 3/8", 1/2", 5/8", 3/4"

INSTALLATION:
The machine must be placed on a working table 28" to 36" high above the floor. If
necessary leveled with aid of screw foot on machine. Leave a clear area of at least 12"
inches around the machine for cleaning and servicing operations.
*Place the machine on a solid and stable base.
FIRST CLEANING:
The machine must be cleaned before use. Clean the outer surfaces and the inner
parts that will come in contact with product only with a sponge wet with lukewarm
water and a neutral cleansing agent.
GROUNDING:
The machine is provided with cord with ground. Failure to use ground may cause
bodily harm and damage machine. 115 volt machines come with cord and plug. 208,
220, 230 volt machines come with cord no plug. * Have a certified electrician verify
proper connection.
USE OF THE MACHINE:
* In order to safely operate the machine the operator must stand at correct
working and control position. Machine should be on strong sturdy work surface 28"
to 36" inch's high. Controls should be in front of operator and in clear view. * Remove
all chains, bracelets, ties or loose scarves. The head and its components must be
disassembled and cleaned after each use. Reassemble them only when you start to
work again.
To assemble the various components of the head (B). Insert barrel/head into machine
hub checking that machine is not operating first. Insert worm into barrel (on models
that require fiber washer, insure it is in place on back off worm). Turn worm while
slightly pushing until it drops completely into drive shafts. Install knife on square end of
worm, verifying that the cutting blades are turned outwards.
Place cutting plate with holes into barrel, rotate plate until it aligns with locating pin on
barrel inch.
*Always work at correct
height. A)
*Always work with controls in
front of you. Easily
accessible. (A)
*Clean working parts before
and after use. (B)
5
8
1
4
This manual suits for next models
3
Table of contents
Other Fleetwood Meat Grinder manuals