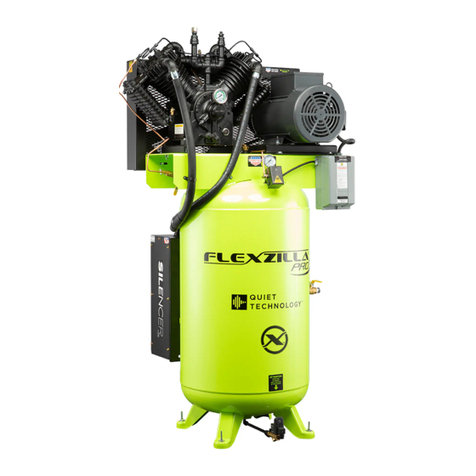
Flexzilla CF10050F Service manual

Operating, Service and
Warranty Manual
ELECTRIC OPERATED, OIL-FREE PORTABLE AIR COMPRESSORS
Flexzilla® designs and manufactures products for safe operaon. However, operators and maintenance persons are
responsible for maintaining safety. All safety precauons are included to provide a guideline for minimizing the
possibility of accidents and property damage while equipment is in operaon. Keep these instrucons for reference.
2006

2
Flexzilla Electric Operated, Oil-Free Portable Air Compressors
Contents
1. Important Safety Notes - Please read .................. 3-4
2. Set Up Instructions....................................................5
2.1 Initial Set Up.........................................................5
2.2 Location................................................................5
2.3 Electrical...............................................................5
3. Operation................................................................ 5-6
3.1 Test Run ...............................................................5
3.2 Daily Operation ................................................ 5-6
4. Maintenance...............................................................6
4.1 Cleaning...............................................................6
4.2 Cleaning or Changing the Air Filter ......................6
4.3 Draining the Air Tank ............................................6
4.4 Pressure Switch ...................................................6
4.5 Testing for Leaks ..................................................6
5. Troubleshooting.........................................................7
6. Exploded Diagrams ............................................. 8-10
CF10050F....................................................................8
CB20100F / CB20200F ...............................................9
7. Pre-Operation Checklist..........................................10
8. Location of Product Labels.....................................11
9. Warranty ...................................................................12

3
Flexzilla Electric Operated, Oil-Free Portable Air Compressors
1. IMPORTANT SAFETY NOTES
Safety Messages & Signal Words:
Danger indicates an immediate hazardous situaon which, if not
avoided, will result in death or serious injury.
Warning indicates an potenally hazardous situaon which, if not
avoided, could result in death or serious injury.
Cauon indicates an potenally hazardous situaon which, if not
avoided, may result in minor or moderate injury.
Indicates a situaon which, if not avoided, may result in damage
to product components or other property.
This manual contains important instrucons for operang this
product. For your safety, and the safety of others, be sure to read
this manual thoroughly before operang the product.
Failure to properly follow all the instrucons and precauons can
cause you and others to be seriously hurt or killed.
Use cauon to minimize risk of re or explosion.
It is normal for the air compressor motor and pressure switch to
produce sparks while operang. If sparks come in contact with
vapors from gasoline or solvents, they may ignite and cause a re
or explosion.
Abrasive tools such as grinders, drills and other tools can make
sparks that can ignite ammable materials.
Always operate the air compressor a safe distance away from
ammable items. Use in well-venlated areas.
Never exceed the maximum rated pressure.
There is a danger of electric shock.
Use only undamaged electrical cords.
DO NOT touch bare wires or receptacles.
DO NOT operate air compressor in wet weather or in wet
condions.
DO NOT touch air compressor or cords if hands or feet are wet.
Ensure that all cords are free of damage before connecng to the
power supply.
Ensure that you have a sucient electrical supply for supporng
the requirements of the motor.
Improper installaon of the grounding plug can result in a risk
of electric shock. When repair or replacement of the cord or
plug is required, do not connect the grounding wire to either at
terminal. The wire with insulaon having an outer surface that is
green with or without yellow stripes is the grounding wire.
This product must be grounded. In the event of an electrical
short circuit, grounding reduces the risk of electrical shock by
providing an escape wire for the electric current.
This product is equipped with a cord having grounding wire and
appropriate grounding plug. The plug must be plugged into an
outlet that is properly installed and grounded in accordance with
the local codes and ordinances.
This product is for use on a nominal 120V circuit and has
a grounding plug similar to the plug illustrated in sketch A
(below). Only connect the product to an outlet having the same
conguraon as the plug.
Do not use an adapter with this product.
Use cauon when using extension cords.
Use 3-wire extension cord which is no more than 25’ (7,6 m)
long, at least 14 gauge, and has a 3-blade grounding plug.
Using an excessively long or thin-wired extension cord will cause
severe damage to the motor.
An undersized cord results in a drop in the line voltage and loss
of power and overheang.
When in doubt, use a heavier gauge. The smaller the AWG
rang, the more current the cord can carry.
DANGER
WARNING
WARNING
WARNING
DANGER
CAUTION
CAUTION
NOTICE
EXPLOSION FIRE
STORE COMPRESSOR INDOORS
(SKETCH A)
GROUNDED
OUTLET
GROUNDING
PIN

4
Flexzilla Electric Operated, Oil-Free Portable Air Compressors
Dust or dust-like parculates caused by power-sanding, sawing,
grinding, drilling or any other construcon-like acvies can
contain contaminants that are harmful to breathe.
Always use your air compressor in a well-venlated and clean
area.
Never breath the air that comes directly out of the air
compressor or air hose. This air is not suitable for breathing.
Always wear approved safety equipment. When performing
dust-creang acvies, securely wear properly-t face masks or
respirators.
If your feel ill from breathing while operang your air
compressor, stop and seek medical aenon immediately.
Flying objects can cause injury to the eyes, head and other parts
of the body.
Air-powered equipment and power tools are capable of
propelling items (metal chips, fasteners and parculates) at high
speed into the air and could result in injury.
Always wear approved head and eye protecon.
Never point the air stream at any part of your body, or at
another person or animal.
When operang the air compressor, make sure all other people
and animals maintain a safe distance.
Do not move the air compressor when the air tank is under
pressure.
Never use the air hoses to pull or move the air compressor.
Keep the air compressor on a at surface.
WARNING
WARNING
RISK TO BREATHING
FLYING OBJECTS
Use cauon to minimize risk of re or explosion.
Improper care could lead to the air tank bursng or exploding.
Drain air tank daily or aer each use to prevent moisture buildup
in the air tank.
Rust can weaken the air tank and cause leaks or bursng. If rust
is detected, replace tank immediately. Do not try to repair air
tank by welding, drilling or modifying it in any other way. These
modicaons can weaken the air tank and cause a hazardous
condion.
If air tank develops a leak, replace air tank immediately. Never
repair, weld or make modicaons to air tank or its aachments.
Never make adjustments to the factory-set pressures.
Never exceed manufacturer’s maximum-allowable pressure
rang aachments.
Because of extreme heat, do not use plasc pipe or lead n
solder joints for a discharge line.
Moving parts can cause severe trauma.
Keep hands and feet away from rotang parts, e up long hair,
remove jewelry, and DO NOT wear loose clothing.
WARNING
BURSTING
RISK OF CUTTING
DANGER

5
Flexzilla Electric Operated, Oil-Free Portable Air Compressors
3. OPERATION
3.1 Test Run
Before using the air compressor for the rst me
complete a test run as follows:
1.) Turn the power switch to the OFF posion.
Plug the power supply cord into a power supply
socket.
Start the air compressor by turning the power
switch to the ON posion.
The pressure gauge reading will slowly rise as
pressure increases inside the air tank.
When the gauge reading reaches 120 PSI – 125 PSI,
the pressure switch will automacally turn the
power o.
This indicates the compressor is working normally.
2.) Turn the power switch to the OFF posion, unplug
the power supply cord and release the air in the
tank by pulling on the safety valve. At this point
proceed to the next step.
Note: If the air compressor is not working properly,
the pressure gauge will indicate that there is a
decrease in pressure in the air tank. If there is an
air leak from the compressor the pressure in the
air tank decreases, the pressure switch resets and
the motor automacally turns back on.
If you detect an air leakage, turn the power switch
to the OFF posion, release the air from the tank
by pulling on the safety valve. Unplug the power
supply cord and contact Customer Support for
assistance.
3.2 Daily Operaon
Starng the compressor:
1.) Turn the power switch to the OFF posion.
2.) Aach air hose to the 1/4” Universal/Industrial
Quick Connector.
3.) Check that all air ngs are ght and close manual
drain valve.
4.) Maintain 2 feet of open space around the air
compressor.
5.) Plug the power supply cord into a 110V 20 amp
outlet/breaker.
6.) Turn the power switch to the ON posion.
7.) Let the motor run and tank ll unl motor
turns o.
8.) To regulate air ow. While the air compressor is
running, turn on your tool and turn the regulator
knob to the right increasing the pressure.
Turn the pressure up unl the desired pressure is
reached.
9.) Operate air tool normally. Do not use connuously
(running) for more than (8-12) hours.
2. SET UP INSTRUCTIONS
2.1 Inial Set Up
1.) Read safety warnings before seng up air
compressor.
2.2 Locaon
1.) In order to avoid damaging the air compressor,
do not incline the air compressor transversely or
longitudinally more than 10°.
2.) Place air compressor at least 2 feet away from
obstacles that may prevent proper venlaon.
Do not place air compressor in an area:
a. Where there is evidence of oil or gas leaks.
b. Where ammable gas vapors or materials may
be present.
c. Where air temperatures fall below 32°F or
exceed 104°F.
d. Where extremely dirty air or water could be
drawn into the air compressor.
2.3 Electrical
1.) USE OF AN EXTENSION CORD IS NOT RECOMMENDED
because it could cause the compressor motor to
overheat. It’s preferable to use addional air hose
instead of an extension cord.
2.) If use of an extension cord is unavoidable, be
sure to use one heavy enough to carry the current
your compressor will draw. Minimum cord sizes are
as follows:
Ampere
Rang
Range
Voltage Length of cord in .
120V 25 . 50 100 . 150 . 200 . 250 .
240V 50 . 100 . 200 . 300 . 400 . 500 .
8 - 10 18 14 12 10 8 8
10 - 12 16 14 10 8 8 6
12 - 14 16 12 10 8 6 6
14 - 16 16 12 10 8 6 6
16 - 18 14 12 8 8 6 4
18 - 20 14 12 8 6 6 4
3.) Use only a 3-wire extension cord that has a 3-blade
grounding plug and a 3-slot receptacle that will
accept the plug of the compressor.
4.) Examine cords before using. Do not use the
compressor if its cord is damaged. Do not use a
damaged extension cord.
5.) Keep cords away from heat and sharp edges. Do
not pull on a cord to disconnect a plug – grasp
the plug.
6.) Always shut o the compressor pressure switch
before unplugging the compressor.

6
Flexzilla Electric Operated, Oil-Free Portable Air Compressors
Shung down the compressor:
1.) Turn the power switch to the OFF posion.
2.) Disconnect the power cord from the power supply
and wrap the power cord around the air
compressor handle to reduce the risk of damage.
3.) Release all the pressure and moisture from the air
tank by manually opening the drain valve.
4.) Clean the air compressor to remove all dirt
and dust.
Before storing for a prolonged period of me:
5.) Cover the air compressor to protect the unit from
dust and moisture.
6.) Do not stack or store any items on top of or around
the air compressor. Damage could occur.
4. MAINTENANCE
4.1 Cleaning
Clean items with a so brush, or wipe with a
moistened cloth using a biodegradable solvent.
Do not use ammable liquids such a gasoline or
alcohol. Always keep parts clean from dirt and dust for
beer performance.
4.2 Cleaning or Changing the Air Filter
The air lter is designed to reduce noise and help
prevent parculates in the air from entering and
damaging the air compressor.
Aer being used for a period of me, the air lter
will become clogged. This will reduce the air
intake capabilies of the air compressor, reducing
performance. Therefore, the air lter must be cleaned
or replaced regularly.
1.) Open the lid on the air lter, then remove the air
lter element.
2.) To clean the element, blow o or brush o the dirt
and dust.
3.) If clogged, replace with a new air lter.
4.3 Draining the Air Tank
The frequency at which you should drain the air
tank depends on the environmental condions and
the amount of operaon me logged. The average
draining frequency is every 1 to 2 days.
1.) Place the air compressor above a container
capable of holding water.
2.) With compressed air in the air tank, slowly turn
the drain valve knob to the forward (open) or
straight posion. The water in the air tank will
drain out.
3.) Aer all of the accumulated water has drained out,
turn the drain valve knob to the closed or le
posion in order to avoid leakage.
4.) Draining the air tank protects parts from rust and
corrosion.
4.4 Pressure Switch
The pressure switch is factory pre-set to shut o at
between 120-125 PSI and restart at between
90-95 PSI.
4.5 Tesng for Leaks
Make sure all connecons are ght. Do not
overghten.
A small leak in any hose or pipe connecon will
reduce the air compressor’s performance.
To test for small leaks, spray a small amount of soapy
water on the area suspected of leaking. If the soap
bubbles, replace the broken part.

7
Flexzilla Electric Operated, Oil-Free Portable Air Compressors
5. TROUBLESHOOTING
Problem Possible Cause Repair
Pressure drop in the tank. Air leaks at connecons. Let the compressor build pressure in the tank, to the
maximum pressure if possible. Brush soapy water on air
connecons and look carefully for air bubbles. Tighten
leaky connecons. If the problem persists, contact
Customer Support for further advice.
The unloader valve leaks when
the compressor is idle.
Unloader valve seal is defecve. Let the air in the air tank ow out unl all the pressure is
released. Then remove the unloader valve plug and clean
the valve seal. If necessary, replace the seal and then
reinstall all components.
The compressor stopped and
does not start.
The thermal protecon turned
on because the motor is
overheang.
Check that the main voltage corresponds to the air
compressor specicaons. An extension cord that is too
thin or too long can cause a voltage drop and cause the
motor to overheat.
Excessive use (over 1 hour connuous use) can cause the
motor to overheat.
Allow the motor to cool down.
Motor windings are burned out. Contact Customer Support.
The motor does not start and
makes a humming noise.
Capacitor is burned out. Contact Customer Support.
The motor does not start or
starts slowly.
Low voltage supply to the motor. Check that the main voltage corresponds to the air
compressor specicaons.
An extension cord that is too thin or too long can cause a
voltage drop. Use heavy duty extension cords.
Ensure that the air compressor is plugged into a fully
funconal power outlet.
The compressor is noisy with
metallic clangs.
Compressor head gasket or reed
valve is damaged.
Stop the compressor and contact Customer Support.
The compressor does not reach
the maximum pressure.
Compressor head gasket or reed
valve is damaged.
Stop the compressor and contact Customer Support.
The compressor doesn’t seem
to provide as much air as it
did when new and/or the
compressor cuts o within a
much shorter me period.
The pressure switch needs
adjusng.
Stop the compressor and contact Customer Support.
The tank is full of water due to
condensaon.
Open the drain valve and release the water from the tank.
The motor pump unit does not
stop when the tank pressure
reaches its maximum working
pressure.
Pressure switch is defecve or
needs adjusng.
Stop the compressor immediately and contact Customer
Support.

8
Flexzilla Electric Operated, Oil-Free Portable Air Compressors
6
8
910
7
12
13
14
15
16
17 18 19 21 22 23
24
25
26
27
28
29
30
31
32
33
35
37 36
38
40
41
42
43
44
48
49 51
52
34
21 3 4 5
50
11 20
45
46
47
#
PART NO./KIT CODE
DESCRIPTION QTY.
1RP000500 REGULATOR SUPPORT 1
2RP000501
REGULATOR PRESSURE GAUGE 1
3A77425 QUICK COUPLER 1
4RP000502 ELBOW 1
5A77425 QUICK COUPLER 1
6RP000503 or A CYLINDER HEAD 2
7A or B RUBBER SEAL 2
8A or B SCREW 8
9A or B VALVE PLATE 2
10 A or B RUBBER SEAL 2
11 A PLUG 1
12 A CYLINDER SUPPORT 2
13 A CRANKCASE 2
14 A SCREW 4
15 ASTATOR & WINDING 1
16 RP000504 AIR DELIVERY TUBE 1
17 RP000505 ELBOW 1
18 RP000506 or A
CYLINDER HEAD CONNECTION 2
KIT CODE PART NO. DESCRIPTION
ARP000540 Flexzilla™ Portable Air Compressors Replacement Pump and Motor for CF10050F
BRP000541 Flexzilla™ Portable Air Compressors Pump Repair Kit for CF10050F
CRP000542 Flexzilla™ Portable Air Compressors Replacement Fan and Cover for CF10050F
DRP000545 Flexzilla™ Portable Air Compressors Replacement Foot Kit for CF10050F
ERP000543 Flexzilla™ Portable Air Compressors Replacement Capacitor Cover for CF10050F
FRP000544 Flexzilla™ Portable Air Compressors Replacement Power Cord for CF10050F
#
PART NO./KIT CODE
DESCRIPTION QTY.
19 RP000507 or A CYLINDER HEAD COVER 2
20 RP000508 or A AIR FILTER 2
21 A or B CYLINDER 2
22 A or B SCREW 2
23 A PRESS PAD 2
24 A or B TEFLON PISTON CUP 2
25 A CIRCLIP 2
26 ABEARING 2
27 ACRANKSHAFT 2
28 A or C FAN 2
29 A or C FAN COVER 2
30 RP000509 INSULATOR 4
31 ABEARING 2
32 AROTOR 1
33 RP000510 CAPACITOR 1
34 RP000511 SAFETY VALVE 1
35 FPOWER CORD 1
36 FCABLE LOCK 1
#
PART NO./KIT CODE
DESCRIPTION QTY.
37 RP000512 PRESSURE SWITCH 1
38 RP000513 RELEASE TUBE 1
39 RP000514 AIR DELIVERY TUBE 1
40 D NUT 4
41 DSPRING 4
42 D SCREW 4
43 DRUBBER FOOT 4
44 RP000515 WATER DRAIN 1
45 RP000516 TANK 1
46 RP000517 CHECK VALVE 1
47 RP000518 RUBBER GRIP 1
48 ECAPACITOR COVER 1
49 E SCREW 1
50 RP000519 PANEL 1
51 ACONNECTING ROD 2
52 A SCREW 4
6. EXPLODED DIAGRAMS
CF10050F

9
Flexzilla Electric Operated, Oil-Free Portable Air Compressors
12345
6
8
910
7
11
12
13
14
15
16
17 18 19 20 21 22 23
24
25
26
27
28
29
30
31
32
33
34
35
37 36
38
39
40
41
42
43
44
45
46
47
48
49
50
51
52
53
54
55
56
57
58
59
KIT CODE PART NO. DESCRIPTION
ARP000640 Flexzilla™ Portable Air Compressors Replacement Pump and Motor for CB20100F and CB20200F
BRP000641 Flexzilla™ Portable Air Compressors Pump Repair Kit for CB20100F and CB20200F
CRP000642 Flexzilla™ Portable Air Compressors Replacement Fan and Cover for CB20100F and CB20200F
DRP000645 Flexzilla™ Portable Air Compressors Replacement Foot Kit for CB20100F and CB20200F
ERP000646 Flexzilla™ Portable Air Compressors Replacement Wheel Kit for CB20100F and CB20200F
FRP000643 Flexzilla™ Portable Air Compressors Replacement Capacitor Cover for CB20100F and CB20200F
GRP000644 Flexzilla™ Portable Air Compressors Replacement Power Cord for CB20100F and CB20200F
#
PART NO./KIT CODE
DESCRIPTION QTY.
1RP000600 SAFETY VALVE 1
2RP000601
RUBBER GRIP 1
3RP000602 HANDLE 1
4RP000603 SCREW 2
5RP000604 CHECK VALVE 1
6RP000605 or A CYLINDER HEAD 2
7A or B RUBBER SEAL 2
8A or B SCREW 8
9A or B VALVE PLATE 2
10 A or B RUBBER SEAL 2
11 APLUG 1
12 A CYLINDER SUPPORT 2
13 A CRANKCASE 2
14 A SCREW 4
15 ASTATOR & WINDING 1
16 RP000606 AIR DELIVERY TUBE 1
17 RP000607 ELBOW 1
18 RP000608 or A
CYLINDER HEAD CONNECTION 2
19 RP000609 or A CYLINDER HEAD COVER 2
20 RP000610 or A AIR FILTER 2
#
PART NO./KIT CODE
DESCRIPTION QTY.
21 A or B CYLINDER 2
22 A or B SCREW 2
23 A PRESS PAD 2
24 A or B TEFLON PISTON CUP 2
25 A CIRCLIP 2
26 ABEARING 2
27 ACRANKSHAFT 2
28 A or C FAN 2
29 A or C FAN COVER 2
30 RP000611 INSULATOR 4
31 ABEARING 2
32 AROTOR 1
33 RP000612 CAPACITOR 1
34 RP000613 TANK PRESSURE GAUGE 1
35 GPOWER CORD 1
36 GCABLE LOCK 1
37 RP000614 PRESSURE SWITCH 1
38 RP000615 RELEASE TUBE 1
39 RP000616 CONNECTOR 1
40 RP000617 REGULATOR 1
#
PART NO./KIT CODE
DESCRIPTION QTY.
41 RP000618
REGULATOR PRESSURE GAUGE
1
42 RP000619 CONNECTOR 1
43 A77425 QUICK COUPLER 1
44 RP000620 THREE WAY ELBOW 1
45 A77425 QUICK COUPLER 1
46 D NUT 2
47 DSPRING 2
48 D SCREW 2
49 DRUBBER FOOT 2
50 RP000621 DRAIN VALVE 1
51 E NUT 2
52 E WHEEL 2
53 E SCREW 2
54 RP000625 10 GAL TANK (CB20100F) 1
54 RP000626 20 GAL TANK (CB20200F) 1
55 F CAPACITOR COVER 1
56 FSCREW 1
57 RP000622 THREAD ADAPTOR 1
58 ACONNECTING ROD 2
59 A SCREW 4
6. EXPLODED DIAGRAMS
CB20100F/CB20200F

10
Flexzilla Electric Operated, Oil-Free Portable Air Compressors
7. PRE-OPERATION CHECKLIST
Inial Set-up:
Package Contents:
1.) Air compressor
2.) Owner’s Manual
3.) Air Filter Kit (2)
- Includes pre-assembled unit consisng of male housing, female
housing, lter element, and intake tube
4.) An-Vibraon Foot Kit (4)
- Includes elastomer pad, screw, and nut
5.) Wheel Kit (2)
- Includes wheel, bolt, at washer, lock washer, and nut
5.) Hot Surface Protecon Kit (2)
- Includes plasc head cover, head cover clamp, 2 screws
Assembly:
1.) Install Foot Kit (2 Locaons)
- Lay down compressor handle side down to prevent unit from rolling
- Insert bolt through elastomer foot and through hole located in frame
- Thread nut onto bolt, lightly ghten
- Repeat at remaining locaon
- Leave compressor in this posion for step 2
2.) Install Wheel Kit (2 Locaons) (CB20100F/CB20200F models only)
- Li compressor slightly to raise wheel o ground
- Insert bolt through wheel and through hole in bracket
- Install at washer over bolt
- Install lock washer over bolt
- Thread nut onto bolt and ghten with wrench
- Repeat at remaining posion
- Tip compressor upright by using the handle
3.) Install Air Filter
CF10050F (1 Locaon)
- When facing the front of compressor, locate the thread port in
motor head along le side
- Thread lter into port, and ghten by hand securely
CB20100F/CB20200F (2 Locaons)
- When facing the back of compressor, locate the thread ports near
the top of the motor head behind the handle
- Thread lter into port, and ghten by hand securely
4.) Install Hot Surface Protecon Kit (2 Locaons)
- When facing the rear of the compressor, place plasc head cover
over the cylinder head
- Note: The screw holes are located near the center of the
compressor pump
- Place head cover clamp below the plasc head cover
- Insert the 2 screws and ghten with PH2 screw driver securely
Screw
Elastomer Foot
Bolt
FOOT KIT DIAGRAM
Wheel
Flat Washer
Lock Washer
Nut
Bolt
WHEEL KIT DIAGRAM
(CB20100F/CB20200F)
AIR FILTER LOCATION
(CF10050F)
AIR FILTER LOCATION
(CB20100F/CB20200F)

11
Flexzilla Electric Operated, Oil-Free Portable Air Compressors
8. LOCATION OF PRODUCT LABELS
Read these important labels before operang.
These labels provide important safety and
maintenance informaon. These labels should be
considered as permanent parts of the air compressor.
Should any of these labels become illegible, damaged
or removed, please contact Legacy Manufacturing
Company Service department for replacements by
phone at 800-645-8258 ext. 121 or email
service@legacymfg.com, M-F 8am-5pm CST.
PRODUCT LABEL
A
B
C
D
E
F
G
B
E
C
D
A
A
G
F
E
D
C
B
CF10050F:
CB20100F / CB20200F:
F

12
Flexzilla Electric Operated, Oil-Free Portable Air Compressors
9. Warranty Statement
LIMITED WARRANTY STATEMENT
LEGACY MANUFACTURING COMPANY ("LEGACY") warrants that its products will be free from defects in material and
workmanship under normal use for the period listed below:
Flexzilla® Portable Air Compressors 2 years from date of purchase
LEGACY’S sole obligaon under this warranty is limited to replacing or repairing, free of charge, any equipment proven by an
authorized service center to be defecve in material or workmanship under normal use during the applicable warranty me
period. To obtain repair or replacement, the product must be shipped to a LEGACY authorized Warranty and Service Center
during the warranty period, transportaon charges prepaid by the customer, with proof of date of purchase and explanaon
of the alleged defect. In the event of repair or replacement, the warranty period shall not be extended beyond the original
warranty period.
This warranty is extended to the original purchaser only and is not transferable. This warranty does not apply to normal
wear items such as packings, seals, ps and lters; equipment damaged from accident, overload, abuse, misuse, negligence,
improper setup or installaon, abrasive or corrosive materials; equipment repaired or altered by anyone not authorized by
LEGACY to repair and alter equipment, or by acts of God. No allowance will be granted for any repairs or alteraons made by
a purchaser without LEGACY’S prior wrien consent.
LEGACY WILL BEAR NO OTHER EXPENSE, INCLUDING BUT NOT LIMITED TO LABOR AND MATERIAL COSTS (OTHER
THAN THOSE SPECIFIED HEREIN) OF ANY KIND, AND YOUR EXCLUSIVE REMEDY, IN LIEU OF ALL INCIDENTAL, SPECIAL,
CONSEQUENTIAL OR ANY OTHER DAMAGES, INCLUDING, BUT NOT LIMITED TO, DAMAGES FOR NEGLIGENCE, IS LIMITED
TO REPAIR OR REPLACEMENT AS HERETOFORE DESCRIBED. THE FOREGOING WARRANTIES ARE IN LIEU OF ALL OTHER
REPRESENTATIONS OR WARRANTIES, EXPRESS OR IMPLIED OF ANY KIND REGARDING ANY EQUIPMENT, INCLUDING BUT
NOT LIMITED TO THE IMPLIED WARRANTIES OF MERCHANTABILITY AND FITNESS FOR A PARTICULAR PURPOSE OR USE.
IN NO CASE SHALL LEGACY BE LIABLE FOR DEATH, INJURIES TO PERSON OR PROPERTY OR FOR INCIDENTAL, SPECIAL OR
CONSEQUENTIAL DAMAGES ARISING FROM THE USE OF OUR PRODUCTS, WHETHER BASED UPON BREACH OF WARRANTY,
BREACH OF CONTRACT, NEGLIGENCE, STRICT LIABILITY, OR ANY OTHER LEGAL THEORY.
Unless modied in wring, and signed by both pares, this Limited Warranty is understood to be the complete and exclusive
agreement between the pares, superseding all prior agreements, oral or wrien, and all other communicaons between
the pares relang to the subject maer of this Limited Warranty. Any acon for breach of warranty must be commenced
within twelve (12) months following the end of the warranty period.
While necessary maintenance or repairs on your Legacy equipment can be performed by any company, we recommend that
you use only authorized Legacy dealers. Improper or incorrectly performed maintenance or repair voids this warranty.
Contact Legacy Manufacturing Co.: 1-800-645-8258 ext. 121
Email service@legacymfg.com or visit www.exzilla.com

Instrucciones de
operación y garantía
COMPRESORES DE AIRE PORTÁTILES DE FUNCIONAMIENTO
ELÉCTRICO Y SIN ACEITE
Flexzilla® diseña y fabrica productos para una operación segura. Sin embargo, los operadores y el personal de
mantenimiento son responsables de mantener la seguridad. Se incluyen todas las precauciones de seguridad para
proporcionar una pauta que minimice las posibilidades de accidentes y daños a la propiedad mientras el equipo está
en operación. Conserve estas instrucciones como referencia.
2006

2
Compresores de aire portáles de funcionamiento eléctrico y sin aceite Flexzilla
Contenido
1.
Por favor lea las notas importantes de seguridad
...... 3-4
2. Instrucciones de ajuste.............................................5
2.1 Ajuste inicial .........................................................5
2.2 Ubicación .............................................................5
2.3 Instalación eléctrica..............................................5
3. Operación............................................................... 5-6
3.1 Prueba de funcionamiento ...................................5
3.2 Operación diaria............................................... 5-6
4. Mantenimiento ...........................................................6
4.1 Limpieza...............................................................6
4.2 Limpieza o cambio del filtro de aire......................6
4.3 Drenado del tanque de aire..................................6
4.4 Interruptor de presión...........................................6
4.5 Pruebas para detectar fugas................................6
5. Solución de problemas .............................................7
6. Diagramas de despiece....................................... 8-10
CF10050F....................................................................8
CB20100F/CB20200F .................................................9
7. Lista de verificación previa a la operación ...........10
8. Ubicación de las etiquetas del producto...............11
9. Garantía ....................................................................12

3
Compresores de aire portáles de funcionamiento eléctrico y sin aceite Flexzilla
1. NOTAS IMPORTANTES DE SEGURIDAD
Mensajes de seguridad y palabras de advertencia:
Indica una situación de peligro inmediato que, si no se evita, provocará la
muerte o lesiones graves.
Indica una situación de peligro potencial que, si no se evita, podría
provocar la muerte o lesiones graves.
Indica una situación de peligro potencial que, si no se evita, puede
provocar lesiones menores o moderadas.
Indica una situación que, si no se evita, puede provocar daños a los
componentes del producto o alguna otra propiedad.
Este manual conene instrucciones importantes para la
operación de este producto. Por su seguridad y la de los demás,
asegúrese de leer este manual detenidamente antes de operar
este producto.
Si no se siguen debidamente todas las instrucciones y
precauciones, usted y otros pueden resultar gravemente heridos
o muertos.
Tenga la precaución de minimizar el riesgo de incendio o
explosión.
Es normal que el motor del compresor de aire y el interruptor
de presión produzcan chispas mientras están en operación. Si
las chispas entran en contacto con los vapores de gasolina o
solventes, estas pueden causar un incendio o una explosión.
Las herramientas abrasivas, como las reccadoras, los taladros
y otras herramientas pueden causar chispas que incendien
materiales inamables.
Siempre opere el compresor de aire a una distancia segura de los
materiales inamables. Ulícelo en áreas bien venladas.
Nunca exceda la presión máxima indicada.
Existe peligro de descarga eléctrica.
Use solo cables eléctricos que no estén dañados.
NO toque receptáculos o cables pelados.
NO opere el compresor de aire en climas húmedos o en condiciones
húmedas.
NO toque el compresor de aire o los cables si ene mojados los pies o
las manos.
Asegúrese de que ningún cable esté dañado antes de conectar la fuente
de alimentación.
Asegúrese de contar con suciente suministro de corriente para cumplir
con los requisitos del motor.
La instalación inadecuada del enchufe con conexión a erra puede
presentar un riesgo por descarga eléctrica. Cuando se requiera el
reemplazo o la reparación del cable o el enchufe, no conecte el cable de
conexión a erra a ninguna las terminales planas. El cable con aislante
que ene una supercie exterior de color verde, con o sin bandas
amarillas, es el cable de conexión a erra.
Este producto debe estar conectado a erra. En el caso de un corto
circuito, la conexión a erra reduce el riesgo de una descarga eléctrica al
proporcionar un cable de escape para la corriente eléctrica.
Este producto está equipado con un cable de conexión a erra y un
enchufe de conexión a erra adecuado. El enchufe debe conectarse
en un tomacorriente debidamente instalado y conectado a erra de
acuerdo con los códigos y ordenanzas locales.
Este producto está diseñado para funcionar con un circuito nominal de
120V y cuenta con un enchufe de conexión a erra similar al enchufe
ilustrado en el esquema A (a connuación). Conecte el producto
únicamente a un tomacorriente que tenga la misma conguración que
el enchufe.
No ulice un adaptador para conectar este producto.
Tenga precaución al usar cables de alimentación.
Ulice un cable de alimentación polarizado que no mida más de 25
pulgadas (7.6 m) de largo, por lo menos de calibre 14 y que posea un
enchufe de conexión a erra de 3 clavijas.
El uso de un cable de alimentación excesivamente largo o delgado
causará daños graves al motor.
Un cable de menor tamaño provoca una caída en el voltaje de línea, la
pérdida de potencia y sobrecalentamiento.
Si ene dudas, ulice un calibre mayor. Entre menor sea la clasicación
AWG, mayor corriente podrá llevar el cable.
PELIGRO
ADVERTENCIA
ADVERTENCIA
ADVERTENCIA
PELIGRO
PRECAUCIÓN
PRECAUCIÓN
AVISO
EXPLOSIÓN INCENDIO
ALMACENE EL COMPRESOR BAJO TECHO
(SKETCH A)
GROUNDED
OUTLET
GROUNDING
PIN
(ESQUEMA A)
TOMACORRIENTE
CONECTADO A TIERRA
CLAVIJA DE
CONEXIÓN A TIERRA

4
Compresores de aire portáles de funcionamiento eléctrico y sin aceite Flexzilla
El polvo o las parculas similares causados por el lijado eléctrico, el
aserrado, el reccado, el taladrado o cualquier otra acvidad de
construcción pueden contener contaminantes que son perjudiciales si
se respiran.
Siempre ulice su compresor de aire en una zona limpia y que esté bien
venlada.
Nunca respire el aire que sale directamente del compresor de aire o de
la manguera de aire. Este aire no es adecuado para respirarlo.
Siempre ulice equipo de seguridad aprobado. Cuando realice
acvidades que generen polvo, ulice mascarillas faciales o respiradores
que se ajusten bien.
Si se siente mal al respirar mientras opera su compresor de aire,
deténgase y busque asistencia médica de inmediato.
Los objetos voladores pueden causar lesiones en los ojos, la cabeza y
otras partes del cuerpo.
El equipo accionado por aire y las herramientas eléctricas son capaces
de arrojar objetos (virutas de metal, sujetadores y parculas) por el aire
a gran velocidad y pueden causar lesiones.
Siempre ulice protección aprobada para la cabeza y los ojos.
Nunca apunte la corriente de aire a ninguna parte de su cuerpo o al de
otra persona o animal.
Al operar el compresor de aire, asegúrese de que todas las personas y
animales se mantengan a una distancia segura.
No mueva el compresor de aire cuando el tanque de aire se encuentre
bajo presión.
Nunca ulice las mangueras de aire para jalar o mover el compresor de
aire.
Mantenga el compresor de aire en una supercie plana.
ADVERTENCIA
ADVERTENCIA
RIESGO PARA LA RESPIRACIÓN
OBJETOS PROYECTADOS EN EL AIRE
Tenga la precaución de minimizar el riesgo de incendio o explosión.
El cuidado indebido puede llevar a que el tanque de aire se reviente o
explote.
Drene el tanque de aire a diario o después de cada uso para evitar
que la humedad se junte en el tanque de aire. El óxido puede
debilitar el tanque de aire y causar fugas o rupturas. Si detecta óxido,
reemplace el tanque de inmediato. No intente reparar el tanque de
aire soldándolo, taladrándolo o modicándolo de alguna otra manera.
Estas modicaciones pueden debilitar el tanque de aire y provocar una
situación peligrosa.
Si el tanque ene una fuga, reemplace el tanque de aire de inmediato.
Nunca repare, suelde o modique el tanque de aire o sus accesorios.
Nunca realice ajustes a las presiones establecidas desde fábrica.
Nunca exceda los accesorios de presión máxima permida por el
fabricante.
Debido al calor extremo, no ulice tuberías de plásco o uniones
soldadas de plomo y estaño para una línea de descarga.
Las piezas móviles pueden causar traumasmos graves.
Mantenga las manos y los pies alejados de las piezas giratorias, recójase
el cabello largo, quítese las joyas y NO use ropa holgada.
ADVERTENCIA
ESTALLIDO
RIESGO DE CORTE
PELIGRO

5
Compresores de aire portáles de funcionamiento eléctrico y sin aceite Flexzilla
3. OPERACIÓN
3.1 Prueba de funcionamiento
Antes de ulizar el compresor de aire por primera vez ene
que completar una prueba de funcionamiento del siguiente
modo:
1.) Cambie el interruptor de encendido a la posición
de APAGADO. Conecte el cable de la fuente de
alimentación en el receptáculo para la fuente de
alimentación. Ponga en marcha el compresor de
aire cambiando el interruptor de encendido a la
posición de ENCENDIDO. La lectura del indicador de
presión aumentará lentamente conforme aumenta la
presión dentro del tanque de aire. Cuando la lectura
del indicador esté entre los 120 PSI y los 125 PSI, el
interruptor de presión cortará automácamente la
corriente. Esto indica que el compresor funciona con
normalidad.
2.) Cambie el interruptor de encendido a la posición
de APAGADO, desconecte el cable de la fuente de
alimentación y re de la válvula de seguridad para
liberar el aire en el tanque. En este punto prosiga con el
siguiente paso.
Nota: En caso de que el compresor de aire no funcione
adecuadamente, el indicador de presión le indicará que
ha disminuido la presión en el tanque de aire. Si hay una
fuga de aire en el compresor, la presión en el tanque de
aire disminuirá, el interruptor de presión se reinicia y el
motor se enciende automácamente.
Si detecta una fuga de aire, cambie el interruptor de
encendido a la posición de APAGADO y re de la válvula
de seguridad para liberar el aire del tanque. Desenchufe
el cable de la fuente de alimentación y comuníquese con
el Servicio al Cliente para obtener ayuda.
3.2 Operación diaria
Cómo encender el compresor:
1.) Cambie el interruptor de encendido a la posición de
APAGADO.
2.) Conecte la manguera de aire al conector rápido
universal/industrial de 1/4 de pulgada.
3.) Verique que todas las conexiones de aire estén bien
apretadas y cierre la válvula de drenado manual.
4.) Mantenga un espacio abierto de 2 pies
(60 cm)
alrededor del compresor de aire.
5.) Conecte el cable de la fuente de alimentación en un
tomacorriente/disyuntor de 110V 20 amperios.
6.) Cambie el interruptor de encendido a la posición de
ENCENDIDO.
7.) Deje el motor en marcha y llene el tanque hasta que se
apague el motor.
8.) Regulación del ujo de aire. Mientras el compresor de
aire está en marcha, encienda su herramienta y gire la
perilla del regulador hacia la derecha para aumentar la
presión. Aumente la presión hasta alcanzar la presión
deseada.
9.) Opere la herramienta de aire con normalidad. No la
ulice connuamente (en marcha) por más de (8 a 12)
horas.
2. INSTRUCCIONES DE AJUSTE
2.1 Ajuste inicial
1.) Lea las advertencias de seguridad antes de usar el
compresor de aire.
2.2 Ubicación
1.) Para evitar dañar el compresor de aire, no incline el
compresor de aire de forma transversal o longitudinal a
más de 10°.
2.) Coloque el compresor de aire al menos a 2 pies (61 cm)
de distancia de obstáculos que puedan evitar que tenga
una venlación adecuada. No coloque el compresor de
aire en una zona:
a. Donde haya evidencia de fugas de gas o aceite.
b. Donde puedan estar presentes materiales o vapores
de gas inamables.
c. Donde las temperaturas del aire desciendan por
debajo de los 32 °F (0 °C) o excedan los 104 °F
(40 °C).
d. Donde el aire o el agua extremadamente sucios
puedan terminar dentro del compresor de aire.
2.3 Eléctrico
1.) NO SE RECOMIENDA EL USO DE UN CABLE DE
ALIMENTACIÓN dado que podría sobrecalentar el
motor del compresor. Es preferible que ulice una
manguera de aire adicional en lugar de un cable de
alimentación.
2.) Si es inevitable el uso de un cable de alimentación,
asegúrese de ulizar uno lo sucientemente resistente
para soportar la corriente que consumirá su compresor.
Los tamaños mínimos de los cables son los siguientes:
Rango de
clasica-
ción de
amperios
Voltaje Longitud del cable en pies
120V 25 pi
(7.5 m)
50 pi
(15 m)
100 pi
(30 m)
150 pi
(46 m)
200 pi
(61 m)
250 pi
(76 m)
240V 15 m
(50 pi)
100 pi
(30 m)
200 pi
(61 m)
300 pi
(91 m)
400 pi
(122 m)
500 pi
(152 m)
8 - 10 18 14 12 10 8 8
10 - 12 16 14 10 886
12 - 14 16 12 10 86 6
14 - 16 16 12 10 86 6
16 - 18 14 12 8 8 64
18 - 20 14 12 8664
3.) Solo ulice un cable de alimentación polarizado que
tenga un enchufe con conexión a erra de 3 clavijas y
un receptáculo de 3 ranuras que acepte el enchufe del
compresor.
4.) Examine los cables antes de usarlo. No ulice el
compresor si su cable está dañado. No ulice un cable
de alimentación dañado.
5.) Mantenga alejados los cables del calor y los bordes
alados. No re del cable para desconectar un enchufe:
sujete el enchufe.
6.) Siempre apague el interruptor de presión del
compresor antes de desconectar el compresor.

6
Compresores de aire portáles de funcionamiento eléctrico y sin aceite Flexzilla
Apagado del compresor:
1.) Cambie el interruptor de encendido a la posición de
APAGADO.
2.) Desconecte el cable de corriente de la fuente de
alimentación y envuelva el cable de corriente alrededor
del mango del compresor de aire para reducir el riesgo
de daño.
3.) Abra manualmente la válvula de drenado para liberar
toda la presión y la humedad del tanque de aire.
4.) Limpie el compresor de aire para rerar toda la
suciedad y el polvo.
Antes de almacenarlo por un periodo de empo
prolongado:
5.) Cubra el compresor de aire para proteger la unidad del
polvo y la humedad.
6.) No apile o almacene ningún otro objeto encima del
compresor de aire o alrededor del mismo. Podría
ocurrir un daño.
4. MANTENIMIENTO
4.1 Limpieza
Limpie las partes con un cepillo de cerdas suaves o limpie
con un paño húmedo, usando un solvente biodegradable.
No ulice líquidos inamables, como gasolina o alcohol.
Mantenga siempre las partes libres de suciedad y polvo para
obtener un mejor rendimiento.
4.2 Limpieza o cambio del ltro de aire
El ltro de aire está diseñado para disminuir el ruido y para
ayudar a evitar que las parculas en el aire terminen dentro
del compresor de aire y lo dañen.
Después de ser ulizado por un periodo de empo, el
ltro del aire se obstruirá. Esto disminuirá la capacidad de
entrada de aire del compresor de aire, disminuyendo el
rendimiento. Por lo tanto, el ltro de aire debe limpiarse o
reemplazarse regularmente.
1.) Abra la tapa del ltro de aire, después rere el
elemento del ltro de aire.
2.) Sople o ulice un cepillo para limpiar la suciedad y el
polvo en el elemento.
3.) Si está obstruido, reemplácelo con un nuevo ltro de
aire.
4.3 Drenado del tanque de aire
La frecuencia con la que debe drenar el tanque de aire
depende de las condiciones ambientales y la candad de
empo de operación registrado. La frecuencia de drenado
en promedio es de 1 a 2 días.
1.) Coloque el compresor de aire sobre un recipiente capaz
de contener agua.
2.) Cuando haya aire comprimido en el tanque de aire, gire
lentamente la perilla de la válvula de drenado hacia
la posición delantera (abierta) o recta. El agua en el
tanque de aire será drenada.
3.) Una vez que se haya drenado toda el agua acumulada,
gire la perilla de la válvula de drenado a la posición de
cerrado o izquierda para evitar fugas.
4.) El drenado del tanque de aire protege las partes del
óxido y la corrosión.
4.4 Interruptor de presión
El interruptor de presión está precongurado desde la
fábrica para apagarse entre los 120 y los 125 PSI y reiniciarse
entre los 90 y los 95 PSI.
4.5 Pruebas para detectar fugas
Asegúrese de todas las conexiones estén apretadas. No las
ajuste demasiado.
Una fuga pequeña en cualquier conexión de manguera o
tubería disminuirá el rendimiento del compresor de aire.
Para vericar si hay fugas pequeñas, rocíe un poco de agua
jabonosa en la zona donde se sospecha que hay una fuga. Si
el jabón burbujea, reemplace la parte rota.

7
Compresores de aire portáles de funcionamiento eléctrico y sin aceite Flexzilla
5. SOLUCIÓN DE PROBLEMAS
Problema Causa posible Reparación
Caída de presión en el tanque. Fugas de aire en las conexiones. Deje que el compresor acumule presión en el tanque, hasta
alcanzar la presión máxima si es posible. Aplique agua jabonosa
en las conexiones de aire y observe detenidamente si aparecen
burbujas de aire. Ajuste las conexiones con fugas. Si el problema
persiste, comuníquese con el Servicio al Cliente para una mayor
asesoría.
La válvula de descarga ene fugas
cuando el compresor está inacvo.
El sello de la válvula de descarga
está defectuoso.
Deje uir el aire en el tanque de aire hasta liberar toda la presión.
Después rere el enchufe de la válvula de descarga y limpie el
sello de la válvula. Si es necesario, reemplace el sello y reinstale
todos los componentes.
El compresor se detuvo y no
enciende.
La proteccion térmica se
encendió porque el motor se está
sobrecalentando.
Verique que el voltaje principal corresponda con las
especicaciones del compresor de aire. Un cable de alimentación
muy delgado o muy largo puede disminuir el voltaje y
sobrecalentar el motor.
El uso excesivo (más de 1 hora de uso connuo) puede
sobrecalentar el motor.
Permita que el motor se enfríe.
Las bobinas del motor están
quemadas.
Comuníquese con Servicio al Cliente.
El motor no enciende y hace un
zumbido.
El condensador está quemado. Comuníquese con Servicio al Cliente.
El motor no enciende o arranca con
lentud.
Suministro de bajo voltaje al motor. Verique que el voltaje principal corresponda con las
especicaciones del compresor de aire.
Un cable de alimentación muy delgado o muy largo puede
disminuir el voltaje. Ulice cables de alimentación para uso rudo.
Asegúrese de que el compresor de aire esté conectado en un
tomacorriente totalmente funcional.
El compresor es ruidoso, con
sonidos metálicos.
La junta del cabezal o la válvula de
láminas del compresor está dañada.
Detenga el compresor y comuníquese con Servicio al Cliente.
El compresor no alcanza la presión
máxima.
La junta del cabezal o la válvula de
láminas del compresor está dañada.
Detenga el compresor y comuníquese con Servicio al Cliente.
El compresor no parece
proporcionar tanto aire como
cuando estaba nuevo o el
compresor se apaga en un periodo
de empo mucho más corto.
El interruptor de presión necesita
ajustarse.
Detenga el compresor y comuníquese con Servicio al Cliente.
El tanque está lleno de agua debido
a la condensación.
Abra la válvula de drenado y libere el agua del tanque.
La unidad de bombeo del motor
no se deene cuando la presión
del tanque alcanza su presión de
funcionamiento máxima.
El interruptor de presión está
defectuoso o necesita ajustarse.
Detenga el compresor de inmediato y comuníquese con Servicio
al Cliente.

8
Compresores de aire portáles de funcionamiento eléctrico y sin aceite Flexzilla
6
8
910
7
12
13
14
15
16
17 18 19 21 22 23
24
25
26
27
28
29
30
31
32
33
35
37 36
38
40
41
42
43
44
48
49 51
52
34
21 3 4 5
50
11 20
45
46
47
#
NÚM. DE PARTE/
CÓDIGO DE KIT
DESCRIPCIÓN
CANT.
1
RP000500 SOPORTE DEL REGULADOR
1
2
RP000501 INDICADOR DE PRESIÓN DEL
REGULADOR
1
3
A77425 ACOPLADOR RÁPIDO
1
4
RP000502 CODO
1
5
A77425 ACOPLADOR RÁPIDO
1
6
RP000503 o A CABEZAL DEL CILINDRO
2
7
A o B SELLO DE GOMA
2
8
A o B TORNILLO
8
9
A o B PLACA DE LA VÁLVULA
2
10
A o B SELLO DE GOMA
2
11
A TAPÓN
1
12
A SOPORTE DEL CILINDRO
2
13
A CAJA DEL CIGÜEÑAL
2
14
A TORNILLO
4
15
A ESTATOR Y BOBINADO
1
16
RP000504 TUBO DE SUMINISTRO DE AIRE
1
17
RP000505 CODO
1
CÓDIGO
DEL KIT
NÚMERO DE
PARTE DESCRIPCIÓN
ARP000540 Bomba y motor de repuesto para compresores de aire portáles Flexzilla™ para el modelo CF10050F
BRP000541 Kit de reparación de bombas para compresores de aire portáles Flexzilla™ para el modelo CF10050F
CRP000542 Venlador y cubierta de repuesto para compresores de aire portáles Flexzilla™ para el modelo CF10050F
DRP000545 Kit de patas de repuesto para compresores de aire portáles Flexzilla™ para el modelo CF10050F
ERP000543 Cubierta del condensador de repuesto para compresores de aire portáles Flexzilla™ para el modelo
CF10050F
FRP000544 Cable de corriente de repuesto para compresores de aire portáles Flexzilla™ para el modelo CF10050F
#
NÚM. DE PARTE/
CÓDIGO DE KIT
DESCRIPCIÓN
CANT.
18
RP000506 o A CONEXIÓN DEL CABEZAL DEL
CILINDRO
2
19
RP000507 o A
CUBIERTA DEL CABEZAL DEL CILINDRO
2
20
RP000508 o A FILTRO DE AIRE
2
21
A o B CILINDRO
2
22
A o B TORNILLO
2
23
A ALMOHADILLA DE PRESIÓN
2
24
A o B COPA DE PISTÓN DE TEFLÓN
2
25
ASUJETADOR
2
26
A COJINETE
2
27
A CIGÜEÑAL
2
28
A o C VENTILADOR
2
29
A o C CUBIERTA DEL VENTILADOR
2
30
RP000509 AISLANTE
4
31
A COJINETE
2
32
AROTOR
1
33
RP000510 CONDENSADOR
1
34
RP000511 VÁLVULA DE SEGURIDAD
1
#
NÚM. DE PARTE/
CÓDIGO DE KIT
DESCRIPCIÓN
CANT.
35
FCORDÓN ELÉCTRICO
1
36
F CABLE DE SEGURIDAD
1
37
RP000512 INTERRUPTOR DE PRESIÓN
1
38
RP000513 TUBO DE ESCAPE
1
39
RP000514 TUBO DE SUMINISTRO DE AIRE
1
40
DTUERCA
4
41
DMUELLE
4
42
D TORNILLO
4
43
D PATA DE GOMA
4
44
RP000515 DESAGÜE
1
45
RP000516 TANQUE
1
46
RP000517 VÁLVULA DE RETENCIÓN
1
47
RP000518 ASIDERO DE CAUCHO
1
48 E
CUBIERTA DEL CONDENSADOR
1
49 E TORNILLO 1
50 RP000519 PANEL 1
51 ACIGUEÑAL 2
52 A TORNILLO 4
6. DIAGRAMAS DE DESPIECE
CF10050F
This manual suits for next models
2
Table of contents
Languages:
Other Flexzilla Air Compressor manuals
Popular Air Compressor manuals by other brands
Campbell Hausfeld
Campbell Hausfeld FP2090 Series operating instructions
ULTIMATE SPEED
ULTIMATE SPEED USKT 60 B2 Operation and safety notes

EXTOL PREMIUM
EXTOL PREMIUM CC 120 Translation of the original user manual
Hatsan USA
Hatsan USA TactAir Volt Operation manual
Draper
Draper DA50/281B instruction manual
Stanley
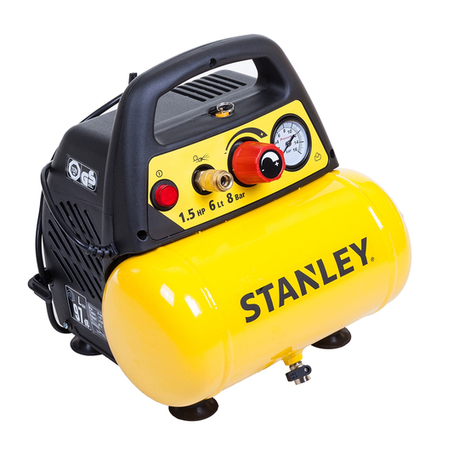
Stanley D 200/8/6 manual
