Adjustin and Framin -Up the Camera View
1. Camera Access and Lo in:
Access the camera in one of the follo ing ays:
a. If using the DNA application, click the DNA icon . In the Discovery List, click to select the camera, right-click to open the
shortcut menu, and select Browse.
b. If using a eb bro ser, enter the camera’s IP address in the address bar.
2. Before lo in into the camera:
The client application is automatically installed hen you connect to the camera through your PC/ orkstation eb bro ser for the
first time. Before accessing the camera, ensure that ActiveX controls can be do nloaded by (a) changing the ActiveX controls and
plug-in settings or (b) setting the Internet security level to default. For further details, refer to the camera’s User and Installation
Guide.
ActiveX Controls and Plug
Start Internet Explorer (IE 9, 10, or 11).
Step 2: Select Tools from the main menu of the
browser. Then click Internet Options.
Step 3: Select the Security tab and click Internet. Then
click Custom level to change ActiveX settings.
Step 4: Set all ActiveX controls and plug-ins settings to
Prompt or Enable.
Start Internet Explorer (IE 9, 10, or 11).
Step 2: Select Tools from the main menu of the
browser. Then click Internet Options.
Step 3: Select the Security tab and click Internet.
Step 4: Click Default level. Click OK to confirm the
setting. Close the browser window. Open a
new one later to access the IP camera.
3. Camera Lo in:
See the section titled Initial configuration for instructions on setting the cameras IP address.
4. Lo in ID and Password:
a. Enter the camera’s IP address in the bro ser’s address bar and press the Enter key.
b. Enter the default user name (Admin) and pass ord (1234).
NOTE: The user name is case-sensitive.
5. Install the ActiveX control:
a. After accessing the camera through the eb bro ser for the first time, a request to install the ActiveX control file
(install.cab) appears on the screen.
b. Click Yes.
c. In the pop-up security arning, click Install to start do nloading the Quasar Player soft are onto the PC.
d. Click Finish hen the Quasar Player installation is completed.
NOTE: Before accessing the camera, if you have previously installed an older version of the DVTEL Web Player (DVPlayer or
DCVie er) on the PC, use the Windo s Add/Remove program to uninstall the existing player from the PC. For more information,
refer to the camera’s User and Installation Guide.
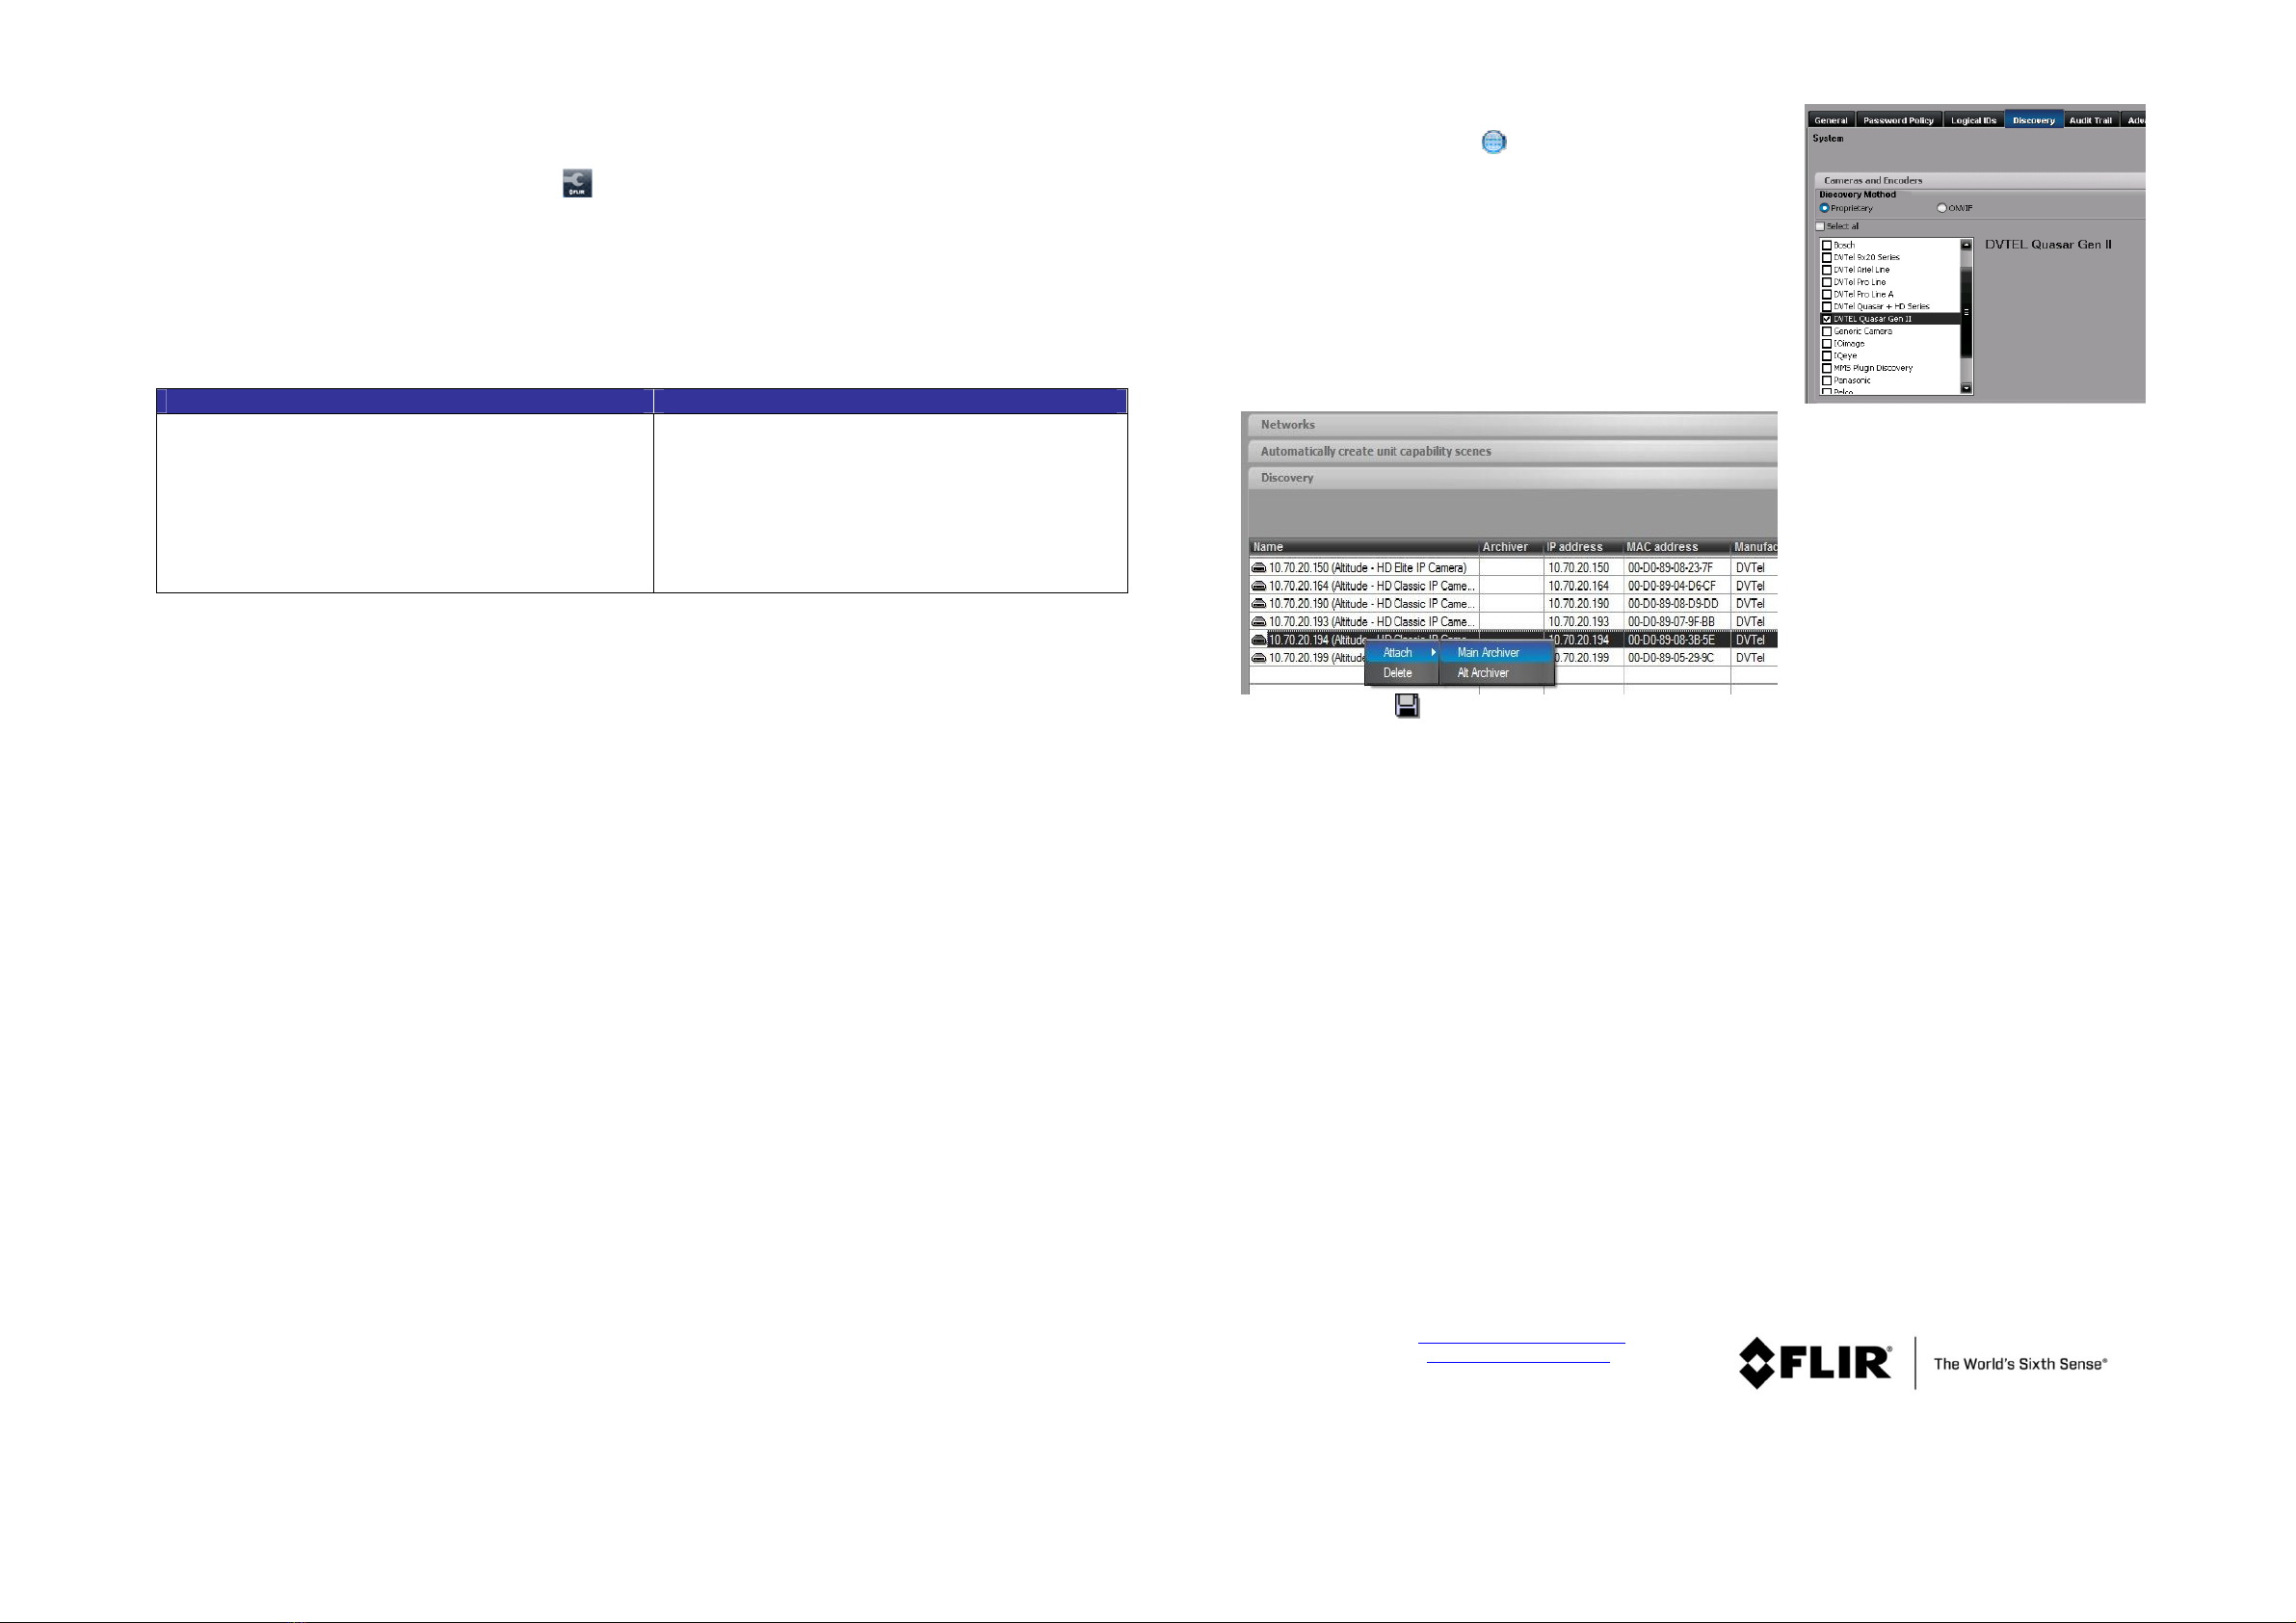
Attach in Latitude
1. In the Latitude application, on the Sidebar click Physical View.
2. On the Navigation Tree click the Sys em name.
3. Select the Discovery tab and do the follo ing:
a. Under Cameras and Encoders, verify that DVTEL Quasar Gen II
is selected.
b. Click Start. The camera details are displayed in the Discovery table.
c. If the camera asn’t found after running S ar , click Discover
Unit Manually.
d. In the dialog box that opens, enter the camera’s IP address,
select DVTEL Quasar Gen II and click OK.
4. In the Discovery table, right-click the camera, choose Attach, and then click
the Archiver name to attach.
5. When finished, click to save.
For technical assistance, email us at product.visible.support@flir.com
or visit the Service & Support page at http:// .flir.com/security
© FLIR Systems, Inc. All rights reserved orld ide. Printed May 10, 2016


