FLIR Ariel Gen II CB-3102 User manual
Quick Install Guide
Ariel Gen II
CB-3102
Bullet IP Camera
A. What's in the Box
Qty
Description
1
CB-3102 mini-bullet camera
1
Bag containing three screws and three plastic anchors
1
T6 Torx wrench
1
Drill template
1
CB-3102 Quick Installation Guide
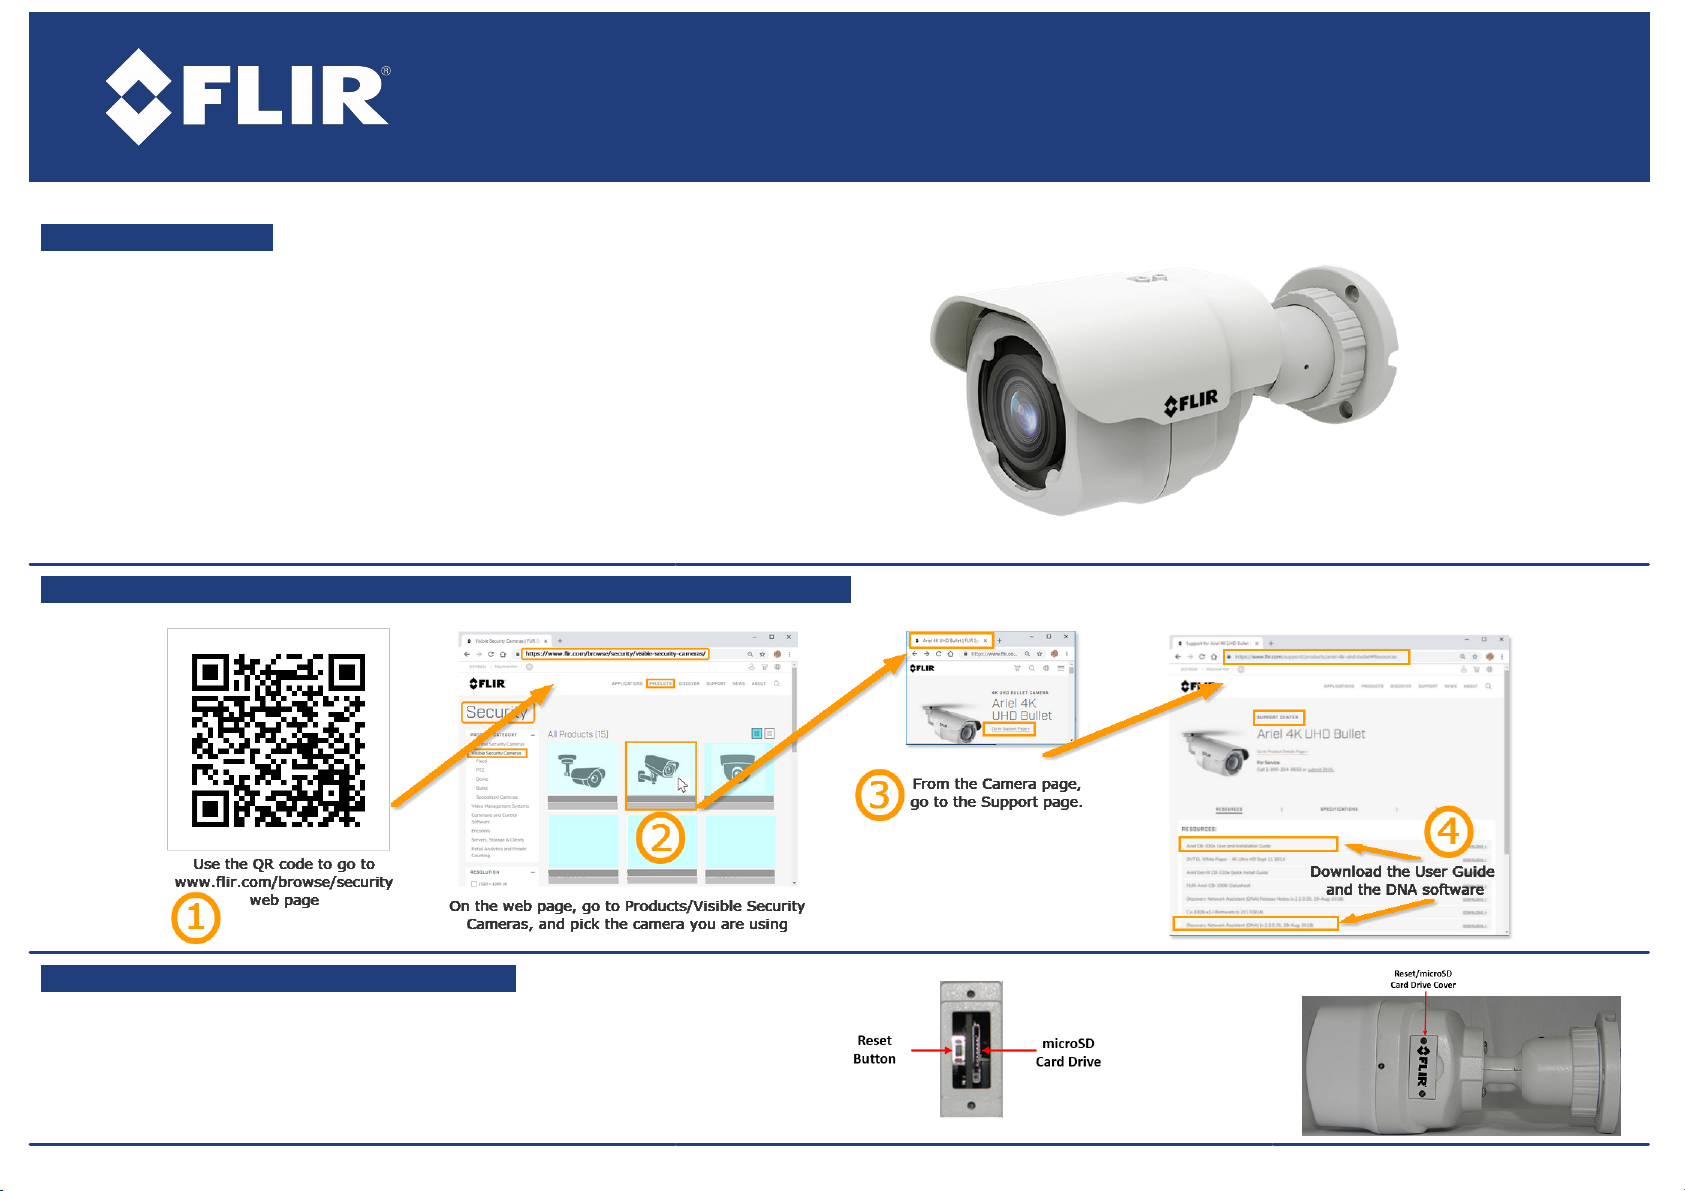
B. Accessing Camera Documentation and Utility Software from the Web
C. Insert and Configure the MicroSD Card
1. Unscrew the panel cover on the underside of the camera body.
2. Insert a microSDXC card (up to 128GB, Class 10) in the card drive.
3. Screw the panel cover closed.
D. Install the camera
1. Be sure to have the required accessories and tools
available.
2. Refer to the User Guide as necessary.
3. Using the provided template, mark the drill locations
4. Mount the camera.
5. Check that camera orientation covers the required field of
view.
E. Connect the camera
1. Insert a cable in the RJ45
connector to attach to the
network switch for a 10/100
Mbps Ethernet and POE
connection.
Note:
This camera must be connected
to a PoE source.
2. Connect the Audio-IN and Alarm-
IN connectors
Connectors
White - Audio IN
Grey - GND
Purple - Alarm IN
Yellow - GND
F. Discover the Camera
The camera’s web interface can be
accessed by Internet Explorer 10 and higher (32-
bit) with the ActiveXplug-in and by browsers that
do not require ActiveX, such as Microsoft Edge,
Chrome or Firefox, on PCs running 64-bit
Windows 7, 8, 8.1, or 10.
Set the Camera's IP address and Video Format
1. Download and install the DNA Utility from the FLIR website as
shown above
2. Attach the unit to the same LAN segment as the computer that is
managing the unit. DNAautomatically discovers the unit on the
network and displays the device’s current IP address in the
Discover List.
3. Select the unit from the Discover List.
4. If using a Static IP address (as on a Latitude System), follow the
DNAinstructions to set the desired IP address.
5. On a system using DHCP, select the DHCP option in DNA.
6. To select PAL or NTSC, select the device in the Discover list,
right-click to open the context menu and clicking Change Video
Format.
5. Click Update.
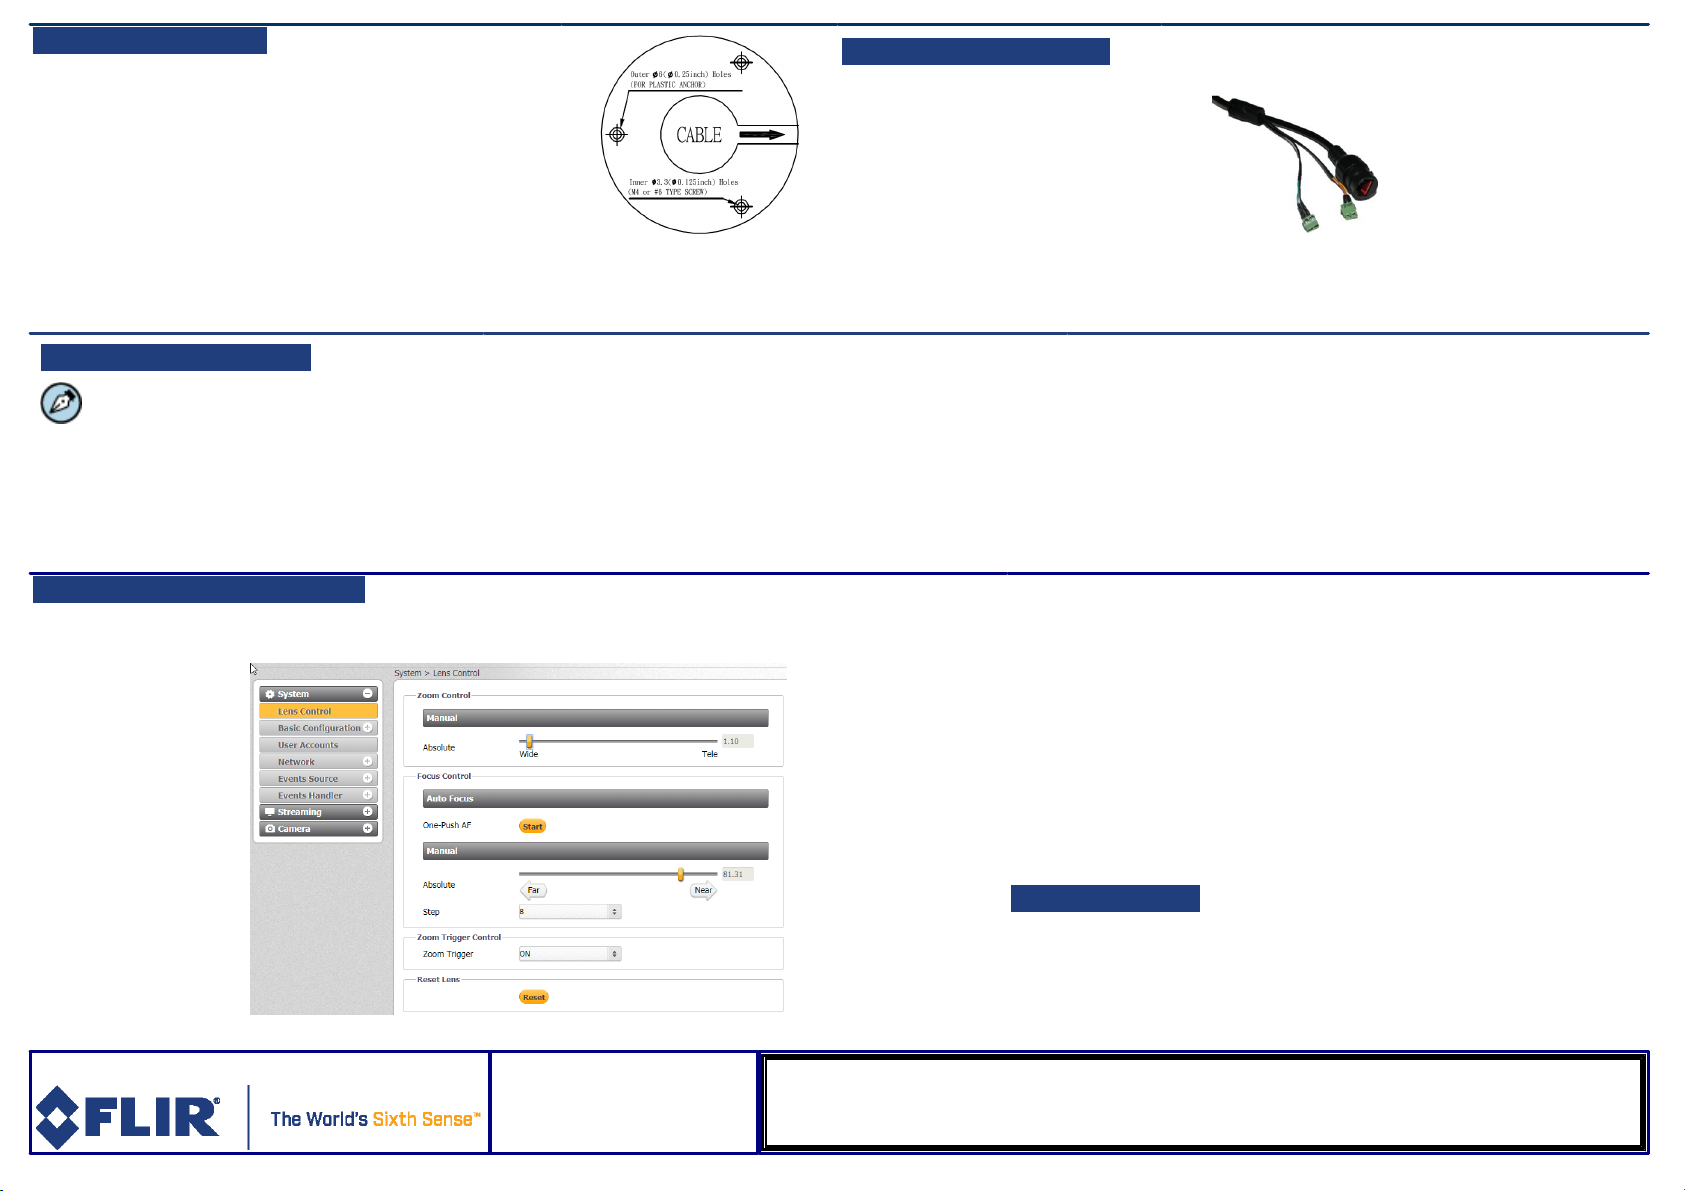
G: Completing Camera Setup
1. 1. For Varifocal models ( CB-3102-11) , use the Web Interface to set Zoom and Focus.
Default Username is Admin, password 1234.
2. For SoE recording use the Web interface to check SD card
status, and format it.
a. Verify that the card status is displayed as Mounted in
the System > Events Handler > SD Card screen.
b. Format the card.
c. Configure the camera to store snapshots and recordings from the
System > Events Source screens.
H. Attach to VMS
Once you have completed installation and setup and found the current IP
address with DNA, use your VMS Discovery/Attach procedures to attach the
camera to your VMS.
CC-3102_QIG_v3
FLIR Systems, Inc.
Tel: +1-800-254-0632
6769 Hollister Ave.
product.enterprise.support@flir.com
Goleta, CA 93117
www.flir.com/security
Other FLIR IP Camera manuals

FLIR
FLIR Photon Manual

FLIR
FLIR Quasar Gen III User manual

FLIR
FLIR D-Series C User manual

FLIR
FLIR SyncroIP Camera Series Mounting instructions

FLIR
FLIR CB-5222 User manual

FLIR
FLIR PathFindIR II User manual

FLIR
FLIR DNB13TF2 Instruction Manual

FLIR
FLIR Quasar CM-6206-H1-I User manual

FLIR
FLIR EX Series User manual

FLIR
FLIR FC-Series Assembly instructions

FLIR
FLIR Oryx User manual

FLIR
FLIR DBV53TL User manual

FLIR
FLIR T640 User manual

FLIR
FLIR M400 User manual

FLIR
FLIR A3 F series User manual

FLIR
FLIR CM-6308-P1-I Instruction Manual

FLIR
FLIR FC-Series R User manual

FLIR
FLIR Tau SWIR User manual

FLIR
FLIR Voyager III User manual

FLIR
FLIR Quasar Gen III CM-6308 User manual


