FLIR TG275 User manual

USER MANUAL
Automotive
Diagnostic
Thermal Camera
Model TG275


USER MANUAL
Automotive Diagnostic
Thermal Camera
#NAS100009; r. AA/57810/57810; en-US iii


Table of contents
1 Advisories ..........................................................................1
1.1 Copyright..................................................................1
1.2 Quality Assurance ...................................................... 1
1.3 Documentation ..........................................................1
1.4 Disposal of Electronic Waste.........................................1
2 Introduction........................................................................2
3 Safety ................................................................................3
3.1 Safety Warnings and Cautions.......................................3
4 Description.........................................................................4
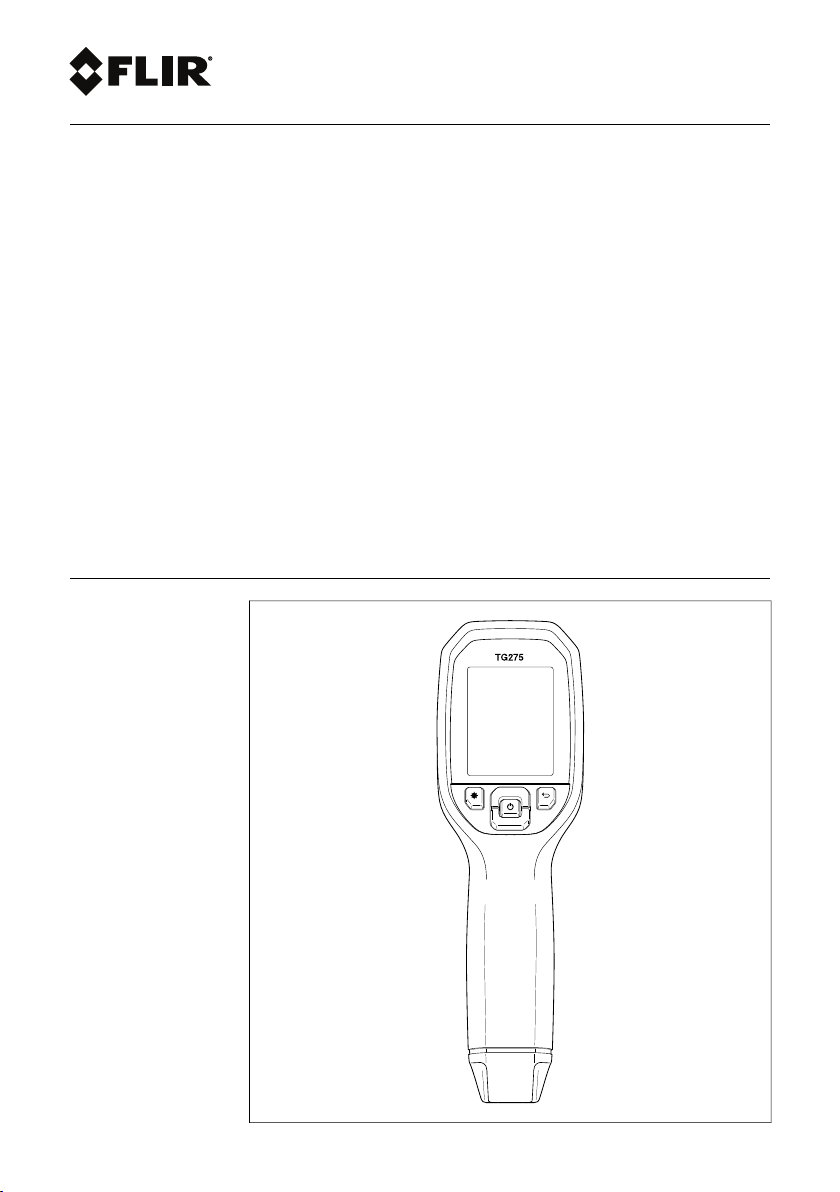
4.1 Product Description.....................................................4
4.2 Control Button Descriptions ..........................................5
4.3 Display Description ..................................................... 5
5 Operation...........................................................................7
5.1 Powering the TG275.................................................... 7
5.2 IR Camera and Thermometer ........................................ 7
5.3 High Temperature Switch .............................................8
5.4 Visible Spectrum Camera ............................................. 9
5.5 Capturing and Working with Images................................ 9
6 Programming Menu System ............................................... 10
6.1 Menu System Basics ................................................. 10
6.2 Main Menu.............................................................. 10
6.3 SETTINGS Sub-Menu ............................................... 12
7 Bluetooth® Communication and FLIR Tools™ ...................... 17
7.1 FCC Compliance ...................................................... 17
8 Field Firmware Upgrades ................................................... 19
8.1 System Firmware upgrade .......................................... 19
8.2 Bluetooth® Firmware upgrade..................................... 19
9 Maintenance..................................................................... 20
9.1 Cleaning................................................................. 20
9.2 Battery Considerations and Service .............................. 20
9.3 Disposal of Electronic Waste....................................... 20
9.4 Reset the TG275 ...................................................... 20
10 Specifications................................................................... 21
10.1 Imaging and Optical Specifications............................... 21
10.2 Detector Specifications .............................................. 21
#NAS100009; r. AA/57810/57810; en-US v

Table of contents
10.3 Image Presentation Specifications................................ 21
10.4 Measurement Specifications ....................................... 22
10.5 Measurement Analysis Specifications ........................... 22
10.6 Configuration Specifications........................................ 22
10.7 Image Storage Specifications ...................................... 23
10.8 Digital Camera ......................................................... 23
10.9 Flashlight Specifications............................................. 23
10.10 Laser Pointer Specifications........................................ 23
10.11 Data Communication and Interface Specifications ........... 24
10.12 Rechargeable Battery Specifications ............................ 24
10.13 Environmental Specifications ...................................... 24
10.14 Physical Specifications .............................................. 25
10.15 Included Equipment .................................................. 25
11 Appendices ...................................................................... 26
11.1 Emissivity Factors for Common Materials....................... 26
11.2 IR Energy and Imaging Overview ................................. 26
12 2–10 Extended Warranty .................................................... 28
13 Customer Support............................................................. 29
#NAS100009; r. AA/57810/57810; en-US vi

Advisories
1
1.1 Copyright
©2019, FLIR Systems, Inc. All rights reserved worldwide. No parts of the
software including source code may be reproduced, transmitted, transcribed
or translated into any language or computer language in any form or by any
means, electronic, magnetic, optical, manual or otherwise, without the prior
written permission of FLIR Systems.
The documentation must not, in whole or part, be copied, photocopied, repro-
duced, translated or transmitted to any electronic medium or machine-read-
able form without prior consent, in writing, from FLIR Systems. Names and
marks appearing on the products herein are either registered trademarks or
trademarks of FLIR Systems and/or its subsidiaries. All other trademarks,
trade names or company names referenced herein are used for identification
only and are the property of their respective owners.
1.2 Quality Assurance
The Quality Management System under which these products are developed
and manufactured has been certified in accordance with the ISO 9001
standard.
FLIR Systems is committed to a policy of continuous development; therefore,
we reserve the right to make changes and improvements on any of the prod-
ucts without prior notice.
1.3 Documentation
To access the latest manuals and notifications, go to the Download tab at:
https://support.flir.com. It only takes a few minutes to register online. In the
download area you will also find the latest releases of manuals for our other
products, as well as manuals for our historical and obsolete products.
1.4 Disposal of Electronic Waste
As with most electronic products, this equipment must be disposed
of in an environmentally friendly way, and in accordance with existing
regulations for electronic waste. Please contact your FLIR Systems
representative for more details.
#NAS100009; r. AA/57810/57810; en-US 1

Introduction
2
The FLIR TG275 Automotive Diagnostic Thermal Camera combines non-con-
tact temperature measurement and thermal imaging into one troubleshooting
tool to help you quickly find the source of heat-related problems and to spot
potential faults when performing automotive maintenance and repair. Register
the TG275 within 60 days to activate the 2–10 Year Warranty Extension at this
link: https://support.flir.com/prodreg.
Features
• 160 x 120 pixel true thermal imager (Lepton® microbolometer with inte-
grated shutter)
• Visible spectrum 2M pixel digital camera
• Adjustable MSX® (Multi-Spectral Dynamic Imaging) adds key details from
the visible spectrum to the IR image for improved diagnostics
• Easy-to-read 320 x 240 2.4” TFT color LCD display
• Wide temperature range –25 ~ 550℃(-13 ~ 1022℉)
• High temperature switch for measurements > 400℃(752℉)
• Intuitive programming menu system in over 21 languages
• 3 presets and 1 custom emissivity setting
• LED Flashlight
• Laser pointer and cross-hair display for easy targeting
• 4 GB internal image capture memory
• USB–C connectivity for image transfer and charging
• Bluetooth® remote temperature monitoring and image transmission to mo-
bile devices
• IP54 enclosure protects from dirt, dust, and oil
• Rechargeable battery with adjustable auto power off (APO) timer
• Accessory mounting for tripods and other accessories
#NAS100009; r. AA/57810/57810; en-US 2

Safety
3
3.1 Safety Warnings and Cautions
WARNING
⚠This symbol, adjacent to another symbol indicates the user must refer to the manual for
further information.
WARNING
The instrument’s IP54 rating is only in affect when the top flap (covering the USB-C jack) is
completely sealed. Do not operate the instrument with the flap open, except for charging
and PC interface.
CAUTION
Use of controls or adjustments or performance of procedures other than those specified
herein may result in hazardous radiation exposure.
CAUTION
Use extreme caution when the Laser pointer is on.
CAUTION
Do not point the Laser beam toward anyone's eye or allow the beam to strike the eye from
a reflective surface.
CAUTION
Do not use the Laser near explosive gases or in other potentially explosive areas.
CAUTION
Refer to the CAUTION statement label (shown below) for critical safety information.
#NAS100009; r. AA/57810/57810; en-US 3

Description
4
4.1 Product Description
Figure 4.1 Imaging IR Thermometer Description
1. Display area
2. Return button (to back up in the menu system)
3. Laser pointer button
4. Up/Down Navigation buttons & Power (long press)/Menu (short press)
button
5. Lanyard post
6. Accessory mount
7. High temperature lever switch
8. 160 x 120 pixel Lepton® IR camera
9. Laser pointer with circular target-spot assist
10. USB-C jack compartment
11. Spot thermal sensor
12. Flashlight (LED)
13. 2M pixel visible spectrum camera
14. Image capture trigger (also used to exit the menu system)
#NAS100009; r. AA/57810/57810; en-US 4

Description
4
4.2 Control Button Descriptions
Long press to power ON or OFF
Short press to access the menu system
Return button. Back out to previous screen in menus
Press to scroll upward in the menus
Press to scroll downward in the menus
Press to activate the Laser pointer
TRIGGER
Pull trigger to capture camera image
Pull trigger to exit the menu system
4.3 Display Description
Figure 4.2 TG275 Displays
1. Menu area
2. Date and time
3. Battery status indicators
4. Bluetooth® active
5. Image storage space status indicator
6. USB connection active
#NAS100009; r. AA/57810/57810; en-US 5

Operation
5
5.1 Powering the TG275
The TG275 is powered by a rechargeable lithium battery. Long press the
power button (center) to switch the TG275 ON or OFF. If the TG275 does not
power ON, charge the battery by connecting to a 5V/1A rated AC wall charger
(not supplied) using the supplied USB-C cable. The USB-C jack is located in
the compartment at the top of the TG275. Do not use the TG275 while it is
charging. When the top flap is closed, the TG275 is rated IP54 for encapsula-
tion. See Section 9.2, Battery Considerations and Service for more
information.
The TG275 has an Auto Power OFF (APO) utility that switches it OFF auto-
matically if no buttons are pressed for the duration of the selected APO time.
Use the menu system (under Device Settings) To set the APO timer. See Sec-
tion 6, Programming Menu System, for more information.
5.2 IR Camera and Thermometer
Figure 5.1 Combined Thermal and Visible Image (MSX®)
1. Long press the power button to switch the TG275 ON.
2. If not already selected, choose the Thermal plus Visible Image mode in
the menu system (under Image Adjustments/Image Mode). You can adjust
the MSX® (Multi-Spectral Dynamic Imaging) alignment in the Image
Mode menu (press MENU at the MSX® image option and use the arrows
to make the adjustments; press MENU to confirm).
3. Point the camera toward the test area and scan as desired. View the cam-
era image on the TG275 display.
#NAS100009; r. AA/57810/57810; en-US 7

Operation
5
4. Use the cross-hair icon to target a spot. If the cross-hairs are not shown,
check the menu system (under Measurement) to see if the Center Spot
(cross-hairs) function is enabled.
5. Press the Laser pointer button to switch ON the Laser pointer. The TG275
Laser pointer includes a circular spot indicating the area that is being
monitored for temperature. See the Laser pointer image example below in
Figure 5.2. If the Laser beam does not appear when the button is pressed,
check the menu system (under Device Settings) to see if the Laser is
enabled.
6. The temperature reading on the display represents the measurement of
the targeted spot. See Figure 5.1.
7. The distance-to-spot ratio is 30:1 and the minimum target distance is 26
cm (10.2 in.).
8. To measure higher than 400℃(752℉) use the High Temperature Switch,
see Section 5.3 below.
9. If a measurement is out of range, the display will show ‘OL’.
10. To adjust the Emissivity, use the menu system (under Measurement).
11. To change the display color palette, use the menu system (under Image
Adjustments/Colors).
Figure 5.2 Laser pointer with circular border indicating temperature measurement spot
5.3 High Temperature Switch
1. To access the high temperature mode, slide the lever to the right (to ex-
pose the red color code).
2. The lever is located directly below the lens area and above the image cap-
ture trigger.
3. When engaged, the high end of the temperature range (>400℃[752℉]) is
accessible.
#NAS100009; r. AA/57810/57810; en-US 8

Operation
5
5.4 Visible Spectrum Camera
Figure 5.3 Visible Spectrum Digital Camera Image
1. Long press the power button to switch the TG275 ON.
2. Select the Visible Image mode in the menu system (under Image Adjust-
ments/Image Mode).
3. Point the camera toward the test area and scan as desired.
4. View the image on the display, see Figure 5.3. Pull the image capture trig-
ger to save an image. Refer to Section 5.5, Capturing and Working with
Images, (next) for more information.
5.5 Capturing and Working with Images
1. To capture a camera image, pull and release the trigger. Note that an im-
age cannot be saved if the USB cable is connected to the TG275.
2. After a successful capture, a display confirmation will briefly appear show-
ing the filename for the image.
3. The image is now stored in the TG275’s internal memory.
4. To send/view/delete images from the TG275, access the Gallery mode in
the main menu. In the Gallery, scroll through the stored images with the ar-
rows and open an image with the MENU button. Once an image is
opened, press MENU again to see the SEND/CANCEL/DELETE/DELETE
ALL IMAGES menu. Select the SEND command to transmit an image, via
Bluetooth®, to a paired mobile device. Select the DELETE or DELETE
ALL IMAGES command to erase the selected image or all of the stored
images. Press CANCEL to return to the previous screen.
5. You can send images to a mobile device using Bluetooth® (see Section 7,
Bluetooth®) or you can transfer images to your PC by connecting the
TG275 to a PC using the supplied USB-C cable. The USB jack is located
at the top of the TG275 under the flap. Once connected to the PC you can
use the TG275 as you would any external storage drive.
#NAS100009; r. AA/57810/57810; en-US 9

Programming Menu System
6
6.1 Menu System Basics
Short press the MENU button to access the menu system. Use the MENU
button to switch settings ON or OFF, use the Return button to move to the pre-
vious screen, and use the arrows to scroll. In addition, the MENU button is
used in some cases to confirm settings. Use the trigger to exit the menu
system.
6.2 Main Menu
•LIGHT: Short press MENU to switch the Flashlight ON or OFF.
•GALLERY: Press MENU to access the stored images. Use the arrow but-
tons to scroll through the stored images and use the MENU button to open
an image. Press MENU at an opened image to see the SEND/CANCEL/
DELETE/DELETE ALL IMAGES menu. Select SEND to transmit the se-
lected image to a mobile device (see Section 7, Bluetooth® and Section
5.5, Capturing and Working with Images, for more information).
•IMAGE ADJUSTMENTS: Press MENU to access IMAGE MODES (includ-
ing MSX® alignment) and COLORS, see below:
#NAS100009; r. AA/57810/57810; en-US 10

Programming Menu System
6
1. Image Modes: Press MENU at IMAGE MODES and use the arrow buttons
to select VISIBLE IMAGE or THERMAL PLUS VISIBLE IMAGE (MSX®).
2. MSX® Alignment: While at the Image Mode menu you can adjust the
MSX® alignment so that the thermal image and the visible image are
aligned accurately. While viewing the THERMAL PLUS VISIBLE IMAGE
screen in the menu, press MENU to access the MSX® adjustment screen
and then use the arrow buttons to adjust the alignment. Press MENU to
confirm.
#NAS100009; r. AA/57810/57810; en-US 11

Programming Menu System
6
3. Colors: Press MENU at the Colors menu and use the arrow buttons to se-
lect a color palette: Iron, Rainbow, White hot, Black hot, Arctic, or Lava.
Press MENU to confirm selection.
•SETTINGS: Press MENU to access the Settings sub-menu (see below):
6.3 SETTINGS Sub-Menu
•MEASUREMENT
#NAS100009; r. AA/57810/57810; en-US 12

Programming Menu System
6
1. Center Spot: Press MENU to enable/disable the display cross-hairs. The
cross-hairs identify the spot that is being measured for temperature.
2. Emissivity: Press MENU to open the Emissivity adjustment utility. Use the
arrows to scroll through the presets (0.95, 0.80, and 0.60) and use the
MENU button to select a preset. Choose the Custom Value utility (last se-
lection on the list) to select a specific emissivity value. At the Custom Val-
ue setting, press MENU and then use the arrows to select the emissivity
value; press MENU to confirm.
•DEVICE SETTINGS
1. Bluetooth®: Press MENU to switch Bluetooth® ON or OFF. See Section 7,
Bluetooth®, and Section 5.5, Capturing and Working with Images, for
details.
#NAS100009; r. AA/57810/57810; en-US 13

Programming Menu System
6
2. Laser: Press MENU to enable/disable the Laser pointer. When enabled,
you can use the Laser pointer button to switch ON the Laser pointer.
3. Screen brightness: Use the arrows to select the desired display intensity
(LOW, MEDIUM, or HIGH).
4. Auto Power OFF (APO): Use the arrows to scroll and MENU to select the
desired APO time (5/15/30 minutes). Set to ‘Never’ to disable APO.
•GENERAL SETTINGS
#NAS100009; r. AA/57810/57810; en-US 14
Other manuals for TG275
2
Table of contents
Other FLIR Thermal Camera manuals

FLIR
FLIR i3 User manual

FLIR
FLIR FC-Series S User manual

FLIR
FLIR InfraCAM User manual

FLIR
FLIR TG267 User manual

FLIR
FLIR T6 series User manual

FLIR
FLIR M100SERIES Instruction Manual

FLIR
FLIR Scout PS-Series User manual

FLIR
FLIR P-640 User manual

FLIR
FLIR D-Series C User manual

FLIR
FLIR ThermaCAM E320 User manual