FLS FlowX3 F9.20 User manual

F9.20 Battery Powered Flow Monitor
INSTRUCTION MANUAL
EN 05-03
Table of Contents
1. Introduction…………………………………………………………………. 3
1.1. Safety Instructions………………………………………………………………. 3
1.2. Unpacking…………………………………………………………………………. 3
2. Description………………………………………………………………….. 4
2.1. Design……………………………………………………………………………... 4
2.2. Technical Features……………………………………………………………… 4
2.3. Connection to FlowX3 Sensors………………………………………………. 4
3. Specifications………………………………………………………………. 5
3.1. Technical Data…………………………………………………………………… 5
3.2. Dimensions………………………………………………………………………. 6
4. Installation………………………………………………………………….. 7
4.1. Panel Installation……………………………………………………………….. 7
4.2. Wall Installation…………………………………………………………………. 8
4.3. Compact Installation…………………………………………………………… 8
4.4. Wiring……………………………………………………………………………... 9
5. Operational Overview…………………………………………………….. 11
5.1. Keypad Functions………………………………………………………………. 11
5.2. General Operation Flowchart…………………………………………………. 11
6. View Level…………………………………………………………………... 13
7. Menu Directory Level……………………………………………………… 13
7.1. Free access (no password required)………………………………………… 14
7.2. Password protected access…………………………………………………… 14
F9.20 BatteryPowered Flow Monitor
1

8. Menu and Edit Level………………………………………………………. 15
8.1. Calibration Menu…………………………………………………………………… 15
8.1.1. Unit………………………………………………………………………………. 15
8.1.2. K-Factor…………………………………………………………………………. 16
8.1.3. Inftot Backup……………………………………………………………………. 16
8.4. Options Menu……………………………………………………………………….. 17
8.4.2. Filter……………………………………………………………………………… 17
8.4.3. Flow Decimal Point…………………………………………………………….. 18
8.4.4. Total Decimal Point…………………………………………………………….. 18
8.4.7. Menu PWD……………………………………………………………………… 19
8.4.8. Restot PWD…………………………………………………………………….. 19
8.4.9. K-Factor Calculate……………………………………………………………… 20
9. Troubleshooting……………………………………………………………. 21
9.1. Display messages………………………………………………………………….. 21
10.K-Factor Tables…………………………………………………………….. 22
11.Ordering Data………………………………………………………………. 23
F9.20 BatteryPowered Flow Monitor
2

1. Introduction
1.1. Safety Instructions
General Statements
Do not install and service the instrument without following the Instruction
Manual.
Unit installation and wiring connections should only be performed by qualified
staff.
Do not modify product construction.
Installation and Commissioning Statements
To clean the unit, use only chemical compatible products.
1.2. Unpacking
Please verify that the product is complete and without any damage. The following
items must be included:
• F9.20 Battery Powered Flow Monitor
• Instruction Manual for F9.20 Battery Powered Flow Monitor
• Instruction Manual for F3.00 Flow Sensor (only for F9.20.XX Compact Battery
Powered Flow Monitor)
F9.20 BatteryPowered Flow Monitor
3

2. Description
2.1. Design
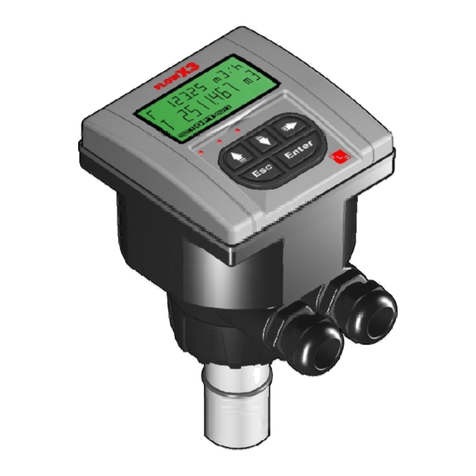
The FLS FlowX3 F9.20 Battery Powered Flow Monitor is equipped with two long life
lithium batteries and it integrates the power supply for the sensor. It is designed to
show on the LCD display flow rate and totalized flow volume with no external power
supply required. One of the two totalizers is resettable while the other is non-resettable
and it is used to permanently record volume consumption. Self explaining calibration
menus allow a customized setup of all measuring parameters and the state of the art
electronic design ensures long-term reliable and stable indications. The high flexibility
is maximized with only one packaging for compact pipe mount, panel or wall
installation.
2.2. Technical Features
2.3. Connection to FlowX3 Sensors
FlowX3 Sensors
FlowX3
Monitor
F3.00.H
F3.00.C
F3.01.H
F3.01.C
F3.15.H*
F3.30.H*
ULF.H
ULF.R
ULF3.15*
ULF3.30*
F111.H
F111.C
F9.20 X X X X
* with Output Kit mounted
F9.20 BatteryPowered Flow Monitor
4

3. Specifications
3.1. Technical Data
General
Associated flow sensor:
• FLS FlowX3 Coil effect with frequency output
• FLS FlowX3 Reed effect
Materials:
• Case: PC
• Panel gasket: Neoprene
• Wall & Field gasket: EPDM
• Keypad: 5-button silicone rubber
Display:
• 3 line LCD: 2 x 12 alphanumeric lines + 1 icon line
• Update rate: 1 second
Enclosure: IP65 front
Electrical
Supply Voltage: 2 x 3.6 Volt Lithium thionyl chloride battery, 2.8 Ahr
Battery life: nominal 5 years
Sensor Input (Frequency):
• Sensor power: 3,6 Volt
• Range: 1 to 500 Hz
Environmental
Operating temperature: -5 to +60°C (23 to 140°F)
Storage temperature: -10 to +80°C (14 to 176°F)
Relative humidity: 0 to 95% non condensing
Standards and Approvals
Manufactured under ISO 9002
CE rating according to:
- Immunity: EN50082-1
- Emission : EN61000-6-2
- Low Voltage Directive : EN61010
F9.20 BatteryPowered Flow Monitor
5

3.2. Dimensions
Compact Mount
Panel Mount
Wall Mount
F9.20 BatteryPowered Flow Monitor
6

4. Installation
The battery powered flow monitor is available just in one packaging for compact field
version, panel or wall installation. The compact field version is mounted on top of the
sensor using the compact mounting kit (F9.KC1), the panel version is installed using the
panel mounting kit (F9.KP1), while the wall mounting version is fixed with the wall
mounting kit (F9.KW1).The mounting kits can be ordered directly connected to the monitor
or separately and then simply installed on it.
4.1. Panel Installation
The panel mounting version consists of the monitor and the mounting bracket kit
F9.KP1 with gasket for IP65 watertight panel installation. The monitor perfectly fits into a
standard ¼ DIN panel cutout.
1. Cut out the panel: the F9.20
requires a panel opening of
90,5 x 90,5 mm (3,563” x
3,563”). ¼ DIN punches are
recommended, alternatively a
jigsaw or another cutting tool
may be used.
2. Recommended minimum
clearance between panel
cutouts is 28 mm (1.1”) as
illustrated.
3. Place gasket on the instrument
and install into the panel. Be sure
the panel gasket is properly
seated against the panel and
around the instrument case.
4. Slide the metal bracket over the
back of the instrument. Press the
bracket against the inside of the
panel to perfectly fix the
instrument in place.
To REMOVE: press the clips outward while pulling the bracket away from the
instrument panel. Do not allow the instrument to fall out of the panel opening: it
may be helpful to secure the instrument temporarily with tape from front.
F9.20 BatteryPowered Flow Monitor
7

4.2. Wall Installation
The wall mounting version consists of the monitor and the wall mounting kit. The
F9.KW1 kit includes the plastic adapter with gasket for IP65 watertight wall installation
and the fixing screws.
1. Fix the wall mounting kit to a solid wall
using the included screws.
2. Pull the electrical cables through
liquid tight connectors.
3. Make wiring connections according to
wiring diagrams.
4. Secure carefully the F9.20 to the wall
mounting kit using the included
screws until finger tight.
5. Assemble the front cover.
4.3. Compact Installation
The compact mounting kit F9.KC1 includes the
compact plastic adapter with gasket for IP65
watertight installation, the sensor gasket, the
compact cap, the locking ring and four fixing screws.
1. Assemble the sensor gasket in the proper
2. ate the sensor gasket with a silicone
3. and
4.
5. ugh liquid tight
6. connections according to
7. he F9.20 to the compact
8. e front cover.
seat.
Lubric
lubricant. Do not use any petroleum based
lubricant that may damage the gasket.
Add the compact cap to the sensor
insert the sensor into the plastic adapter
making sure the alignment tabs are seated
in the fitting notches.
Lock the sensor to the adapter: screw
completely the locking ring.
Pull the electrical cables thro
connectors.
Make wiring
wiring diagrams.
Secure carefully t
mounting kit using the included screws until
finger tight.
Assemble th
F9.20 BatteryPowered Flow Monitor
8

4.4. Wiring
ll wiring connections to F9.20 are made via removable terminals. Flow sensor
eneral recommendation
Terminals accept 26 to 12 AWG (0.08 to 2.5 mm2)
S tips and tin bare ends to
ggested when connecting more than one wire to a single terminal.
with the screw until
Wall Installation
proper external diameter for the liquid tight
nal diameter between 2-7 mm (0.079-0.276”)
”)
ear Terminal View
attery Replacement
ure to save the current totalizer in permanent memory
A
terminals are orange, all other terminals are green.
G
trip around 10 mm (0.4”) of insulation from the wire
avoid fraying.
Ferrules are su
Remove the upper part of the terminals for an easy cabling.
Insert wire tip or ferrule completely into the terminal and fix
finger tight.
Compact or
Use electrical cables with the
connector:
PG11: exter
PG13,5: external diameter between 5-12 mm (0.197-0.472
R
B
• Perform the proced
Battery indication appears
on the display when battery
voltage is low
before battery replacement. Refer to section 8.1.3. Inftot Backup
• Replace the batteries on the rear side of the instrument
ispose of the worn out battery properly! Ask to local authorities.D
F9.20 BatteryPowered Flow Monitor
9

Sensor Wiring Diagram
3.00.C IP68 or F3.01.C (compact version) F3.00.C IP65 flow sensor connection
LFXX.R flow sensor connection
• Maximum cable length is 16 m (52.8 ft).
F
flow sensor connection
U
F9.20 BatteryPowered Flow Monitor
10

5. Operational Overview
he FlowX3 F9.20 battery powered flow monitor, like all members of X3 Line, features a
5.1. Keypad Functions
The five push buttons of the keypad are used to navigate display levels and modify
he function of each button may change according to display level; please refer
T
digital display and a five-button keypad for system set-up, calibration and operation. This
section contains a description of the keypad functions and the general operation flowchart
of the instrument.
settings.
T
to following table:
View Scroll through Scroll through S
m
--------- Go to Menu
D litems items
elect items
arked with > irectory Leve
items items
Enter menu for
editing
---------
throu
items items em for editing Directory
or a flashing
digit
or a flashing
digit
Scroll right
through
shing digi
without saving settings
Level Function
Menu Directory Scroll through Scroll through Return to View
Menu Scroll gh Scroll through Enter menu
it
Return to Menu ---------
Edit Modify an item Modify an item
fla ts
Return to Menu Save new
5.2. General Operation Flowchart
The F9.20 battery powered flow monitor features four different levels as shown in the
View Level: this is the default level. After instrument set-up, all measured
u Directories for different set-
correct
each item in a Menu can be viewed and
eters can be set, modified and saved at this
following flowchart illustrating the basic navigation concepts.
values. Refer to section 6. View Level for details.
Menu Directory Level: there are two different Men
up and calibration. Refer to section 7. Menu Directory Level for details.
Access to this level can be free or password protected. Entering the
password allows direct access to next levels and to all editable items in all
menus, until a return to View Level.
Menu Level: the current setting for
selected for editing at this level.
Edit Level: all instrument param
level. Refer to section 8. Menu and Edit Levels for details.
F9.20 BatteryPowered Flow Monitor
11

F9.20 BatteryPowered Flow Monitor
12

F9.20 BatteryPowered Flow Monitor
13
6. View Level
• During normal operation, the flow monitor is in View Level displaying all measured
values.
• If the flow monitor is in a different level and no activity occurs for more than 3
minutes, it will return to View Level.
• To select the item you want displayed, press UP or DOWN arrows.
• Changing display indication does not affect or interrupt instrument operation
and calculation.
Description
Flow rate and resettable totalizer value
Resettable totalizer and flow rate value
Permanent totalizer value
Flow rate value
Resettable totalizer value. Press the RIGHT arrow key
to reset. If locked, you will need to enter the password
first. Lock or unlock the total reset in Option Menu (refer
to section 8.4.8. Restot PWD for details)
7. Menu Directory Level
Access to this level can be free or password protected. Entering the correct password
allows direct access to next levels and to all editable items in all menus, until a return to
View Level (refer to section 8.4.7. Menu PWD to select password protected access).
Four different menus are available to fully set-up the F9.00 flow monitor and transmitter.
These menus are separated in two different Menu Directories.
In terms of getting started and making measurements, Calibration Menu is the most
important menu in the F9.00 and it is the only one included in the first Menu Directory.
Output Menu, Simulation Menu and Option Menu are included together in the second
Menu Directory.

7.1. Free access (no password required)
7.2. Password protected acc
ess
F9.20 BatteryPowered Flow Monitor
14

8.
8.1. Calibration Menu
The F9.20 basic settings are made in this menu:
8.1.1. Unit
Set the engineering units for the instant flow rate and the total flow rate.
All the options available are displayed on the LCD.
The instrument will
automatically convert
the values of the two
totalizers in the new
engineering units.
To set K-Factor
To set flow rate and
totalizer Engineering Units
Menu and Edit Levels
F9.20 BatteryPowered Flow Monitor
15

he monitor and transmitter how to convert the input frequency
om the flow sensor into a flow rate. The K-factor is unique to the sensor model and to
the pipe size and material.
Refer to section 10. K-Factor Tables for the correct v
Limits: 000.01 to 99999 (the K-Factor cannot be set to 0)
8.1.3. Inftot Backup
The totalizer value can be stored in permanent memory whenever desired.
The procedure must be
performed before
batte
8.1.2. K-Factor
Set the K-Factor to tell t
fr
alue.
ry replacement.
F9.20 BatteryPowered Flow Monitor
16

.2. Options Menu
8.2.1. Filter
eraging level
to dampen LCD
indication, output and
relay response.
OFF: no dampening
effect, near instantaneous
response.
To select the averaging level of
LCD, output and relay response
To set the flow rate decimal
point position
To set the totalizer decimal
point position
To set ON or OFF password
protection to enter Menu Levels
reset totalizer
To perform automatic
calculation of K-Factor
8
To set ON or OFF password
protection to
Select the av
F9.20 BatteryPowered Flow Monitor
17

8.2.2. Flow Decimal Point
et the decimal point
pplication.
ns:
.XXXX ; XX.XXX ;
Set the decimal point
position to get the best
resolution for the
application.
Select one of the
following options
XXXXXXXX.XX
S
position to get the best
solution for there
a
Select one of the
llowing optiofo
X
X
X
XX.XX ; XXXX.X ;
XXXX.
8.2.3. Total Decimal Point
XXXXXXXXX.X
XXXXXXXXXX.
F9.20 BatteryPowered Flow Monitor
18

8.2.4. Menu PWD
Set
pro
Dir
lev
NOTE: the standard password is and it cannot be modified.
Se
pro
tot undesired
res
OTE: the standard password is and it cannot be modified.
ON the Menu PWD to
tect access to Menu
ectory Level and next
els.
.2.5. Restot PWD8
t ON the Restot PWD to
tect the resettable
alizer from
et operations.
N
F9.20 BatteryPowered Flow Monitor
19

8.2.6. K-Factor Calculate
Option used to perform automatic calculation of K-Factor by measuring the volume filled
into a tank. This to get the highest accuracy possible.
Press ENTER to start calculation.
Switch on a pump or open a valve.
F9.2
the s
When the tank is full, switch off the
pump or close the valve. Press
ENTER to stop calculation. F9.20
stops counting pulses from the
sensor.
Enter the volume (in liter) of fluid
filled into the tank.
F9.20 is calculating the new
K-F
0 starts counting pulses from
ensor.
actor.
Successful K-Factor
calculation. Press ENTER to
accept new K-Factor or ESC
to return without saving.
F9.20 BatteryPowered Flow Monitor
20
Table of contents
Other FLS Measuring Instrument manuals
