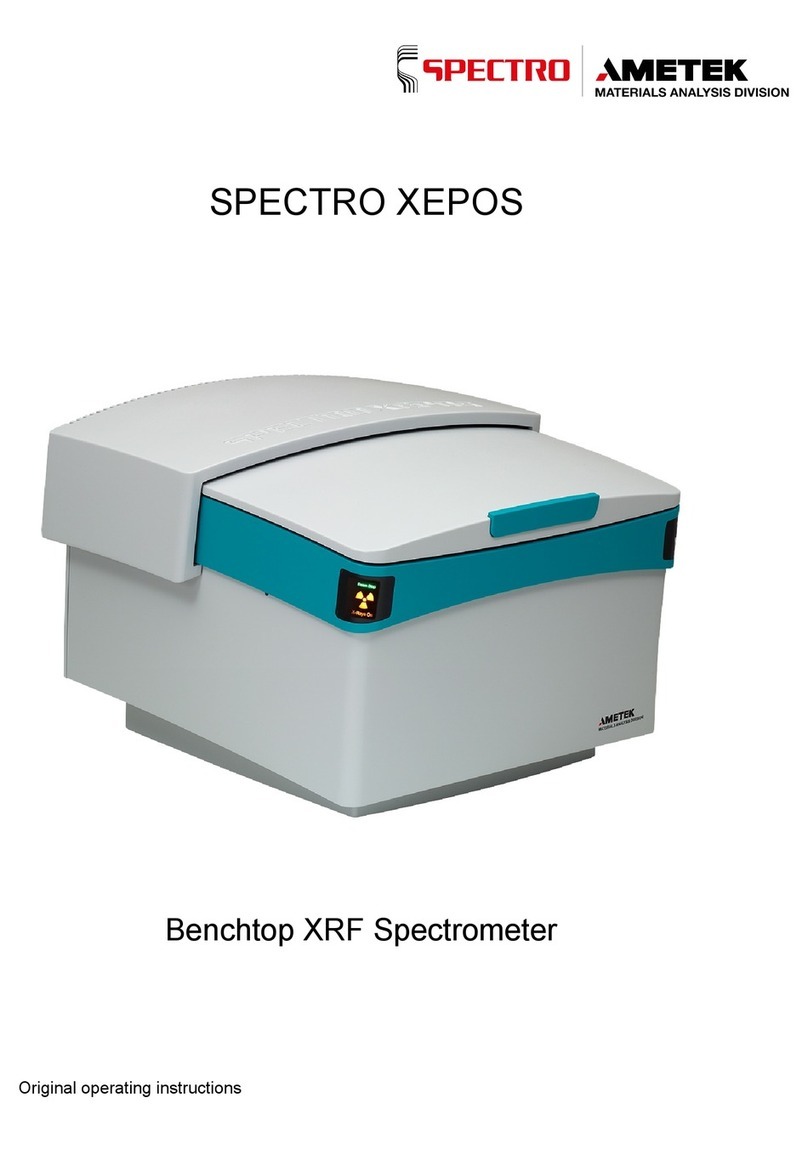
SPECTRO SPECTROCUBE C XEP06C User manual

DasverknüpfteBildk ann nichtangezeigtwerden.Möglicherweisewurdedie Dateiverschoben, umbenanntoder gelöscht.StellenSie sicher, dass d ie Verkn üpfun g auf die
korrek te Dateiun d den k o r rek ten Speicher or t zeigt.
SPECTROCUBE C
Benchtop XRF Spectrometer
Original operating instructions


SPECTROCUBE C — 28.08.2019 — 3
Table of Contents
1Description of instrument ....................................................................................5
1.1Description .......................................................................................................................... 5
1.2Function .............................................................................................................................. 5
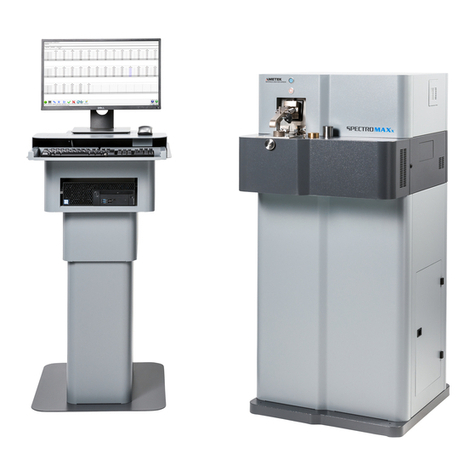
1.3Overview ............................................................................................................................. 6
1.3.1Sample chamber with single sample holder or single sample rotation ................. 7
1.3.2Sample chamber with sample tray ........................................................................ 8
1.3.3Sample chamber - additional components............................................................ 9
1.3.4Sample tray ........................................................................................................... 9
2Safety................................................................................................................10
2.1Symbols used ................................................................................................................... 10
2.2User information................................................................................................................ 11
2.3Intended use ..................................................................................................................... 12
2.4Prohibited operating conditions ........................................................................................ 12
2.5Residual risks.................................................................................................................... 12
2.6Radiation protection advice .............................................................................................. 14
2.6.1Germany.............................................................................................................. 14
2.6.2Other countries .................................................................................................... 14
3Technical data...................................................................................................15
4Transportation/Setting-up .................................................................................16
4.1Storage ............................................................................................................................. 17
4.2Uninterruptible power supply – UPS (option) ................................................................... 17
5Operation ..........................................................................................................19
5.1Overview of controls ......................................................................................................... 19
5.2Displays ............................................................................................................................ 20
5.3Switching on the instrument.............................................................................................. 21
5.3.1Safety circuits are automatically checked after one month ................................. 22
5.4Switching off the instrument.............................................................................................. 23
5.5Measuring procedure........................................................................................................ 24
5.5.1Preparing the measuring procedure.................................................................... 26
5.5.2Start the measurement via the XRF Analyzer Pro software program ................. 27
5.5.3Start measurement at instrument ........................................................................ 27
How to change / remove the sample tray............................................................ 28
6Maintenance by the operator ............................................................................29
6.1Operator maintenance plan .............................................................................................. 29
6.2(MCA / Global) recalibration sample................................................................................. 31
6.2.1Energy channel recalibration procedure (MCA) .................................................. 31
6.2.2Global recalibration.............................................................................................. 32
6.3Clean the sample tray ....................................................................................................... 33
6.4Clean the sample chamber............................................................................................... 33

— 4 SPECTROCUBE C — 28.08.2019
6.5Insert the film for the "liquid protect" sample cup.............................................................. 34
7Troubleshooting................................................................................................ 36
8Spare parts and consumables.......................................................................... 38
9De-commissioning............................................................................................ 38
10Manufacturer address ...................................................................................... 38
11EC Declaration of Conformity........................................................................... 39

Description of instrument
SPECTROCUBE C — 28.08.2019 — 5
1 Description of instrument
1.1 Description
Designation: SPECTROCUBE C
Model: XEP06C
Type: 76004856
1.2 Function
X-rays excite the atoms of the sample, causing them to emit radiation. This
radiation is measured by a semiconductor detector.
To achieve a higher sensitivity, the exciting radiation can be optimized by using
filters.
The instrument comes with a preset method of analysis installed. Data are already
stored in the instrument's memory. The measured values are compared with these
data. After the measurement is complete, the results of a sample for an unknown
composition are displayed on the screen.
The sample material can be solid, liquid or a powder.

Description of instrument
— 6 SPECTROCUBE C — 28.08.2019
1.3 Overview
The sample to be measured is placed onto the measurement position (single
sample holder) and it is subsequently measured.
The following options are available:
Single sample rotation
Sample tray
Sample tray with sample rotation
Additional option:
Gas flushing (helium or nitrogen)
Measurements can be taken with variable measurement conditions.
Information
Set up the instrument so that the power isolators (switches and power cable) can
be easily reached.
Fig. 1
No. Component No. Component
1 PC 6 Rear
2 Instrument a Key switch with removable key
3 Sample chamber b Power supply connection point
4 Sample chamber lid c Gas flushing connection
5 X-ray radiation indicator d Video (USB) connection point (not
available for this instrument)
e PC connection point (LAN)

Description of instrument
SPECTROCUBE C — 28.08.2019 — 7
1.3.1 Sample chamber with single sample holder or single sample rotation
Fig. 2
No. Component
1 Single sample holder or single sample rotation
2 Measurement position (position of the sample during the measurement)

Description of instrument
— 8 SPECTROCUBE C — 28.08.2019
1.3.2 Sample chamber with sample tray
Fig. 3
No. Component
1 Sample tray (different models available)
2 Tray handle
3 Tray screw
4 Sample tray locking device
5 Measurement position (covered by sample tray for protection)

Description of instrument
SPECTROCUBE C — 28.08.2019 — 9
1.3.3 Sample chamber - additional components
Fig. 4
No. Component
1 Discharge reservoir (if liquid samples are leaking, the liquid is collected here)
2 Sample tray holder (optional if the instrument is equipped with a sample tray)
3 Sample rotation drive (option), (only visible if sample tray or single sample
holder/rotation is removed)
4 Measurement position, (only visible if sample tray or single sample holder/rotation
is removed)
1.3.4 Sample tray
The sample trays come in different versions.
12 sample positions for Ø 40 mm samples with an adapter for Ø 32 mm
samples
8 sample positions including sample rotation for Ø 40 mm samples

Safety
— 10 SPECTROCUBE C — 28.08.2019
2 Safety
Every user of the instrument must have read and understood these operating
instructions. This applies in particular to the safety instructions.
2.1 Symbols used
The following symbols are used in these abbreviated operating instructions and/or
on the instrument.
If required, additional important information is available in connection with these
symbols.
General warning sign!
Warning of hazardous voltage!
Warning! Flammable substances!
Warning! Toxic substances!
Warning of hand injury!
Warning of radioactive substances or ionizing radiation!
Notice!
Warns of activities or conditions that may adversely affect the function of the
instrument.
Information
Displays information that is important for the correct and safe use of the instrument

Safety
SPECTROCUBE C — 28.08.2019 — 11
2.2 User information
Compliance with all safety instructions is mandatory. For your own safety.
Only an expert organization or accordingly trained personnel are permitted to
transport the instrument in its transport packaging.
Only service personnel authorized by the manufacturer are permitted to
unpack, install, set up and connect the instrument.
Only carry out operator maintenance work that is described in Chapter 6 of
the operating manual. The operating personnel are not permitted to perform
any other maintenance work. Any further maintenance work (e.g. technical
maintenance) or repairs must only be performed by service personnel
authorized by the manufacturer.
Compliance with all safety instructions and accident prevention regulations is
mandatory during operation and while performing maintenance tasks.
Check the protective measures after every technical maintenance or repair
activity. The checking procedure is carried out in accordance with DGUV V3
(German Social Accident Insurance) or an equivalent national regulation.
Compliance with the maintenance schedule specified by the manufacturer
and the recording of all maintenance activities is mandatory. This helps
maintain the operational safety of the instrument.
Never tamper with the safety devices! If you suspect that a safety device does
not work properly, shut down the instrument immediately! Please contact your
Service Center.
Compliance with the information labels provided on the instrument is
mandatory.
Only genuine spare parts must be used when repairing the instrument. The
use of non-genuine spare parts will render the CE Declaration of Conformity
null and void.
Operate the instrument only using system networks with protective ground
(PE) conductors.
Operate the instrument only in a dry environment (protection class IP 30,
DIN 40050).
If the instrument is located on an incline and equipped with castors, it can roll
away during operation. Secure the instrument for operation. This also applies
when the instrument is located on a cart.
Compliance with the relevant safety regulations for the use of auxiliary aids
and operating equipment is mandatory.
Disconnect the power plug before opening the instrument.

Safety
— 12 SPECTROCUBE C — 28.08.2019
2.3 Intended use
This instrument can be used for analyzing solids weighing up to 20 kg. Liquid or
powdery samples have to be placed into special containers (e.g. cuvettes, sample
cups) for analysis. The instrument is designed as a table-top device and intended
solely for operation in enclosed rooms.
2.4 Prohibited operating conditions
Do not operate the instrument if one of the following conditions exists:
If the instrument is faulty or damaged.
If the instrument is not maintained at regular intervals.
If the ambient conditions do not comply with the specification.
If the area where the instrument is used is not a commercial/industrial
premise.
2.5 Residual risks
This instrument has been manufactured in accordance with the state of the art.
Nevertheless, a residual risk cannot be completely excluded.
Information
The instrument produces ionizing radiation (X-rays) in normal operating mode
(standby or measuring).
Warning of hazardous voltage!
The spectrometer produces electric voltages of up to 50 kV.
Shut down the instrument immediately if it is damaged.

Safety
SPECTROCUBE C — 28.08.2019 — 13
Warning of toxic substances!
The ray exit window of the X-ray tube and the detector window contain beryllium.
Vapors or dust of beryllium and its compounds are toxic and hazardous to your
health when inhaled.
Therefore never touch these windows.
Should you have broken a beryllium window of the detector, immediately seal
off the measurement window of the spectrometer with adhesive tape. This
ensures that no broken beryllium window pieces can leave the spectrometer.
Switch off the spectrometer and inform your Service Center. The detector and
hence the spectrometer can no longer be used in such a case.
Warning of hand injury!
Fingers can get crushed when closing the sample chamber lid.
When closing the sample chamber lid keep your fingers out of the sample
chamber.
Warning of ionizing radiation!
This spectrometer operates with ionizing radiation (X-rays). The safety devices
ensure that the instrument can be operated only in a safe, closed and shielded
condition.
Never tamper with the safety devices.
If you suspect that the safety devices are not working properly, shut down the
instrument immediately. Please contact your Service Center.
Information
The safety circuits in the instrument are designed so that either the sample
chamber lid or the shutter (=> protective shield upstream of X-ray tube which is
being opened for taking the measurement) must be closed. Otherwise, the X-ray
tube will be deactivated.
The sample chamber lid is locked when the shutter is open. This prevents
accidental opening of the sample chamber lid.
The sample chamber lid can only be opened again after the shutter is closed (at
the end of the measurement).
The safety circuits are checked automatically to ensure your safety.

Safety
— 14 SPECTROCUBE C — 28.08.2019
2.6 Radiation protection advice
2.6.1 Germany
The operation of the device requires the approval in accordance with §12 of the
law for the protection against the harmful effect of ionizing radiation
(Strahlenschutzgesetz - StrlSchG (German Radiation Protection Ordinance)).
The approval procedure according to Radiation Protection Ordinance is only
applicable in Germany. Compliance with the relevant safety regulations is
mandatory!
2.6.2 Other countries
In other countries, the operation of the device may also require approval.
Compliance with the national safety and approval regulations in force in your
country and/or state is mandatory! Please contact the responsible local approval
authority.

Technical data
SPECTROCUBE C — 28.08.2019 — 15
3 Technical data
Description Value
Instrument height 380 mm (15’)
Instrument width 520 mm (20.5’’)
Instrument depth 540 mm (21.3’’)
Instrument weight approx. 56 kg (~124 lbs)
Place of installation Inside of dry, dust-free rooms up to an
altitude of 2000 m above sea level,
vibration-free (not subject to impact or
vibration load conditions)
Operating voltage range 90 to 253 V AC / 50 / 60 Hz
Spectrometer power consumption (without
PC)
Standby mode (deactivated X-ray tube)
145 W
50 W
Fuse rating 16 A (slow-blow)
Temperature range
Optimum temperature range
(within specifications)
+ +10° C to +35° C (50 to 95 °F)
+ +15° C to +30° C (59 to 86 °F)
Atmospheric humidity 10 to 80 % (non-condensing) at 25° C
(77° F)
10 to 75 % (non-condensing) at 30° C
(86° F)
Protection class / Contamination class IP 30 (DIN 40050)
Contamination class II
(laboratory environment)
EMC environment Industrial environment / Laboratory
environment

Transportation/Setting-up
— 16 SPECTROCUBE C — 28.08.2019
4 Transportation/Setting-up
Only instructed personnel are permitted to transport, unpack, install, and start up
the instrument.
Information: Measurement errors!
Shocks to the instrument during the measuring process can result in
measurement errors.
Shocks to the instrument while taking measurements should therefore
be avoided.
Avoid mechanical impacts.
Measurement errors can result from temperature differences inside the
instrument.
Install the instrument so that it cannot heat up on one side only.
Notice! Damage to instrument
There is a risk of damage to the instrument whenever it is moved to another
location after it has been set up. To this end, please contact your Service Center.
Compliance with the following information is required regarding the instrument's
transport and setup:
Always transport the instrument in a horizontal position, ensuring its legs are
pointing down. Ensure that the instrument is always transported by two
persons. To this end, use both of your hands to reach underneath the
housing.
Avoid mechanical impacts.
Save the shipping box in case you have to ship the instrument to the Service
Center at a later date.
When setting up the instrument, ensure that all sides can be easily
accessed for maintenance, repair and connection purposes.
All necessary cables are included in the delivery.

Transportation/Setting-up
SPECTROCUBE C — 28.08.2019 — 17
4.1 Storage
Storage conditions:
The instrument has to be stored in a dry place.
Room temperature: -10 °C to +50 °C (14 °F to 122 °F).
Avoid storing the instrument at very low temperatures.
The warranty for the X-ray tube is rendered null and void should the
instrument be stored outside of the specified temperature range.
4.2 Uninterruptible power supply – UPS (option)
Notice! Damage to instrument
Without an uninterruptible power supply (UPS), the X-ray tube could sustain
damage in case of frequent power failures.
When a UPS is available, ensure that the instrument, including the PC, is
connected to the UPS. Please do not connect the laser printer to the UPS.
Information
The first installation of the UPS must be performed by a technician authorized by
SPECTRO.
If you would like to retrofit the instrument at a later date, please order the
retrofitting set.
In case of a power failure, the UPS (uninterruptible power supply) sends a signal
to the instrument. The instrument is then shut down in a controlled manner. In the
case of extended power failures, the computer is also shut down after a given
duration of time.

Transportation/Setting-up
— 18 SPECTROCUBE C — 28.08.2019
Fig. 5
No. Component No. Component
1 Acknowledgement (deactivation) of
alarm signal
4 PC communication port
2 UPS ON/OFF 5 Automatic circuit breaker, 6 A
3 Power connection points for
instruments
6 UPS power supply connection point
When changing or reconnecting the UPS, proceed as follows:
1. Connect all components with the UPS (instrument, PC, monitor, etc.)
2. Connect the UPS with the power supply.
3. Switch on the UPS.
4. Switch on the components (instrument, PC, monitor, etc.).
The UPS is now installed.

Operation
SPECTROCUBE C — 28.08.2019 — 19
5 Operation
5.1 Overview of controls
Fig. 6
No. Control element Function
1 Pushbutton Used to start a measurement
2 Measurement position:
A Single sample holder / single
sample rotation Positioning of sample to be measured
B Sample tray
3 Sample chamber lid Used to open and close the sample chamber
4 Key switch with removable key
(rear of instrument)
Horizontal position: ON setting
Vertical position: OFF setting

Operation
— 20 SPECTROCUBE C — 28.08.2019
5.2 Displays
Fig. 7
No. Display Function
1 X-ray radiation Lit orange when X-ray tube is in operation.
This manual suits for next models
1
Table of contents
Other SPECTRO Measuring Instrument manuals
Popular Measuring Instrument manuals by other brands

ModWeigh
ModWeigh MW95A instruction manual

Microtronics
Microtronics myDatalogEASYmbm user manual

Hilti
Hilti PRA 20G operating instructions

Precision Digital Corporation
Precision Digital Corporation ProtEX-MAX PD8-6100 instruction manual

IRIS
IRIS 600 Ultra Applications manual

Terra Exploration Group
Terra Exploration Group EZ Res Pro user guide