manuals.online logo
Brands
  1. Home
  2. •
  3. Brands
  4. •
  5. Fluke
  6. •
  7. Measuring Instrument
  8. •
  9. Fluke i400s User manual

Fluke i400s User manual

Other Fluke Measuring Instrument manuals

Fluke i5s User manual

Fluke

Fluke i5s User manual

Fluke 321 Instruction manual

Fluke

Fluke 321 Instruction manual

Fluke VIBGUARD IIoT User manual

Fluke

Fluke VIBGUARD IIoT User manual

Fluke VIBXPERT II User manual

Fluke

Fluke VIBXPERT II User manual

Fluke CO-220 User manual

Fluke

Fluke CO-220 User manual

Fluke MDA-550 User manual

Fluke

Fluke MDA-550 User manual

Fluke 433 User manual

Fluke

Fluke 433 User manual

Fluke 301D User manual

Fluke

Fluke 301D User manual

Fluke 360 Instruction manual

Fluke

Fluke 360 Instruction manual

Fluke 323 User manual

Fluke

Fluke 323 User manual

Fluke 971 User manual

Fluke

Fluke 971 User manual

Fluke LinkSprinter 100 User manual

Fluke

Fluke LinkSprinter 100 User manual

Fluke a3002 FC User manual

Fluke

Fluke a3002 FC User manual

Fluke TS44DLX User manual

Fluke

Fluke TS44DLX User manual

Fluke 3210-PR User manual

Fluke

Fluke 3210-PR User manual

Fluke CertiFiber Pro User manual

Fluke

Fluke CertiFiber Pro User manual

Fluke 323 User manual

Fluke

Fluke 323 User manual

Fluke 302+ User manual

Fluke

Fluke 302+ User manual

Fluke endurance series User manual

Fluke

Fluke endurance series User manual

Fluke 700G Series Configuration guide

Fluke

Fluke 700G Series Configuration guide

Fluke VT305 User manual

Fluke

Fluke VT305 User manual

Fluke DPM2 Plus User manual

Fluke

Fluke DPM2 Plus User manual

Fluke 3310-PR User manual

Fluke

Fluke 3310-PR User manual

Fluke Nuclear Associates 07-453 User manual

Fluke

Fluke Nuclear Associates 07-453 User manual

Popular Measuring Instrument manuals by other brands

Powerfix Profi 278296 Operation and safety notes

Powerfix Profi

Powerfix Profi 278296 Operation and safety notes

Test Equipment Depot GVT-427B user manual

Test Equipment Depot

Test Equipment Depot GVT-427B user manual

Fieldpiece ACH Operator's manual

Fieldpiece

Fieldpiece ACH Operator's manual

FLYSURFER VIRON3 user manual

FLYSURFER

FLYSURFER VIRON3 user manual

GMW TG uni 1 operating manual

GMW

GMW TG uni 1 operating manual

Downeaster Wind & Weather Medallion Series instruction manual

Downeaster

Downeaster Wind & Weather Medallion Series instruction manual

Hanna Instruments HI96725C instruction manual

Hanna Instruments

Hanna Instruments HI96725C instruction manual

Nokeval KMR260 quick guide

Nokeval

Nokeval KMR260 quick guide

HOKUYO AUTOMATIC UBG-05LN instruction manual

HOKUYO AUTOMATIC

HOKUYO AUTOMATIC UBG-05LN instruction manual

Test Products International SP565 user manual

Test Products International

Test Products International SP565 user manual

General Sleep Zmachine Insight+ DT-200 Service manual

General Sleep

General Sleep Zmachine Insight+ DT-200 Service manual

Sensa Core Lacto Spark user manual

Sensa Core

Sensa Core Lacto Spark user manual

VOLTCRAFT UTS-1980 operating instructions

VOLTCRAFT

VOLTCRAFT UTS-1980 operating instructions

EBCHQ 94915 Operation manual

EBCHQ

EBCHQ 94915 Operation manual

Balluff BIP LD2-T017-01-EP-S4 Series user guide

Balluff

Balluff BIP LD2-T017-01-EP-S4 Series user guide

Pulsar IMP Lite Series instruction manual

Pulsar

Pulsar IMP Lite Series instruction manual

ETCR 6800 user manual

ETCR

ETCR 6800 user manual

IRIMO 984-6D-1 owner's manual

IRIMO

IRIMO 984-6D-1 owner's manual

manuals.online logo
manuals.online logoBrands
  • About & Mission
  • Contact us
  • Privacy Policy
  • Terms and Conditions

Copyright 2025 Manuals.Online. All Rights Reserved.

Информация по безопасности
Внимание!
Во избежание удара электрическим током
ипрочих повреждений персонала:
•Проверяйте токовые клещи перед каждым
использованием.
•Не используйте токоизмерительные
клещи-адаптер, если прибор или провод
имеют внешние повреждения, или если
есть сомнения висправности прибора.
•деляйте особое внимание сохранности
изоляции корпуса прибора.
•Не используйте поврежденные или
неисправные токовые клещи.
If the Current Clamp does not work or perform properly, use the
following steps to help isolate the problem:
1. Inspect the jaw mating surface for cleanliness. If any
foreign material is present, the jaw will not close properly
and measurement errors will result.
2. Verify that the function selection and range on the
Multimeter are correct and adjusted to the sensitivity of
the Current Clamp.
Уход иочистка
Периодически протирайте корпус тканью, смоченной
мягким моющим средством.
Внимание
Во избежание повреждения токовых клещей, не
используйте абразивы ирастворители для очистки
прибора.
Откройте клещи ипротрите части магнитопровода тканью,
слегка смоченной машинным маслом. Не допускайте
коррозийных повреждений металлических частей.
Гарантийные обязательства иограничения
Для данной продук ии Fluke гарантирует отсутствие дефектов
материалов или дефектов, возникших вследствие некачественной
работы, втечение двух лет смомента приобретения. Настоящая
гарантия не распространяется на предохранители, батареи или
повреждения, возникшие врезультате несчастного случая,
пренебрежительного или неправильного обращения,
вмешательства вконструк ию, загрязнения или ненормальных
условий работы или обращения. Посредники не имеют права
расширять гарантийные обязательства от имени Fluke. Для
получения сервисного обслуживания втечение гарантийного
периода, свяжитесь сближайшим авторизованным сервисным
ентром Fluke для получения подтверждения овозврате, затем
отправьте прибор вэтот сервисный ентр сописанием проблемы.
ДАННАЯ ГАРАНТИЯ ЯВЛЯЕТСЯ ЕДИНСТВЕННЫМ
ОБЕСПЕЧЕНИЕМ. НИКАКИЕ ДРУГИЕ ВИДЫ ГАРАНТИИ, ТАКИЕ,
КАК УТВЕРЖДЕНИЕ ОПРИГОДНОСТИ ДЛЯ СПЕЦИАЛЬНЫХ
ЦЕЛЕЙ, НЕ ПРЕДУСМОТРЕНЫ. FLUKE НЕ НЕСЕТ
ОТВЕТСТВЕННОСТИ ЗА ЛЮБЫЕ КОСВЕННЫЕ ИЛИ
СЛУЧАЙНЫЕ УБЫТКИ, ВОЗНИКШИЕ ВСЛЕДСТВИЕ ЛЮБЫХ
ПРИЧИН ИЛИ ПРЕДПОЛОЖЕНИЙ.
Поскольку некоторые страны не допускают ограничений или
исключений из гарантийных обязательств, либо случайных или
косвенных убытков, настоящие ограничения ответственности
могут не применяться.
Fluke Corporation Fluke Europe B.V.
P.O. Box 9090
Everett, WA 98206-9090 U.S.A.
11/99
PN 2282671
October 2004
©2004 Fluke Corporation, All rights reserved. Printed in U.S.A.
All product names are trademarks of their respective companies.
Руководство по
эксплуатации
i400s
AC Токоизмерительные
клещи-адаптер
Введение
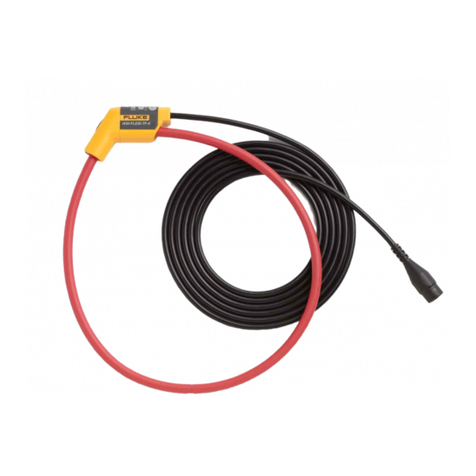
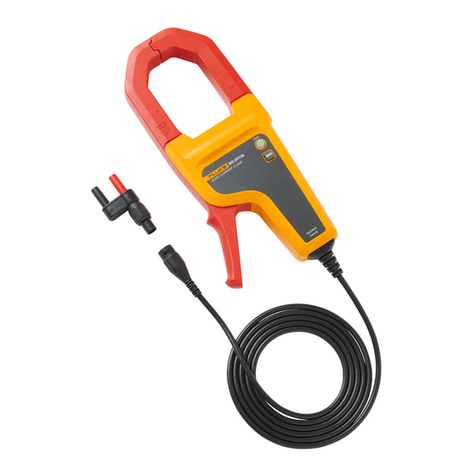
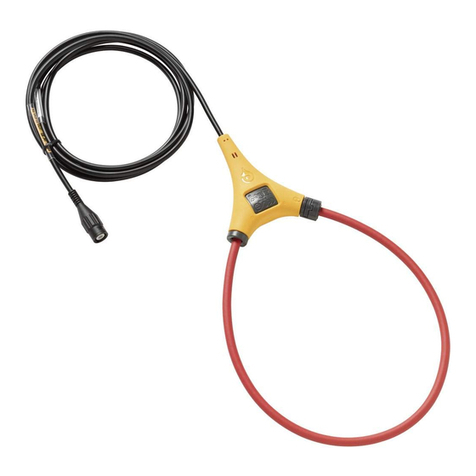
The i400s (hereafter called "Current Clamp") is compatible with
any instrument capable of ac millivolt measurements. It can
accept a standard BNC connector, and has an input impedance
of greater than or equal to 1 M fl in parallel with a maximum of
47 pF. The Current Clamp can also be used with digital
multimeters using a BNC-to-banana jack adapter.
Контактная информация Fluke
Для контакта сFluke, используйте следующую информа ию:
USA: 1-888-44-FLUKE (1-888-443-5853)
Canada: 1-800-36-FLUKE (1-800-363-5853)
Europe: +31 402-675-200
Japan: +81-3-3434-0181
Singapore: +65-738-5655
Anywhere in the world: +1 -425-446-5500
USA Service: 1-888-99-FLUKE (1-888-993-5853)
Либо Вы можете обратиться на региональный Web-
сайт www.fluke.ru. Для регистра ии Вашего прибора
зайдите по ссылке: http://register.fluke.com/
Информация по безопасности
AA Read First: Safety Information To
ensure safe operation and service of the
current clamp, follow these instructions:
• Read the operating instructions before use
and follow all safety instructions.
• Use the Current Clamp only as specified in
the operating instructions, otherwise the
clamp's safety features may not protect you.
• Adhere to local and national safety codes.
Individual protective equipment must be used
to prevent shock and arc blast injury where
hazardous live conductors are exposed.
• Do not hold the Current Clamp anywhere
beyond the tactile barrier, see Figure 1.
• Before each use, inspect the Current Clamp.
Look for cracks or missing portions of the
clamp housing or output cable insulation.
Also look for loose or weakened
components. Pay particular attention to the
insulation surrounding the jaws.
• Never use the clamp on a circuit with
voltages higher than 1000 V CAT III or 600 V
CAT IV.
• CAT III equipment is designed to protect
against transients in equipment in fixed-
equipment installations, such as
distribution panels, feeders and short
branch circuits, and lighting systems in
large buildings.
• CAT IV equipment is designed to protect
against transients from the primary
supply level, such as an electricity meter
or an overhead or underground utility
service.
• Use extreme caution when working around
bare conductors or bus bars. Contact with the
conductor could result in electric shock.
5602
BD Eindhoven
The Netherlands
• Use caution when working with voltages
above 60 V dc or 30 V ac. Such voltages pose a
shock hazard.
Символы
Application around and removal from hazardous live
conductors is permitted.
И
Product is protected by double insulation.
A\
Risk of Danger. Important information. See Instruction Sheet.
Ж
Hazardous voltage.
Conforms to relevant Canadian Standards Association
directives
.
Conforms to relevant European Union directives.
Стандарты безопасности
Категории: CAT III 1000 ВиCAT IV 600 Ввсоотв.
EN61010-1, Pollution Degree 2
EMC: EN 61326-1, FCC for emission and immunity
„©„,: Tested to US and Canadian standards for compliance to
UL61010-1 and CAN/CSA C22.2 No. 101.1:2004
CЂ: IEC 61010-1 2
nd
Edition IEC 61010-02-032
Технические характеристики
Reference Conditions: 23 ± 5 °C, 20 to 75 % RH; conductor
centered in jaw opening; no DC component; no adjacent
conductor.
Диапазон
40
A
Диапазон
400
A
Диапазон измерений
:
0.5
A
…
40
A
5
A
…
400
A
Выходной сигнал
:
10
мВ/А
1
мВ/А
Точность
:
45
Гц
…
400 Гц
2% + 0.015A
2 % + 0.04 A
Фазовый сдвиг
:
(
45
Гц
…
400 Гц
)
0.5 A
…
1 A
Не установлено
NA
1 A
…
5 A
4
°
NA
5 A
…
10 A
3
°
Не
установлено
10
A
…
20
A
3
°
2
°
20
A
…
40
A
2
°
2
°
40
A
…
400
A
NA
1.5
°
Пик
-
фактор
:
≤
3
≤
3
при
300 A
≤
2.5
при
400
A
Typical Bandwidth: 5 Hz to 10 kHz
Рабочее напряжение: 1000 Впеременного
напряжения (действ. значение), всоотв. сEN61010
Common Mode Voltage: 1000 V ac rms from earth ground, in
compliance with EN61010
Input Load Impedance (of host instrument): > 1 M in
parallel with up to 47 pF
Maximum Non-destructive Current: 1000 A
Duty Cycle: 0.5 A to 400 A continuous
Influence of Adjacent Conductor: < 9.0 mA/A
Influence of Conductor Position in Jaw Opening: ± 1.0 %
of reading + 0.05 A
Основные характеристики
Длина соед. кабеля: 2.5 м
Макс. Диаметр проводника: 32 мм
Температура хранения: -20 °C … 60 °C
Рабочая температура: 0 °C … 50 °C
Отн. влажность: 10 °C … 30 °C: 95 %
30 °C … 40 °C: 75 %
40 °C … 50 °C: 45 %
Температурный коэффициент: 0.01 % X (заявленная
точность)/ °C (< 18°… >28°C)
Altitude: Operating: 2000 m; 2000 m to 4000 m, derate
category rating to 1000 V CAT II/600 V CAT III, Non-operating:
12000 m
Dimensions: 150 x 70 x 30 mm
Weight: 114 g
Совместимость соборудованием
The i400s is compatible with any Fluke Multimeter or any other
current measurement device that has the following features:
• BNC or Banana inputs
• Input accuracy of 2 % or better to take full advantage of
the accuracy of the Current Clamp.
• Input impedance of > 1 M in parallel with up to 47 pF
Measurement Considerations
• Center the conductor inside the Current Clamp jaw.
• Make sure the clamp is perpendicular to the conductor.
• For optimal reading, make sure the conductor is
positioned between the alignment marks on the jaws of
the Current Clamp.
Observe the following guidelines when making measurements:
• Avoid taking measurements close to other current-
carrying conductors.
Применение
To use the i400s, refer to "Measurement Considerations" and
Figure 1:
1. If necessary, add a banana plug to the BNC connector
on the i400s.
2. Connect the clamp cable to the instrument. If using an
adapter, use the common and volts inputs of the meter
and switch it on.
3. Make sure the clamp and the measurement instrument
are set to the proper range. Use the range select
switch on the clamp.
4. The arrow on the top of the clamp must face towards
the load of the circuit.
5. Connect the current clamp jaws around the conductor
to be measured.
Предупреждение
Во избежание получения травмы, держите клещи,
размещая пальцы до ограничителя Рис. 1.
Рисунок
1.
i400s
Setup