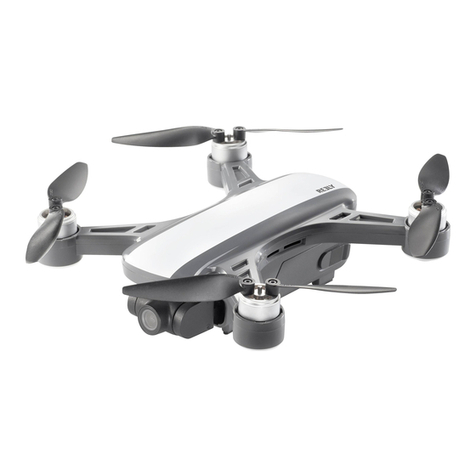
Fly Dragon FDG30 User manual

FDG30 Mako Shark mapping survey VTOL UAV
User-Manual V1.0
CHENGDU FLYDRAGON AVIATION TECH CO., LTD

Purpose of this manual
This is the user manual of FLYDRAGON FDG30 VTOL UAV,
This user guide explains in detail how to install, configure, and use the FDG30
VTOL UAV drone, and use the UAV GSC ground station software to perform video
control-free operations on the FDG30 VTOL UAV.
Experience Requirements
To better use the FDG30 VTOL UAV system, FLYDRAGON recommends that you
read this user guide carefully before using this product. If you are not familiar with
the principle of the FDG30 VTOL UAV system, please contact us for relevant
technical consultation and training.
Disclaimer
Before using this product, please read this manual carefully. The information, data,
illustrations, etc. contained in this manual only represent the technology currently
mastered by our company. The company is not responsible for any loss. The
company reserves the right to change the function, performance, technical
specifications, and manufacturing process of the product without prior notice.
Technical and service
The FLYDRAGON website has opened the "Service and Download" section. If you
have any questions, you can pass the "Feedback" Leave a message, or directly call
the technical consultation phone: 028-82143396, we will answer your questions
in time.

1. Product introduction
FDG30 Mako Shark allows you to conduct small- and large-scale aerial surveys
with extreme data quality and cost savings at a significant time.
1.1 KEY FEATURES
HIGH EFFICIENCY. LONG ENDURANCE
360 mins endurance and up to 65 km² coverage per flight.
FDG30 Mako Shark is characterized by an ultra-efficient aerodynamic design and
can reach 360 minutes of endurance with its payload to cover large areas per
flight with low cruise speed of 18 m/s. With advanced power management and
superior navigation algorithms, the FDG30 Mako Shar can accurately map a
region of 65 km² at a scale of 1:500(270 km² at a scale of 1:2000). Mapping
highway corridors and surveying open-pit mines are now within reach in a single
flight.
TRUSTED BY AERIAL SURVEY SPECIALISTS
Triple redundant flight control system and safer operation.
The FDG30 Mako Shark is packed with the latest aviation technologies. High
accuracy GNSS system, a triple IMU system, 5 safe return to base strategies, and
safety monitoring checks guarantee safe flight operations and reliable aerial
survey results.
REDUCE OPERATING COSTS AND SAVE TIME
No more systematic ground control points (GCP) required.
The FDG30 integrates a high-accuracy GNSS RTK / PPK module that has up to 10

Hz differential data update rate. With its advanced GNSS PPK data processing and
photogrammetry software, the final mapping results are accurate to the
centimeter level. Avoiding the establishment of ground control points can also
save up to half of the time required for the project. Faster data acquisition with a
smaller field crew significantly increases the return on investment of the mission.
SWAPPABLE AIRBORNE SENSORS
Switching cameras in the field is fast and simple.
The FDG30 Mako Shark is not only available with an orthophoto camera for
producing orthophoto maps, but also with optional sensors, such as an oblique
camera for 3D modeling applications, to address the most demanding mapping
and topographic surveys. The load bay design supports a wide range of sensors,
including orthophoto cameras, half-frame and full-frame oblique cameras,
medium-frame cameras, multispectral cameras, or lightweight laser scanners, and
the ability to quickly switch between them.
The application scenarios of the FDG30 Mako Shark UAV system are based on the
application of various large-area topographic surveys (water conservancy,
highways, railways, various scale topographic maps), electric power site selection,
engineering construction / patrolling (roads and bridges) and other private
surveying and mapping industry units and related applications. Applications in
universities and institutions in the field of scientific research.

1.2 UAV GCS software installation
2. Safty flight
2.1 Connect to UAV
Connect the battery to the aircraft and enter the aircraft self-check;
★Attention
After the aircraft is assembled and the battery is connected, the aircraft will
automatically calibrate each sensor and the autopilot will detect it autonomously.
Do not shake the aircraft at this time (shaking the aircraft will cause the gyro
calibration to fail or cause errors)

Click on "Connect Drone";

The ground station software will automatically connect to the aircraft and upload
aerial survey tasks; the aircraft status can be monitored in real time through the
aircraft indicator lights, the following table shows the aircraft status under different
indicator lights;
Light status Drone status Remark
Red light
flashes quickly
Aircraft enters IMU calibration
Red light
Flashes slowly
After the aircraft is calibrated,
enter the waiting position
Green light
flashes slowly
The aircraft has been positioned
successfully, waiting to be
unlocked
Unlock via UAV ground station
before takeoff
Green light flashes
quickly
The aircraft is unlocked
successfully, waiting for takeoff
The VTOL drone will automatically
take off after idling for 5 seconds
☆hint:
If the connection fails, you can do the following to reconnect (try in sequence):
1) Manually select the serial port
2) Power on the aircraft and disconnect and reconnect the digital USB
3) Try to replace the data cable and restart the computer
4) Replace the computer (there are a small number of computers that cannot be
connected due to lack of system components or damage to system components,
you can try to replace the computer, or reinstall the system, please try to install
the genuine Windows system)
5) If the connection still fails, please contact the manufacturer

2.2 Pre-flight inspection
Select "Check" in the control bar at the bottom of the ground station,
The ground station will pop up a check list window, check in the order of the list
and check the checked rows, then click "Next" to complete all checks.

2.3 Takeoff Tutorial
2.3.1 Set Landing Point
After completing the check, the "Check" button becomes "Set Landing Point"
Place the aircraft at the landing point (it must be far away from the propeller), click
"Set landing point", and click "OK" to complete the landing point setting;
2.3.2 Unlock
After completing the "Set Landing Point", the "Setting Landing Point" button
becomes the "Unlock" button;
Judge the status of the aircraft by the flight instrument display on the flight tab
on the right side of the ground station or the change of the indicator light of the
aircraft; when the status of the flight indicator flashes green slowly or the flight
instrument on the ground station displays "ready to unlock", you can click
"Unlock", when the navigation light flashes green quickly or the ground station
flight instrument area shows that the unlock is successful, you can take off; please
press the pop-up warning to check the drone. After confirming that the check is
completed, the ground station will pop up the task information preview window.

2.3.3 Take off
After unlocking, the propeller will start to idle immediately, and after idling for
5 seconds, it will automatically perform vertical take-off.
2.3.4 Monitoring and control
(1) Flight monitoring The flight status of the aircraft can be monitored in real time
through the ground station. The status panel next to the aircraft icon in the map
area displays the flight airspeed, altitude, mode, power and signal, etc. The small
arrows and numerical values next to the aircraft icon indicate the wind direction
and direction. In addition, you can view more detailed information on the flight
tab on the right. flight data.
(2) Flight control In the flight control bar of the ground station, you can send
commands to the UAV to control its flight at any time. In addition, you can directly
drag the waypoint in the map area of the ground station to control the flight path.

★Attention
The waypoints, aerial survey points and flight paths of the aircraft are stored in
the UAV flight control system. If the ground station loses contact with the aircraft,
the aircraft will perform the flight mission according to the original aerial survey
plan by default.
2.3.5 Landing
Warning
During the landing of the aircraft, the user is responsible for ensuring the flight
safety of the drone. Therefore, it is necessary to keep monitoring the flight and
landing of the drone to ensure that there are no obstacles in the landing
clearance area.
After completing the aerial survey task, by default, the aircraft will return to the
landing circle point and automatically start the landing procedure, and land
vertically at the set altitude above the landing point according to the original
landing path. After the landing is completed, the aircraft will automatically lock.

3. Aerial survey mission planning
The aerial survey operation requires strict compliance with local laws and
regulations, and it is strictly forbidden to set the aerial survey area in the no-fly
area. Users need to do a field inspection of the operation area in advance to
understand the local topography, urban layout and population density, etc., to
provide a basis for the selection of take-off and landing sites and route planning.
The following figure shows the UAV GCS aerial survey mission planning process:
3.1 Basic setup process
3.1.1 Set the aerial survey area
Method 1: UAV GCS planning aerial survey area
To find the aerial survey area on the map, it is recommended to use the "Search
Location" function in the "UAV" tab to find the location of the aerial survey area.

Click the aerial survey tab on the right, a shaded polygon area can be seen in the
map display area of the ground station, click and drag the shaded area to the
desired aerial survey position, click the edge of the polygon to increase the
vertices of the polygon, and adjust by dragging the vertices of the polygon The
scope and shape of the aerial survey area.
⚫hint:
If the shadow area is not displayed in the map area after clicking the aerial survey
tab, you can right-click on the map area and select "Replace the survey zone here".
Method 2: Import the KML file to generate the operation area If the aerial survey
area has been planned on the Google Earth software, you can directly import the
KML file at the ground station to generate the operation area. Specific operation:
Click the "UAV" menu bar, click "Import KML of survey area", select the KML file,
the map area will display the KML overlay area, right-click in the area and select
"Create aerial survey area from this KML file" to create an aerial survey area .
Delete KML: Right-click on the KML area and "delete this KML area" to delete the
KML area.

3.1.2 Set the aerial survey parameters
In the aerial survey tab, set the resolution, flight height, route angle and overlap
rate according to the aerial survey requirements. The flight altitude and the
resolution affect each other. The larger the ground distance represented, the
larger the single operation area.

⚫ hint:
Increasing the horizontal overlap rate increases the density of routes, and the
operating area per unit time will decrease.
Recommendation: The default heading overlap rate is 75%, and the lateral overlap
rate is 60%. If you want to achieve higher quality results, it is recommended that
the vertical overlap rate is not less than 80%, and the horizontal overlap rate is not
less than 65%.
Introduction to using the terrain function: Check the "Use terrain" function, the
ground station will automatically download the terrain elevation data and adjust
the minimum ground clearance of each route to the target flight height. This
function can ensure flight safety in areas with large height differences and avoid
accidents such as collisions with mountains.
⚫ Suggest: In areas with large terrain fluctuations, select the "Use Terrain"
function of the ground station, and the ground station will automatically plan the
altitude of the route according to the terrain.
Automatically generate waypoints
After setting the aerial survey parameters, you can learn the relevant information
of aerial survey operations in the aerial survey information data column and click
Generate Waypoint to automatically plan and generate aerial survey tasks.

Introduction to the intelligent low-voltage return-to-home function: The
flight controller comes with a low-voltage return-to-home function. The
intelligent return-to-home voltage will be calculated in combination with the
current return distance to ensure that the aircraft has enough power to land safely
without worrying about flight accidents due to insufficient power.
Introduction to terrain self-checking function: After the aerial survey task is
generated, the ground station will automatically self-check according to the
terrain. If the altitude difference between the route and its location is less than
50m, the route will display a red danger warning, requiring adjustment of the
route.

3.1.3 Export or load tasks
After the aerial survey task setting is completed, click "Export Task" in the UAV
menu bar, select the save path to save the aerial survey task, and also select "Load
task" to load the aerial survey task and use it directly.
⚫ Suggest: Pre-store the map of the operation area in the ground station
software in advance and save the route plan in the computer in advance to reduce
the time for field tasks.
The actual operation needs to reasonably adjust the route according to the actual
terrain, surrounding buildings, human and animal activities, etc.

3.2 Advanced features of aerial survey planning
3.2.1 Multi-region task generation
The UAV GCS ground station supports flying multiple independent areas in the
same mission. The operations are as follows: After generating an aerial survey area
task according to the above operation, you can click the aerial survey tab on the
right again, drag the aerial survey shadow area and adjust the polygon shape
(same as above), Set the aerial survey parameters (same as above), click to
generate waypoints, the ground station will prompt "whether to clear the existing
waypoints", click "No", this mission will be superimposed on the existing mission,
and the drone will execute the previous one After the block, continue to execute
the task of this block.

▼Attention
This function is different from flying in different sorties. The planned multi-
measurement area tasks will all be uploaded to the UAV waypoint list, and the
UAV will automatically execute the waypoint tasks in sequence until all the
waypoint tasks are completed.
This function can also be used for mission planning of survey areas with large
elevation changes, and the survey area is divided into multiple aerial survey datum
planes for flight to meet the requirements of the internal industry.
3.2.2 Large-area aerial survey mission planning:
A large-area survey area can be directly planned as a task, such as a survey area
of 50 square kilometers, one flight is planned, and the planned operation time is
6 hours, which can be used as a task flight. The low-voltage automatic return-to-
home function of the flight control enables the drone to return to home
automatically when the battery is low. After replacing the battery, there is no need
to re-plan. After unlocking, it can automatically resume the task and execute the
unfinished task until the task is completed (after unlocking). The ground station
will remind "whether to continue the unfinished task", click "Yes", if the task has
been re-planned or re-executed another task, no need to resume the task, click
"No").

3.2.3 Save and load sub-division measurement areas
Save sub-division measurement areas independently, flexibly combine and load,
which can be used for task assignment of multiple operation groups and can also
be used for operation planning by period.
When planning a mission, you only need to save each survey area separately.
During the actual flight, you can flexibly combine and load the independent survey
areas into the same task. The combined loading method is the same as above.
When loading multiple survey areas, the ground station will remind "whether to
clear Existing waypoint", click "No", the new survey area task will be superimposed.
3.2.4 Export KML to google earth:
After the mission is generated, you can select "Export Route" in the UAV menu
bar to convert the UAV GCS mission into a kml file and import it into the 3D flight
plan in Google Earth.
Table of contents
Other Fly Dragon Drone manuals

