Flybar 1200 User manual

Instruction Manual
Flybar 1200

Unpacked your Flybar 1200? Good. Can’t wait to jump on? Not so fast. Before using your Flybar
1200, please take a minute to read through these instructions carefully.
SAFETY
Use your head—play hard, but play safe. The Flybar 1200 puts a lot of power under you.
Using it safely is mostly common sense. It boils down to three rules:
1Wear a helmet.
Don’t even think about using the Flybar 1200 without one. If worn properly, helmets prevent
hundreds of serious head injuries every year. Choose one that’s been approved by the American
National Standards Institute (ANSI), and make sure you adjust it correctly. The helmet should
fit snugly—if you can easily twist or push it out of position, the straps are too loose. It should sit
squarely atop your head (versus tilted back) to protect your forehead in case of a forward fall.
2Check for hazards before you start.
Never jump without making sure that the surface is safe—solid, flat, clean, well lit, and dry. The
best bet: concrete. Stick to outdoor areas that are free of hazards and give you plenty of room to
maneuver (you’ll need several yards of clear surface on all sides). Define a field of action before
you start a session, and have the discipline to step off the Flybar 1200 if you near the edge.
3Hazards to watch out for:
• Traffic: Steer clear of streets, parking lots, and any other area vehicles may use. Maintaining
your balance (and attempting challenging moves) is going to require your full attention.
It’s about focus—not about trying to dodge SUVs.
• Humans: Using your Flybar 1200 too close to other people is dangerous and rude. There’s
no way to predict how they’ll react, so back off. Respect their safety and their space.
• Slippery Ground: Don’t try to jump on a surface which is wet, oily, or even lightly covered
with sand, gravel, leaves, or litter—you’ll greatly reduce the traction of your Flybar 1200’s
tip. You want to maintain an upright posture, not skid off-balance.
• Overhead Obstacles: Once you master the Flybar 1200, it’s possible to bounce so high
that the top of your head will be 10-to-12 feet in the air. Even novices, however, should
check for overhead clearance all around the field of action.
• Steep Inclines: Remember, you want to maintain a position perpendicular to the ground.
If the surface slopes sharply, that’s just not possible, and it’s far more likely you’ll skid
sideways and fall.
• Soft or Weak Surfaces: At peak compression, the Flybar 1200 can pack over 1000
pounds of force. Don’t jump on plank flooring, lawns, or any other surface you wouldn’t
be confident driving a car across.
• Holes and Uneven Ground: You’re in greater danger of skidding or experiencing a
jarring drop if you use your Flybar 1200 on any surface with holes (e.g. storm grates)
or irregularities such as speed-bumps or curbs.

ASSEMBLY
For the most part, your Flybar 1200 comes pre-assembled. All you have to do is attach the handlebar
assembly cap to the top of the outer shell. Use the included 5mm Allen key and attach the handlebar
clamp to the metal plate by tightening the four bolts on the top cap into the corresponding holes on the
metal plate. Be sure to remove the four black boots that are used to keep the bolts in place during shipment.
Bolts are to be tightened incrementally in a proper order to ensure a firm grip on the handlebars.
SETUP AND ADJUSTMENT
Before using your Flybar 1200, you’ll need to adjust it to suit your weight, skill level and goals. This involves two key decisions: how many
thrusters to engage and how long to set the piston. Before we go any further, remove the shell. Use the end of the Flybar Tool marked “A”
to loosen and remove the six bolts near the bottom of the shell. Now, take a good look at the Flybar 1200’s guts.
Stay within your abilities
With experience and skill, you’ll be able to react to pretty much any situation reflexively. But skill develops slowly, so take your time. As you put in
the hours, you’ll become instinctively aware of how much traction you have, how high you’re going to bounce, how to correct for balance, and
where you’re going to land. Be prepared to bail out at any time.
4
1
2
3
Partially tighten bolt 1, then 2,
then 3, and then 4. Repeat the sequence
until all the bolts are fully tightened.

How Many Thrusters to Engage?
Your Flybar 1200 is equipped with twelve thrusters—the rubber rods anchored to the lower mount. The top end of each thruster is designed to be
hooked —or “engaged”—onto the upper mount in order to power the Flybar 1200. By choosing how many thrusters to engage, you determine the
force of the Flybar bounce. Note: For safety reasons, always use your Flybar 1200 with at least four thrusters engaged.
We recommend you start by engaging one thruster per twenty pounds of weight (i.e. if you weigh 160 lbs., engage eight out of the 12 thrusters.)
If you engage too many thrusters for your weight/ability, you’ll encounter too much resistance. If you engage too few, you’ll be able to “bottom
out” (i.e. push the foot pegs to the ground) without even tapping your full strength. Either way, your bounce height will suffer. The ideal setting
should allow you to nearly bottom out while jumping with your full strength.
How to Engage and Disengage Thrusters
When the T-shaped hanger at the top of a thruster has been hooked into its cradle in the upper mount, the thruster is “engaged.” Otherwise, the
thruster hangs slack. Engaging and disengaging thrusters is relatively simple, but it may take some practice to get these maneuvers down.
To engage a thruster: (1) Insert the end of the Flybar Tool marked “B” in the hanger’s access slot. The tool functions as a hook. (2) Using the tool,
lift the hanger up and over the cradle sill in the upper mount. (3) Then lower the hanger into the cradle, and (4) withdraw the tool.
To disengage a thruster: Perform steps 1-4 of Engaging/Disengaging Thrusters in reverse order. Insert the “B” end of the Flybar Tool into the
hanger’s slot. Lift the hanger up and out of the cradle, then let the thruster slacken, and withdraw the tool.
Note: Special slots in the Flybar 1200’s shell allow experienced users to engage and disengage thrusters even when the shell is in place. At first,
however, you’ll want to perform the operation with the shell off.
Engaging/Disengaging Thrusters – Shell Off
Engaging/Disengaging Thrusters – Shell On

Which Piston Length is Right for You?
Piston Length can be set in nine positions, from seven inches to eighteen inches. Generally, the longer you
set the piston, the higher you’ll bounce.
That’s because most people can achieve a peak bounce height (measured from the foot-pegs to the ground)
that’s twice the piston length. In other words: if the piston is set at 12 inches, you’ll end up with your feet 24
inches above the ground during a peak bounce. Of course, some athletes can achieve bounces four times the
piston length. It depends on skill and strength (not to mention the number of thrusters engaged).
For novices, we recommend a shorter piston length for greater control, although even advanced users may
prefer a shorter piston length for certain tricks or precision maneuvers. You’ll likely want to increase the pis-
ton length as your skill and confidence grow.
Setting the Piston Length
First, you need to loosen the friction clamp and the locking screw that fix the piston into place.
Both of these are part of the upper mount.
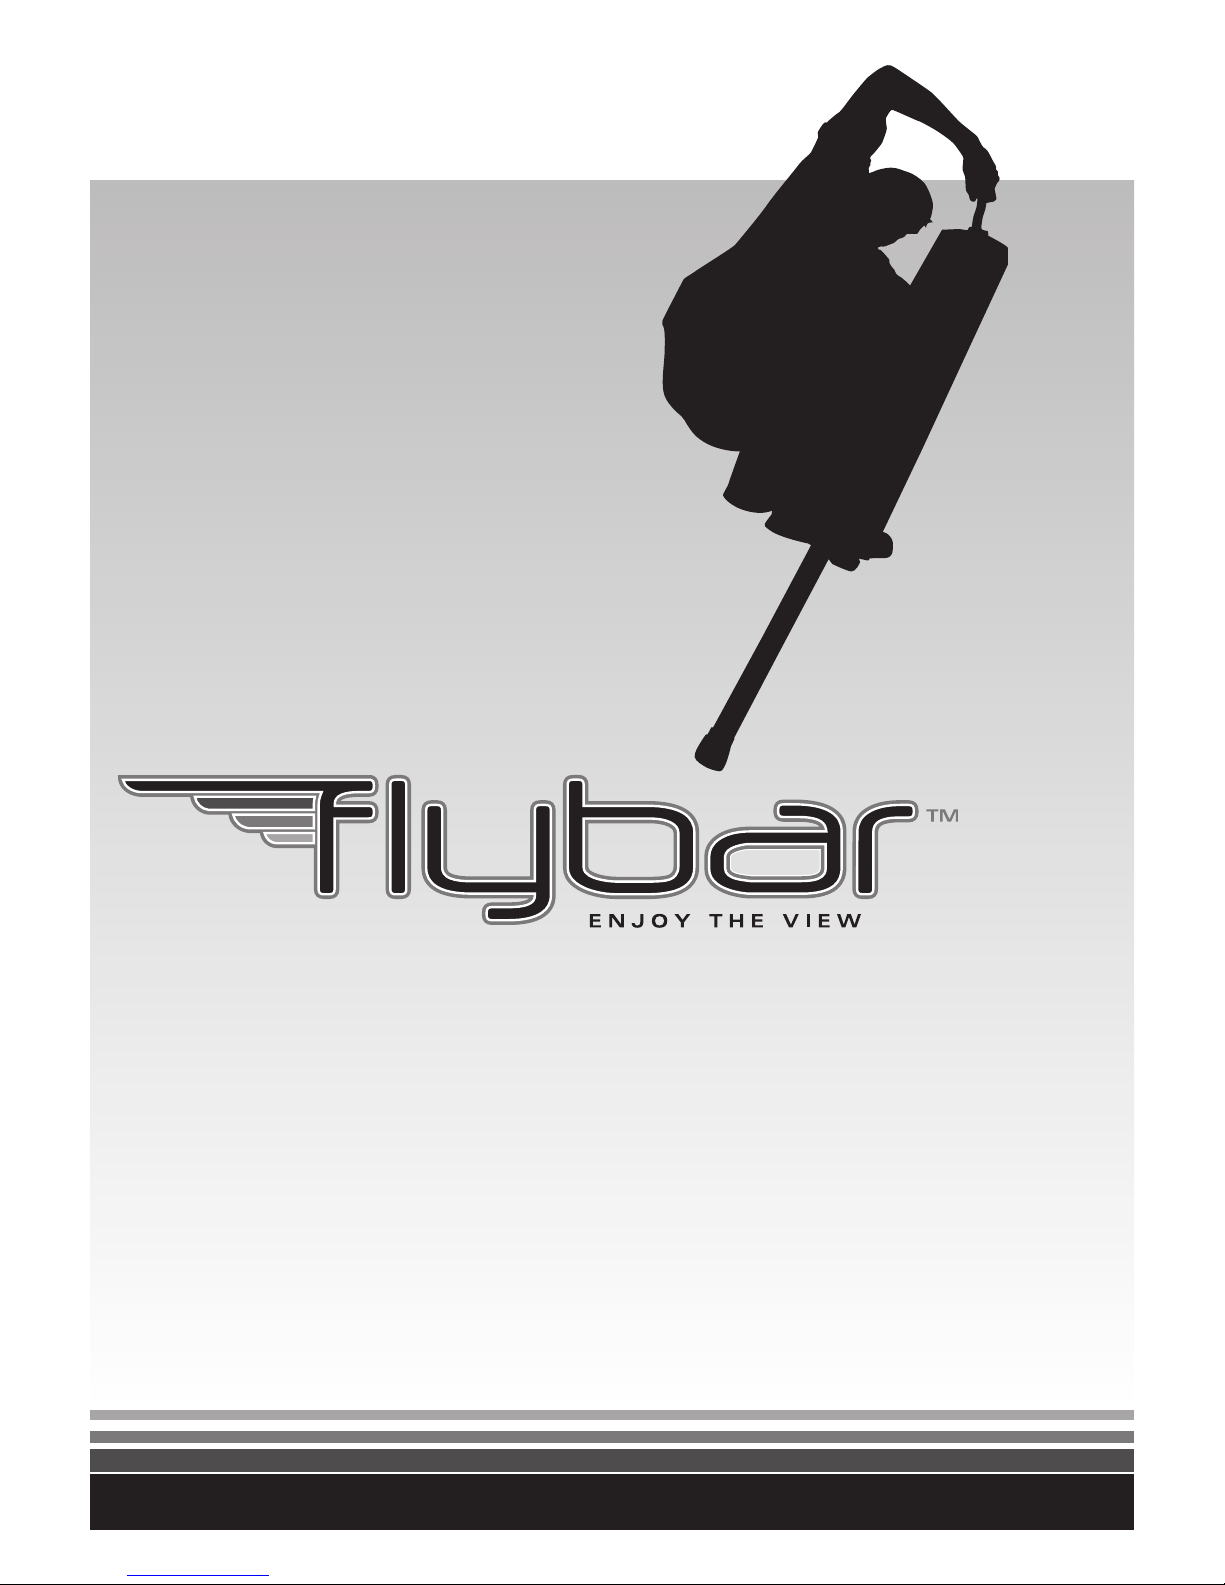
Use the end of the Flybar Tool marked “A” to loosen:
1: the locking screw (the one in the middle). Note: When loosened enough to disengage from the
piston, the head of this screw will project into the hole in the shell, preventing use of the Flybar.
2: the two screws that secure the friction clamp (the ones on the sides). Loosen these just
enough to permit the piston to slide freely (less than one complete turn); then, as you adjust the piston extension, you should hear a click each time
the spring-loaded locator pin (visible in the upper mount) snaps into one of the nine holes that determine piston-length. If the clamp screws are
loosened too much the locator feature will not work.
Note: Only the nine settings, which permit the locking screw to engage a piston
adjustment hole, can be used; otherwise, the Flybar 1200 will not be safe to use.
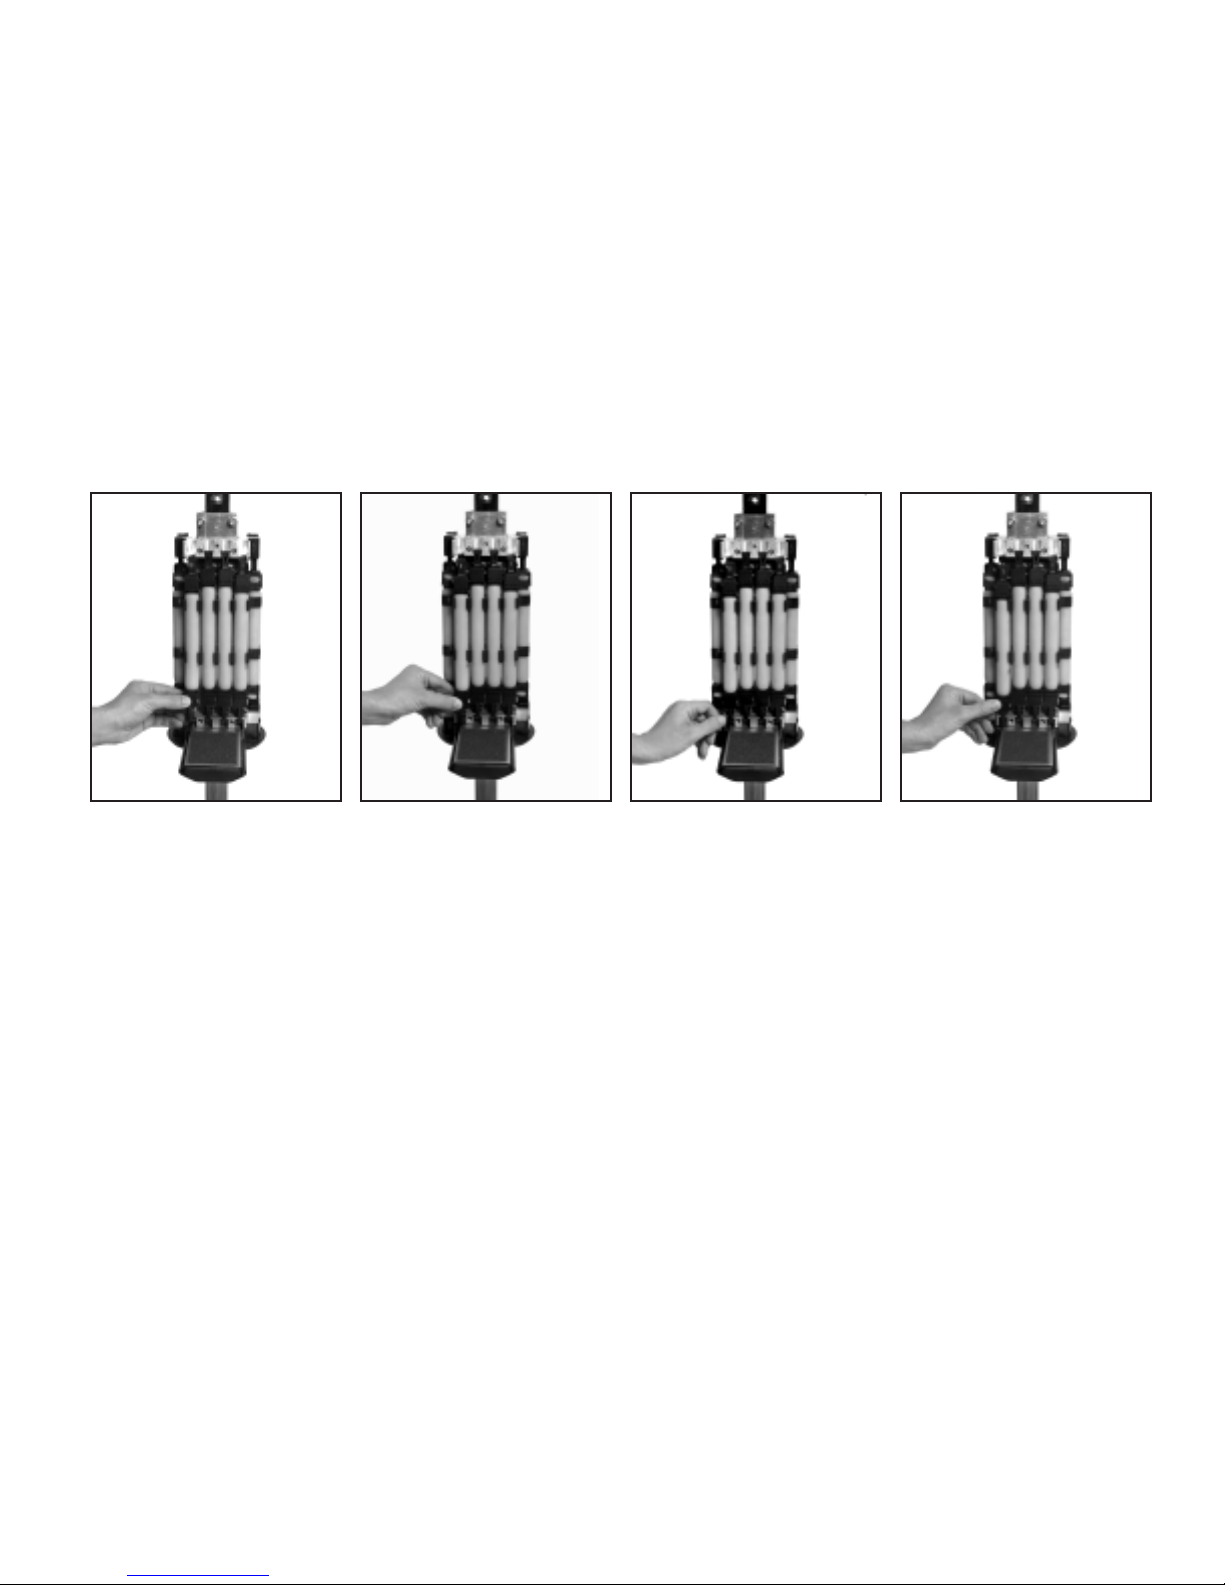
Once you’ve chosen a piston length—and heard the spring-loaded mechanism click into place—you need to secure the piston by tightening:
1: the locking screw. If properly located at a piston hole, it will screw in easily until its head is well clear of the Flybar shell. Do not force the screw:
if it does not screw in easily, adjust the piston position slightly to find a hole.
2: the two clamp screws. These should be tightened firmly, to a torque of at least 3 foot-pounds.
We really can’t stress how important it is to tighten both these devices, as directed.
It is not safe to use the clamp without the locking pin, and vice versa.
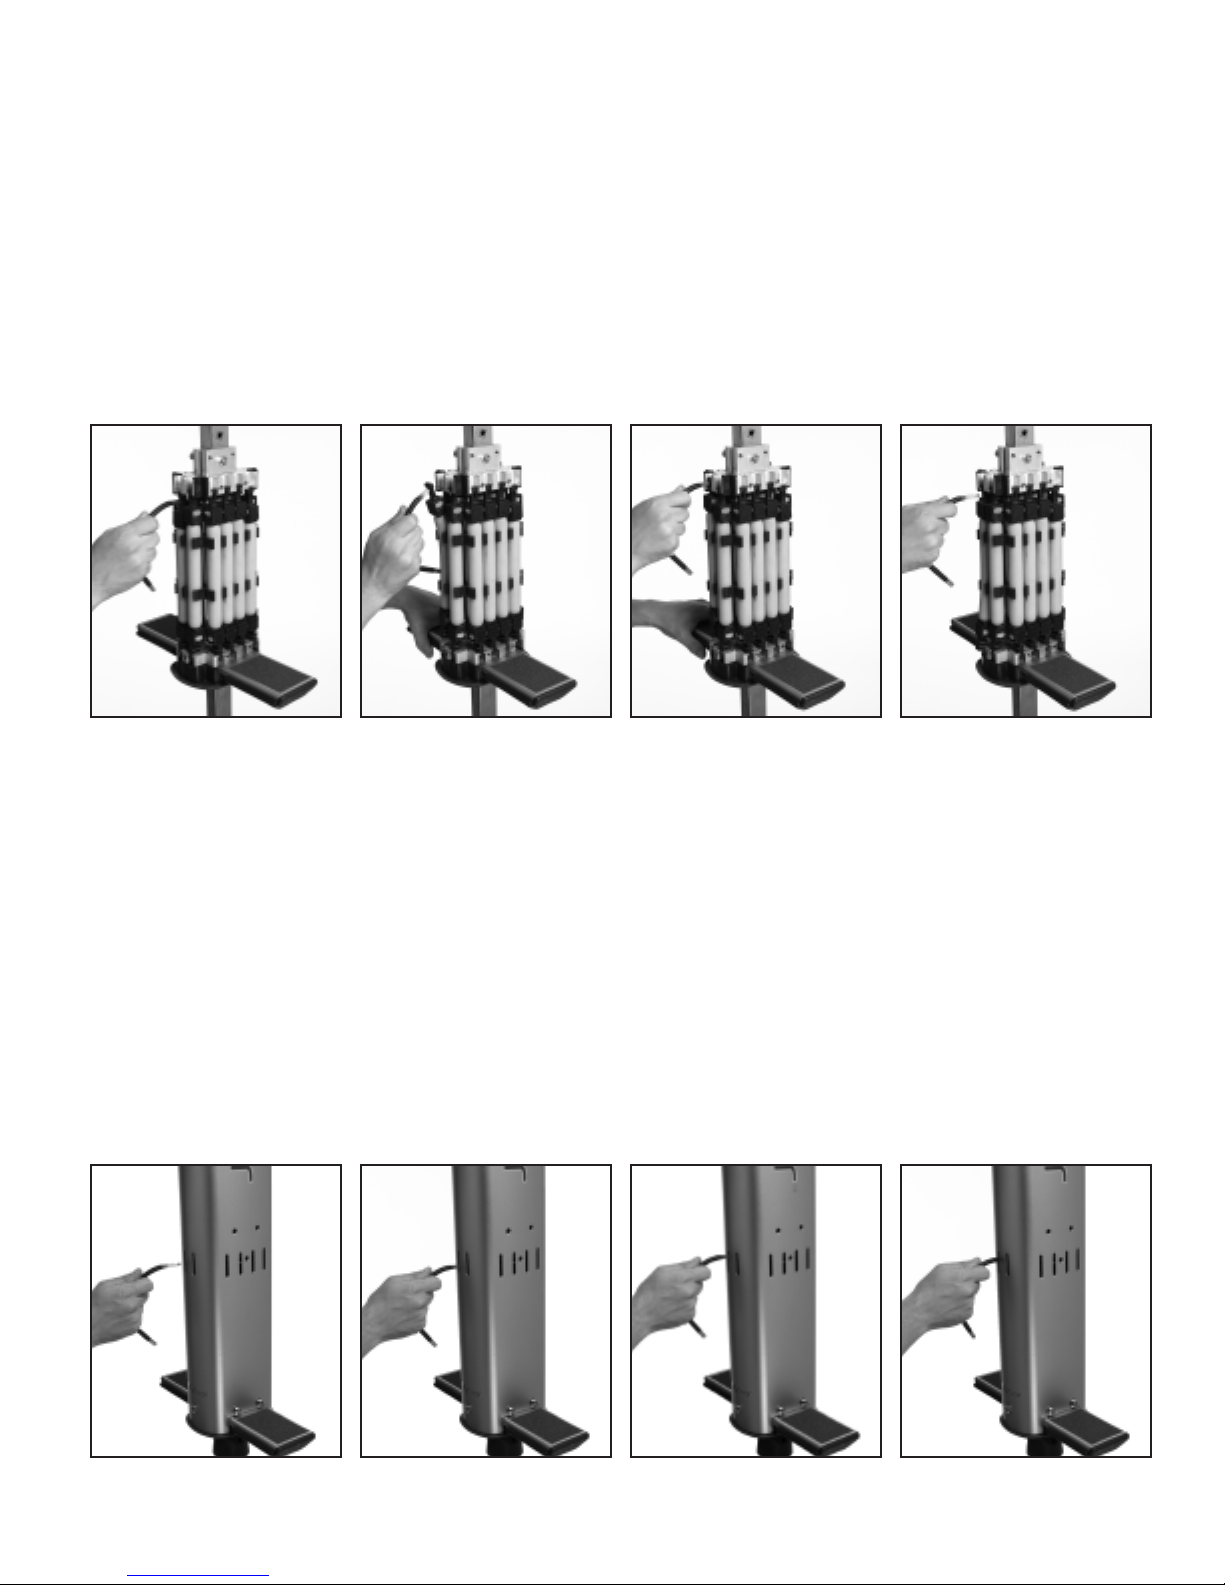
Note: The Flybar 1200’s shell has been designed with round access holes on one side to allow experienced users to adjust piston length even
when the shell is in place. First-time users, however, should definitely perform the operation with the shell off. When replacing the outer shell of
the Flybar 1200, make sure to have the piston adjustment access bolt heads facing the corresponding access holes in the outer shell.
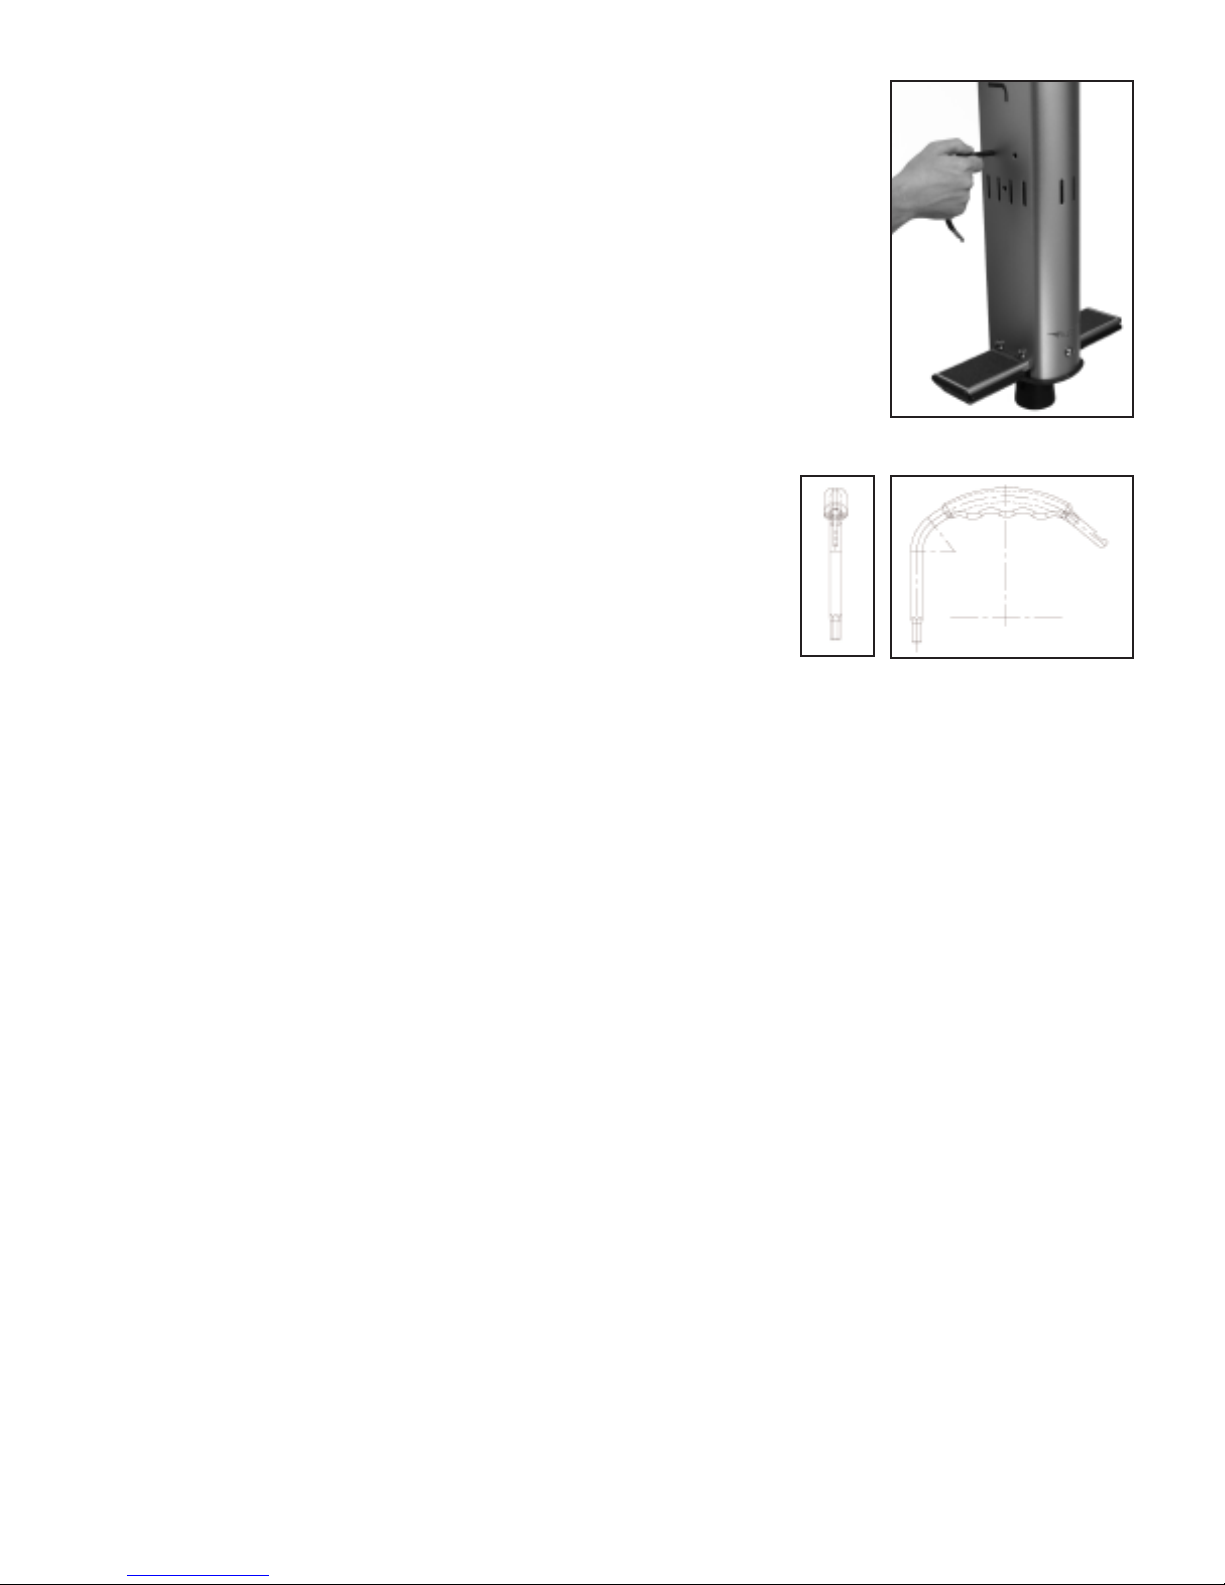
How to Adjust the Handlebars
While most of you should be fine using the Flybar as it comes out of the box, shorter users may find it more comfortable if they invert the position
of the handlebars—which lowers them by 2.5”. Use the “A” end of your Flybar tool to loosen the four screws set deep into the cap. (A couple of
turns should suffice.) Then twist the handlebars down and retighten.
MAINTENANCE
It’s important to examine your Flybar 1200’s mechanism periodically to check that all its parts are in good working order. First, remove the shell by
unscrewing the six screws around the base, and sliding it off.

Note: Whenever replacing the Flybar 1200’s outer shell be sure to have the 6 bolt holes in the shell properly
aligned with their corresponding threads on the Flybar 1200 core. This will guide the bolts properly into the
Flybar 1200 core and prevent the threads from stripping. Do not force the bolts - if they do not screw in easily,
remove and realign them.
Thrusters
If engaged, a thruster will naturally lose a little elasticity over time and stretch out. The Flybar 1200 has been
designed so that you can reposition aging thrusters to ensure they still deliver optimal performance.
When to reposition a thruster: If the hanger, when disengaged, brushes against the upper mount, it’s time to
make the adjustment.
How to reposition a thruster: You’ll notice that the bottom of each thruster is attached to a plastic anchor
equipped with three flanges. Initially, the lowest of these three flanges is used to engage the thruster in the
lower mount. Grip the anchor and disengage it by pulling outwards. Now, re-engage the anchor. Shift it down
to the next-lowest flange and push it back into place.
Replacing a thruster: If, for any reason, you need a new thruster, contact your dealer or www.flybar.com.
Bearings: The Flybar 1200 uses sliding plastic bearings designed to last for several years, but inevitably
they will wear somewhat with use. To prolong bearing life, try to keep the piston clean of sand and grit. If you
notice that your piston has begun to wobble seriously from side to side, you may need to replace the bear-
ings. Contact your dealer or www.Flybar.com for a bearing-replacement kit, including instructions.
Skid Plates: It’s not always the tip that hits the terrain first. Advanced users—or reckless novices—will
sometimes land on the foot pegs, intentionally or not. The bottom of each foot peg is equipped with a skid
plate to protect the Flybar 1200 (and the terrain), but if the plate has cracked, or has worn to the point where
its screwheads are exposed, it needs to be replaced. Contact your dealer or www.Flybar.com for a skid-plate
replacement kit, including instructions.
Shock Pad: The shock pad is the rubber cushion attached to the top surface of the Flybar 1200 core. If
this pad becomes visibly damaged it should be replaced. Order a replacement kit from your dealer or from
www.flybar.com; instructions will be enclosed.
Tip: The Flybar 1200’s rubber tip is designed for heavy-duty use, but if it cracks or becomes excessively worn,
it’s time to toss it. Order a replacement kit from your dealer or from www.flybar.com; instructions will be enclosed.
Repositioning Thruster Anchors

Lubricants: We don’t recommend using lubricants, but if you want to experiment, choose a dry
graphite lubricant. Oil- and grease-based lubricants can carry grit up into the mechanism, which tends
to wear out the bearings.
Storing Your Flybar 1200: If you’re are planning to store your Flybar 1200 for a significant
period of time, disengage all the thrusters (they’ll last longer) and store it in a cool, dry place where
it’s unlikely to experience extreme temperatures.
THE BASICS: HOW TO USE THE FLYBAR 1200
1Jump on. Using the Flybar 1200 is mostly intuitive, and the best way for novices to learn is
to simply hop on. Initially, just focus on trying to keep your balance as long as possible.
2Try to stand correctly as you start bouncing: For the best results, hold the Flybar 1200 per-
pendicular to the ground (as vertical as possible, with no tilt) so its tip lands squarely on the
surface. Stand upright with knees bent, centering your weight over the piston. Hold the
handlebars in close to your body. As you improve, try leaning your chest over the handle-
bars for even better alignment.
3Learn to master balance. Good balance is really the key, so be patient. Focus on executing
small controlled hops in one spot until you can bounce, say, 25 times in a row. Ultimately,
you want to gain enough control that you can step off at any time and land on your feet.
4Now start plotting your moves. Once you’ve got balance down, try to control your trajectory.
Choose a landing spot and challenge yourself to place the tip accurately. (A hopscotch
court is idea for this).
5Go for it. What’s next? That’s totally up to you.
Just remember: Keep it safe.
TROUBLESHOOTING GUIDE
You’re bottoming out too easily
You can’t thrust the foot pegs more than
halfway down the piston, even during your
best jumps. (Ask a friend to check how much
of the piston is still showing; no more than a
few inches should be visible.)
If you hear a rattling or tapping sound from
inside the core
The piston seems to be sticking or grinding
Engaging additional thrusters and/or increasing
the piston length.
Disengaging some thrusters
Check the thrusters to see if they have
stretched out (their hangers may be rattling in
their cradles) and need to be repositioned.
Remove tip from piston, disengage all
thrusters, and slide piston up and out of the
core. Then shake your Flybar 1200 to dislodge
any foreign objects that may have been stuck
in the piston’s path.

For info on Flybar events, contests, and products
go to www.Flybar.com.
Designed in the USA
Made in China
Table of contents