Flycatcher Smart Sketcher 2.0 User manual

USB Power Plug
connection
The toy should be periodically examined
for potential hazardous parts to be repaired or replaced.
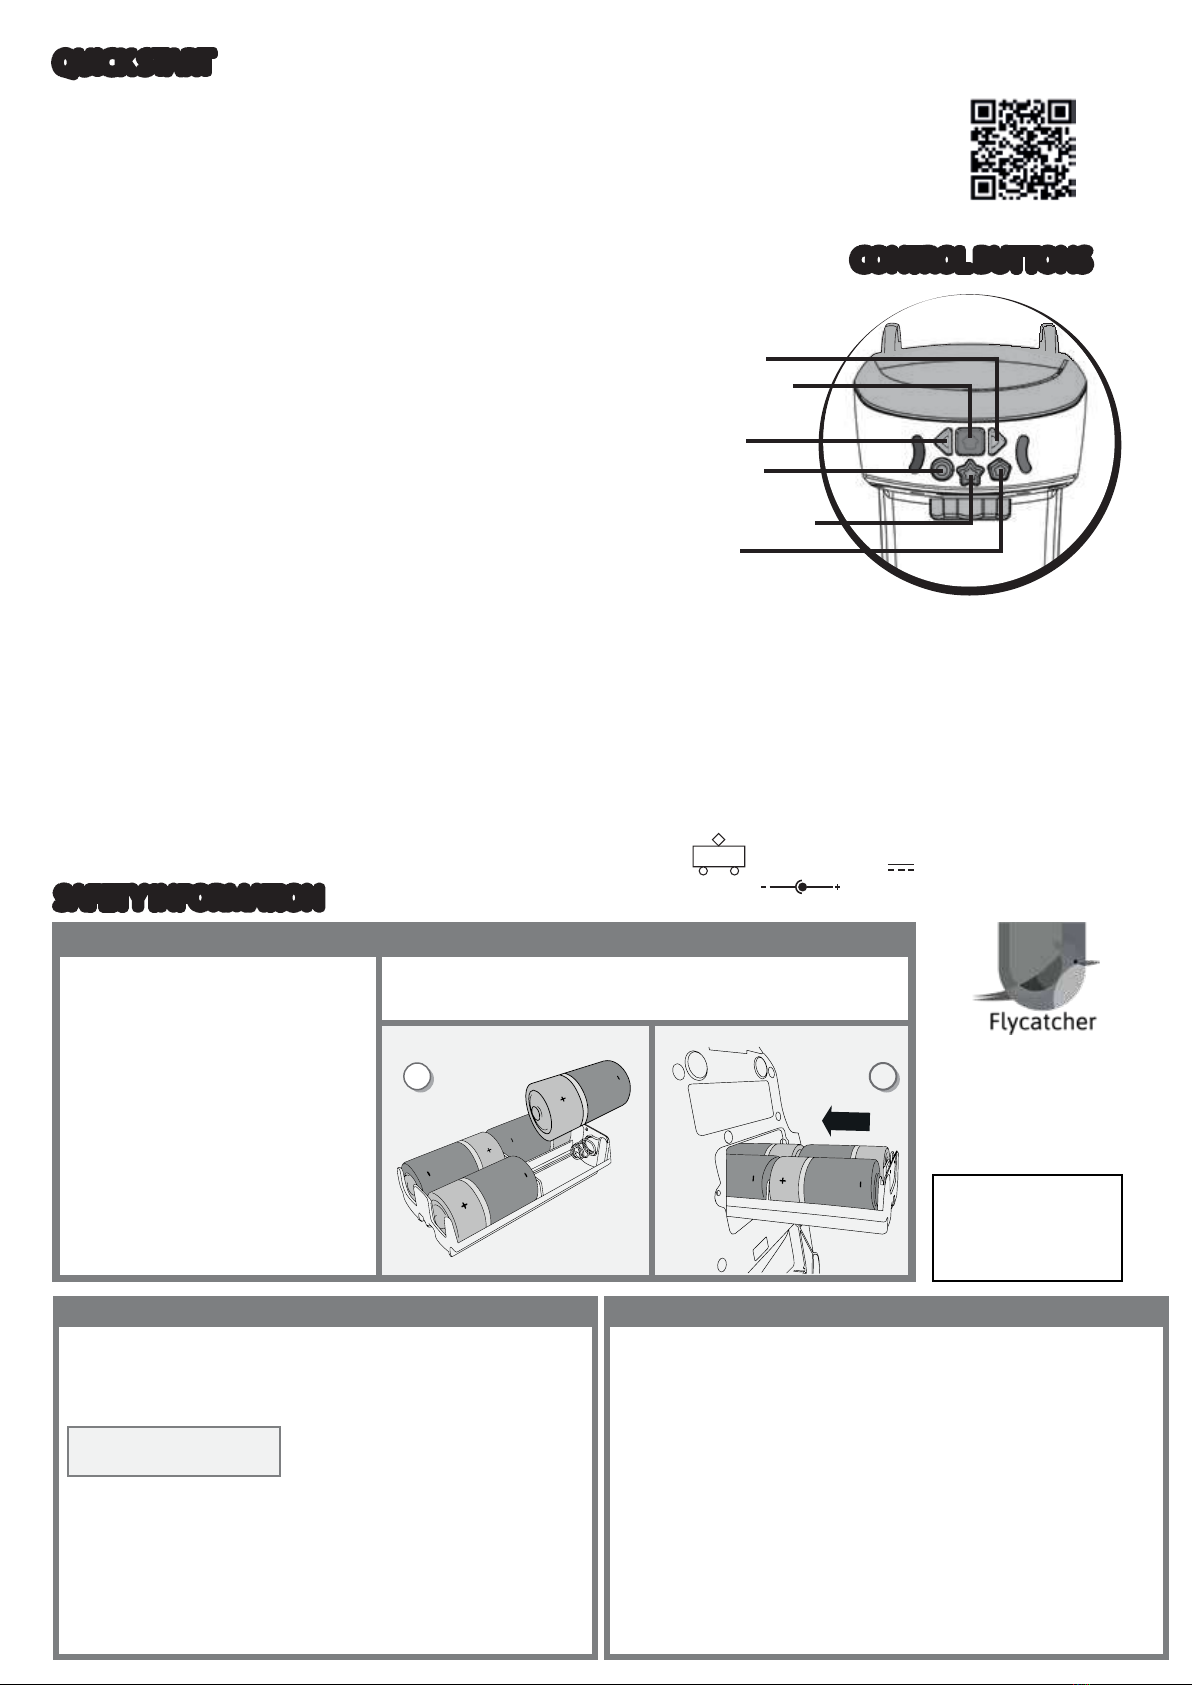
Control Buttons
Paper Holder
On/Off Switch (back)
*Battery Compartment (bottom)
Adjustable
Focus
Stability Legs
LED Indicators
Activity Cartridge
Slot
Activity Cartridge
Storage Compartment
CAUTION-
ELECTRIC TOY:
Not recommendedfor childrenunder 3 years of ages.
As with all electric products, precautions should be
observed during handling and use to prevent electric shock.
AC adapter:INPUT:100-240VAC, 0.3A MAX 50/60Hz;
OUTPUT: 5.9V 1.0A
1. Separate the projector head from the base unit.
2. Insert the head unit into the top of the base unit until you hear a click.
3. Plug the USB Power Cable (included) into the back of the unit and into a USB power
outlet (5V DC, minimum 1.2A). If you wish to use batteries instead, insert four D batteries
(not included) according to the directions provided. When using batteries, it is recommended
to enable "efficiency mode" by pressing the blue circle button for 2 seconds (see image).
4. Pull out the blue legs to stabilize the projector and create a paper holder.
5. Flip the Power Switch on the back to turn on the projector.
6. Insert the pre-loaded Activity Cartridge into the top of the projector.
7. After 10 minutes with no activity the projector light will
automatically turn off. Reactivate the light by using the buttons
in the app or on the projector.
For more fun, additional Activity Cartridges and accessories are available at:
https://www.flycatcher.toys/smart-sketcher-2
2s
SIMPLE SET UPSIMPLE SET UP
USER MANUALUSER MANUAL
Please retain this user manual for future reference
1 2
1. Download the “smART sketcher Projector” app on your mobile device or tablet.
2. Open the app and enable Bluetooth on your device.
3. If you haven’t registered yet: Click the “I have a smART sketcher” button
and follow the instructions to complete the one-time registration process.
If you have already registered: Click the “Login with Flycatcher ID” link.
4. Once the device is connected to the projector, choose your mode
of play: Learn to Draw (pre-loaded Activity Cartridge), or Trace Pictures
(taken from your own device).
5. Trace Pictures:
- Click the camera button (you will need to enable
permission for access to camera and photos)
- Select an image from your photos or take your own
using the in-app camera.
- Select a filter.
- Drag the slider button to adjust darkness.
- Press the “check” button to transfer
the image to the smART sketcher® Projector.
- Begin tracing on paper.
6. Learn to Draw:
- Insert the Activity Cartridge that came with your device or any smART
sketcher® Activity Cartridge (purchased separately) into the top
of the projector.
- The app will display the loaded content.
- Scroll to find the image you want to draw and select it.
- The image will be projected onto your paper.
- Begin drawing!
Go to Home / Animate
Go Back a Step
Go Forward a Step
Previous Drawing
Repeat Last Step/AutoPlay
Next Drawing
In exceptional circumstances batteries may leak fluids
that can cause a chemical burn injury or ruin your
product.
To avoid battery leakage:
To insert or change the batteries, twist the screw counter-clockwise to loosen.
Remove old batteries and insert 4 D batteries with the correct polarity.
Replace the screw and twist clockwise to close.
Note:
This equipment has been tested and found to comply with
the limits for a Class B digital device, pursuant to part 15 of
the FCC Rules. These limits are designed to provide
reasonable protection against harmful interference in a
residential installation. This equipment generates, uses and
can radiate radio frequency energy and, if not installed and
used in accordance with the instructions, may cause harmful
interference to radio communications. However, there is no
guarantee that interference will not occur in a particular
installation. If this equipment does cause harmful
interference to radio or television reception, which can be
determined by turning the equipment off and on, the user is
encouraged to try to correct the interference by one or more
of the following measures:
- Reorient or relocate the receiving antenna.
- Increase the separation between the equipment and
receiver.
- Connect the equipment into an outlet on a circuit different
from that to which the receiver is connected.
- Consult the dealer or an experienced radio/TV technician
for help.
Transformers / charger used with the toy are to be
regularly examined for damage to the cord, plug,
enclosure and other parts, and that, in the event of
such damage, the toy must not be used with this
transformer/charger until the damage has been
repaired.
The toy is not intended for children under 3 years old;
1)
2)
3)
4)
The toy shall only be used with a transformer for toys
The model number XY06J-0601000Q-EW (EU
only/ XY06J-0601000Q-BW (UK only)/
XY06S-0601000Q-UW/XY06S-0591000Q-UW/
XY-0601000-A (Aus-NZ only) or specification of
Input Voltage:
AC 100-240V 50-60 Hz, Output Voltage: DC 6V, 1A,
transformer for use with the toy
The transformer is not a toy;
Toys liable to be cleaned with liquid are to be
disconnected from the transformer before cleaning.
If your smART sketcher came with
a USB POWER CABLE:
1)
2)
Connect to an AC ADAPTER having
output DC Voltage Rating of 5V DC
and a minimum current Rating of 1.2A
WARNING!
DO NOT PLUG USB CABLE INTO A
LAPTOP OR COMPUTER!
Non-rechargeable batteries are not to be recharged.
Rechargeable batteries are to be removed from the toy
before being charged.
Rechargeable batteries are only to be charged under
adult supervision.
Do not mix alkaline, standard (carbon-zinc), or
rechargeable (nickel-cadmium) batteries.
Do not mix old and new batteries.
Only batteries of the same or equivalent types as
recommended to be used.
Batteries are to be inserted with correct polarity.
Exhausted batteries are to be removed from the
product.
The supply terminals are not to be short circuited.
Dispose of battery(ies) safely.
Do not dispose of this product in a fire.
BATTERY INSTALLATION
EXTERNAL POWER SUPPLY RADIO STATEMENT
BATTERY SAFETY INFORMATION
For more detailed instructions,
questions or problems, please visit
www.flycatcher.toys/smart-sketcher-2
smART sketcher® is a trademark of Flycatcher Inc.
Copyright © 2021 Flycatcher Inc.
All rights reserved.
Visit us at:
www.flycatcher.toys/smart-sketcher-2
Requires Android 5.01+
Requires Apple iOS 9.0+
This device complies with Part 15 of the FCC
Rules. Operation is subject to the following
two conditions: (1) this device may not
cause harmful interference, and (2) this
device must accept any interference
received, including interference that may
cause undesired operation.
This device contains licence-exempt
transmitter(s)/receiver(s) that comply with
Innovation, Science and Economic
Development Canada’s licence-exempt RSS(s).
Operation is subject to the following two
conditions: (1) This device may not cause
interference. (2) This device must accept any
interference, including interference that may
cause undesired operation of the device
Warning: Changes or modifications to this
unit not expressly approved by the party
responsible for compliance could void the
user's authority to operate the equipment.
If your smART sketcher came with
an AC ADAPTER:
CONTROL BUTTONSCONTROL BUTTONS
SAFETY INFORMATIONSAFETY INFORMATION
QUICK STARTQUICK START
Transformer:
Input: AC 230V, 0.3A max. 50Hz
Output: DC 6V 1A 6W
FCM-IM-US-01 rev. I
Manufactured by:
Flycatcher Inc.
59 East 54th street
New York, NY 10022
support@flycatcherapps.com
Other Flycatcher Toy manuals


