5
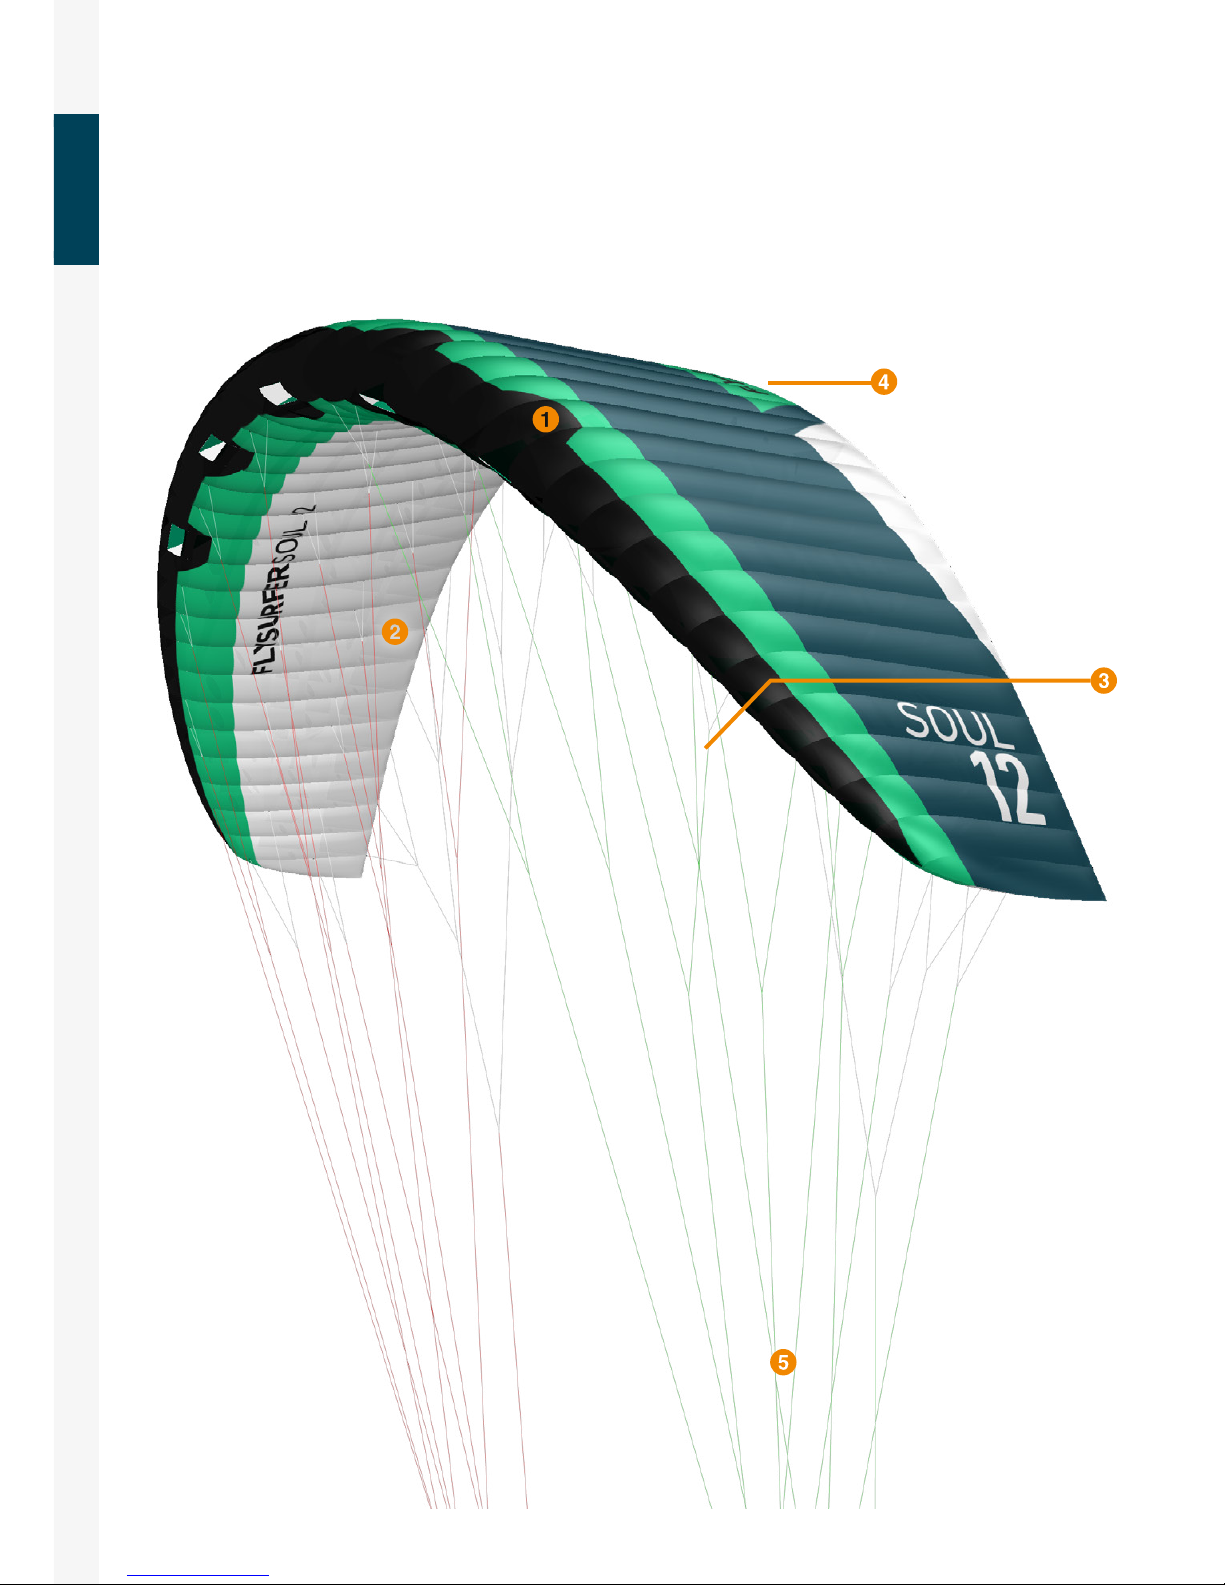
OVERVIEW OF THE KITE
Competition tested fabric & rigid foils
High tenacity nylon 6.6, 32g/m² double ripstop, UV-resistant +
PU coating outside and lotus coating on the inside. Rigid foils are
used to ensure a stier, more dynamic canopy. The rigid foils are
moved more to the inside to prevent abrasion in the same place.
Swept back outline for superb launch
Swept back wing design. Pull one steering line as on any other
kite system. Instant reverse relaunch.
Black marked bridle points & internal PMA’s
4 black marked bridles checkpoints for easy measurement,
allowing uncomplicated maintenance. The P.M.A’s can be used
to increase stability or depower of the kite, but should only be
trimmed by an ocial FLYSURFER service partner.
Deflate valves & trailing edge design
The kite deflates through two deflate valves, located in the
middle of the trailing edge. Revised trailing edge sewing.
Reworked drainage channels between ribs and trailing edge and
optimized air/dirt outlet.
LIROS Dyneema Lines
FLYSURFER trusts in the lines of LIROS that are produced in
Germany with a high quality standard. Thanks to their strong
Dyneema core fibers, a reduced line diameter is possible while
maintaining equal breaking strength.
X-Light / DLX+ Construction
At FLYSURFER Kiteboarding, we blended the SOUL’s construction
with lightness and durability. The new X-Light fabric has the
best qualities for maximum performance and impressive longe-
vity. The incredibly lightweight double-ripstop material is highly
tear-resistant as well as airtight, and provides an extremely
smooth sail. The leading edge is protected with durable DLX+
fabric against dirt and abrasion.
One Line Relaunch
The development team created a new outline assuring a superb
relaunch of the SOUL. We believe that foilkites will revolutionize
the way of teaching and learning how to kite. Safety is a key fact
and restarting your kite from to water by pulling one steering
line must be similar on any system. The SOUL combines all bene-
fits of a foilkite with the same methodical relaunch of a LEI-kite
to make exercises as simple as possible.
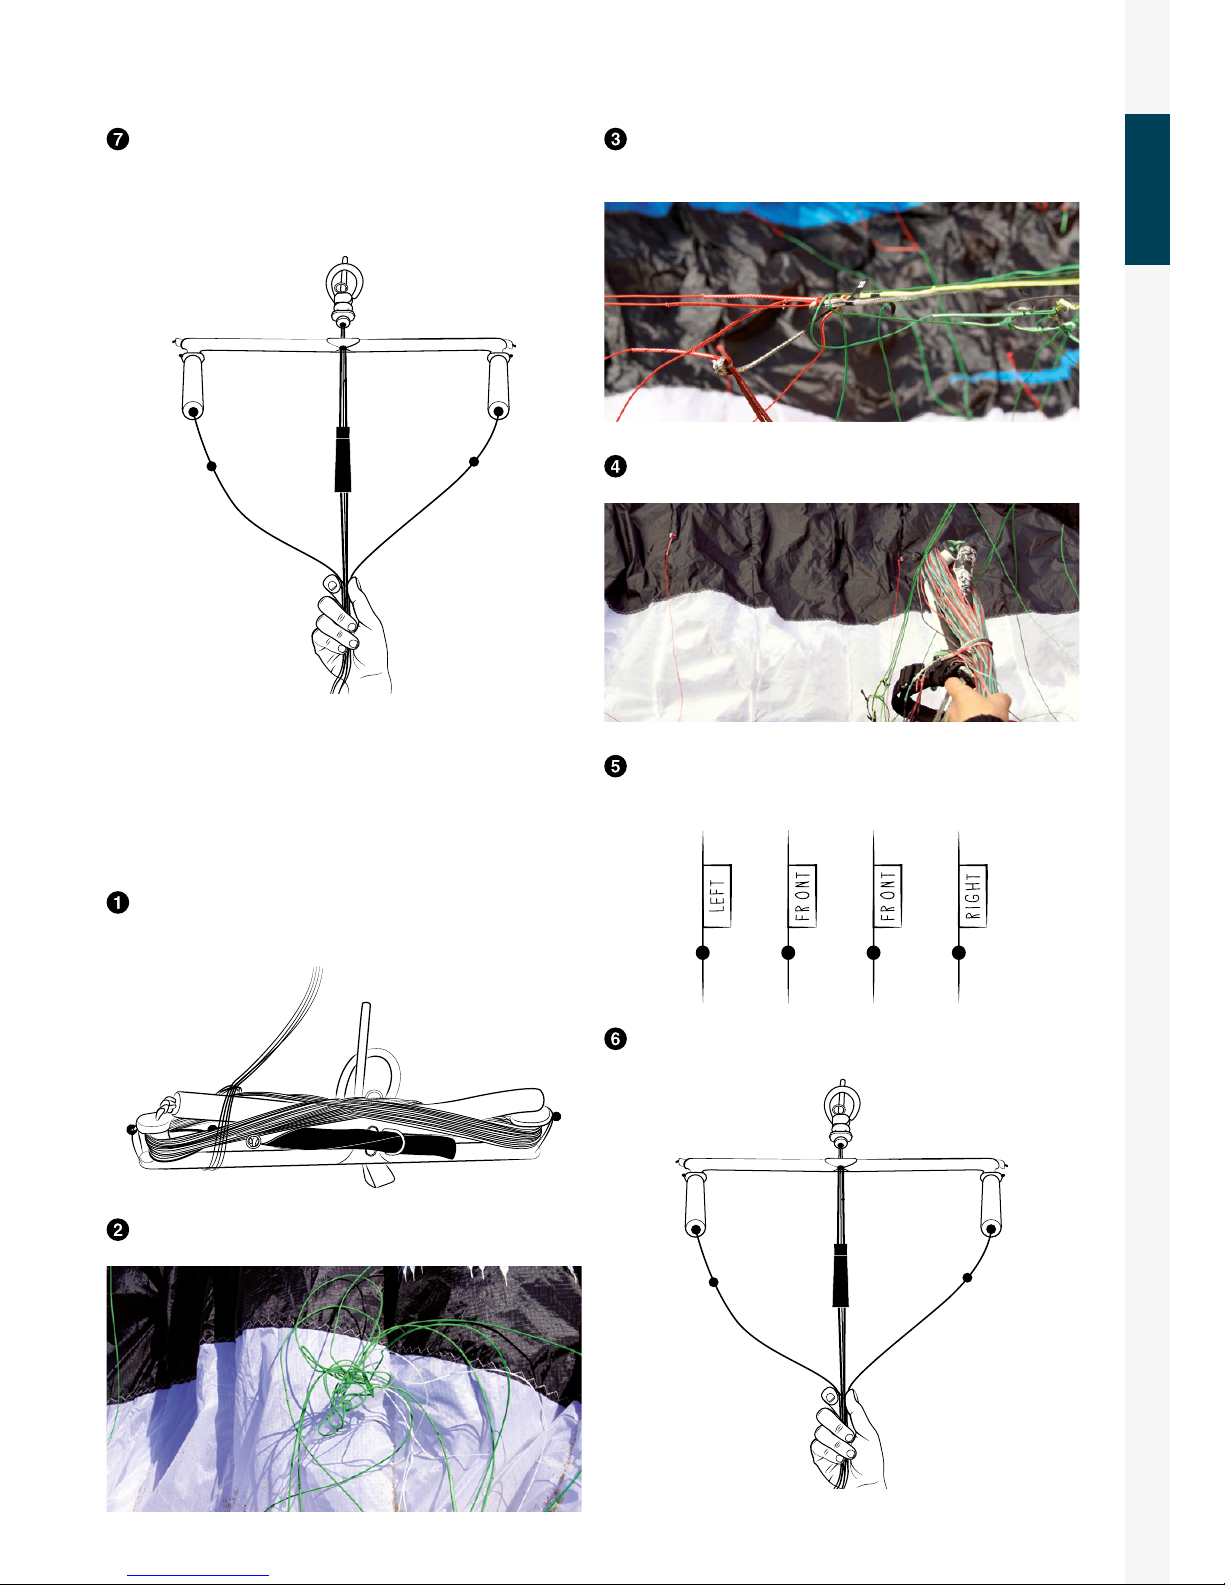
Maintenance - Bridle Check
The SOUL oers a wide variation of tools for maintenance. The
new bridle check can be done by measuring and comparing
the black marked lines at the canopy to compensate stretch or
shrink of the bridle. The individual levels of the kite are cont-
rolled with dierent ratios by the Mixer and thus influence the
angle of attack and the curvature of the profile. Adjustments
after heavy use over years should be done to keep the products
performance and ensure a long-term use of the SOUL. The right
approach must be learned.
Improved Automatic Drainage System
Safety is a central matter in the development of our products,
and the automatic drainage system is an important component
when it comes to trust. The interior and the choice of material of
a FLYSURFER closed-cell foilkite is optimized to absorb as little
water as possible and, in case of a long wash or windhole, to
ensure that it can restart. This feature separates us from the
competition, enabling deep water launches and gives the cus-
tomer confidence to relaunch our kites in the lightest breeze.
Experience Short Lines
The SOUL gives you a sublime hydrofoil experience by using
short flying lines (from 12-17m, depending on the size), to allow
for the fastest maneuvers. This setup enables a more direct feel
of the kite and generates less lift, which is perfect for learning
a new aspect of the kitesport and adds safety whilst teaching
on land or snow.