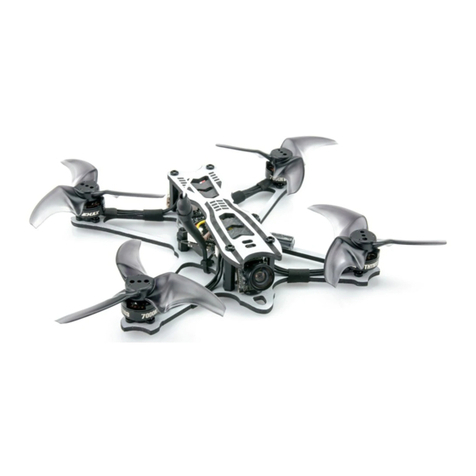
Foamdrones Baby Turtle Instruction Manual

Box contents
•2x EPP foam main frame pieces
•2x EPP foam landing gear/lipo hub
•4x 3D printed motor mounts
•4x 3D printed motor end caps
•8x carbon rod
•4x rubber band (2+2 spares)
•1x 3D printed motor mount installing tool
Necessary for assembly
•sharp knife
•regular CA glue. Don't worry, EPP foam can handle that.
•Foam-safe kicker spray for CA glue (optional) !SEE WARNING BELOW!
•flexible contact glue (UHU-por, Welders, Foam-tac)
Compatible electronics
•6mm motors
•Any flight controller with the form factor of a Blade Inductrix board
(beebrain, beecore, acrowhoop...)
•regular stick-shape 1-cel lipo battery.
•Boldclash F-01, Eachine EF-02 or similar micro AIO FPV camera units

Warning! Important!
Foamdrones does not recommend using “ZAP ZIP kicker” spray for your
Baby Turtle build.
We have received a report of this product, combined with CA glue,
desintegrating the motor mounts included in our Baby Turtle kits.
ZAP ZIP kicker appears to be a very agressive product unfitted for very fine
crafting.
Hereby, we at Foamdrones want to advice using either foam-safe CA kicker
spray, or no kicker at all.
We at Foamdrones use foam-safe ca kicker and did not experience any issue
at all.

step-by-step assembly
1
Check if your carbon rods can go all the way in both recesses on each motor
mount. If not, clean out the recesses with your sharp knife until the rods fit in
smoothly.
2
Install the included end caps on your motors. Make sure the motor wires are
guided upwards through the small recess on the end cap, as seen on the
picture above. Take care not to damage the wires! If you want to use the
included camera mounting system, install 2 of the included rubber bands on
your flight controller. Then put the electronics aside for a while.

3
Lay out the 2 landing skid pieces exactly (!!) as shown on the picture above.
Apply flexible glue on both pieces according to your preferred glue's manual,
except for the parts within the orange rectangles as seen above.. Take care to
use enough glue, but not too much. Glue increases weight!
4
When both pieces are ready to be put together (depending on the glue that's
been applied) push them together. As soon as they are firmly glued together,
use your knife to cut out the partially attached piece of foam in the middle.
This is where your lipo will be seated.

5
Remove the partially attached circular pieces of foam on the main frame
piece you see above. You can simply pull them loose or use your knife to cut
them out.
6
Create a setup as seen above. Use a motor mount, motor mount installing
tool and 2 carbon rods. For this part of the build, make sure that both the
foam frame piece and the motor mount installing tool are on the same FLAT
surface. The carbon rods should be inserted deep enough, preferably until
they “touch” the motor mount installing tool. If the cuts that have been
machined in the foam frame piece don't go deep enough, use your hobby
knife to cut them deeper, but avoid cutting them completely through.

7
Apply medium CA glue at the locations marked above. For the green marks,
apply a generous amount of glue inside the cuts, but make sure to not
accidently glue the motor mount installing tool to the frame.
For the yellow marks, i recommend to use a fine nozzle to apply a small
amount of CA. Using a toothpick with a small drop of glue on it is also a good
idea. Allways make sure that your motor mount installing tool does not get
glued to the frame or your motor mount! For fast curing and a firm assembly,
use CA kicker spray. As soon as the glue did its job, remove the motor mount
installing tool and repeat step 6 and 7 for the other motor mounts.

8
Turn over the foam frame unit containing the motor mounts. Take your other
foam frame unit and position it as seen above. Glue both together using
flexible contact glue. Make sure to follow the guidelines considering gluing
EPP foam materials specific to the brand and type of glue you are using. For
UHU-por, apply glue on both main frame pieces and spread it out. Let the
glue cure for a few minutes and then push them firmly together. Do not apply
glue to the partially attached foam pieces which are marked as seen on the
picture above. Attention! Glue increases weight. So use enough, but don't
overdo it.

9
Turn over your main frame and attach the landing skid/battery holder using
flexible contact glue.

1
Turn over your frame again and carefully remove the partially attached pieces
of foam on the upper foam frame unit. 2 of these excess pieces contain 2 little
foam parts you need in order to assemble the camera mount.

11
Use your sharp knife to make a cut in the sides of the flight controller hub
about halfway down. Your flight controller will be held in these cuts later on.
Take good care not to cut completely through and try to make your cuts as
straight as possible. A cut should be no more then 2 mm deep, so do this step
very carefully.
12
Install your flight controller in it's hub. Make sure the sides of the flight
controller are seated in the cuts you made earlier.

13
Install your motors in their motor mounts and feed your motor wires to the
upper side of the frame through the sides of the landing skid and connect
them to the flight controller.
14
Take the 2 camera mount pieces you have put aside previously and glue
them together using flexible glue.

Done!
*weight without battery


