FOHERE MG-2950R User manual
MEAT GRINDER MG-2950R
USER MANUAL
Before operating the appliance, please read this manual and all the
safety instructions thoroughly and retain it for future reference.
HOUSEHOLD USE ONLY
Manufacturer: Shenzhen Foduosi Trading Co., Ltd.
Address: 1403, Block 4, Haixuan Plaza, No.89 Jinlong Road,
Luogang Community, Buji Street, Longgang District, Shenzhen
Facebook Page: http://www.facebook.com/foherehome
Email: [email protected]
Web: www.fohere.com
MADE IN CHINA

TABLE OF CONTENTS
Important Safeguards
Know the Meat Grinder
Key Operation Specification
How to Grind Meat
How to Make Sausages
How to Use Slicer Attachment
How to Make Kubbe
How to Make Tomato Sauce
Care and Cleaning
Troubleshooting
01
03
04
05
08
09
10
12
14
15

IMPORTANT SAFEGUARDS
When using the meat grinder, basic safety precautions should always
be followed to avoid the risk of fire, electric shock, or injury to persons,
including the following:
• Please read all instructions prior to operating this appliance.
• NOTE: Check if the voltage indicated on the appliance corresponds
to the local mains voltage before you connect the appliance.
• WARNING: This appliance should not be used by or near children.
Please keep out of the reach of children.
• This appliance is not intended for use by persons (including
children) with reduced physical, sensory or mental capabilities, or
lack of experience and knowledge unless they have been given
supervision or instruction concerning use of the appliance by a
person responsible for their safety.
• Do not operate this unit near an open flame or any hot surface.
• To avoid the risk of electrical shock, Do not put the appliance in
water or other liquids.
• Do not let the cord hang over the edge of the table or counter,
come into contact with sharp edges, or touch hot surfaces.
• Do not unplug the unit by pulling on the electrical cord itself. Never
unplug the unit with wet hands.
• WARNING: Check whether all parts are damaged before use. If the
component is found to be damaged, please stop using this product
and contact our company's customer service. Please do not detach
and repair the damaged component by yourself because it may be
dangerous.
• WARNING: If this product needs maintenance during the process of
use, please contact customer service. Please do not detach this
product by yourself because it may be dangerous.
• WARNING: Wash all components before using. Do not immerse the
Motor housing in water. DO NOT WASH ANY PARTS OF THIS
GRINDER IN A DISHWASHER. (Refer to Washing Instructions
section on page 14.)
• WARNING: THE CUTTING BLADE IS SHARP, HANDLE WITH
CARE BOTHUSING AND CLEANING.
• WARNING: Always monitor the grinder during use. Do not leave
unattended. It is recommended that after 5 minutes of continual use,
the unit should be allowed to cool for a few minutes to prevent
overheating.
• This grinder is NOT intended for grinding ANY bones, sinew, and
fat beef. Grinding bones with this grinder will damage the unit and
render it useless.
• Never add meat products by hand. ALWAYS use the food pusher
provided. Do not use knives, forks, spoons, etc. to push meat down
the grinding head chute.
• Never carry the unit by the grinding head or hopper plate. Please lift
the entire appliance when moving.
• WARNING: Switch the appliance off before detaching and install
any accessory.
• Tunoffthemachineandallowtheaugertocompletelystopbefore
changingthegrindersettingsfromSLOWtoREV.(andviceversa)
Rapidchangesinaugerdirectioncoulddamagethemotor.
• NOTE: Meat preparation and temperature are very important for
optimal performance and results. (Read the Pre-Grinding Meat
Preparation section before using it on page 6.)
• NOTE: Check that the grinding cutting blade is inserted correctly
prior to use. (Cutting Blade Assembly photos on page 6.)
01 02

KNOW THE MEAT GRINDER KEY OPERATION SPECIFICATION
Food Chamber
Grinding Head
Hopper Plate
Locking Clip
Attachment Opening
Motor Housing
/SLOW/REV Switch
Tomato Strainer Attachment
Slicer Attachment
1.
2.
3.
4.
5.
6.
7.
8.
9.
10.
11.
12.
13.
14.
15.
16.
17.
18.
Food Pusher
Kubbe Attachment
Fixing Ring
Sausage Attachment
Cutting Plate (Fine)
Cutting Plate (Medium)
Cutting Plate (Coarse)
Cutting Blade
Feed Screw
18171615
3
14
10
8
1211 13
92
1
4
5
6
7
1. " " key: Power Switch
NOTE: Turn on/Turn off.
2. "SLOW " key: Slowdown Switch
TIPS: Better for cutting vegetables and squeezing tomato sauce.
3. " REV" key: Reverse Switch
NOTE: If the meat is blocked, please turn off the machine first, then
hold the "REV" switch for 3-5 seconds, the feed screw will start to
reverse, then press the power switch again, and the machine recovers
to rotate in forwarding direction and work on.
03 04

1. Prepare boneless (including chicken feet), sinewless, skinless meat
(Do not use frozen meat.)
2. Cut the meat to fit the size of the feed opening
3. Go through the machine with fatty meat to make the subsequent
grinding process smoother.
NOTE: In order to better protect the machine, we will coat the Cutting
plate and blade of the machine with Anti-rust oil before leaving the
factory, so when you use it for the first time, please use the fatty meat
to go through the machine.
4. According to your personal preference, use the Cutting plate with a
suitable hole diameter.
5. Place the machine in a stable place.
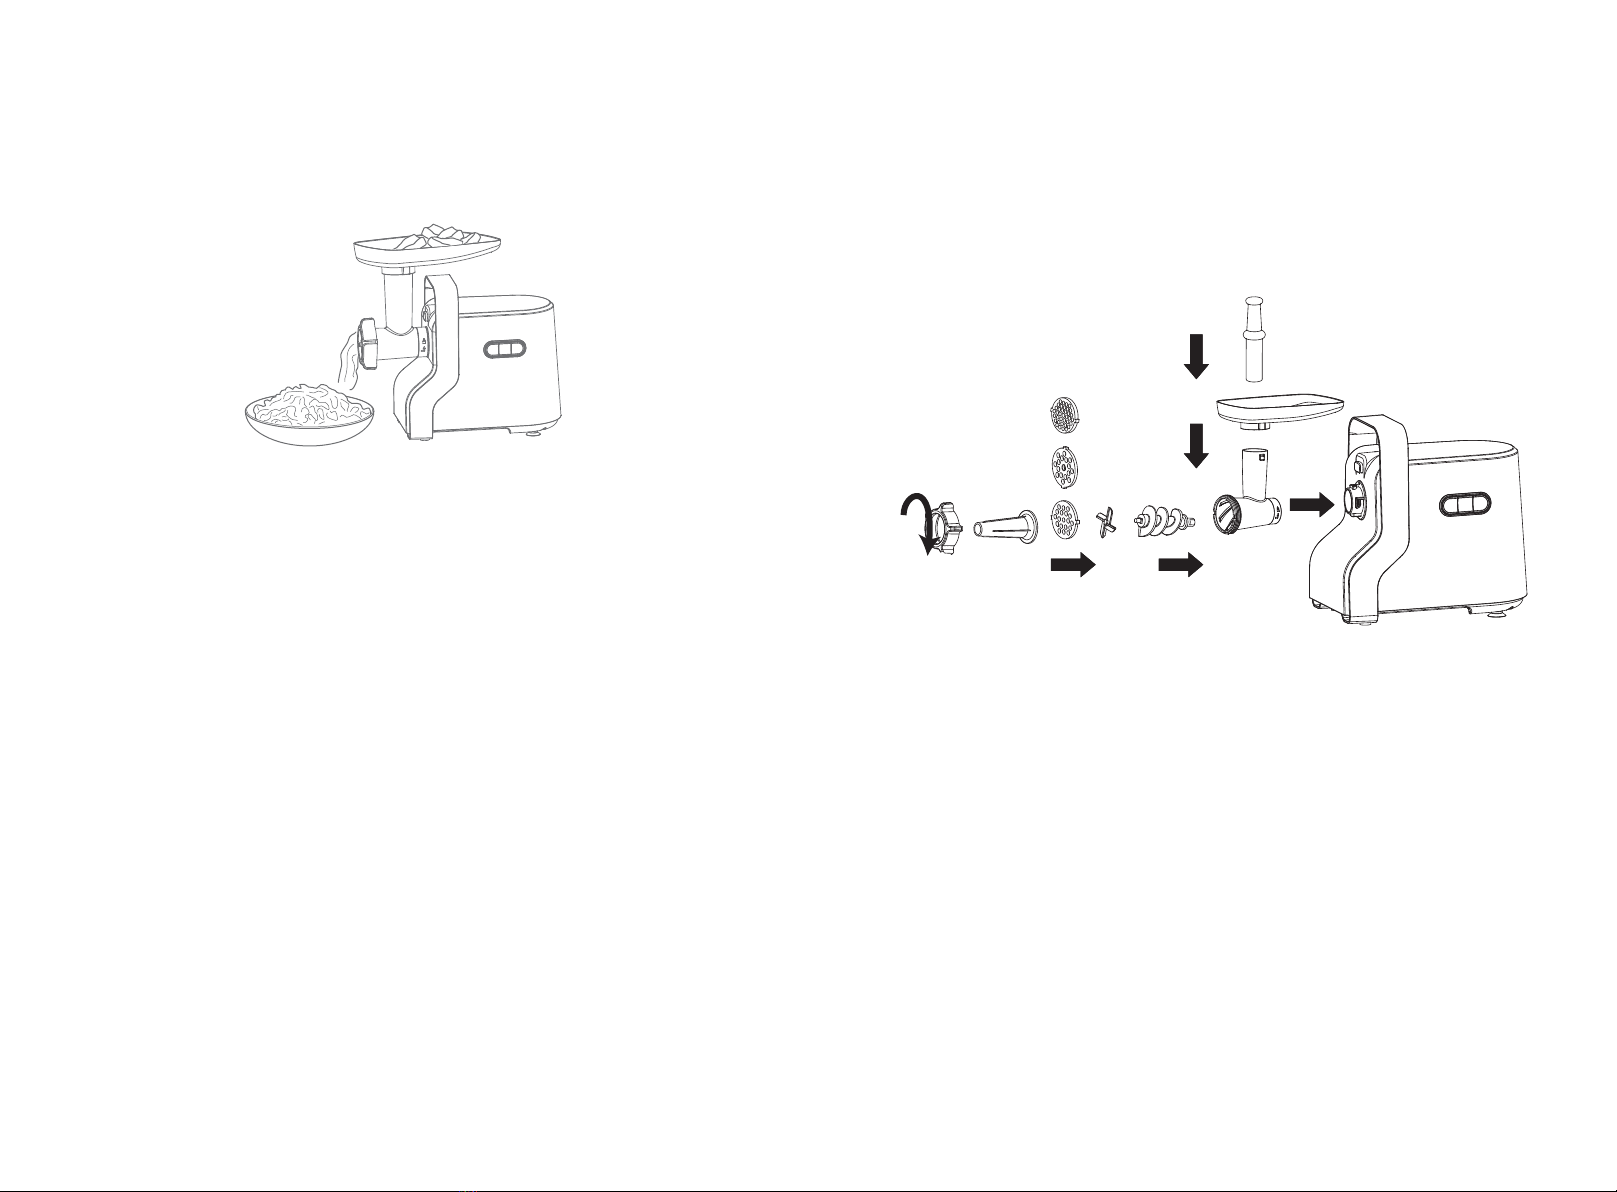
B. Cutting Blade Assembly
C: Pre-grinding Meat
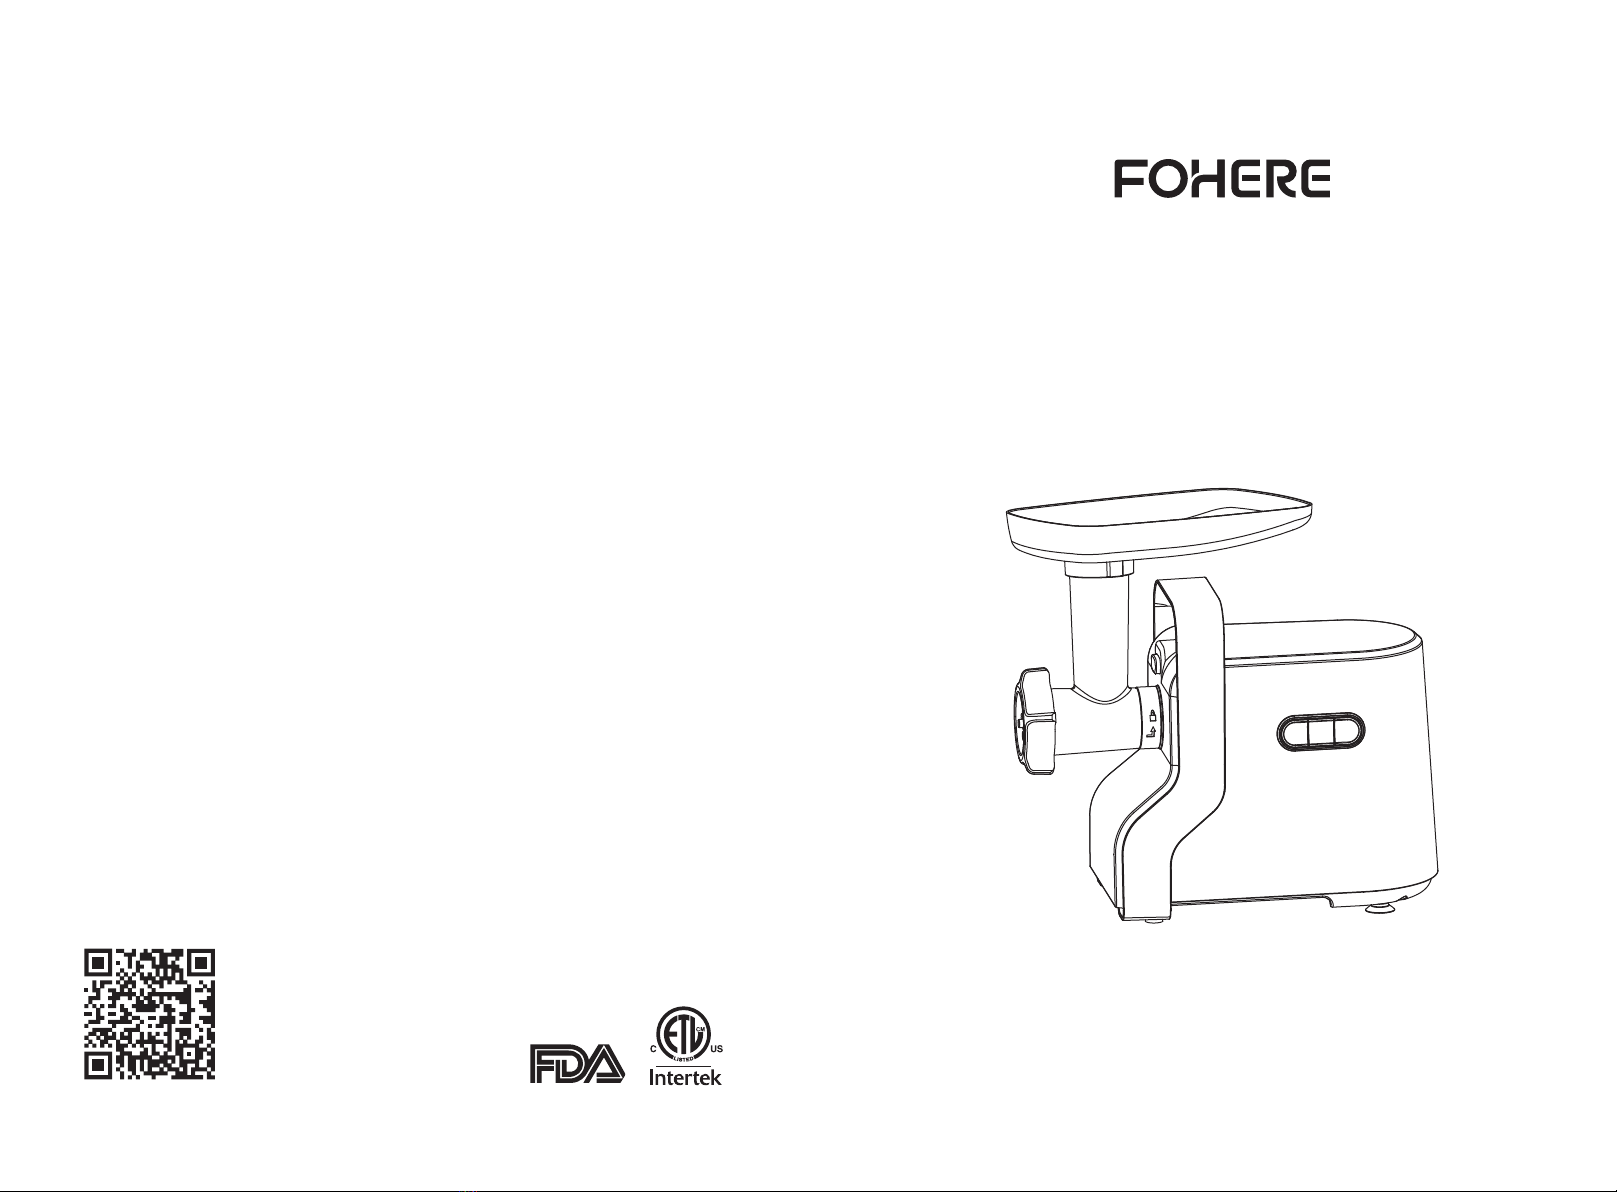
HOW TO GRIND MEAT
NOTE:
1. All accessories should be cleaned before installation, soaked in
water. (NEVER WASH IN THE DISHWASHER.)
2. Make sure that the machine is turned off before installation.
Install all parts according to the picture, and put a bowl under the
grinder to catch food.
NOTE: The connection position of each component is marked with the
insertion mark and the direction of rotation. Please install it strictly
according to the position of the mark.
A: Quick Assembly
NO
×
YES
√
05 06
1. Plug in the socket, switch it on and be ready to work.
2. Put the meat in the Hopper plate on the top of the assembled grinder.
3. Use the food pusher to guide the meat into the feed through grinding
head.
NOTE: Don't apply too much force to the food pusher.
NOTE: Meat must be prepped beforehand. You cannot grind unpro-
cessed meat directly into sausage casings.
1. If you have purchased dry casings, they must be soaked in cold
water until they become soft and pliable, and then rinsed under
lukewarm water, being sure that the water is running through the
casings.
2. Pass the casing through the sausage attachment, leaving a little bit,
and tie a knot at the end of the casing overhang.
TIPS:
1. If the meat is blocked, please turn off the machine first, then hold the
"REV" switch for 3-5 seconds.
2. Pleasedon'tletthemachineworkcontinuouslyformorethan5
minutes.This appliance is equipped with a thermostat system.This
system will automatically cut off the power supply to the appliance in
case of overheating.
If your appliance suddenly stops running:
1. Press the switch button to turn off the appliance.
2. Pull the mains plug out of the socket.
3. Lettheequipmentcooltoroomtemperature.
4. Put the mains plug in the socket.
5. Switch the appliance on again.
D: Start to Grind Meat
HOW TO MAKE SAUSAGES
The sausage attachments allow you to blend meats and spices for
homemade sausages.
A: Quick Assembly
B: Start to Make Sausages
Install all parts according to the picture.
NOTE: The connection position of each component is marked with the
insertion mark and the direction of rotation. Please install it strictly
according to the position of the mark.
07 08

• All foods are better sliced and shredded when they are fresh and
firm.
• Place the food upright in the food chamber.
• Certain soft fruits such as strawberries and kiwi should be firm, not
overripe to slice. These types of fruits can also be placed in a freezer
for a few minutes before slicing. Certain fruits with tough skins such
as apples should be peeled before slicing or shredding.
• The attachment is not designed to shred onions, slice cheese or
chocolate, or process meats and tomatoes.
• The attachment is not designed to chop ice or grind coffee beans.
You may damage the unit.
B: Helpful Hints
Install all parts according to the picture, and put a bowl under the
grinder to catch food.
NOTE: The connection position of each component is marked with the
insertion mark and the direction of rotation. Please install it strictly
according to the position of the mark.
3. Turn on the equipment and put the prepared minced meat into the
hopper plate until the meat completely fills the casing.
4. Turn the unit OFF, remove the end of the casing from the sausage
attachment, and tie a knot in the open end of the casing. Use a knife
or needle to poke holes in the length of sausage to let out air
bubbles.
5. Sausages can be made to the desired length by twisting the casing at
intervals.
HOW TO USE SLICER ATTACHMENT
A: Quick Assembly
HOW TO MAKE KUBBE
A: Quick Assembly
09 10

Kubbe is a traditional Middle Eastern appetizer comprised of a small
football-shaped shell filled with meat (usually bulgur wheat and lamb).
The center section is often stuffed with spiced minced lamb filling and
the ends are sealed. Kubbe is usually deep-fried resulting in a crispy
outside with a delicious filling. It is time-consuming to make, but well
worth the effort. This delicious treat can be directly frozen raw or stored
in the refrigerator after being fried.
B. What is Kubbe?
1. Feed the mixture into the meat hopper and let the mixture extrude.
(NOTE: 1. Do not use a cutting blade or a grinding plate.
2. The meat must be prepared beforehand, prior to using the Kubbe
Attachment.)
2. Cut or pinch off to your desired length leaving one end open. You
now have the finished outer shell for the kubbe.
3. Stuff the interior of the shell with your choice of meat filling.
4. Seal the open end
C. Start to Make Kubbe
Install all parts according to the picture, and put a bowl under the
grinder to catch food.
NOTE: The connection position of each component is marked with the
insertion mark and the direction of rotation. Please install it strictly
according to the position of the mark.
HOW TO MAKE TOMATO SAUCE
A: Quick Assembly
1. Place the gauze into the sleeve next
to the white plastic ring.
2. Put the fixing ring through the sleeve
and make it at the end of the sleeve.
3. Hold the grinding head, insert it into
the attachment opening and place the
feed screw into the grinding head with
the long end in front and then turn the
feed screw slightly until it is set into the
attachment opening.
NOTE: When inserting the grinding
head, NOTE that it must be tilted, and
then move it counterclockwise
according to the arrow on the grinding
head to make the grinding head tight.
sleeve gauze
11 12

1. Before you clean the appliance, switch the appliance off and remove
the plug from the socket.
2. Remove the food pusher and the hopper plate. Press the locking clip
and turn the whole grinding head in the direction of the arrow.
3. Unscrew the fixing ring and remove all parts and wash each part in
warm water.
NOTE:
1) Clean them immediately after use.
2) DO NOT WASH ANY PARTS OF THIS GRINDER IN THE
DISHWASHER!
3) DO NOT submerge the main unit in water to clean.
4. Dry all of the parts thoroughly. Wipe the grinding plates with
vegetable oil and wrap each plate with greaseproof paper. This will
prevent discoloring/rusting.
CARE AND CLEANING
4. Insert the short screw into the
central axis of the feed screw.
5. Put the whole sleeve along with the
fixing ring through the short screw,
then move the fixing ring clockwise to
tighten it.
7. Insert the plastic screw into the hole
of the sleeve, then move it clockwise
until it is properly fastened. Then place
the plastic cover onto the sleeve. Now
the appliance is ready for tomato
sauce.
NOTE: WHEN SQUEEZING THE
TOMATO SAUCE, PLEASE PEEL
OFF THE SKIN.
6. Put the plastic juice tray through the
sleeve and make it on the suitable
position.
13 14

Failures Analysis of causes Troubleshooting
Does not work
after turning on Plug contact is poor.
1. Check whether the plug is loose, whether the socket
is suitable, and whether the socket is faulty.
2. Contact customer service.
Stop working
during use
1.The voltage is too low
or power failure.
2. Working for a long time.
3. Putting too much food
quickly, causing the
machine to open the
self-protection mode.
1. Check if the power is normal.
2. Restartthemachine aftershuttingdownandcooling
down,(Itisrecommendedthatthetimeofcontinuous
workshouldnotexceedfiveminutesatatime.)
3. Turn off the switch and disconnect the power, take
out the food and cut it into small pieces, then finally put
it into the grinder and start the machine.
4. Contact customer service.
Blocked
(ground meat)
1.The cutting blade is
entangled or stuck by
the ingredients.
2. Putting too much food.
3.Improperhandlingof
ingredients
4. Cutting Blade installed
in reverse.
1. Turn off the switch, press REV and use it again
normally.
2. Turn off the switch and disconnect the power supply
then take out the ingredients and continue to use with
power on.
3. Please refer to ingredient types and pre-treatment
recommendations in the product use guide on page 6.
4. Please refer to the selection guide of cutting blade
accessories on Page 6.
5. Contact customer service.
Blocked (jam) Ingredients are not
peeled and cut into pieces. Add peeled and diced ingredients.
Shaking or noise
1.Thepartsforgrinding
meatarenotinstalled
properly.
2. Not placed in a smooth
position.
3. Add too many
ingredients.
1. Turn off the switch and disconnect the power supply,
next, take out the ingredients and then refer to the
product assembly guidelines on Page 6 to assemble
the meat grinder blade components correctly, lastly,
re-energize it for use.
2. Place the meat grinder on a smooth operating
surface for use.
3. Turn off the switch and disconnect the power supply,
take out the excess ingredients and start the machine
again.
4. Contact customer service.
Poor grinding
effect
1. Improper use of
accessories.
2. Incorrect pre-treatment
of ingredients.
3. Ingredients dosage
problem.
1. Please refer to the selection guide of blade
accessories on Page 6.
2. Please refer to ingredient types and pre-treatment
recommendations in the product use guide on page 6.
3. Contact customer service.
Parts or food
discoloration
1. Improper cleaning
method of accessories.
2. Improper product
maintenance.
1. All accessories cannot be cleaned in the dishwasher,
please refer to Page 14 product cleaning guidelines.
2. Please clean the product accessories in time after
use, refer to Page 14 Product Maintenance Guidelines.
TROUBLESHOOTING
15
Table of contents


