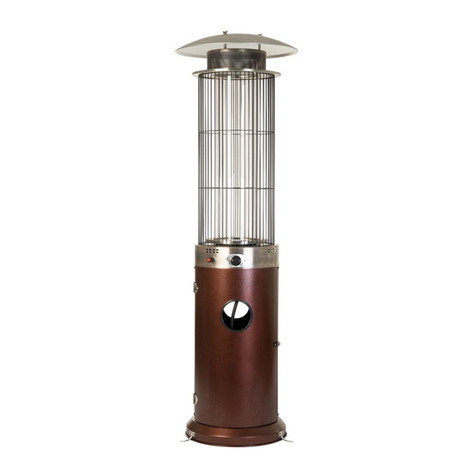
FORO RH13000 User manual

Partyspace bv - Potteriestraat 67 - 8980 Beselare - BELGIUM - Phone +32 (0)57 36 03 30 - Fax +32 (0)57 48 79 61 - BTW BE 0830 189 643
RH13000


EN .............................................................................................................................................................................. 4-19
Warning ..................................................................................................................................................................................................4
Important safety measures .........................................................................................................................................................5-6
Heater stand & location....................................................................................................................................................................7
Leak test ................................................................................................................................................................................................ 8
Operation and storage..................................................................................................................................................................... 9
Cleaning & care..................................................................................................................................................................................10
Parts .......................................................................................................................................................................................................11
Hardware contents...........................................................................................................................................................................12
Specifications.....................................................................................................................................................................................12
Construction and characteristics................................................................................................................................................12
Assembly ........................................................................................................................................................................................ 13-16
Troubleshooting ................................................................................................................................................................................17
Service & maintenance information..........................................................................................................................................18
Declaration of conformity..............................................................................................................................................................19
NL.............................................................................................................................................................................20-35
Waarschuwing...................................................................................................................................................................................20
Belangrijke veiligheidsinformatie ........................................................................................................................................21-22
De haard plaatsen............................................................................................................................................................................ 23
Lektest.................................................................................................................................................................................................. 24
Gebruik en opslag............................................................................................................................................................................ 25
Reiniging en onderhoud ...............................................................................................................................................................26
Onderdelen ....................................................................................................................................................................................... 27
Meegeleverde ijzerwaren..............................................................................................................................................................28
Specificaties.......................................................................................................................................................................................28
Constructie en kenmerken...........................................................................................................................................................28
Montage.........................................................................................................................................................................................29-32
Probleemoplossing ..........................................................................................................................................................................33
Service- en onderhoudsinformatie ........................................................................................................................................... 34
Conformiteitsverklaring ................................................................................................................................................................ 35
FR..............................................................................................................................................................................36-51
Avertissement.................................................................................................................................................................................... 36
Consignes importantes de sécurité.................................................................................................................................... 37-38
Installation et emplacement de l’appareil de chauffage................................................................................................. 39
Test de fuite........................................................................................................................................................................................40
Fonctionnement et stockage .......................................................................................................................................................41
Nettoyage et entretien................................................................................................................................................................... 42
Pièces.................................................................................................................................................................................................... 43
Matériel contenu dans la boite d’emballage ........................................................................................................................ 44
Spécifications.................................................................................................................................................................................... 44
Construction et caractéristiques................................................................................................................................................44
Assemblage..................................................................................................................................................................................45-48
Dépannage .........................................................................................................................................................................................49
Informations concernant la réparation et l’entretien........................................................................................................50
Déclaration de conformité ............................................................................................................................................................51
DE ............................................................................................................................................................................52-67
Warnung .............................................................................................................................................................................................. 52
Wichtige sicherheitsmassnahmen...................................................................................................................................... 53-54
Aufstellungsort ................................................................................................................................................................................. 55
Leckage-test....................................................................................................................................................................................... 56
Gebrauch und lagerung ................................................................................................................................................................ 57
Reinigung und pflege.....................................................................................................................................................................58
Einzelteile .......................................................................................................................................................................................... 59
Zubehör ...............................................................................................................................................................................................60
Technische daten.............................................................................................................................................................................60
Design und eigenschaften............................................................................................................................................................60
Installation ................................................................................................................................................................................... 61-64
Technische daten & störbehebung ........................................................................................................................................... 65
Informationen zu reparatur und wartung..............................................................................................................................66
Konformitätserklärung .................................................................................................................................................................. 67
INHOUD

4FØRO RH13000 - MANUAL
EN
• Read the instructions before installation and use;
• This appliance must be installed and the gas cylinder stored in accordance with the
regulations in force;
• Don’t obstruct the ventilation holes of the cylinder housing;
• Don’t move the appliance when in operation;
• Shut off the valve at the gas cylinder or the regulator before moving the appliance;
• The tubing or the flexible hose must be changed within the prescribed intervals;
• Use only the type of gas and the type of cylinder specified by the manufacturer;
• In case of violent wind particular attention must be taken against tilting;
• Be careful, accessible parts may be very hot. Keep away from young children;
• This appliance requires installation by a competent person;
• For use only in well-ventilated areas. An amply ventilated area must have a minimum or
25% of the surface area open. The surface area is the sum of the walls surface;
• The use of this appliance in enclosed areas can be dangerous and is prohibited. This
appliance shall not be used in basements or below ground level;
• This appliance shall be used for space heating only;
• This appliance has no atmospheric sensing device. It shall be used for heating well-
ventilated buildings used for animal rearing or for outdoor use only;
• Don’t store chemicals or flammable materials or spray aerosols near this appliance.
• Don’t operate this appliance in an explosive atmosphere like in areas where gasoline or
other flammable liquids or vapors are stored;
• Don’t place items on or against this appliance;
• Protect the hot glass tube from rain, water splash or anything that will cause a sudden
change in temperature which may lead to cracking or shattering;
IF THE SMELL OF GAS IS DETECTED:
• Turn off the valve immediately;
• Extinguish any open flame;
• If the odour continues, contact your gas supplier immediately.
WARNING: The user assumes all risk in assembly and operation of gas heater. Failure to follow
the warnings and instructions in this manual can result in several personal injury, death,
property damage. If user can not read or fully understand the instruction manual, please
contact your dealer. Manufacturer or supplier will not be responsible for user’s negligence.
WARNING

5FØRO RH13000 - MANUAL EN
• Installation and repair should be done by a qualified service person.
• Improper installation, adjustment, alteration can cause personal injury or property damage.
• Do not attempt to alter the unit in any manner.
• This appliance must be installed and the gas cylinder stored in accordance with the
regulations in force.
• Do not move the appliance when in operation.
• Shut off the valve at the gas cylinder or the regulator before moving the appliance.
• The tubing or the flexible hose must be changed each year.
• In case of violent wind particular attention must be taken against tilting of the appliance.
• Do not store or use gasoline or other flammable vapors or liquids into the heater unit.
• The whole gas system, hose regulator, pilot or burner should be inspected for leaks or
damages before use.
• All leak tests should be done with a soap solution. Never use an open flame to check for
leaks.
• Do not use the heater until all connections have been leak tested.
• Turn off immediately the gas valve if smell of gas is detected.
• Do not transport heater while it’s operating.
• Do not move the heater after it has been turned off until the temperature has cooled down.
• Keep the ventilation opening of the cylinder enclosure free and clear of debris.
• Do not paint radiant screen, control panel or top canopy reflector.
• Control compartment, burner and circulation air passageways of the heater must be kept
clean.
• Frequent cleaning may be required as necessary.
• The LP tank should be turned off when the heater is not in use.
• Check the heater immediately if any of the following exists:
• The heater does not reach temperature.
• The burner makes popping noise during use (a slight noise is normal when the burner is
extinguished).
• Smell of gas in conjunction with extreme yellow tipping of the burner flames.
• The LP regulator/hose assembly must be located out of pathways where people may trip
over it or in area where the hose will not subject to accidental damage.
IMPORTANT SAFETY MEASURES

6FØRO RH13000 - MANUAL
EN
• Any guard or other protective device removed for servicing the heater must be replaced
before operating the heater.
• Change the gas cylinder in a well ventilated area, away from any inflammation source.
• Check that the regulator seal is fitted and that it is in good condition.
• Do not obstruct the ventilation holes of cylinder housing.
• Adults and children should stay from high temperature surface to avoid bums or clothing
ignition.
• Children should be carefully supervised when they are in the area of the heater.
• Clothing or other flammable materials should not be hung on the heater or placed on or
near the heater.
• Use may replace the rubber hose by himself and note the length of the hose is 60cm. And
the hose must be required by the national conditions.
• LP Characteristics-Flammable, explosive, heavier than air-settles in low areas.
• In its natural state, propane has no odor. For your safety, an odorant is added that smells
like rotten cabbage.
• Contact with liquid LP can cause freeze burns to skin.
• This heater is shipped from the factory for LP gas use only
• Use only EEC approved “10KG” Gas cylinders LP gas cylinders (same as commonly used on
gas grills) with safety valves. These valves can be quickly identifies by their external and
internal threads.
• When heater is not in use, turn Control Valve OFF. Close the valve of the gas cylinder or the
regulator after use
• The use of this appliance in enclosed areas can be dangerous and is “PROHIBITED”.
1. For use outdoors or in amply ventilated areas.
2. An amply ventilated area must have minimum of 25% of the surface area open.
3. The surface area is the sum of the walls surface.

7FØRO RH13000 - MANUAL EN
• The heater is primarily for outdoor use only. Always ensure that adequate fresh air
ventilation is provided.
• Always maintain proper clearance to combustible materials, i.e. top 45cm (18”) and sides
70cm (28”) minimum.
• Heater must be placed on level firm ground.
• Never operate heater in an explosive atmosphere like areas where gasoline or other
flammable liquids or vapors are stored.
GAS REQUIREMENTS
• Use LPG, propane and butane only.
• Maximum inlet pressure of propane regulator must not exceed 100 PSI.
• The pressure regulator and hose assembly to be used must conform to local standard
codes .
• The installation must conform to local codes, or in the absence of codes, with the standard
for storage and handling of liquid petroleum gases.
• A dented, rusted or damaged propane tank may be hazardous and should be checked by
your tank supplier.
• Never use a propane tank with a damaged valve connection.
• The propane tank must be arranged to provide for vapor withdrawal from the operating
cylinder.
• Never connect an unregulated propane tank to the heater.
HEATER STAND & LOCATION
Ceiling
Wall

Gas connections on the heater are leak tested at the factory prior to shipment. A complete
gas tightness check must be performed at the installation site due to possible mishandling in
shipment or excessive pressure being applied to the heater.
• The heater must be checked with a full cylinder.
• Make sure the safety control valve is in the OFF position.
• Make a soap solution of one part liquid detergent and one part water. The soap solution
can be applied with a spray bottle, brush or rag .
• Soap bubbles will appear in case of a leak.
• Leakage test points. See pictures below.
• Turn the gas supply ON.
FUEL GAS ODOR
LP gas and natural gas have manmade odorants added specifically for detection of fuel gas
leaks. If a gas leak occurs you should be able to smell the fuel gas. Since Propane (LP) is
heavier than air you should smell for the gas odor low to the floor.
ANY GAS ODOR IS YOUR SIGNAL TO GO INTO IMMEDIATE ACTION.
• Do not take any action that could ignite the fuel gas. Do not operate any electrical switches.
Do not pull any power supply or extension cords. Do not light matches or any other source
of flame. Do not use your telephone.
• Get everyone out of the building and away from the area immediately.
• Propane (LP) gas is heavier than air and may settle in low area. When you have reason to
suspect a propane leak, keep out of all low area.
• Use your neighbor’s phone and call your fuel gas supplier and your fire department. Do not
reenter the building or area.
• Stay out of the building and away from the area until declared safe by the firefighters and
your fuel gas supplier.
• Finally, let the fuel gas service person and the firefighters check for escaped gas. Have
them air out the building and area before you return. Properly trained service people must
repair any leaks, check for further leakages, and then relight the appliance for you.
LEAK TEST
8FØRO RH13000 - MANUAL
EN

9FØRO RH13000 - MANUAL EN
OPERATION AND STORAGE
HEATER OPERATION
TO T URN THE HEATER ON
1. Ensure the control knob is at the OFF position.
2. Con neet the gas regulator to a compa tible
gas cylinder
3. Ensure a battery has been inser ted into the red
ignition button.
4. Push and turn the control knob anti clock wise
to th e PI LO T position and hold in for 60 seco nds.
5. After 60 seconds h ave passed and whilst holdin g
at the pilot position, press the ignition bu tton
until a blue pilot light appears.
6. Once the blue pilot light flame stays alight
constantly, let go of the variable control knob.
7. Turn the variable control knob to the desired
temperature position - Low to H igh.
NOTE: When lighting the heater for
the first time or when replac ing the
gas cylinder, th e control kn ob may
need to be held tor 120 seconds at
the pilot position instead of the
usual 60 seconds.
TO TURN THE HEATER OFF
1. Turn the control knob to the
pilo t position
2. Push and turn the contro l
knob to OFF position
3. Turn t he regulator connec te d
to the gas cylinder to the OFF
posi tion
TO TURN THE HEATER ON
1. Ensure the control knob is at the OFF position
2. Connect the gas regulator to a compatible gas cylinder
3. Ensure a battery has been inserted into the red ignition button.
4. Push and turn the control knob anti clock wise to the PILOT position and hold in for 60
seconds
5. After 60 seconds have passed and whilst holding at the pilot position, press the ignition
button until a blue pilot light appears.
6. Once the blue pilot light flame stays alight constantly, let go of the variable control knob.
7. Turn the variable control knob to the desired temperature position - Low to High.
NOTE: If lighting for the heater for the first time or if changing a new gas cylinder, the control
knob may need to be held for 120 seconds at the pilot position instead of the normal 60
seconds.
TO TURN THE HEATER OFF
1. Turn the control knob to the pilot position
2. Push and turn the control knob to OFF position
3. Turn the regulator connected to the gas cylinder to the OFF position

10 FØRO RH13000 - MANUAL
EN
STORAGE
1. Always close the gas valve of the gas cylinder after use or in case of a disturbance.
2. Remove the pressure controller and the hose.
3. Check the tightness of the gas valve and for damage. If you suspect a damage, have it
changed by your gas dealer.
4. Never store liquid gas cylinder in a sub-terrain, or at places without adequate air ventilation.
• Wipe off powder coated surfaces with soft, moist rag. For lacquer surface, use suitable
cleaners. Do not clean heater with cleaners that are combustible or corrosive.
• Remove debris from the burner to keep it clean and safe for use.
CLEANING & CARE

11 FØRO RH13000 - MANUAL EN
PARTS
Reflector
Protective guard
Top mesh
Burner assembly
Cylinder housing
Base
Wheel assembly
Regulator &
hose (optional)

12 FØRO RH13000 - MANUAL
EN
CONSTRUCTION AND CHARACTERISTICS
• Transportable terrace/garden heater with tank housing
• Casing in steel with powder-coating or stainless steel
• Soluble gas connections are equipped with metal clamp
• Stainless steel flame screen
• Heat emission from reflector
SPECIFICATIONS
• For outdoor use only
• Uses propane or butane gas only
HARDWARE CONTENTS

13 FØRO RH13000 - MANUAL EN
Step 1: Attach wheel assembly (H) to base. Line
up holes in wheel bracket with corresponding
holes in base, insert M8x16 (BB) through holes,
and finger tighten two M8 flange nuts (AA) and
4 washer (FF). Be sure that the wheel assembly
is parallel to the base, and fully tighten bolts.
Step 2: Use the connection part (MM) and bolt
M6X10 (LL) to connect the Cylinder Housing (F)
to the base (G), and fix it with bolt M8X16 (BB).
ASSEMBLY

14 FØRO RH13000 - MANUAL
EN
Step 3: Remove the protective film from the
reflector and fasten there flector together
using 9 small screws (DD) and 9 cap nuts (CC)
Important Note: To aid with assembly, please
align the reflector sections and attach the
screws loosely before finally tightening
together
If it is with one piece reflector, skip this step
and go to next step directly
Step 4: Use screws 3/16” (KK) to connect the
Top mesh (C) and burner assembly (D).

15 FØRO RH13000 - MANUAL EN
Step 5: First insert the Protective guard (B)
into the top of the burner assembly (D), then
connect the reflector (A) and Top mesh (C) with
Reflector spacers (EE) and wing nuts (GG)
Step 6: Connect the assembled upper and
lower parts, connect the burner assembly (D)
and the Cylinder Housing (F) with bolts M5X10
(HH) and nuts M5 (II).

16 FØRO RH13000 - MANUAL
EN
Attach regulator to gas line and tank.
• Fit the gas regulator rubber hose with the end thread of inlet gas steel pipe and tighten the
nut.
• Connect the regulator with the LPG gas tank in counter- clockwise direction and tighten it
by adjustable wrench.
• Put LPG gas tank into stand.
• Do not store a spare LP-gas cylinder under or near this appliance;
• Never fill the cylinder beyond 80 percent full;
• Place the dust cap on the cylinder valve outlet whenever the cylinder is not in use. Only
install the type of dust cap on the cylinder valve that is provided with the cylinder valve.
Other type of caps or plugs may result in leakage of propane.

17 FØRO RH13000 - MANUAL EN
PROBLEM PROBABLE CAUSE SOLUTION
The pilot doesn’t light. • Gas regulator may be OFF
• Gas cylinder empty
• Opening blocked
• Air in supply system
• Loose connections
• Turn the regulator ON
• Replace with full cylinder
• Clean or replace opening
• Purge air from lines
• Check all fittings
The pilot doesn’t stay
on.
• Debris around pilot
• Loose connections
• Thermocouple faulty
• Gas leak in line
• Lack of fuel pressure
• Clean dirty area
• Tighten connections
• Replace thermocouple
• Check connections
• Tank near empty. Refill LPG
tank.
The burner doesn’t
light.
• Pressure is low
• Opening blocked
• Control not ON
• Thermocouple faulty
• Pilot light assembly bent
• Not in correct location
• Cylinder is almost empty.
Replace with full cylinder
• Remove and clean
• Turn valve to ON
• Replace thermocouple
• Place pilot properly
• Position properly and retry
TROUBLESHOOTING

18 FØRO RH13000 - MANUAL
EN
SERVICE & MAINTENANCE INFORMATION
lf the pilot heater fails to operate correctly, contact place of purchase or their authorised
service agent for advice and service.
DO NOT ATTEMPT REPAIRS YOURSELF.
Periodic maintenance should performed at intervals not exceeding 6 months or when obvious
faults exist. (i.e.) flame burning abnormality or burner discolouration. Flame abnormality or
burner discolouration is generally a sign of gas supply blockage or blocked burner ports.
To clean the burner ports, remove the reflector assembly by removing the three nuts at the
top of the reflector. The mesh screen may than be extracted by removing the four retention
screws at the base of the mesh screen and four screws at the top of the screen. Remove the
two screws retaining the burner assembly, Rotate the burner assembly slightly then remove
the burner assembly upwards.
Care should always be taken to avoid damage to the gas piping and Piezo ignition lead.
The burner and mesh screen may than be cleaned by compressed air. Assembly is a reversal
of the above procedure.
If the pilot is blocked by debris, spider webs etc. the pilot flame may be small and the flame
failure device may have not heated up enough for the main burner to come on. If this happens
it will be necessary to clean the pilot and its gas tube.
To clean the pilot, remove the burner and pilot cover as detai1ed above, Inspect the pilot
injector and tubing for blockage. If obstructed clean with compressed air. Clean the flame
failure device. Assembly is a reversal of the above procedure.

Partyspace BV
Potteriestraat 67
8980 Beselare
Belgium
declares the following device in sole responsibility:
Brand name: Føro
Product type: RH13000
Product name: Round flame patio heater
Item number: FLAHTRNDBL
EAN: 5404019852370
Complies with the following harmonization rules:
EU 2016/426
EN 14543:2017
Beselare, Belgium – July 2021
L. Thiers, Director
DECLARATION OF CONFORMITY

20 FØRO RH13000 - HANDLEIDING
NL
• Lees de handleiding vóór installatie en gebruik;
• Dit apparaat moet worden geïnstalleerd en de gasfles moet worden opgeslagen in
overeenstemming met de geldende voorschriften;
• Blokkeer de ventilatieopeningen in de behuizing van de gasfles niet;
• Verplaats het apparaat niet tijdens gebruik;
• Sluit de kraan op de gasfles of bij de regelaar voordat u het apparaat verplaatst;
• De slang of de flexibele slang moet binnen de voorgeschreven periode worden vervangen;
• Gebruik alleen het door de fabrikant voorgeschreven type gas en type gasfles;
• Vooral bij sterke wind moet erop worden gelet dat het apparaat niet kantelt;
• Wees voorzichtig, de bereikbare onderdelen kunnen zeer heet zijn. Houd het product uit de
buurt van jonge kinderen;
• Dit apparaat vereist installatie door een bekwaam persoon;
• Alleen voor gebruik in goed geventileerde ruimten. In een goed geventileerde ruimte
moet minimaal 25% van de oppervlakte open zijn. De oppervlakte is de som van het
muuroppervlak;
• Het gebruik van dit apparaat in afgesloten ruimten kan gevaarlijk zijn en is verboden. Dit
apparaat mag niet ondergronds of in kelders worden gebruikt;
• Dit apparaat mag alleen worden gebruikt voor het verwarmen van ruimten;
• Dit apparaat beschikt niet over een atmosferische sensor. Het moet worden gebruikt voor
het verwarmen van goed geventileerde gebouwen die worden gebruikt voor het houden
van dieren of uitsluitend voor gebruik buitenshuis;
• Bewaar geen chemicaliën of ontvlambare materialen of spuitbussen in de buurt van dit
apparaat.
• Gebruik dit apparaat niet in een explosieve atmosfeer zoals in gebieden waar benzine of
andere brandbare vloeistoffen of dampen worden opgeslagen;
• Plaats geen voorwerpen op of tegen dit apparaat;
• Bescherm de hete glazen buis tegen regen, waterspatten of andere zaken die een plotselinge
temperatuurverandering kunnen veroorzaken en ertoe kunnen leiden dat het glas barst of
versplintert;
ALS U GAS RUIKT:
• Draai de gaskraan onmiddellijk dicht;
• Doof open vuur en open vlammen;
• Als de geur aanhoudt, neem dan onmiddellijk contact op met uw gasleverancier.
WAARSCHUWING : De gebruiker neemt alle risico’s op zich bij de montage en het gebruik van
de gashaard. Het niet opvolgen van de waarschuwingen en instructies in deze handleiding kan
leiden tot ernstig lichamelijk letsel, de dood of materiële schade. Als u de gebruiksaanwijzing
niet kunt lezen of niet volledig begrijpt, neem dan contact op met uw dealer. De fabrikant of
leverancier is niet verantwoordelijk voor nalatigheid van de gebruiker.
WAARSCHUWING
This manual suits for next models
1
Table of contents
Languages:
Other FORO Patio Heater manuals
Popular Patio Heater manuals by other brands

BlueRhino
BlueRhino Endless Summer EWTS8119L owner's manual

MrHeater
MrHeater MH30LPPH Operating instructions and owner's manual

Firesense
Firesense Lux Series manual

SereneLife
SereneLife SLOHT28 user manual

Ener-G+
Ener-G+ ZHQ2080-CWM-RM instruction manual

BlueRhino
BlueRhino Endless Summer 163000 owner's manual