Foscam FI8903W User manual

Water-proof Wired/ Wireless
IP Camera
User Manual
Model: FI8903W Model:FI8904W

IPCAM User Manual
- 2 -
Contents
1 WELCOME ............................................................................................................................... - 1 -
1.1 Features................................................................................................................................ - 1 -
1.2 Packing List.......................................................................................................................... - 2 -
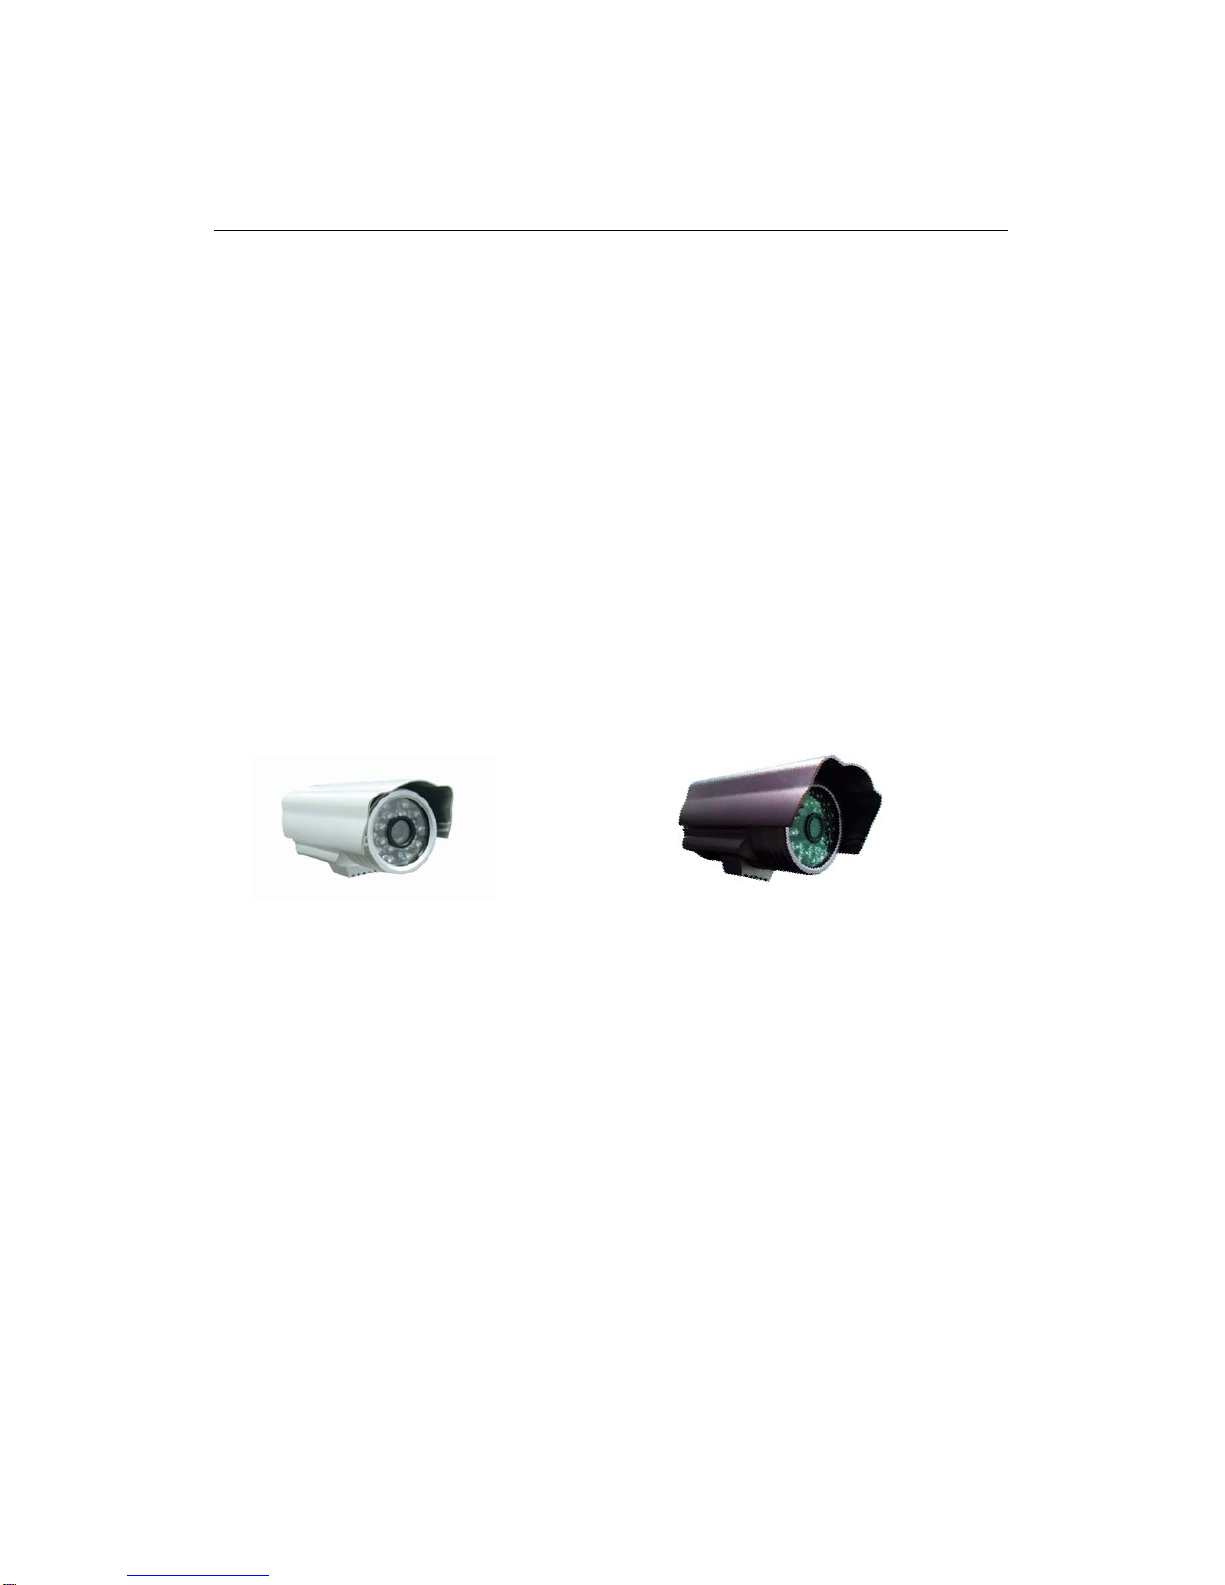
1.3 Product views....................................................................................................................... - 2 -
1.3.1 Front View................................................................................................................. - 2 -
1.3.2 Interface .................................................................................................................... - 3 -
1.4 PC System Requirements..................................................................................................... - 3 -
1.5 Hardware Instruction............................................................................................................ - 3 -
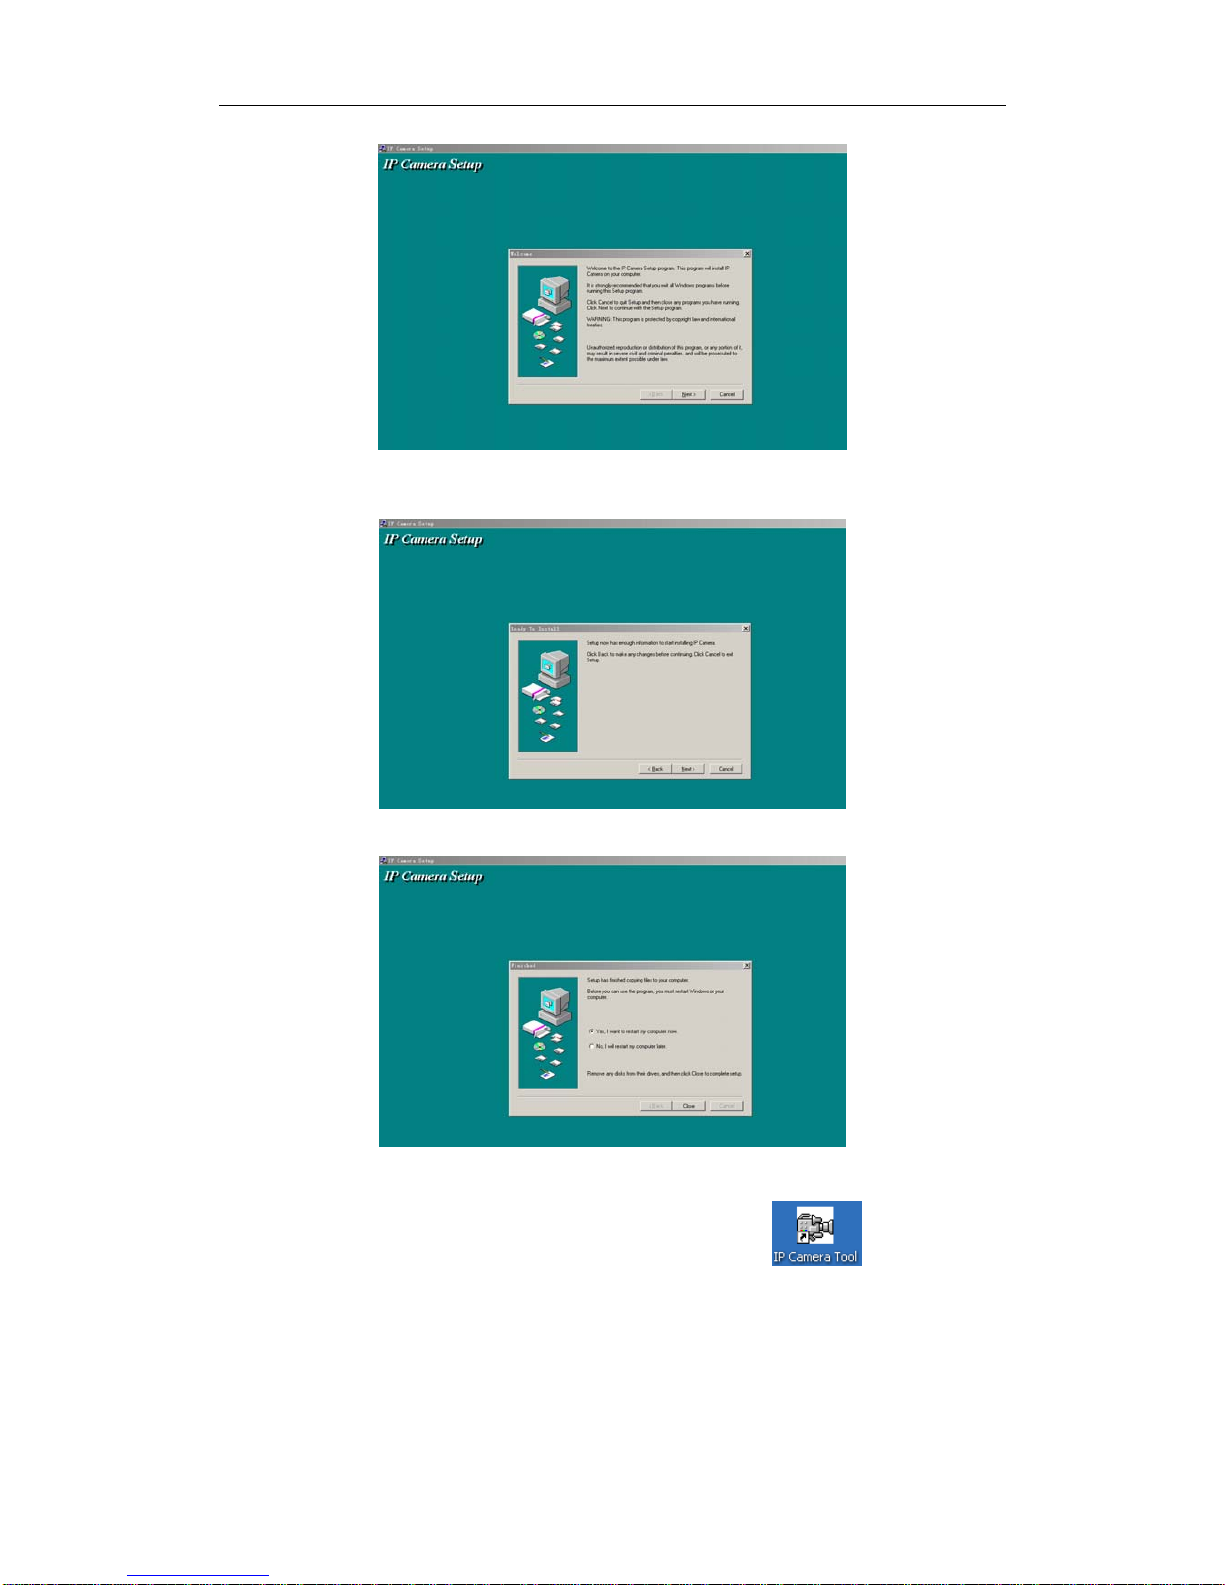
1.6 Software installation ............................................................................................................ - 3 -
2 SOFTWARE OPERATION....................................................................................................... - 6 -
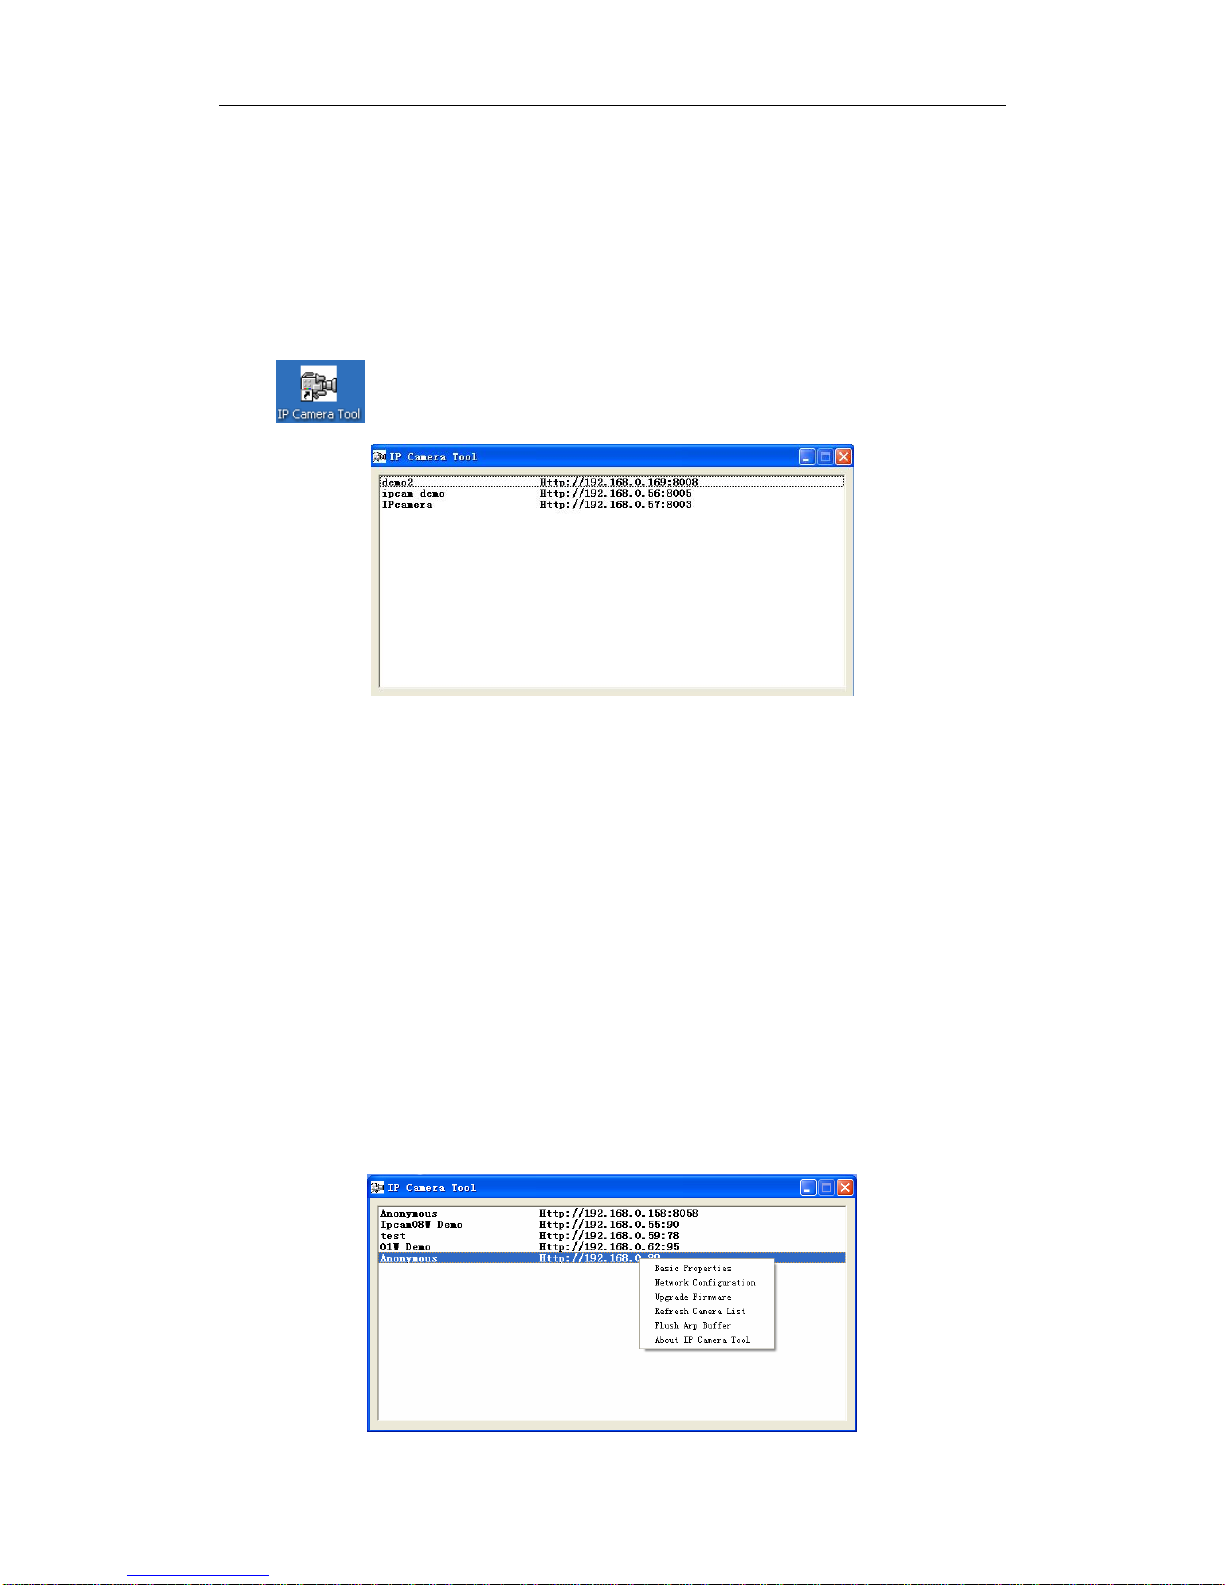
2.1 IP Camera Tool.................................................................................................................... - 6 -
2.2 Camera Login....................................................................................................................... - 9 -
2.3 For Visitor.......................................................................................................................... - 10 -
2.4 For operator.........................................................................................................................- 11 -
2.5 For Administrator............................................................................................................... - 12 -
2.5.1 Multi-Device Settings ............................................................................................. - 13 -
2.5.2 Network Settings..................................................................................................... - 15 -
2.5.3 DDNS Service Settings........................................................................................... - 16 -
2.5.4 Mail and FTP Service.............................................................................................. - 17 -
2.5.5 Motion Detection .................................................................................................... - 19 -
2.5.6 Log.......................................................................................................................... - 20 -
3 HOW TO USE......................................................................................................................... - 21 -
3.1 Step by step to use.............................................................................................................. - 21 -
3.2 Setting Wi-Fi of IP Camera................................................................................................ - 21 -
3.3 Connected to the Internet through ADSL directly ............................................................. - 22 -
3.4 Using a router to access the Internet.................................................................................. - 22 -
3.5 Static IP user ...................................................................................................................... - 23 -
3.6 How to use DDNS.............................................................................................................. - 24 -
3.7 How to use mobile telephone to enter ipcam.................................................................... - 25 -
4 APPENDIX................................................................................................................................... - 26 -
4.1 Frequently Asked Questions.............................................................................................. - 26 -
4.1.1 I have forgotten the administrator username and/or password................................ - 26 -
4.1.2 IPAddress configuration......................................................................................... - 26 -
4.1.3 Network Configuration ........................................................................................... - 26 -
4.1.4 No pictures Problems.............................................................................................. - 26 -
4.1.5 Problems with network bandwidth.......................................................................... - 27 -
4.1.6 For example: Register procedure from a DDNS web ............................................. - 27 -
4.1.7 Why pop-up the prompt”Fail to connect to the device…”?.................................... - 30 -
4.1.8 Can’t access the ipcamera in the internet? .............................................................. - 30 -

IPCAM User Manual
- 3 -
4.1.9 Problems of using the firefox browser.................................................................... - 30 -
4.2 Default Parameters............................................................................................................. - 33 -
4.3 Specification....................................................................................................................... - 34 -
5 OBTAINING TECHNICAL SUPPORT ...................................................................................... - 35 -

IPCAM User Manual
- 1 -
1WELCOME
IPCAM is an integrated wireless IP Camera solution. It combines a high quality digital
video Camera with network connectivity and a powerful web server to bring clear to your
desktop from anywhere on your local network or over the Internet.
The basic function of IPCAM is transmitting remote video on the IP network. The high
quality video image can be transmitted with 30fps speed on the LAN/WAN by using
MJPEG hardware compression technology.
The IPCAM is based on the TCP/IP standard. There is a WEB server inside which could
support Internet Explore. Therefore the management and maintenance of your device
become more simply by using network to achieve the remote configuration, start-up and
upgrade firmware.
You can use this IPCAM to monitor some special places such as your home and your
office. Also controlling the IPCAM and managing image are simple by clicking the website
through the network.
NOTE: You can use the IP Camera Step by Step(details: 3.1).
1.1 Features
●Powerful high-speed video protocol processor
●High-sensitivity 1/4" CMOS sensor
●300K Pixels
●IR night vision
●Optimized MJPEG video compression for transmission
●Multi-level users management and passwords definition
●Embeded Web Server
●Support a wide range of browsers(IE, Firefox, Google)
●Support wireless network (Wi-Fi/802.11/b/g)mobile
●Supporting Dynamic IP (DDNS)and UPnP LAN and Internet(ADSL,Cable Modem)
●Giving alarm in cause of motion detection
●Supporting image snapshot
●Supporting image fullsceen
●Supporting mobile telephone
●searching the wireless network
●log
●Control Signal
●Support multiple network protocols:HTTP/TCP/IP/UDP/STMP/DDNS/SNTP/DHCP/FTP
●Support remote system update
Advanced Features
Multi-Protocol support and Transportation

IPCAM User Manual
- 2 -
IPCAM supports Multi-Protocol such as TCP/IP, SMTP and HTTP. Sending the image to
your mailbox automatically when the IPCAM is triggered.
Motion Detection
Your may use the internal Motion Detection function or external sensor to trigger images
recording and transportation.
DDNS support
Using the IPCAM in the condition which including ADSL and IP change often is more
convenient, because IPCAM provides dynamic DNS function.
Advanced User Management
Only allowing authorized users access to real-time images of the IP Camera.
1.2 Packing List
Untie the pack and check the items contained against the following list:
zIPCAM×1
zWi-Fi Antenna×1 (only available for wireless model)
zDC Power Supply×1
zUser Manual×1
zCD×1(Include IPCAM user guide、IP camera tool)
zNetwork Cable×1
zMounting bracket×1(option)
NOTE:Contact us immediately in the case of any damaged or short of contents.
1.3 Product views
1.3.1 Front View
FI8903W FI8904W
Figure 1.1
Infrared LED 18 IR LEDs(model FI8903W) /24 IR LEDs(model FI8904W)
LENS CMOS sensor with fixed focus lens.

IPCAM User Manual
- 3 -
Wi-FI Antenna Wireless Antenna
1.3.2 Interface
LAN : RJ-45/10-100 Base T
DC5V : 5V/2A Power supply
RESET BUTTON: Press and hold down the RESET BUTTON for 5 seconds.Release the
power button and IP camera will be reset back to the factory default parameter.
1.4 PC System Requirements
System configuration requirements: ( Example for view four IP Camera )
CPU: 2.06GHZ or above Memory: 256M or above
Network Card: 10M or above Display Card: 64M or above memory
Recommendable Operating System: Windows2000 or Windows XP
1.5 Hardware Instruction
Follow the steps below to set up your camera hardware. Make sure to follow each step
carefully to ensure that the camera operates properly.
1) Plug the network cable into the camera and then into your Cable/DSL router.
2) Plug the power adapter into the camera and then into the power outlet.
CAUTION: Make sure to only use the power adapter supplied with IPCAM. Using a
non-approved power adapter may damage the camera.
3) The camera takes approximately 30 seconds to start up before it displays an IP
address on the IP Camera Tool(details: 2.1).
4) When the camera is powered and network cable plug correctly.It’s head will turn
around and the Network Indicator LED is blank.
1.6 Software installation
Software installation is the key to the successful use of this product.
1 Open the CD,find the software as instruction;
2 Double click IPCamSetup.exe and install the software as instruction.

IPCAM User Manual
- 4 -
Figure 1.4
3 Only click Next,you will complete the software installation.
Figure 1.5
Figure 1.6
The computer restarts upon installation completion and an icon appears on the
desktop automatically.
NOTE: Before installing and using the product, please read the following precautions
carefully and make sure they are fully understood.
Use only the power adapter attached with the product. Use of unauthorized power

IPCAM User Manual
- 5 -
adapter may cause damage to your IP Camera.
IP Camera terminal shall be installed in an indoor environment.

IPCAM User Manual
- 6 -
2 SOFTWARE OPERATION
2.1 IP Camera Tool
When the Device has been mounted properly, you can double click the icon “IP Camera
Tool” and a dialog box as Figure 2.1 will pop up.
Figure 2.1
Note: The software searches IP Servers automatically over LAN.
There are 3 cases:
1No IP Camera found within LAN. After about 1 minute search, the Result Field will show
“not found IP Server” and the program shut automatically;
2IP Cameras having been installed within LAN. All the IP Cameras will be listed and the
total number is displayed in the result field as shown in Figure 2.1.
3The IP Cameras installed within LAN do not share the same subnet with the monitoring
PC. A prompt as shown in result field (prompt: Subnet doesn’t match,dbclick to change!).
Click the left mouse button to choose the prompt and click the right mouse, choose
Network Configuration to set the IP address of the Camera to the same subnet as LAN.
Six Options
Choose the IP Camera list and Click right mouse button,there are five options,Basic
Properties, Network Configuration, Upgrade Firmware, Refresh Camera List, Flush Arp
Buffer, About IP Camera Tool as shown 2.2.

IPCAM User Manual
- 7 -
Figure 2.2
zBasic Properties
There are some device information in the Basic Properties, such as Device ID, System
Firmware Version, Web UI Version.
Figure 2.3
zNetwork Configuration
In this page, you can configure the Network parameter.
Figure 2.4
DHCP checkbox:if checked, the device will obtain IP from DHCP server (To be make
sure the Router which the device connect with has DHCP function).
IP address: Fill in the IP address assigned and make sure it is in the same subnet as the
gateway.(i.e. the first three sections are the same)
Mask: The default subnet mask of the equipment is: 255.255.255.0
Gateway: Make sure it is in the same subnet with PC IP address.
DNS: IP address of IPS network provider.
Port: LAN port assigned for the equipment, usually 80
User & Password : Default administrator username/password: admin/No password
Enable Using Dhcp the system will assign a reasonable IP address for your equipment
only if your gateway supports DHCP (It is the case with most gateways).
NOTE: when the prompt”ubnet doesn’t match,dbclick to change!”ppeared,please set the
IP Camera IP address once again.
zUpgrade Firmware
Enter the correct User and Password to upgrade system Firmware and Web UI.

IPCAM User Manual
- 8 -
Figure 2.5
zRefresh Camera List
Refresh camera list manually.
zFlush Arp Buffer
When cable network and wireless network of the device both are fixed IP address. There
is a a problem you may encounter is can search the camera IP but can’t open the camera
web page.you may try to use flush arp buffer.
zAbout IP Camera Tool
There are some Basic informations of IP Camera Tool, such as IP Camera Tool Version,
IP Camera ActiveX control Version.

IPCAM User Manual
- 9 -
2.2 Camera Login
You can access the camera through IP Camera Tool or IE directly.
1) Double click the IP address of the IP Camera listed(Figure 2.1).IE will be opened
automatically and display the camera login page.
2) Access the camera by IE browser directly, type in the camera’s IP address.for example:
3) The Camera Login page pop-up.
Figure 2.6
enter your account and password on the login page as shown in Figure 2.6. By default,
administrator’s username is:admin and no password.. Click “Sign in” to enter the
monitoring page(Figure 2.7). The IP camera supports five languages: english, french,
spanish, simple chinese, traditional chinese.
Note:
1、Support ActiveX Browser Plug-ins(IE, GreenBrowser). Click on the first Login
Button.
2、Other Browser(Firefox, Google). Click on the Second Login Button. Some features
would be lost(Full sceen、Multi-channel image).

IPCAM User Manual
- 10 -
2.3 For Visitor
Figure 2.7
For example: if is bright ,the first route is on Detection(Motion Detection).
If you want to detect 4 views , need to click this ico .The first you should add more
deivce.see details in 2.5.1 Multi-Device Settings.
OSD: Display date and time on the video. You can disable the OSD function or choice
other color. (OSD:on-screen display)
Add timestamp on record:When checked, the timestamp will add in the rightdown
corner of the video record
Full Screen: Click to Enlarge Image. Click an image, image full-screen.
REC: Click ico into REC mode, is stop.(audio is recording when audio switch is
open)
Snapshot: Click ico to snap the picture.
Note:
the record file name is: device Alias_ Current time.Avi
For example: IPCAM_20081211134442.Avi
It means the device alias is IPCAM and its record’s end time is : At 13:44:42 on December
11, 2008
When use motion detection and checked Send Mail on Alarm. The name of the picture
received in mailbox is like this: device id(Alias)_ Current time.jpg

IPCAM User Manual
- 11 -
For example: 00606E576A02(IPCAM)_m20081216212745.jpg
It means the device ID is 00606E576A02, the device alias is IPCAM and its picture’s time
is : At 21:27:45 on December 16, 2008
2.4 For operator
When login as operator or administrator, you can enter the For Operator.
Figure 2.8
Flip: To see the flip image.
Mirror: To see the mirror image.
Resolution:VGA(640 X 480)/ QVGA(320 X 240)
Work mode:50Hz/60Hz/Outdoor
Color parametar:click or can adjust the brightness and contrast

IPCAM User Manual
- 12 -
2.5 For Administrator
When you login as administrator, “For Administrator” is enabled.
Device Info:You can find the information about Device ID,Firmware Version and
Embeded Web UI Version.
Alias Settings: You can Input the new name as you like.
Data&Time Settings: Data&Time Settings page.
Users Settings: Eight accounts are acceptable for this system. Here the eight users can
configure their user names and password as Administrator, Operator or Visitor.
Figure 2.9
zVisitor: In this mode,you can only view.
zOperator: You can control the direction of IP Camera and set some parameter.
zAdministrator: You can setup the advanced configurations of the IP Camera.
Set Record Path:Click “Browse” to choose the record path.
Set AlarmRecord Path: Click “Browse” to choose the alarm record path.
the both default path is C:\Documents and Settings\All Users\Documents.
Note: In Windows Vista, there are two points need to notice:
1) Vista's Security level is higher than Windows XP/2000.For "set record path" function,
user should add the Device IP address to the IE's 'Trusted sites' first.
The 'Trusted sites' path: IE browser->Tool->Internet Proper->Security->Trusted
sites->Sites->Add".In Vista,there is a prompt to add Trusted sites when user set
record/Alarmrecord path.
2) In Vista, Can't Set Windows System Root Directory as the Record/AlarmRecord Path.
These prompts only pop-up in Vista.
UpnP Settings:If you access IP Camera,to be make sure UpnP Status is Succeed.
Upgrade Device Firmware:Upgrade Device Firmware and device embeded web UI
sofeware in this page.
Restore Factory Settings: Restore factory settings of the device.

IPCAM User Manual
- 13 -
Reboot Device:Reboot the device.
log: Record who entered ipcam
Back: Back to Monitoring Mode.
2.5.1 Multi-Device Settings
zAdd cameras in LAN
In the Multi-Device Settings page,you can see all devices searched in LAN.The 1st Device
is this device deault.You can add more cameras list in LAN for monitoring. This Web
software supports up to 9 IP Cameras online simultaneously.Click “The 2ND Device”
and Double click the item in the “Device List in Lan”, Alias、Host and Http Port will fill in
automatically.Enter the correct username and password then click “add”.Add more
cameras in the same way.
Figure 2.10
zAdd cameras in the Internet
Firstly,make sure the camera added can access in the Internet with the IP address or
DDNS domain.like this:http://202.96.133.134: 9008 or http://IPcamera.dyndns.org:9008
You can enter the Host: 202.96.133.134 port: 9008 or Host: IPcamera.dyndns.org
port: 9008.Enter the correct username and password then click “add”.Add more cameras
in the same way as shown in Figure 2.11.

IPCAM User Manual
- 14 -
Figure 2.11
Figure 2.12

IPCAM User Manual
- 15 -
2.5.2 Network Settings
zBasic Network Settings
If the router that the IP camera connect has DHCP function, you can choice “Obain IP
from DHCP Server” else fill in the network parameters manually.
Http Port:In most cases, you can leave this value as 80, however, if your Internet Service
Provider blocks this port, you may switch to another port number such as 8005.
Figure 2.13
zWireless Lan Settings
1) manual control
Please enter the wireless net setting page of the wireless Router to find out SSID,Channel,
Encryption,Authetication. The product supports WEP and WAP security encryption.

IPCAM User Manual
- 16 -
Figure 2.14a
2) Automatic
Please Click the button ‘scan’, Wireless Network showed in the Wireless Network list. Then
Select a wireless network.. writed the correct password.
zADSL Settings
When connected to the Internet through ADSL directly, you can enter the ADSL username
and password obtained from ISP.
Figure 2.15
2.5.3 DDNS Service Settings
DDNS Service: The system supports protocols from some DDNS providers: Dyndns.org.
User and Password: the user name and password used when applying for the domain
name. (details: 4.1.6)
DDNS Host: the Domain Name

IPCAM User Manual
- 17 -
Figure 2.16
2.5.4 Mail and FTP Service
Note: When Alarm Service Settings-> Send Mail on Alarm is check, the Mail Service
takes effect.
Configure the E-mail box to receive and send mails. The E-mail box is used for receiving
the images sent after alarm and the system IP address after successful dial-up.
Sender: This device use the sender mailbox to send mails.
Receiver: To receive the mail from the Sender. You can set up to 4 receiver mailbox.
SMTP Server: the SMTP server for the sender mailbox
Need Authentication: if the sender mailbox need authentication, you should check it then
input the SMTP username & Password.
Mail test:Please set the Mail parameter and click "Submit" first. There are Mail test result.
1 Can not connect to the server
2 Network Error. Please try later
3 Server Error
4 Incorrect user or password
5 The sender is denied by the server. Maybe the server need to authenticate the user,
please check it and try again
6 The receiver is denied by the server. Maybe because of the anti-spam privacy of the
server
7 The message is denied by the server. Maybe because of the anti-spam privacy of the
server
8 The server does not support the authentication mode used by the device
Report Internet IP by Mail: When ipcam power on or Internet IP changed,it will send the
internet IP by mail.(for example:IPCAM 's url is http://119.123.207.96:9002). Make sure
the port is map to the router correctly by UPNP or Virtual Map function.
Other manuals for FI8903W
6
This manual suits for next models
1
Table of contents
Other Foscam IP Camera manuals

Foscam
Foscam FI8910W User manual

Foscam
Foscam FI8903W User manual

Foscam
Foscam FI9818W User manual

Foscam
Foscam FI9816P User manual

Foscam
Foscam FI8904W User manual

Foscam
Foscam FI9831P User manual

Foscam
Foscam FI8601 User manual

Foscam
Foscam FI9803P User manual

Foscam
Foscam FI9820W User manual

Foscam
Foscam C1 Lite User manual

Foscam
Foscam FI9826P User manual

Foscam
Foscam FI9818W User manual

Foscam
Foscam FI8903W User manual

Foscam
Foscam FI9805P User manual

Foscam
Foscam FI8908W User manual

Foscam
Foscam FI9803P User manual

Foscam
Foscam FI9851P User manual

Foscam
Foscam C1 Lite User manual

Foscam
Foscam FI9901EP User manual

Foscam
Foscam FI9821EP User manual