Fostex DV-40 User manual

DV40 Owner’s Manual
<V1.1 Supplement>
The DV40 software has been upgraded to
Version 1.1.This owner’s manual supplement
describesnewly addedand changedfunctions
on the V1.1 software.
For basic operations and functions, refer to
the DV40 owner’s manual.
8288687000

2
Contents
1. New UTILITY Menu “Edit Volume Lbl (Edit Volume Label)?” . . . . . . . . . . . . . . . . . . .
1-1. Editing VOLUME LABEL . . . . . . . . . . . . . . . . . . . . . . . . . . . . . . . . . . . . . . . . . . .
1-2. Renaming VOLUME LABEL Recognized as “REEL NUMBER” . . . . . . . . . . . . . . .
2. New UTILITY Menu “Set SCENE&REEL (Set SCENE & REEL No.)?” . . . . . . . . . . . . . . . .
3. Change on “TC UBIT SEL” TC SETUP Menu . . . . . . . . . . . . . . . . . . . . . . . . . . . . . . . . .
3-1. Selecting “SRNo.” as TC UBIT Information . . . . . . . . . . . . . . . . . . . . . . . . . . . .
3-2. Selecting “MDYf” as TC UBIT Information . . . . . . . . . . . . . . . . . . . . . . . . . . . .
3-3. Selecting “DMYf” as TC UBIT Information . . . . . . . . . . . . . . . . . . . . . . . . . . . .
4. New SETUP Menu “F.Name MD (File Name Mode)?” . . . . . . . . . . . . . . . . . . . . . . . . . .
5. New SETUP Menu “DefaultFileName (Default File Name)?” . . . . . . . . . . . . . . . . . . . . .
6. LIST PLAY Function . . . . . . . . . . . . . . . . . . . . . . . . . . . . . . . . . . . . . . . . . . . . . . . . . . . .
6-1. Turning On LIST PLAY Mode . . . . . . . . . . . . . . . . . . . . . . . . . . . . . . . . . . . . . . .
6-2. Confirming Linked Files . . . . . . . . . . . . . . . . . . . . . . . . . . . . . . . . . . . . . . . . . .
6-3. Reprogramming PLAY LIST . . . . . . . . . . . . . . . . . . . . . . . . . . . . . . . . . . . . . . . .
6-4. Locating to Beginning of PLAY LIST . . . . . . . . . . . . . . . . . . . . . . . . . . . . . . . . .
6-5. Locating to End of PLAY LIST . . . . . . . . . . . . . . . . . . . . . . . . . . . . . . . . . . . . . .
7. Use of PS/2 Keyboard . . . . . . . . . . . . . . . . . . . . . . . . . . . . . . . . . . . . . . . . . . . . . . . . . .
7-1. Valid and Invalid keys . . . . . . . . . . . . . . . . . . . . . . . . . . . . . . . . . . . . . . . . . . .
7-2. DV40 & PS/2 Keyboard Key Correspondence . . . . . . . . . . . . . . . . . . . . . . . . .
8. FTP SERVER FUNCTION . . . . . . . . . . . . . . . . . . . . . . . . . . . . . . . . . . . . . . . . . . . . . . . . .
8-1. Connection . . . . . . . . . . . . . . . . . . . . . . . . . . . . . . . . . . . . . . . . . . . . . . . . . . . . .
8-2. FTP Command Compliance . . . . . . . . . . . . . . . . . . . . . . . . . . . . . . . . . . . . . . . .
8-3. Saved File Location . . . . . . . . . . . . . . . . . . . . . . . . . . . . . . . . . . . . . . . . . . . . . .
8-4. FTP Client Application . . . . . . . . . . . . . . . . . . . . . . . . . . . . . . . . . . . . . . . . . . .
8-5. Checking TCP/IP Menus . . . . . . . . . . . . . . . . . . . . . . . . . . . . . . . . . . . . . . . . . .
8-6. Changing the TCP/IP Setting . . . . . . . . . . . . . . . . . . . . . . . . . . . . . . . . . . . . . . .
9. Deletion of “Running Time?” SETUP Menu . . . . . . . . . . . . . . . . . . . . . . . . . . . . . . . . .
10. LIST of SETUP / UTILITY / TC SETUP MENU . . . . . . . . . . . . . . . . . . . . . . . . . . . . . . . .
10-1. SETUP Menu . . . . . . . . . . . . . . . . . . . . . . . . . . . . . . . . . . . . . . . . . . . . . . . . . . .
10-2. UTILITY Menu . . . . . . . . . . . . . . . . . . . . . . . . . . . . . . . . . . . . . . . . . . . . . . . . .
10-3. TC SETUP Menu . . . . . . . . . . . . . . . . . . . . . . . . . . . . . . . . . . . . . . . . . . . . . . . .
3
3
4
6
7
7
8
8
9
10
11
12
13
14
14
14
15
15
15
16
16
16
17
17
17
19
21
22
22
23
23
3
1. New UTILITY Menu “Edit Volume Lbl (Edit Volume Label)?”
The “VOLUME LABEL” is a name which is used to identify a disk. It is normally named when
formatting a disc. As mentioned in the DV40 Owner’s Manual page 1-5, the default name of
VOLUME LABEL to be attached to the DVD-RAM disk is “DV40-DVD”. This UTILITY menu
has been newly added so that the VOLUME LABEL can be changed even after formatting the
DVD-RAM disk used on DV40. The followings are the procedures explaining about chang-
ing the default VOLUME LABEL “DV40-DVD” of the preformatted DVD-RAM disc.
1-1. Editing VOLUME LABEL
1) While the unit is in STOP mode, press the [SHIFT] key and then [SETUP] key to enter the UTILITY
mode.
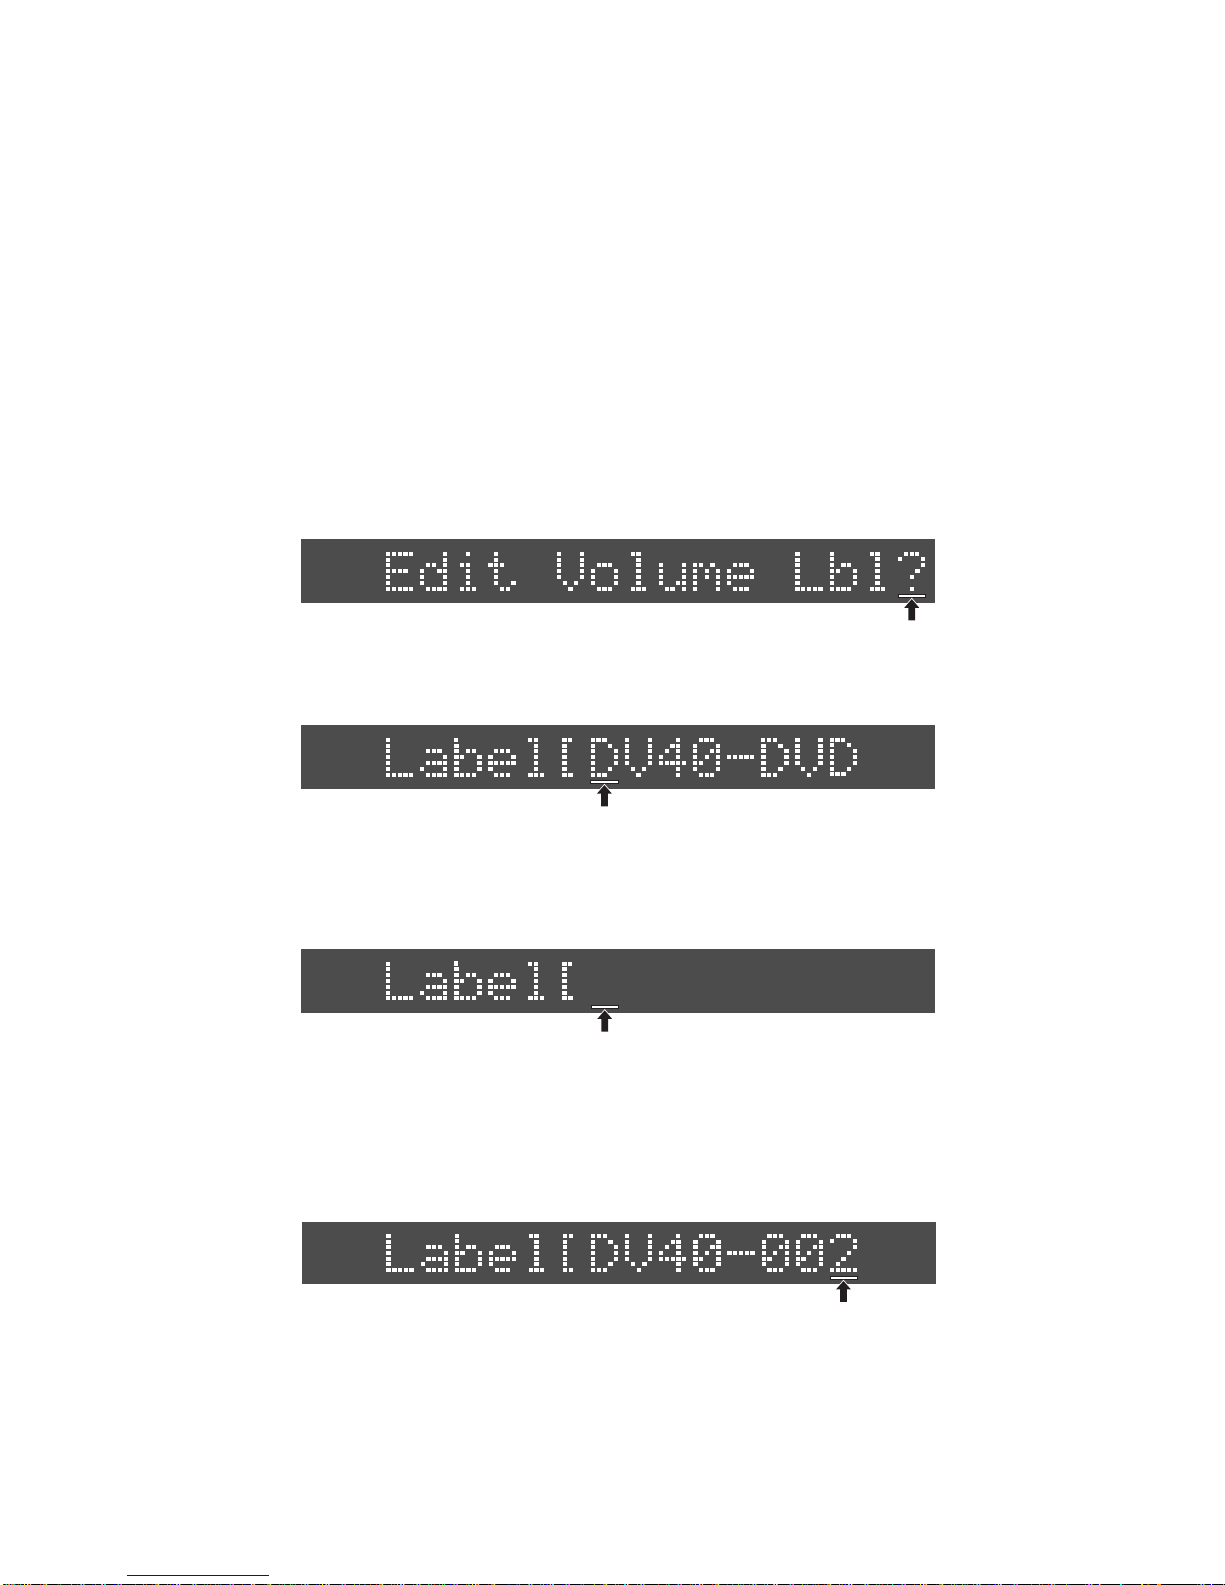
2) Rotate the jog dial or press the [SKIP/CURSOR |<<] / [SKIP/CURSOR >>|] key to select the “Edit
Volume Lbl?” menu.
“?” is flashing on the DV40 FL display.
Flashing
4) Press the [MARGIN RESET / CLR] key several times to erase all the alphanumeric characters
named as a VOLUME LABEL.
Regardless of flashing alphanumeric character position, pressing the [MARGIN RESET / CLR] key
several times will erase all the VOLUME LABEL characters.
3) Press the [ENTER/YES] key.
Presume that the default VOLUME LABEL “DV40-DVD” is displayed. The first character “R” is
flashing.
Then, use the alphanumeric keys to rename the VOLUME LABEL. In the case only a couple of
characters are to be modified, instead of pressing the [MARGIN RESET / CLR] several times, moving
the cursor by the [SKIP/CURSOR |<<] and [SKIP/CURSOR >>|] keys to a desired position and rotating
the jog dial is more convenient.
Presume that “DV40-002” is named as a new VOLUME LABEL.
5) Press the [ENTER/YES] key.
Pressing the [ENTER/YES] key will rename the VOLUME LABEL of the DVD-RAM disk put in the
DV40 DVD-RAM drive as “DV40-002”. After pressing the [ENTER/YES] key, “Edit Volume Lbl?” will
be displayed again. (“?” is flashing.)
Flashing
Flashing
Flashing

4
6) Press the [EXIT/NO] key or [STOP] key.
Pressing the [EXIT/NO] key or [STOP] key goes back to the normal display.
CAUTION
There is a limitation on the number of maximum alphanumeric characters on the VOLUME LABEL
recognized by WINDOWS 98/NT, Macintosh computer and UDF standards as follow.
WINDOWS 98/NT: 10 characters
Macintosh: 27 characters
UDF Standards: 127 characters
Considering the usage of DVD-RAM disc in both the WINDOWS and Macintosh platforms, naming
up to 10 characters of VOLUME LABEL would be recommended.
1-2. Renaming VOLUME LABEL Recognized as “REEL NUMBER”
The “REEL NUMBER” is put on each tape (file in the case of DV40) and is used to identify a tape (file)
with time code information. Putting a REEL NUMBER is substantial when creating a EDL (Edit Decision
List). By adding “-XXX (XXX: 000 ~ 999)” after a name, the section “XXX” is recognized as a REEL
NUMBER.
VOLUME LABEL: ######-XXX (######: Name)
(XXX: REEL NUMBER. 000 ~ 999)
CAUTION 1
Due to the limitation of the number of alphanumeric characters used for VOLUME LABEL recog-
nized on Windows OS, using up to 10 alphanumeric characters including the 3-digit REEL NUMBER
are recommended.)
CAUTION 2
The REEL NUMBER XXX is just a character string. Please remember that it does not roll over to the
next digit or roll back to the previous digit.
The following is an example of renaming the VOLUME LABEL to be recognized as a “REEL NUM-
BER”.
1) While the unit is in STOP mode, press the [SHIFT] key and then [SETUP] key to enter the UTILITY
mode.
2) Rotate the jog dial or press the [SKIP/CURSOR |<<] / [SKIP/CURSOR >>|] key to select the “Edit
Volume Lbl?” menu.
3) Press the [ENTER/YES] key.
Presume that the default VOLUME LABEL “DV40-DVD” is currently set.
Flashing

5
Flashing
4) Press the [MARGIN RESET / CLR] key several times to erase all the alphanumeric characters
“DV40-DVD”.
Regardless of flashing alphanumeric character position, pressing the [MARGIN RESET / CLR] key
several times will erase all the VOLUME LABEL characters. Then, use the alphanumeric keys to
rename the VOLUME NAME. Presume that “DV40-008” is named as a new VOLUME LABEL.
5) Press the [ENTER/YES] key.
By the press of [ENTER/YES] key, “Edit Volume Sel?” starts flashing.
6) Press the [EXIT/NO] or [STOP] key.
Pressing the [EXIT/NO] key goes back to the normal display. If “SRNo.” is selected in the “TC UBIT
Sel?” menu explained in the section 3. Change on “TC UBIT SEL” TC SETUP Menu, the “REEL NUM-
BER: 008” will be output as a TC UBIT information.
NOTE 1
The REEL NUMBER set in the “Edit Volume Lbl?” UTILITY menu interlocks with the REEL NUMBER
set by another UTILITY menu “Set REEL&SCENE?” which will be explained in the section 2. New
UTILITY Menu “Set SCENE&REEL?”. The latter REEL NUMBER set by either UTILITY menu is going to
be the one to be sent out as a TC UBIT information when the “SRNo.” is selected in the “TC UBIT
Sel?” TC SETUP menu.
NOTE 2
When formatting the DVD-RAM disk, renaming the VOLUME LABEL with 3-digit number (e.g. DV40-
005) from the default name (DV40-DVD) is possible, so that the 3-digit number can be recognized
as a REEL NUMBER which allows to output as a TC UBIT information.

6
2. New UTILITY Menu “Set SCENE&REEL (Set SCENE & REEL No.)?”
This UTILITY menu has been newly added so that the SCENE NUMBER as well as the REEL NUMBER on
each file created on DV40 can be set. The SCENE / REEL NUMBERS set by this UTILITY menu can be
sent out as a TC UBIT information when “SRNo.” is selected in the “TC UBIT Sel?” TC SETUP menu. The
followings are the procedures explaining about changing the SCENE / REEL NUMBER.
1) While the unit is in STOP mode, press the [SHIFT] key and then [SETUP] key to enter the UTILITY
mode.
2) Rotate the jog dial or press the [SKIP/CURSOR |<<] / [SKIP/CURSOR >>|] key to select the “Set
SCENE&REEL?” menu.
“?” is flashing on the DV40 FL display.
3) Press the [ENTER/YES] key.
The SCENE NUMBER “00000” starts flashing by the press of [ENTER/YES] key.
Select either the SCENE NUMBER or the REEL NUMBER by the [SKIP/CURSOR |<<] / [[
[[
[SKIP/CURSOR
>>|] key and rotate the jog dial / use the alphanumeric keys to set a desired number. The following
example shows that the SCENE NUMBER is set to “00005” and the REEL NUMBER “002”.
3) Press the [ENTER/YES] key.
By pressing the [ENTER/YES] key, the SCENE NUMBER and the REEL NUMBER are set to “00005”
and “002” respectively. Also these values can be sent out as TC UBIT information.
NOTE
The REEL NUMBER set in the “Set REEL&SCENE?” UTILITY menu interlocks with the REEL NUMBER
set by another UTILITY menu “Edit Volume Lbl?” explained in the section 1-2. Renaming VOLUME
LABEL Recognized as “REEL NUMBER”. The latter REEL NUMBER set by either UTILITY mode is
going to be the one to be sent out as a TC UBIT information when “SRNo.” is selected in the “TC
UBIT Sel?” TC SETUP menu.
Flashing
Flashing
Flashing

7
3. Change on “TC UBIT SEL” TC SETUP Menu
This menu allows to select the TIMECODE UBIT information attached to the TIMECODE output from
DV40. In addition to the current selection “MDYf” (Month/Day/Year/File No.) and “DMYf” (Day/
Month/Year/File No.), “SRNo” (S: Scene, R: Reel) is newly added on the V1.1 software. The date
information on “MDYf” and “DMYf” is taken out from the internal clock on DV40 and is based on the
time when the file is created. “SRNo” information is derived from the 3-digit REEL NUMBER attached
to the VOLUME LABEL set in the “Edit VOLUME Lbl?” UTILITY menu or SCENE / REEL NUMBER set in
the “Set SCENE&REEL?” menu. To select the TC UBIT information, follow the procedures below.
1) Press the [SHIFT] key and then [CHASE] key to enter the TC SETUP mode.
2) Rotate the jog dial or press the [SKIP/CURSOR |<<] / [SKIP/CURSOR >>|] key to select the “TC
UBIT Sel?” menu.
The default setting of TC UBIT information is “SRNo”. The following appears on the DV40 FL
display. (“?” flashes.)
3) Rotate the jog dial to select a desired TC UBIT information and press the [ENTER/YES] key.
Pressing the [ENTER/YES] key allows to select the TC UBIT information attached to the TC output
from DV40. The UBIT information you can select is the one among “MDYf”, “DMYf” and “SRNo”
(default setting).
3-1. Selecting “SRNo.” as TC UBIT Information
Rotate the jog dial and select “SRNo.” in the “TC UBIT Sel?” menu. (“SRNo.” is flashing.) Then,
press the [ENTER/YES] key.
If “SRNo.” is selected, the following 8-digit TC UBIT information derived from the 3-digit REEL
NUMBER attached to the VOLUME LABEL set in the “Edit Volume Lbl?” UTILITY menu or the SCENE
/ REEL NUMBER set in the “Set SCENE&REEL?” UTILITY menu will be output.
SSSSSRRR SSSSS: SCENE No. derived from “Set SCENE&REEL?” UTILITY menu + File No.
RRR: 3-digit REEL No. derived from “Edit Volume Lbl?” UTILITY menu or “Set
SCENE&REEL?” UTILITY menu
• Example No.1
VOLUME LABEL: DV40-002
SCENE / REEL No.: 00000 / 002
File No.: 001
• Example No.2
VOLUME LABEL: DV40-005
SCENE / REEL No.: 00006 / 005
File No.: 002
TC UBIT Information: 00001002 TC UBIT Information: 00008005
Flashing
Flashing

8
3-2. Selecting “MDYf” as TC UBIT Information
Rotate the jog dial and select “MDYf” in the “TC UBIT Sel?” menu. (“MDYf” is flashing.) Then,
press the [ENTER/YES] key.
If “MDYf” is selected, the following 8-digit TC UBIT information based on the date when the file is
originally created will be output.
MMDDYYff MM: Month by 2-digit (01 ~ 12)
DD: Day by 2-digit (01 ~ 31)
YY: Year by 2-digit (00 ~ 99)
ff: File No. by 2-digit in hexadecimal (01 ~ C7)
• Example No.1
File No.: 001
Created date: July 4, 2002
TC UBIT Information: 07040201
• Example No.2
File No.: 184
Created date: December 23, 2005
TC UBIT Information: 122305B8
3-3. Selecting “DMYf” as TC UBIT Information
Rotate the jog dial and select “DMYf” in the “TC UBIT Sel?” menu. (“DMYf” is flashing.) Then,
press the [ENTER/YES] key.
If “DMYf” is selected, the following 8-digit TC UBIT information based on the date when the file is
originally created will be output.
DDMMYYff DD: Day by 2-digit (01 ~ 31)
MM: Month by 2-digit (01 ~ 12)
YY: Year by 2-digit (00 ~ 99)
ff: File No. by 2-digit in hexadecimal (01 ~ C7)
• Example No.1
File No.: 001
Created date: 6 June, 2001
TC UBIT Information: 06060101
• Example No.2
File No.: 169
Created date: 15 November, 2007
TC UBIT Information: 151107A9
Flashing
Flashing

9
4. New SETUP Menu “F.Name MD (File Name Mode)?”
The file on DV40 with a previous software version is named based on the DATE information such as
“B09h51m29s14feb2002.wav” and “S09h53m25s14feb2002.sd2”. From the V1.1 software, the SETUP
menu “F.Name MD?” has been newly added to DV40, which allows to select the file name as either
DATE or TAKE. The newly added “TAKE” mode names files with 3-digit automatic incremental num-
ber attached every time a file is newly created.
Refer to the following explanations for selecting a File Name Mode.
1) Press the [SETUP] key to enter the SETUP mode.
2) Rotate the jog dial or press the [SKIP/CURSOR |<<] / [SKIP/CURSOR >>|] key to select the “F.Name
MD?” menu.
The default File Name Mode is “DATE”. The following appears on the DV40 FL display. (“?” flashes.)
3) Press the [ENTER/YES] key.
By pressing the [ENTER/YES] key, you can select either the DATE or TAKE File Name Mode. In this
condition, “DATE (Default setting)” is flashing.
4) Rotate the jog dial to select either the File Name Mode.
Rotating the jog dial C.W. selects the “TAKE” and C.C.W. selects the “DATE” mode. The example
below indicates that the “TAKE” mode is selected.
5) Press the [ENTER/YES] key.
Pressing the [ENTER/YES] key defines the File Name Mode. In the above example, the “TAKE” File
Name Mode is selected.
6) Press the [EXIT/NO] key or the [STOP] key.
Pressing the [EXIT/NO] key or the [STOP] key goes back to the normal display.
CAUTION
In order to name the file with 3-digit automatic incremental number attached every time a file is
newly created, the “TAKE” File Mode must be selected in the “F.Name MD?” and the file itself must
be properly named as well. The way to name the file is explained in the section 5. New SETUP
Menu “DefaultFileName?”.
If the file is not named in the “DefaultFileName?” SETUP menu properly, the file will be named
based on the DATE information.
SETUP
Flashing
SETUP
Flashing
SETUP
Flashing

10
5. New SETUP Menu “DefaultFileName (Default File Name)?”
This is the SETUP menu newly added on DV40 with the V1.1 software. This menu should be used to
name a file with 3-digit automatic incremental number every time it is newly created. This mode
becomes valid when the “TAKE” File Name Mode is selected.
Refer to the following explanation for inputting a Default File Name.
1) Press the [SETUP] key to enter the SETUP mode.
The following appears on the DV40 FL display. (“?” flashes.)
2) Press the [ENTER/YES] key.
The following appears on the DV40 FL display. (“_” flashes.)
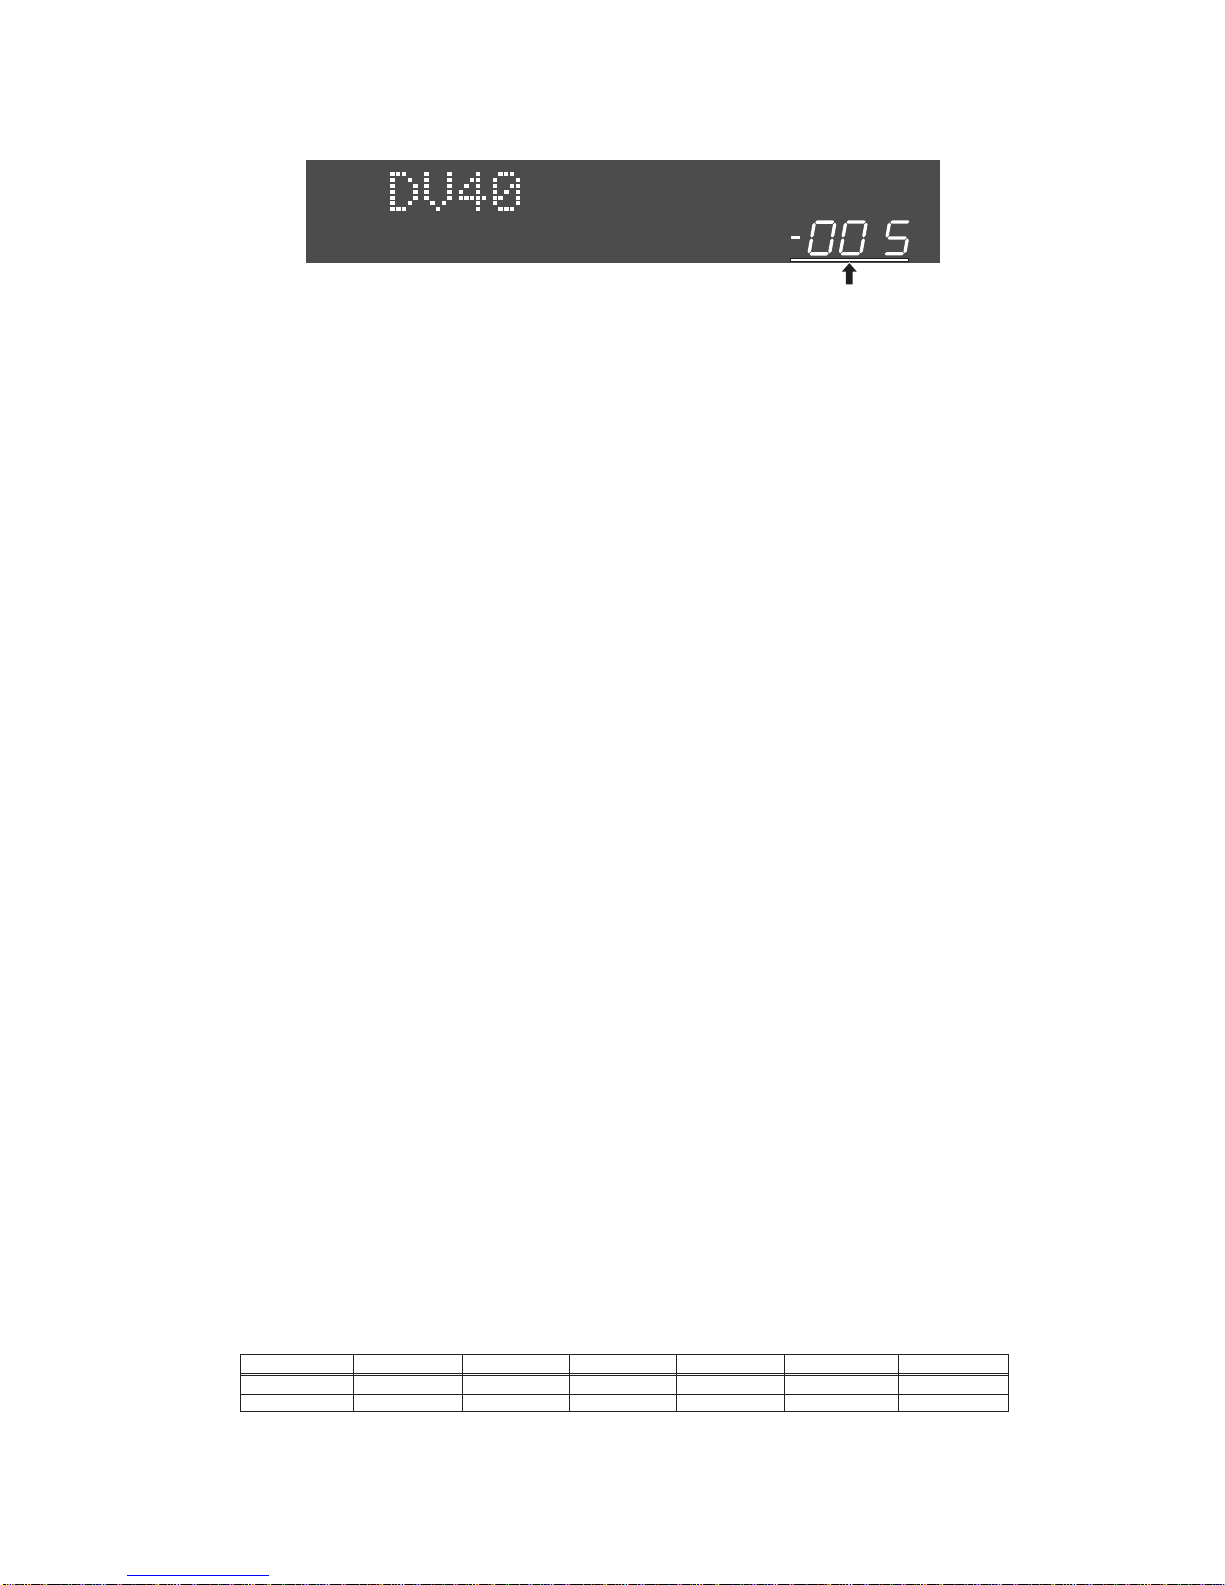
4) Press the [ENTER/YES] key.
By pressing the [ENTER/YES] key, the file name is defined as “DV40” and 3-digit number “-001”
starts flashing.
3) Input a desired file name.
Using alphanumerical keys, jog dial and [SKIP/CURSOR >>|] / [SKIP/CURSOR |<<] key, input a de-
sired name. The following example names the file as “DV40”.
CAUTION
When naming a file using a PS/2 keyboard, be careful about the use of special characters. The file
name with the following characters are not correctly recognized by the Windows OS platform.
“ / ”, “ ? ”, “ . ”, “ < ”, “ > ”, “ | ”, “ ¥ ”, “ - ”
Remember that the 1st character of the file name must start from an alphabet and the following
use only ASCII characters. Although up to 247 numbers of characters can be used as a file name,
the maximum number of characters recognized by SDII and BWF specifications are 23 and 55
respectively.
5) Set the 3-digit number.
Set the 3-digit number by rotating the jog dial and / or using the 10 alphanumeric keys (001 ~
999). The input 3-digit number sets the number attached to the default file name. The following
example sets the default file name as “DV40-005”.
SETUP
Flashing
SETUP
Flashing
SETUP
Flashing
SETUP
Flashing
11
6) Press the [ENTER/YES] key.
Pressing the [ENTER/YES] key sets the default file name as “DV40-005”.
7) Press the [EXIT/NO] key or [STOP] key.
“DefaultFileName?” appears again. Pressing the [EXIT/NO] key or [STOP] key goes back to the nor-
mal display.
By the above procedures, the default file name is set to “DV40-005”. If the “TAKE” File Name Mode
is selected, every time a file is newly created, it will be named as “DV40-5”, “DV40-6”, ... “DV40-9”,
“DV40-10”, “DV40-11”, ... “DV40-99”, ... “DV40-100”, “DV40-111”, ... “DV40-999”.
6. LIST PLAY Function
The LIST PLAY function allows to link multiple audio files recorded by the same condition (e.g. TR
MODE, Fs, AUDIO FILE) and reproduce the files continuously while maintaining TC continuity. There
are two LIST PLAY modes; One is the “LTC_Link” and the other the “SongLink” available on DV40.
LTC_Link
In the “LTC_Link” mode, based on the recorded LTC Start Time in each file, multiple files are
linked and reproduced continuously. This mode should be used when the LTC address has to be
matched in conjunction with other equipment such as a video camera.
SongLink
The “SongLink” mode links audio files in the file number ascending order (e.g. file No.1 -> file
No.2 -> file No.3 ...). LTC Start Time will be set according to the one recorded in the first link file
(default setting: 01h00m00s00f) and the LTC will be jammed regardless of recorded LTC Start
Time in the following linked files. This mode is convenient when reproducing multiple audio files
continuously.
CAUTION 1
In order to link multiple audio files recorded on DV40, each SW setting, audio file format (BWF or
SDII), sampling frequency, resolution (quantization bits) and track mode (mono, stereo or multi)
must be the same in all the files to be linked.
CAUTION 2
The message “<<Silent Area>>” indicating no audio to be reproduced exists will be displayed on
the DV40 FL display when in the following condition.
• If there is an overlapping LTC address between the files in the LTC_Link mode, <<Silent Area>>
is displayed while reproducing the overlapped latter file.
• There are hidden files (deleted files) in the LTC_Link mode.
• When the last linked file finishes reproducing.
Presume that the following six files (including deleted File No. 5) recorded by the same condition
(Fs, resolution, etc.) exist on the DVD-RAM disk.
001
01h00m00s00f
30 sec
002
01h01m00s00f
30 sec
File No.
LTC Start Time
Duration
003
01h01m25s00f
30 sec
004
01h02m00s00f
30 sec
005 (DELETED)
-
-
006
01h03m00s00f
30 sec
When executing the LIST PLAY function in the “LTC_Link” and “SongLink” mode, the linked files
and the order are indicated in the drawing next page.
SETUP
Flashing

12
6-1. Turning On LIST PLAY Mode
1) Press the [LIST PLAY] key and rotate the jog dial.
When the [LIST PLAY] key is pressed, the following appears on the DV40 FL display. The default
setting of the LIST PLAY mode is “LTC_Link”. By rotating the jog dial C.W., you can choose the
“SongLink” mode.
2) Press the [ENTER/YES] key.
After pressing the [ENTER/YES] key, “<<Wait!>>” message starts flashing for a short while indicat-
ing that DV40 is creating a linked file list on the DV40 FL display. Then, the [LIST PLAY] key will be
lit solid. This indicates that the selected LIST PLAY mode is turned ON.
3) Press the [PLAY] key.
Pressing the [PLAY] key allows to reproduce the linked multiple files.
NOTE
Pressing the [FILE SEL] key when the LIST PLAY mode is on allows to select either the “LTC_Link”
or “SongLink” mode.
In the LTC_Link mode, there is a gap of LTC address (01h00m30s00f ~ 01h01m00s00f) between
the File No. 001 and 002. Although LTC is continuously output in this section, <<Silent Area>> is
displayed. There is an overlapping LTC address between the File No. 002 and 003. Since a smaller
File No. has a priority, File No. 002 is reproduced and File No. 003 will not be reproduced. Thus,
<<Silent Area>> is displayed from 01h01m30s00f ~ 01h02m30s00f. <<Silent Area>> is also dis-
played in the deleted File No. 005 LTC section (01h02m30s00f ~ 01h03m00s00f).
In the SongLink mode, DV40 just simply links the File No. 001 ~ 004 and 006 regardless of LTC
START address setting on the File No. 002 ~ 004 and 006. Then, it reproduces each file continu-
ously.
In both Link modes, DV40 keeps on playing and outputting LTC even after reproducing the last
link file is completed. In this section, <<Silent Area>> is displayed.
Refer to the following explanation to turn on the LIST PLAY mode.
01h00m00s00f 01h00m30s00f 01h01m00s00f 01h01m30s00f 01h02m00s00f
File No. 001 File No. 002
<<Silent Area>>
<<Silent Area>> <<Silent Area>>
01h02m30s00f
01h00m00s00f 01h00m30s00f 01h01m00s00f 01h01m30s00f 01h02m00s00f
File No. 001 File No. 002 File No.003 File No. 006 <<Silent Area>>
01h02m30s00f
File No. 004
LTC_Link
SongLink
<<Silent Area>>
File No. 004
01h03m00s00f
File No. 006
01h03m00s00f
Flashing
Flashing

13
Press [SKIP/CURSOR >>|] key Press [SKIP/CURSOR |<<] key
Press [SKIP/CURSOR >>|] key Press [SKIP/CURSOR |<<] key
Press [SKIP/CURSOR >>|] key Press [SKIP/CURSOR |<<] key
Press [SKIP/CURSOR >>|] key Press [SKIP/CURSOR |<<] key
LTC
MSFH
LTC
MSFH
LTC
MSFH
LTC
MSFH
LTC
MSFH
6-2. Confirming Linked Files
Pressing the [SKIP/CURSOR >>|] or [SKIP CURSOR |<<] key allows to locate to the beginning of each
linked file in the ascending / descending order respectively. When the files 001 ~ 006 are linked
as shown in the drawing below,
by pressing the [SKIP/CURSOR >>|] or [SKIP CURSOR |<<] key, the followings appear on the DV40 FL
display.
01h00m00s00f 01h00m30s00f 01h01m00s00f 01h01m30s00f 01h02m00s00f
File No. 001 File No. 002 File No. 003 File No. 006 <<Silent Area>>
01h02m30s00f
File No. 004
SongLink

14
6-3. Reprogramming PLAY LIST
If you find that there are unnecessary linked files exist, you can reprogram the PLAY LIST by
deleting them.
1) Turn off the LIST PLAY mode.
If the LIST PLAY LED is lit solid, press the [LIST PLAY] key to turn the mode off.
2) Recall the File you would like to delete.
Press either the [SKIP/CURSOR >>|] or [SKIP CURSOR |<<] key and recall the file you would like to
delete.
3) Press the [SHIFT] key and then [SETUP] key to enter the UTILITY Mode.
4) Rotate the jog dial or press the [SKIP/CURSOR |<<] / [SKIP/CURSOR >>|] key to select the “Delete
File?” menu.
The following appears on the FL display. (“?” is flashing.)
5) Press the [ENTER/YES] key.
“Sure?” message starts flashing.
6) Press the [ENTER/YES] key.
The file is deleted.
CAUTION
Even after unnecessary files are deleted, they can be restored by the “Restore DelFile?” UTILITY
menu. This indicates that the files have not been completely erased from the DVD-RAM disk yet.
However, if you optimize the DVD-RAM disk by the “Optimize Disk?” UTILITY menu, deleted files
are completely erased from the DVD-RAM disk. After optimizing, they can be no longer restored.
NOTE
A deleted file before optimizing on DV40 is categorized as a “hidden file”. It can be seen as a
translucent file on a personal computer. (If the folder option “A hidden files are not displayed.”
on the computer is selected, change the folder option setting to allow to display hidden files.) In
the condition that the translucent hidden file can be seen on the computer, display the file prop-
erty and uncheck the “check mark” on the “hidden file”. By doing so, you can restore the deleted
file even on the computer.
6-4. Locating to Beginning of PLAY LIST
While the LIST PLAY mode is on ([LIST PLAY] key is lit), executing “LOCATE ABS0” (pressing the [<<
REWIND] key while holding down the [STOP] key) allows to locate to the beginning of the first
linked file (the closest file to the LTC 00h00m00soof).
6-5. Locating to End of PLAY LIST
While the LIST PLAY mode is on ([LIST PLAY] key is lit), executing “LOCATE REC END” (pressing the
[F FWD >>] key while holding down the [STOP] key) allows to locate to the end of the last linked file.
Flashing
Flashing

15
7. Use of PS/2 Keyboard
From the V1.00 software, a PS/2 keyboard can be used to input File Name, Volume Label, etc. Refer to
the following explanation and the drawing for the correct usage of PS/2 keyboard.
7-1. Valid and Invalid keys
On the current software version, the translucent keys (gray) in the drawing below cannot be used.
Other keys can be used to input File Name, Volume Label, etc. The keys which do not work are as
follow.
• TAB, F2 ~ F12, Print Scrn, Scroll Lock, Pause, insert, Home, Page Up, Page Down, End
7-2. DV40 & PS/2 Keyboard Key Correspondence
On the current software version, the translucent keys (gray) in the drawing below are not work-
ing. Other keys can be used to input the File Name, Volume Label, etc. The keys which do not work
are as follow.
TAB, F2 ~ F12, Print Scrn, Scroll Lock, Pause, insert, Home, Page Up, Page Down, End
• DV40 Front Panel & PS/2 Key Correspondence
Pressing the following key on the PS/2 keyboard is equivalent to the key manipulation on the
DV40 front panel keys.
• Accessing MENUs using ALT key
Pressing the following key while holding down the PS/2 [ALT] key allows to directly access the
following menus.
• Recalling “Edit File Name?” menu
By the press of F1 key, the “Edit File Name?” UTILITY menu can be directly recalled.
PS/2 Keyboard
DV40 Key SKIP/CURSOR>>| SKIP/CURSOR|<< Jog rotation (C.W.) Jog rotation (C.C.W.) ESC
EXIT/NO
ENTER
ENTER/YES
PS/2 Keyboard
DV40 menu ALT + U
UTILITY ALT + S
SETUP ALT + T
TC SETUP
~!
1@
2#
3$
4%
5^
6&
7*
8(
9)
0
_
-+
=Back Space
TAB QW E R T Y U I O P { }
Caps Lock AS D F G H J K L :"ENTER
SHIFT ZX C V B N M < > ? SHIFT
Ctrl Alt CtrlAlt
/.,
;'
[] |
\
`
ESC F1
Help F2 F3 F4 F5 F6 F7 F8 F9 F10 F11 F12
Print
Screen
SysReq
Scroll
Lock Pause
Break
Insert Home Page
Up
Delete End Page
Down
Num
Lock /
7
Home
* -
+
Enter
89
Pg Up
4
1
End
5
2
6
3
Pg Dn
0
Ins .
Del
2
1
-INT-
CLOCK
kHz 4824
FS
BIT
∞
60 50 42 34 28 2018 12 86543210OL
BWF
FORMAT
To DV40 KEYBOARD Port
16
8. FTP SERVER FUNCTION
Working as a FTP (File Transfer Protocol) server, DV40 can send and receive BWF and SDII files to and
from a client PC using TCP/IP (Transmission Control Protocol/Internet Protocol). When sending and
receiving data, a FTP client application is required.
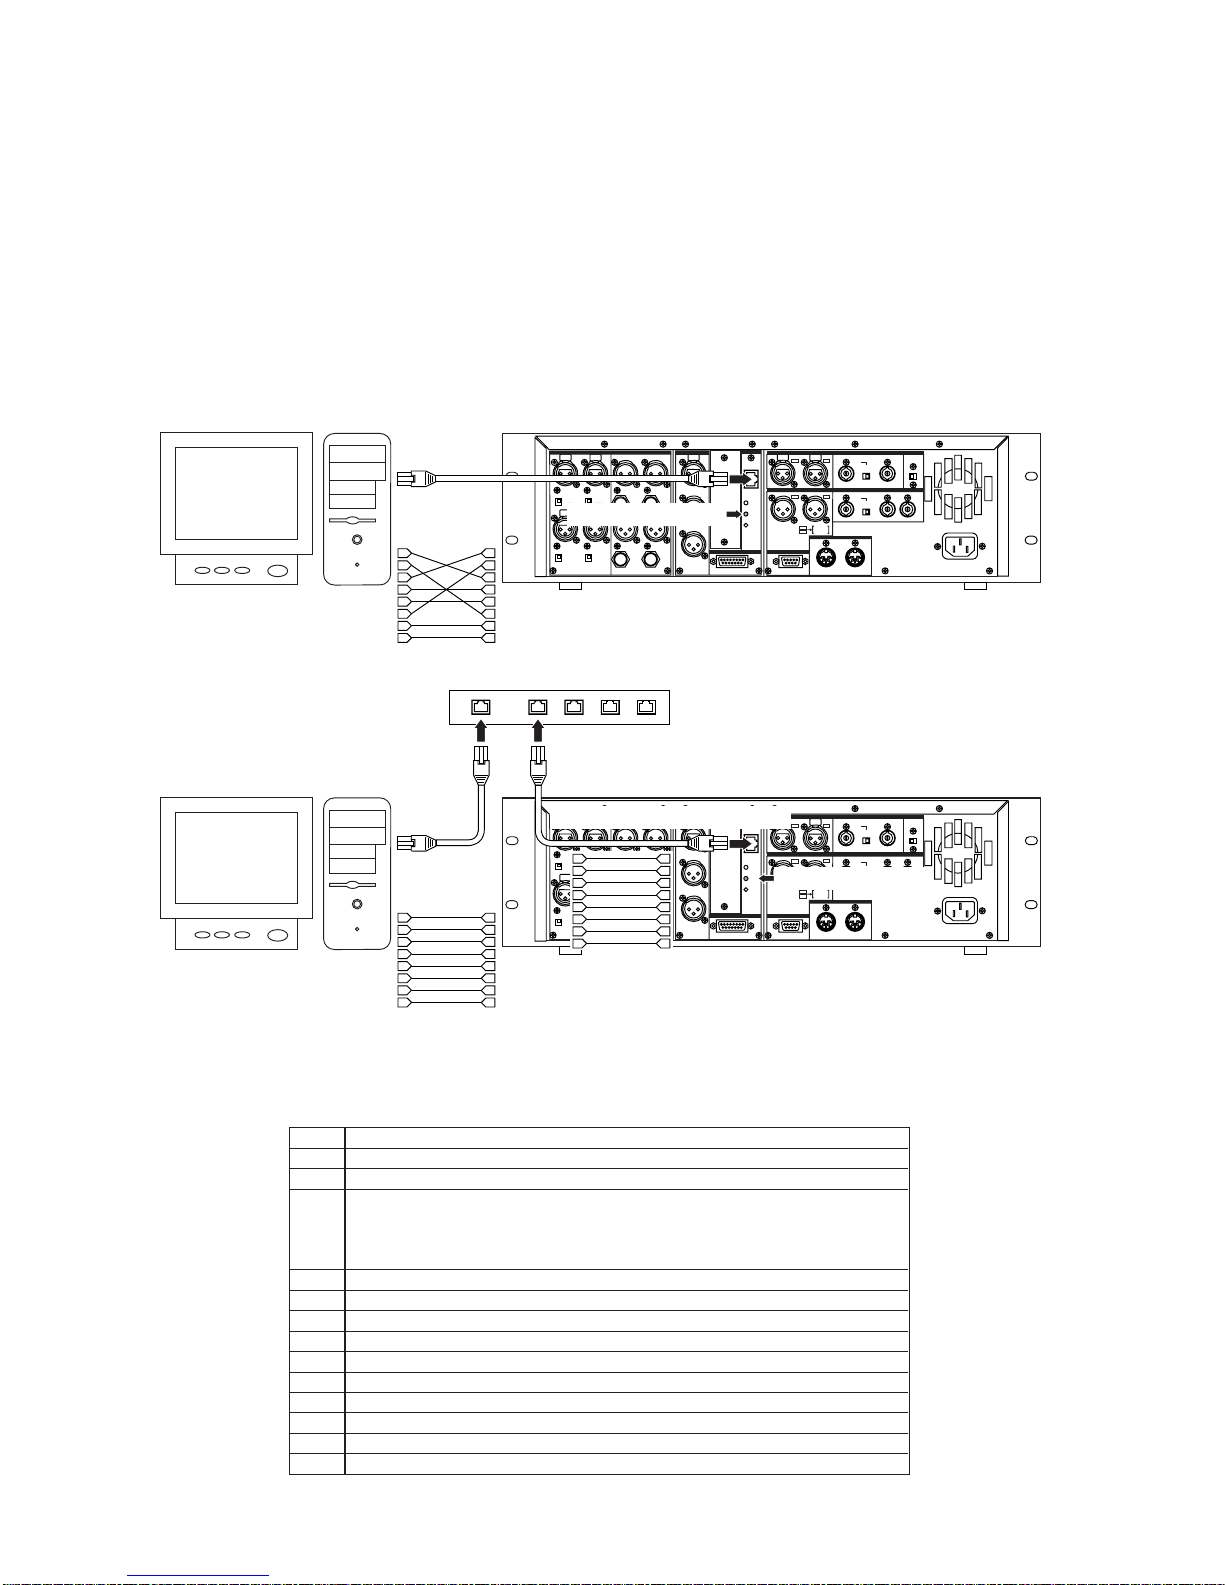
8-1. Connection
When connecting DV40 to a client PC, a “Category 5” cable which complies to 10BASE-T and
100BASE-TX must be used. If DV40 is directly connected to a client PC, a cross cable must be used.
In the case DV40 is connected to a client PC via hub, a straight cable must be used. When DV40
recognizes a client PC, the “LINK” LED on the DV40 rear panel is lit solid.
Identifying user name.
Identifying password.
Terminating FTP connection.TCP connection for Control is also cut off.
When transferring data, relay the connection state open port number for data
transferring at client side to server.
Format: PORT IP1, IP2, IP3, IP4, P1, P2
(IPx: IP address, Px: port number represented by decimal number in every 1 byte unit)
Designating data type (ASCII, EBCIDIC, BINARY, LOCAL).
Instructing server to trasnfer file through data connection.
Instructing server to write data transferred through data connection into a new file.
Requesting server to send a list of files.
Requesting server to send a detailed list of files.
Changing current directory.
Changing current directory to upper level.
Displaying current directoy.
Doing nothing.
Acquire server OS type.
USER
PASS
QUIT
PORT
TYPE
RETR
STOR
LIST
NLST
CWD
CDUP
PWD
NOOP
SYST
8-2. FTP Command Compliance
The following FTP commands can be used when DV40 works as a FTP server.
+4dBu
-10dBV +4dBu
-10dBV
+4dBu
-10dBV +4dBu
-10dBV
TR4 TR2
TR3 TR1 TR3 TR1BAL [+4dBu] BAL[+4dBu]
UNBAL
[-10dBV]
UNBAL
[-10dBV]
TR4 TR2
BAL [+4dBu] BAL [+4dBu]
UNBAL
[-10dBV]
UNBAL
[-10dBV]
OUTPUT
THRU
INPUT
10/100
LINK
TX/RX
TR4-3 TR2-1
TR2 TR1
TR1
TR2
1:GND
2:HOT
3:COLD
192kHz
176.4kHz
INPUT OUTPUT
INPUT
75Ω
ON OFF
INPUT
75Ω
ON OFF
TR4-3 TR2-1
TR2 TR1 THRU
THRU OUTPUT
AC IN
1: GND 2: HOT 3: COLD 1: GND 2: HOT 3: COLD
1: GND
2: HOT
3: COLD
15P-REMOTE 9P-REMOTE
GPI
DIGITAL OUTPUT WORD
TIME CODE ETHERNET
ANALOG INPUT BALANCED ANALOG OUTPUT DIGITAL INPUT VIDEO FAN
HI LO
1
2
3
4
5
6
7
8
1
2
3
4
5
6
7
8
To a PC
LAN Port
Category 5
LAN
Cross Cable LINK LED is lit solid.
< DV40 Direct Connection >
+4dBu
-10dBV +4dBu
-10dBV
+4dBu
-10dBV +4dBu
-10dBV
TR4 TR2
TR3 TR1 TR3 TR1BAL [+4dBu] BAL[+4dBu]
UNBAL
[-10dBV]
UNBAL
[-10dBV]
TR4 TR2
BAL [+4dBu] BAL [+4dBu]
UNBAL
[-10dBV]
UNBAL
[-10dBV]
OUTPUT
THRU
INPUT
10/100
LINK
TX/RX
TR4-3 TR2-1
TR2 TR1
TR1
TR2
1:GND
2:HOT
3:COLD
192kHz
176.4kHz
INPUT OUTPUT
INPUT
75Ω
ON OFF
INPUT
75Ω
ON OFF
TR4-3 TR2-1
TR2 TR1 THRU
THRU OUTPUT
AC IN
1: GND 2: HOT 3: COLD 1: GND 2: HOT 3: COLD
1: GND
2: HOT
3: COLD
15P-REMOTE 9P-REMOTE
GPI
DIGITAL OUTPUT WORD
TIME CODE ETHERNET
ANALOG INPUT BALANCED ANALOG OUTPUT DIGITAL INPUT VIDEO FAN
HI LO
1
2
3
4
5
6
7
8
1
2
3
4
5
6
7
8
To a PC
LAN Port
Category 5
LAN
Straight Cable LINK LED is lit solid.
< DV40 Connection via Hub >
Hub
1
2
3
4
5
6
7
8
1
2
3
4
5
6
7
8
Category 5 LAN Straight Cable
17
APPE
DELE
RNFR
RNTO
HELP
ACCT
PASV
STRU
MODE
RMD
MKD
STAT
Instructing server to write data transferred through data connection into an existing
file additionally.
Deleting designated file.
Designating current file name for renaming.
Changing current file name for renaming.
Displaying command description.
Identifying user account.
Opening command state designated port except default data port (No.20) on server.
Designating file structure.
Designating file tranfer mode (Stream, Block, Compressed).
Deleting designated directory.
Creating designated directry.
Requesting server condition.
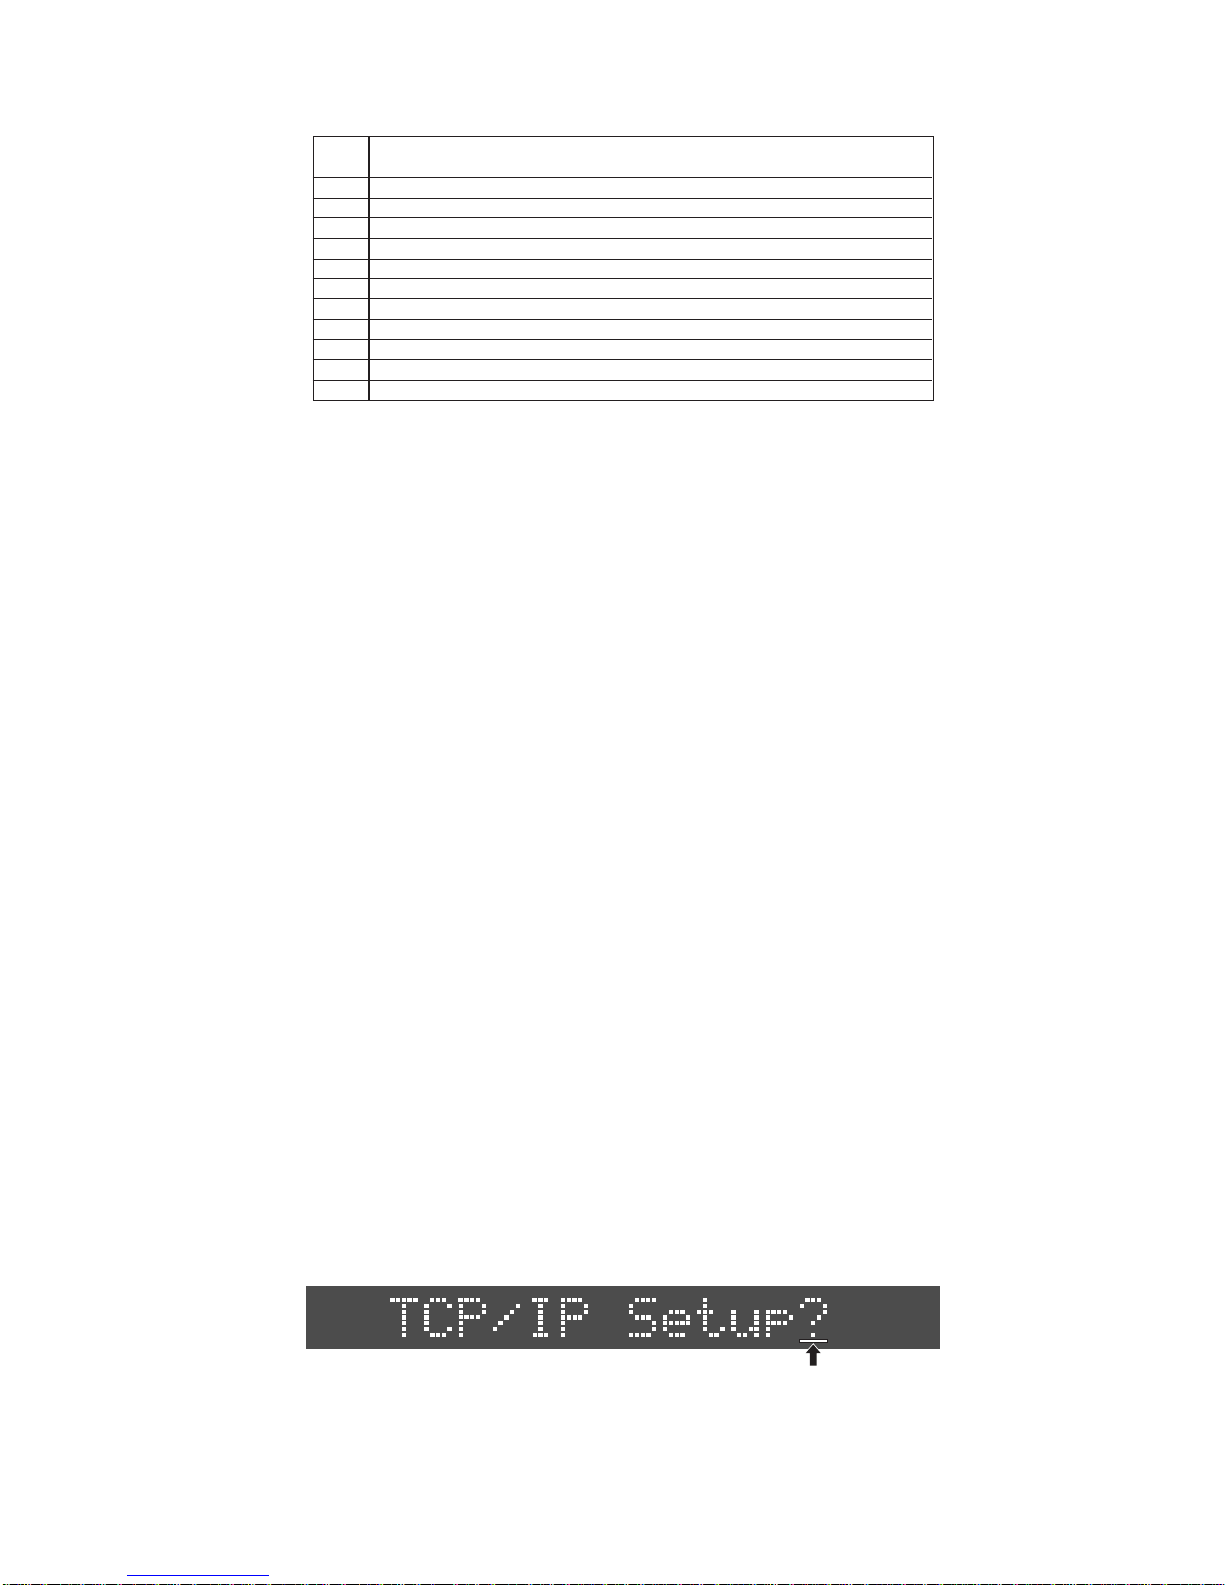
8-5. Checking TCP/IP Menus
There are several menus in the TCP/IP settings on DV40. First, press the [SETUP] key and then
rotate the jog dial. While the menu “TCP/IP Setting?” is displayed, press the [ENTER/YES] key.
8-4. FTP Client Applicationº
The FTP client applications we confirmed the operation are
• Fetch (Shareware for Macintosh computer)
• WS FTP (Shareware for Windows computer)
The FTP client application we found inoperative is
• FTP Explorer (Shareware for Windows computer)
8-3. Saved File Location
8-3-1. BWF File
The files recorded by BWF AUDIO FILE SW setting are saved in the “bwff” folder. Note that only a
file with “.wav” extension can be saved in the “bwff” folder.
8-3-2. SDII File
The files recorded by SDII AUDIO FILE SW are saved in the “sd2f” folder. Note that the file type to
send and received data is “MacBinary version 2”. Because of this, the “*.bin” file extension is
added to a file name.
The following FTP commands cannot be used when DV40 works as a FTP server.
Note that
• Deleting files
• Renaming files
• Creating a new directory
cannot be executed when using a FTP client application.
SETUP
Flashing
18
SETUP
Rotate jog dial CW. Rotate jog dial CCW.
Rotate jog dial CW. Rotate jog dial CCW.
Rotate jog dial CW. Rotate jog dial CCW.
Rotate jog dial CW. Rotate jog dial CCW.
Rotate jog dial CW. Rotate jog dial CCW.
Rotate jog dial CW. Rotate jog dial CCW.
Rotate jog dial CW. Rotate jog dial CCW.
Rotate jog dial CW. Rotate jog dial CCW.
Rotate jog dial CW.
Rotate jog dial CCW.
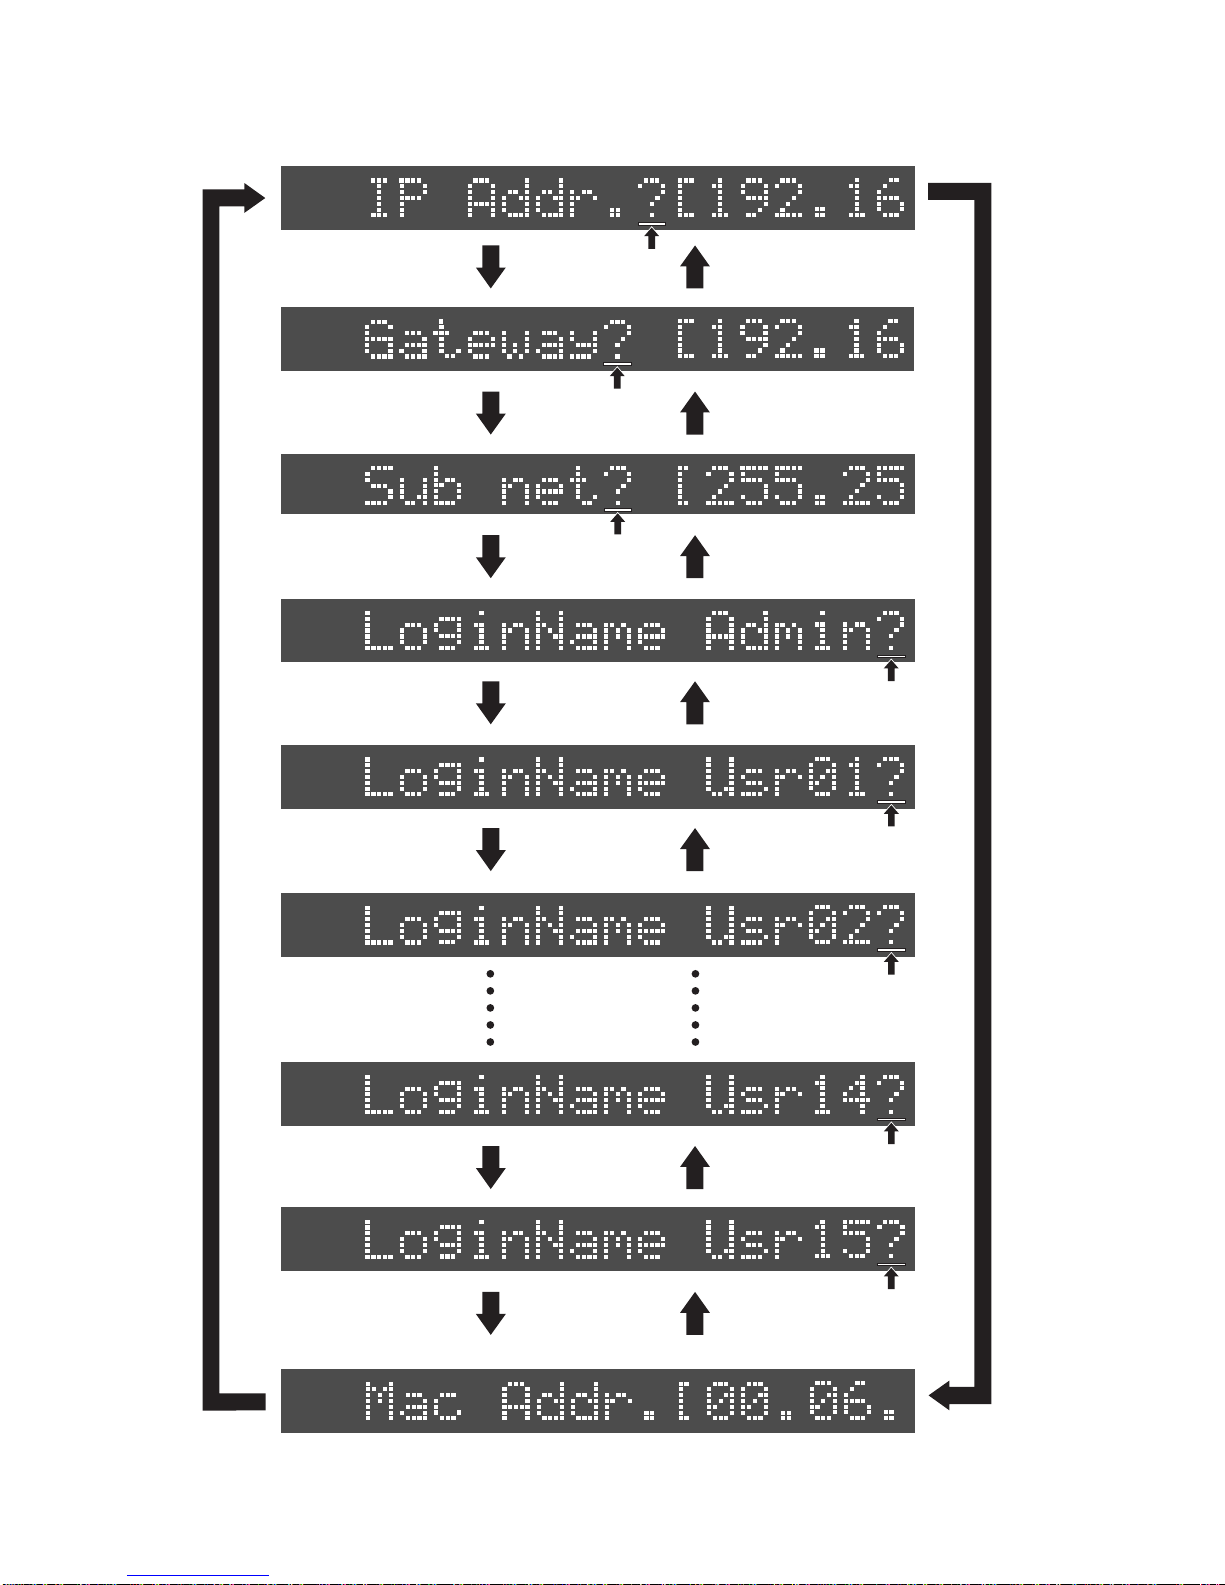
By rotating the jog dial, the menu changes as shown below.
SETUP
Flashing
SETUP
Flashing
SETUP
Flashing
SETUP
Flashing
SETUP
Flashing
SETUP
Flashing
SETUP
Flashing
SETUP
Flashing

19
SETUP
SETUP
Flashing
8-6. Changing the TCP/IP Setting
There are cases that the TCP/IP settings must be changed. For example, if 2 x DV40s exist in a
single network environment, the IP Address on one of the DV40s must be changed. This section
describes how to change the TCP/IP settings.
8-6-1. IP Address
The IP Address on DV40 is set in this menu.
1) Rotate the jog dial to select “IP Addr.?[192.16” and press the [ENTER/YES] key.
To check the full digits of IP address, press the [SKIP/CURSOR >>|] key once. If you do so, the
following will appear on the DV40 FL display.
Now you can see that the current IP Address setting on DV40 is [192.168.1.64].
2) Press the [ENTER/YES] key.
If the [ENTER/YES] key is pressed, the section “192” starts flashing.
3) Move the cursor and change the IP Address.
Move the cursor by the [SKIP/CURSOR >>|] or [SKIP/CURSOR |<<] key and rotate the jog dial to
change the IP Address. The alphanumeric keys can be also used to change the IP Address.
4) Press the [ENTER/YES] key.
Pressing the [ENTER/YES] key defines the change on the IP Address.
8-6-2. Gateway
The Gateway should be set when the Gateway server exists in the network DV40 is connected. If
there is no Gateway server exists, you do not have to set the Gateway.
1) Rotate the jog dial to select “Gateway? [192.16” and press the [ENTER/YES] key.
To check the full digits of IP address, press the [SKIP/CURSOR >>|] key once. If you do so, the
following will appear on the DV40 FL display.
Now you can see that the current IP Address setting on DV40 is [192.168.1.64].
SETUP
SETUP
Flashing
SETUP
Flashing

20
8-6-4. Login Name (Administrator)
Using the Login Name and the Password set in this menu, log in from a FTP client application.
1) Rotate the jog dial to select “LoginName Admin?” and press the [ENTER/YES] key.
The first letter “d” of default login name “dv40” starts flashing.
2) Press the [ENTER/YES] key.
If the [ENTER/YES] key is pressed, the section “192” starts flashing.
3) Move the cursor and change the IP Address.
Move the cursor by the [SKIP/CURSOR >>|] or [SKIP/CURSOR |<<] key and rotate the jog dial to
change the Gateway. The alphanumeric keys can be also used to change the IP Address.
4) Press the [ENTER/YES] key.
Pressing the [ENTER/YES] key defines the change on the Gateway.
8-6-3. Sub net
The Sub net mask value in the network DV40 exists should be set. In the case the Sub net mask is not
used, you do not have to set this value.
1) Rotate the jog dial to select “Subnet? [255.25” and press the [ENTER/YES] key.
To check the full digits of Subnet, press the [SKIP/CURSOR >>|] key once. If you do so, the following
will appear on the DV40 FL display.
Now you can see that the current IP Address setting on DV40 is [192.168.1.64].
2) Press the [ENTER/YES] key.
If the [ENTER/YES] key is pressed, the section “192” starts flashing.
SETUP
3) Move the cursor and change the IP Address.
Move the cursor by the [SKIP/CURSOR >>|] or [SKIP/CURSOR |<<] key and rotate the jog dial to
change the Sub net value. The alphanumeric keys can be also used to change the IP Address.
4) Press the [ENTER/YES] key.
Pressing the [ENTER/YES] key defines the change on the Sub net value.
SETUP
Flashing
SETUP
Flashing
SETUP
Flashing
SETUP
Flashing
Other manuals for DV-40
10
Table of contents
Other Fostex DVD Recorder manuals

Fostex
Fostex PD-6 User manual

Fostex
Fostex DV-40 User manual

Fostex
Fostex PD-6 Owner's manual

Fostex
Fostex DV-824 User manual

Fostex
Fostex DV-40 User manual

Fostex
Fostex D-824 Dimensions

Fostex
Fostex PD204 User manual

Fostex
Fostex DV-40 User manual

Fostex
Fostex DV-40 User manual

Fostex
Fostex DV-824 User manual


