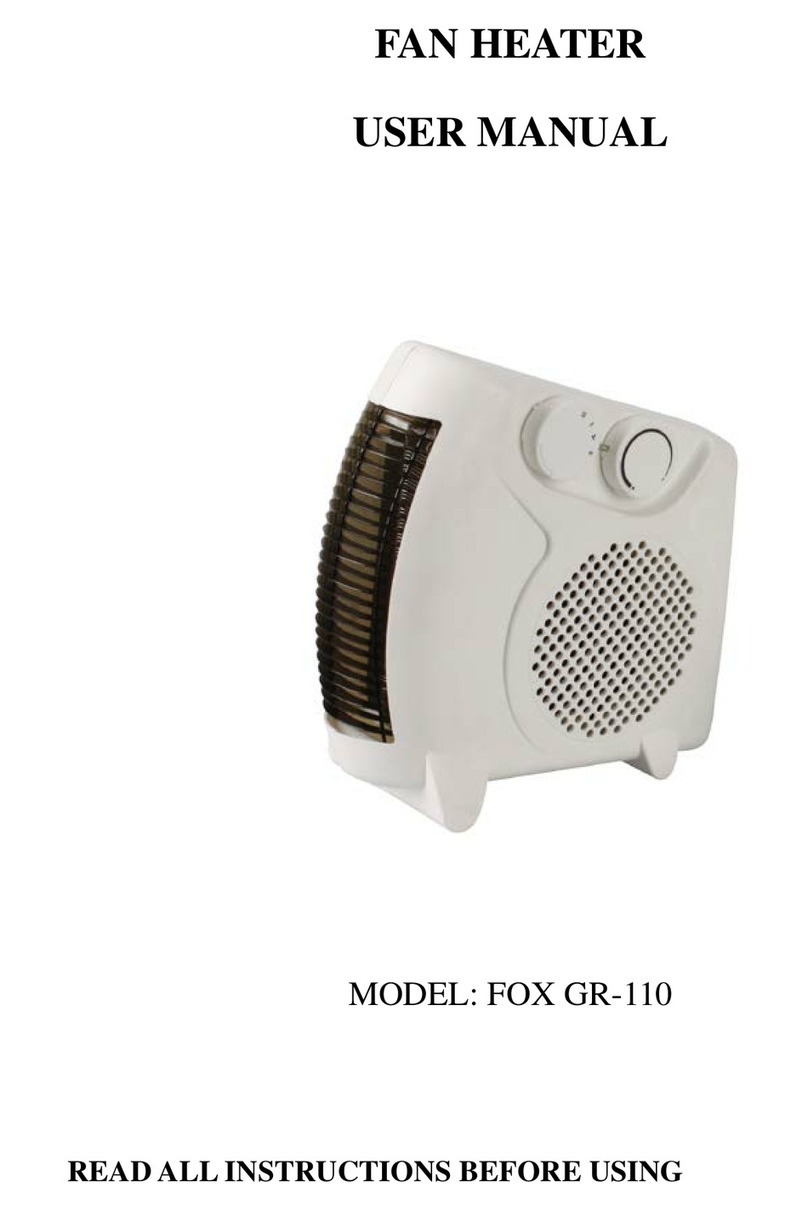
Fox GRB1605 User manual

INSTRUCTIONS FOR CONVECTOR
Bathroom heater
FOX GRB1605

Models covered by this instruction sheet:-
220V-240V~
50-60Hz
IP23
2000 W
Bathroom heater.
IMPORTANT
Read these instructions fully before using the heater. Retain these instructions for future
reference.
NOTE: The frost protector with thermostat is for keeping small. It is for use within the home or
for similar purposes. The heater may only be used in a fixed position and only for the purpose
described.
It is not for outdoor use!
SAFETY INSTRUCTIONS (to be read before operating the heater)
1) This product is a wall mounting appliance, never use it as portable appliance.
2) Do not use the heater unless the feet are correctly attached if the heater is used as
portable appliance.
3) This heater in designed for wall mounting and must be used with the warm air ventfacing
downwards. This heater should not be used in any other orientation and should not be
used as a free standing portable appliance.
4) This heater must be installed so that switches and other controls (except the pull cord)
cannot be touched by person in the bath or shower
5) This product is suitable for installation on surfaces with normal flammability e.g. wood,
plasterboard, masonry. It is not suitable for use on highly flammable surface (e.g.
polystyrene, textiles)
6) The heater is to be installed so that switches and other controls cannot be touched by a
person in the bath or shower.
7) Before making fixing hole(s), check that there are no obstruction hidden beneath the
mounting surface such as pipes or cables.
8) The chosen location of your new heater should allow for the product to be securely
mounted(e.g. to a firm wall) and safely connected to mains supply
9) Ensure the power supply to the socket into which the heater is plugged is in accordance
with the rating label on the heater and that the socket is earthed.
10)Keepthe mains lead away from the hot body of the heater.
11)Do not use outdoors.
12)Do not cover or obstruct any of the heat outlet grilles or the air intake openings of the
heater.
13)Do not place the heater on carpets having a very deep pile.
14)Always ensure that the heater is placed on a firm level surface. Ensure that the heater is
not positioned close to curtains or furniture as this could create a fire hazard.
15)Do not position the heater in front of, or immediately below, a wall socket.
16)Do not insert any object through the heat outlet or air intake grilles of the heater.
17)Do not use the heater in areas where flammable liquids are stored or where flammable
fumes may be present.
18)Particular care should be taken whenthe heater is situated in areas occupied by children
or invalids.
19)Always unplug the heater when moving it from one location to another.
20)Do not use the heater if the power cord is damaged.Ifthe power cord is damaged it
must be replaced by a recognised service agent or other qualified person.
21)Only use a suitable 220-240V electrical socket.

22)The room which is to be heated should not contain any easy inflammable materials (e.g.,
petrol, solvents, spray cannisters etc.) or other easy combustible materials (e.g., wood or
paper). Keep such materials away from equipment. Risk of fire!!
23)This appliance is not intended for use by persons (including children) with reduced
physical, sensory or mental capabilities, or lack of experience and knowledge, unless
they have been given supervision or instruction concerning use of the appliance by a
person responsible for their safety. Children should be supervised to ensure that they do
not play with the appliance.
OPERATION INSTRUCTIONS
1. Before inserting the plug into an electrical outlet, make sure that the electrical supply in your
area matches that on the rating label on the unit.
2. Carefully remove the heater from the plastic bag and the carton.
3. Place the heater on the wall, set the master button to “-”position. plug the cord set into a
AC220-240V~ electrical outlet,with “BEE” sounds the “ ”light is on and the heater will
shows the default temperature ,it will twinkle 3 seconds.
1) HEATING PERPARE
Set time
Before turn on the heater, set the time as right time. Press remote control “”button, light
on control panel, it shows current Room temperature. WEEK Press “Set”button onetime,
“ ”lights on, press ““two buttons set the weekfrom 1--7
(1=Monday,2=Tuesday...7=Sunday etc.)
HOUR Press “Set”button again,“ ” lights on, “two buttons set the Hours from
01--00(01=1 o’clock,02=2 o’clock...00=24 o’clock etc.)
MINUTE Press “Set”button again,“ ” lights on, “two buttons set the Minutes
from 00--59(01=1 Minute,02=2 Minute etc.)
PS: Press “Set”button, screen shows number will twinkle 5 seconds, you should operate in
time ,otherwise appliance will get back to standby.
(Appliance will keep the right time until power off)
2) GENERAL USING OPERATION
1.Turn the heater ON by pressing the “ ”main button with the light is on. The unit will blow the
cold air and “ ” light is on.
2.Pressing the “ ” button ,the unit will blow the warm air and both“ ”and“ ” lights are on.
3.Pressing the “ ” button second times,the unit will blow the hot air and both “ ”“ ” lights
are on.
4.Pressing the “ ” button Three times,the unit will blow the cold air and “ ” light is on.
5.Pressing the “ ” button,the unit will set timer from “01-24” and “ ” light is on.”00” means
closed timer.
PS: Control panel “ ” button is same function with remote control “”button.

3) 24H Timer FUNCTION
1. Open the appliance as working conditions,(fan, warm, hot are all ok). Control panel “”
button and remote control “ ” button are same operate way.
2. Press “”button ,set the timer up to 24 hours, keep press “ ” button to increase
the hours from 00--24(00= close,01=1hour,02=2 hours...24=24 hours etc.) and the “”light
is on.
PS:set as “00”means no set timer ,the “”light is off.
4) THERMOSTAT INSTRUCTIONS
1. Open the appliance as working conditions,(fan, warm, hot are all ok).This function only
through by Remote control.
2. To adjust temperature, press the “”to set the desired temperature and the
temperature set from 10 to 49 .
3. When the air temperature drops 2 degree below the set temperature, the heater will start
heating with ” ”(1000W).
4. When the air temperature drops 4 degree below the set temperature ,the heater will start
heating with””(2000W).
5. When the air temperature high 1 degree or the set temperature, the heater will blow the
cold air .
5) Weekly Timer FUNCTION
1. Open the appliance as working conditions,(fan, warm, hot are all ok).This function only
through by Remote control.
2.WEEK Press “ ”button 1st time,“ ” and”W-Timer”are lights on, show “1”
means “Monday”.
HOUR Press “”button 2ndtimes,“ ” lights on, “two buttons set the Hours
from 01--00(01=1 o’clock,02=2 o’clock...00=24 o’clock etc.)
MINUTE Press “”button 3rd times ,“ ” lights on, “two buttons set the
Minutes from 00--59(01=1 Minute,02=2 Minute etc.)
---------------------------------------------------------This is open time
HOUR Press “”button 4th times,“ ” lights on, “two buttons set the Hours
from 01--00(01=1 o’clock,02=2 o’clock...00=24 o’clock etc.)
MINUTE Press “”button 5th times ,“ ” lights on, “two buttons set the
Minutes from 00--59(01=1 Minute,02=2 Minute etc.)
---------------------------------------------------------This is close time
The above are finished set Monday Timer.

3.Press “ ” button once more,“ ” lights on, show “2”means “Tuesday”.Please
note that to operate with open time HOUR/MINUTE and close time HOUR/MINUTE are all same
as before Monday.
4.From 1-7(1=Monday,2=Tuesday...7=Sunday etc.) are all set finished, press “”button on
remote control 7th times to set from Mondayto Sunday’stemperature and press“two
buttons, select the temperature which you need, the temperature range from 10 to 49 .
PS: In Week timer function, when you set today’s temperature, the thermostat function will start,
the rules same as 4) THERMOSTAT INSTRUCTIONS, please noted.
You can set different open time, closed time and temperature within whole week.
6) Window Open Function
1. Open the appliance as working conditions,(fan, warm, hot are all ok).This function only
through by Remote control.
2.Press “ ” button, the “ ” light is on. The appliance is working as smart saving
energy models.(In this function, the appliance is check and record environment temperature in
immediately. It will stop working, whenthe appliance check the environment are drop
3 .The user should restart the appliance with “ON/OFF”button)
3..Press “”button again, the “ ” light is off. Window Open Function is closed.
7) Delay Function
This function can be use should be fit two points: the appliance is in the standby state, before
the appliance working.
This function only through by Remote control.
2.Press “ ” button light on LED display ,then press “ ” button one time, the “ ”
light and “ ” light are on. press “two buttons set the Hours from 01--24(01=1 o’
clock,24=24 o’clock...00=Closed ect.)
---------------------------------------------------------This is open time
3.Press “ ” button again, the “ ” light and “ ” light are on. Press “two
buttons set the Hours from 01--24(01=1 o’clock,24=24 o’clock...00=Closed etc.)
---------------------------------------------------------This is close time
PS: Press “”button, screen shows number will twinkle 5 seconds, you should operate in
time ,otherwise appliance will get back to standby.
(This function is one-time and must be reset after the power is cut off.)
8) Child-Lock Function
This function only through by Remote control. When appliance are plug in, this function can be
used in any models.
Press “”button one time, all lights and LED display are closed ,only “ ” light on. In
this condition, both control panel and remote control are fault use.
Press “”button again, all lights are on and both control panel and remote control are use
to succeed.

CONTROL PANEL VIEW:
REMOTE CONTROL VIEW:
1. Remote control, please use Lithium battery CR2025 3V.
2. The remote control power button is label as such
1.”ON/OFF” Power button
2.“24H” Setting timer from 1-24 hours
3.“MODE” COLD,WARM,HOT 3 setting for selection
4.“LOCK” Child-Lock function
5.“AUTO” Window Open function
6.“Delay” Wake up and set temperature of one week
7.“W.Timer” Weekly timer
8.“+”Increase
9.“-”Decrease
10. “Set” Set real time

MOUNTING AND ELECTRICAL CONNECTION
1) when mounted, enough space must be left around heater
2) get three holes in the wall above the floor(seeing setting sketch A,B,C position),be sure to
make the diameter just as same as the expanding pipe, insert plastic expanded pin into all
three holes
3) fix two screws in the expanding pipe (as sketch A&B position),keep the tips of the screws out
for 10mm ,and hang up the machine after the screws are strong enough
4) fix the bottom screw on the expanding pipe (as sketch C position)
Figures for wall mounting
MOUNTING AREA
Note:
This product is suitable for mounting in Zone 3 or the safe zone of a bathroom ( or similar ) only
if a permanent connection tothe mains supply is made in accordance with the requirements of
the building Regulations ( including the wiring Regulations).
If in doubt, consult a qualified electrician.

OPERATION OF THE HEATER
NOTE: It is normal when the heaters are turned on for the first time or when they are turned on
after having not been used for a long period of time the heaters may emit some smell and
fumes. This will disappear when the heater has been on a short while.
CLEANING THE HEATER
1) Always un-plug the heater from the wall socket and allow it to cool down before cleaning.
2) Clean the outside of the heater by wiping with a damp cloth and buff with a dry cloth. Do
not use any detergents or abrasives and do not allow any water to enter the heater.
STORING THE HEATER
When the heater is not used for long periods of time it should be protected from dust and stored
in a clean dry place.
INDORMATION ON THE DISPOSAL AND RECYCLING OF THIS PRODUCT
Please note that your product is marked with this symbol:
This means that the product should not be mixed with normal household waste, as there are
separate collection facilities for Waste Electrical and Electronic Equipment.
The WEEE Directive legislation requires each Member State to provide for the correct
collection, recover, handing and recycling of Waste Electrical and Electrical Equipment.
Private households within the EU can return their used equipment to designated collection
sites free of charge. In certain member states, if you purchased the equipment through retail
or a distributor, you can return your used equipment to themfree of charge providing you
purchase similar new equipment. Please contact your retailer, distributor or local authority for
further details on the handling of Waste Electrical and Electrical Equipment.
Owing to our constant development of our products on both functionality and design we
reserve the rightto change the product without preceding notice.

INSTRUCTIONS FOR CONVECTOR
Bathroom heater
UPUTSTVO ZA KORIŠĆENJE
ELEKTRIČNE GREJALICE
FOX GRB1605

Modeli na koje se odnosi ovo uputstvo su:-
FOX GRB1605
VOLTAŽA: 220V-240V~50-60Hz
VODOOTPORNOST: IP23
SNAGA: 1000-2000 W
UPOZORENJE
Pročitajte ova uputstva do kraja pre korišćenja grejalice. Sačuvajte ovo
uputstvo zbog budućeg korišćenja.
.
VAŽNO: Ovaj uređaj je namenjen za korišćenje isključivo u kućnim uslovima.
Koristiti uređaj u fiksiranom položaju i to na način opisan u uputstvu.
UREĐAJ NIJE NAMENJEN ZA SPOLJNU UPOTREBU!
BEZBEDNOSNE INSTRUKCIJE (Pročitati pre uključivanja grejalice.)
1. Deca od 8 godina i starija, osobe sa smanjenim fizičkim, motoričkim ili mentalnim sposobnosti-
ma, osobe sa nedostatkom iskustva ili nedovoljno obučene, mogu upotrebljavati ovakve aparate
ukoliko im je obezbeđen nadzor ili im data uputstva koja se odnose na bezbednu upotrebu aparata,
kao i predočene opasnosti koje proizlaze iz toga. Deca se ne smeju igrati ovakvim aparatima. Apara-
ti se ne smeju čistiti i biti podvrgnuti korisničkom održavanju od strane dece, bez odgovarajućeg
nadzora.
2. Decu mlađu od 3 godine trebalo bi držati podalje od grejalice, osim ako su pod stalnim nadzo-
rom.
3. Deca u dobi od 3 godine i ona mlađa od 8 godina, uređaj mogu uključiti/isključiti (on/off) samo
ako je smešten, odnosno, instaliran u svom normalnom radnom položaju i ako su pod nadzorom
uzimajući u obzir da se uređaj koristi na bezbedan način i uz razumevanje o mogućim opasnostima.
Deca u dobi od 3 do 8 godina ne smeju sama uključivati aparat u utičnicu, regulisati i čistiti uređaj
niti vršiti korisničko održavanje.
4. OPREZ: Neki delovi ovog proizvoda mogu biti veoma vrući i prouzrokovati opekotine. Posebnu
pažnju trebalo bi obratiti kada su deca i osetljive osobe prisutne.
5. PAŽNjA: Da bi se izbeglo pregrevanje, ne prekrivajte grejalicu.
6. Zbog opasnosti od kratkog spoja i električnog udara grejalica se ne sme postavljati neposredno
ispod priključnice za napajanje.
7. Ne koristiti grejalicu u neposrednoj blizini kade, tuš-kade, umivaonika ili bazena.
8. Ne koristiti u kombinaciji sa programerima, tajmerima i sličnim uređajima koji automatski
uključuju grejalicu, jer postoji rizik od požara ukoliko je grejalica pokrivena ili pogrešno postavljena.
9. UPOZORENjE: Ova grejalica nije opremljena uređajem za kontrolu sobne temperature. Ne koris-
tite ovu grejalicu u malim sobama kada su u njih smeštene osobe koje ih ne mogu samostalno
napustiti, osim ukoliko nemaju stalni nadzor.
10. Proizvod je isključivo za kućnu upotrebu.
11. Priključiti proizvod na jednofaznu struju jačine naznačene na kutiji.
12. Nemojte provlačiti kabl ispod tepiha, staza i tome slično, kako bi se isbeglo saplitanje.
13. Ne koristiti sa oštećenim kablom ili utičnicom, ili nakon što je pala, prestala da radi, ili je ošteće-
na na bilo koji drugi način.
14. Ako je kabl oštećen, mora biti zamenjen od strane proizvođača ili ovlašćenog lica kako bi se
izbegla opasnost.
15. Izbegavati upotrebu produžnog kabla, jer može doći do pregrevanja i požara.
16. Koristiti grejalicu u dobro provetrenim prostorijama. Nemojte ubacivati niti dozvoliti da bilo šta
uđe u kanal dovodnog ili odvodnog vazduha. Da bi se izbegao požar, neophodno je držati grejalicu
čistu bez zapušenja dovoda I odvoda vazduha. Ne koristiti na mekanim površinama poput kreveta,
gde može doći do zapušenja ovih kanala. Koristiti grejalicu isključivo na ravnoj I suvoj podlozi.
17. Ne postavljati grejalicu u blizini zapaljivih l eksplozivnih materija ili materijala. Gore navedene
materijale staviti minimum 1 metar od grejalice.
18. Ne koristiti ovu grejalicu u blizini skladišta benzina I ostalih zapaljivih materijala.
19. Grejalica je vrela pri upotrebi. Da bi izbegli opekotine, koristite ručke prilikom pomeranja.
20. Uverite se da koristite grejalicu tako da bude jedina uključena na tu utičnicu.
21.Kabl ne treba postaviti blizu grejalice zbog toplote.

Uputstvo za korišćenje:
1. Pre uključenja u struju, uverite se da je napon u vašim zidovina isti kao i
označen na
nalepnici na poleđini uređaja.
2. Pažljivo izvadite grejalicu iz kutije i plastične kese.
3. Postavite grejalicu na zid, glavno dugme podesite na “ - ” položaj. Priključite
grejalicu na napon AC 220-240V, sa zvučnim signalom i svetlom dugmeta “ ”,
grejalica će pokazati trenutnu temperatutu i spremna je na korišćenje.
1) Priprema za grejanje:
Podešavanje vremena
Pre uključenja grejalice, podesite trenutno vreme. Pritisnite “ ” dugme na dal-
jinskom upravljaču, svetlo na ekranu će pokazati trenutnu sobnu temperaturu. Da
bi ste podesili nedelju, pritisnite “SET” dugme jednom, kada “W” zasvetli, pritisnite
” ” dugmići podešavaju dane od 1-7(1-Ponedeljak, 2-Utorak......7-Nedelja).
Da bi ste podesiti satnicu, pritisnite “SET” dugme, kada zasvetli “ ” dugmićima
“ ” podešavate sate.
Da bi ste podesiti minute, pritisnite “SET” dugme, kada zasvetli “ ” dugmićima
“ ” podešavate minute.
PS: Pritiskom na “SET” dugme, brojke na ekranu će treptati 5 sekundi, a nakon
toga se uređaj vraća u stanje mirovanja. Uređaj će pamtiti i održavati podešeno
vreme do isključenja napajanja.
2) Generalne kontrole
1. Uključite grejalicu klikom na dugme “ ”, grejalica će izduvavati hladan vazduh
i svetleće “ ”.
2. Pritiskom “ ” dugmeta, grejalica će izduvavati topao vazduh, i “ ” i “ ”
svetlo će svetleti.
3. Pritiskom “ ” dugmeta drugi put, grejalica će izduvavati vreo vazduh i “ ” i
“ ” će svetleti.
4. Pritiskom “ ” dugmeta treći put, grejalica će izduvavati hladan vazduh i “ ”
će svetleti.
5. Pritiskom “ ” dugmeta, grejalica će podesiti tajmer od “01-24“ i “ ” će svetle-
ti. “00” predstavlja isključen tajmer.
PS: Kontrol panel “ ” dugme ima istu funkciju kao i dugme “ ” na daljinskom
upravljaču.

3) 24H Tajmer:
1. Pritisnite dugme “ ”, podesite tajmer na 24h, nastavite da pritiskate “ ”
kako bi ste povećali sate od 00 do 24 (00- isključen tajmer, 01- 1 sat, 02- 2
sata.....24- 24 sata), Svetlo “ ” bi trebalo da svetli u ovom režimu.
PS: Podešavanje “ 00 ” znači da je tajmer isključen, i svetlo “ ” ne bi trebalo da
svetli.
4) Podešavanje termostata
1. Da bi ste podesili temperaturu, pritisnite “ ”, možete birati između 10ºC i
49ºC.
2. Kada sobna temperatura padne 2ºC ispod podešene temperature, grejalica će
poćeti grejanjem sa “ ” režimom (1000W).
3. Kada sobna temperatura padne 4ºC ispod podešene temperature, grejalica će
poćeti grejanjem sa “ ” režimom (2000W).
4. Kada sobna temperatura pređe 1ºC preko podešene temperature, grejalica će
početi sa hlađenje.
5) Tajmer
1. Za podešavanja nedeljnog tajmera pritisnite “ ” dugme jednom, “W” bi tada
trebalo da zasvetli, brojka 1 pokazuje “Ponedeljak”.
2. Za podešavanja tajmera po satima pritisnite “ ” dugme dva puta, “ ” bi
tada trebalo da zasvetli, dugmićima “ ” podešavate sate od 01-00 (01- 1 sat,
02- 2 sata......24- 24 sata).
3. Za podešavanja tajmera po minutima pritisnite “ ” dugme tri puta, “ ” bi
tada trebalo da zasvetli, dugmićima “ ” podešavate sate od 00-59 (01- 1
minut, 02- 2 minuta......59- 59 minuta).
4. Od 1-7 (1- Ponedeljak, 2- Utorak.....7- Nedelja) kada podesite tajmere za svaki dan
po želji, pritisnite “ ” dugme 7 puta da bi podesili temperaturu za svaki dan
pojedinačni pritiskom na dugme “ ”, temperatura je od 10ºC do 49ºC.
6) Funkcija otvorenog prozora
1. Pritisnite “ ” dugme, svetlo “ ” će da zasvetli. Uređaj tada radi u režimu
pametne uštede energije. (U ovoj funkciji, uređaj proverava sobnu temperaturu i
prilagođava se paljenjem i gašenjem automatski.
2. Pritiskom na “ ” dugme ponovo, svetlo “ ” će se isključiti i funkcija je iskl-
jučena.

7) Funkcija odlaganja
1. Pritisnite dugme “ ”, zatim pritisnite “ ” dugme jednom, svetlo “ ” i
svetlo “ ” bi trebalo da zasvetle, pritisnite “ ” kako bi ste povećali sate od
00 do 24 (00- isključen tajmer, 01- 1 sat, 02- 2 sata.....24- 24 sata).
2. Pritisnite dugme “ ” ponovo, svetlo “ ” i svetlo “ ” bi trebalo da zasve-
tle, pritisnite “ ” kako bi ste povećali sate od 00 do 24 (00- isključen tajmer,
01- 1 sat, 02- 2 sata.....24- 24 sata).
8) Child lock funkcija
Pritisnite “ ” jednom, sva svetla bi trebala da se isključe, samo “ ” svetli. U
ovom režimu su i kontrolni panel i daljinski upravljač onesposobljeni.
Pritisnite “ ” još jednom, sva svetla bi trebala da se usključe. U ovom režimu su
i kontrolni panel i daljinski upravljač osposobljeni.

Daljinski upravljač:
Oznake dugmića:
ON/OFF: Uključi/isključi
24H: Podešavanje tajmera od 1 do 24 sata
MODE: Hladno, Toplo, Vrelo
LOCK: Child Lock funkcija
AUTO: Funkcija otvorenog prozora
Delay: Postavljanje temperature unapred
W. Timer: Nedeljni tajmer
+: Pojačaj temperaturu
-: Smanji temperaturu
Set: Podesi vreme
1. Molimo vas, koristite litijumske baterije oznake CR2025 3V.
2.
Kontrolni panel:
Ventilator Tajmer
Grejanje 1000W
Grejanje 2000W
Režim otvorenog
prozora (sat)
Funkcija odlaganja
(minut)
RežimDugme uključi/isključi 24h Tajmer
Nedeljni
tajmer
Dekorativni
deo
LED
Displej
Uljučeno/Isključeno

INSTALACIJA I POVEZIVANJE GREJALICE:
1) Kada se montira, dovoljno prostora mora da se ostavi oko grejalice.
2) Napravite tri rupe u zidu (videvši postavljanje skice A,B,C pozicije),obavezno
napravite prečnik jednak kao i cev, ubacite tipl u sve tri rupe.
3) Postavite dva šrafa u proširenoj cevi (kao skica A&B pozicije), držite vrhove šrafova napolju oko
10mm, i okačite uređaj nakon što šrafovi budu dovoljno sigurno postavljeni u zidu.
4) Zategnite donji šraf na proširenoj cevi (kao skicu C pozicije)
Preporučena površina pogodna za montažu:
Važno:
Ovaj proizvod je pogodan za montažu u Zoni 3 ili bezbednoj zoni kupatila ( ili slično ) samo ako je
trajna veza sa glavnim snabdevanjem struje napravljena u skladu sa zahtevima građevinskih propisa
( uključujući i Propise o žicama). Ako ste u nedoumici, posavetujte se sa kvalifikovanim električarem.

NAPOMENA: Normalno je kada su grejači prvi put uključeni ili kada su uključeni nakon što nisu korišćeni
duži vremenski period grejači mogu da emituju neki miris i isparenja.
Ovo će nestati kada grejalica bude radila kratko vreme.
PRINCIP RADA GREJALICE
1) Uvek isključite uređaj iz zidne utičnice i dozvolite mu da se ohladi pre čišćenja.
2) Očistite spoljašnjost grejalice brisanjem vlažnom krpom i prođite suvom krpom.
Nemojte koristiti nikakve deterdžente ili abrazive i ne dozvolite da bilo koja voda uđe u grejalicu.
ČIŠĆENJE GREJALICE
Kada se grejalica ne koristi duži vremenski period treba je zaštititi od prašine i
čuvati na čistom suvom mestu.
SKLADIŠTENJE GREJALICE
Imajte na umu da je vaš proizvod označen ovim simbolom:
To znači da proizvod ne treba mešati sa normalnim kućnim otpadom, kao što postoje odvojeni
objekti za prikupljanje otpadne električne i elektronske opreme.
INFORMACIJE O ODLAGANJU I RECIKLAŽI OVOG PROIZVODA
Table of contents
Languages:
Other Fox Heater manuals
Popular Heater manuals by other brands

Viessmann
Viessmann VITOPLANAR EI2 operating instructions

Hyundai
Hyundai H-HV20-10-UI3324 Instruction manual & warranty card

Electrorad
Electrorad ThermaStoreHHR Installation manual and instructions for use

EQUATION
EQUATION IFH04-33E Assembly, Use, Maintenance Manual

Heatzilla
Heatzilla SY-CLP55 user manual

Thermor
Thermor Emotion 3 instruction manual

Prem-I-Air
Prem-I-Air EH1712 manual

Strend Pro
Strend Pro HH04 instruction manual

Klarstein
Klarstein Lindholm manual

HeatStar
HeatStar MH4B Operating instructions and owner's manual

Harvia
Harvia L30 Instructions for installation and use

Omega Altise
Omega Altise AHPE222W Operation, maintenance and safety instructions