5
Assembly
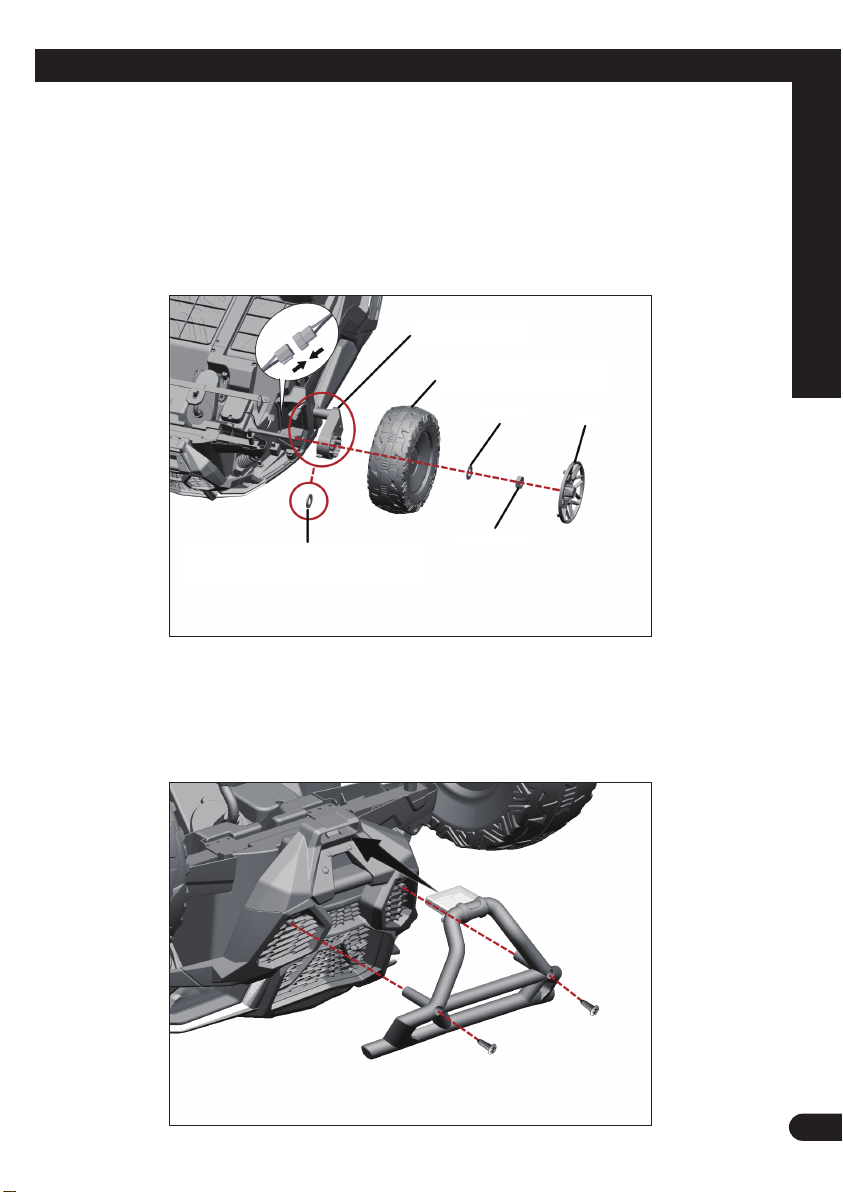
3. Install front wheels
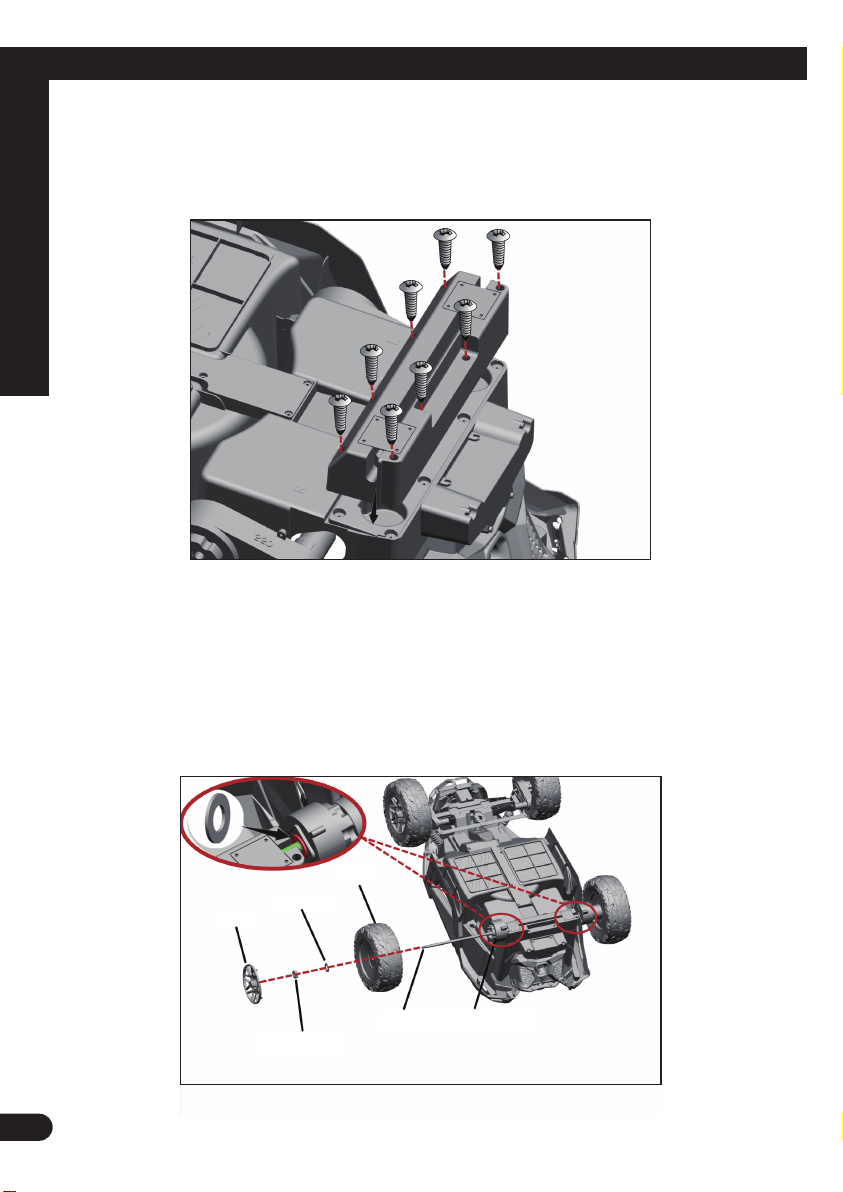
a. Two motors version: Install M12 gasket-Wheels-M12 gasket-M10
locking screw-Wheel cover onto the front axle following the correct
squence.
b. Four motors verison: Install wheels-M12 gasket-M10 locking screw-
Wheel onto the front axle following the correct squence.
4. Install front bumper
Install front bumper onto the car body, and fix it with 2 pcs of
M4*12mm self-tapping locking screws.
Front driving motors under
four motors verison
Front wheel (notes: Under four motors
version, front wheels are with shorter
plum blossom part)
M12 gasket
M12 gasket
M10 Locking Screws
Wheel Cover
Notes: It is used when 2 motors version. There is no front driving motor under 2
motors version, so that neede to be added M12 gasket to the inside part
the wheel
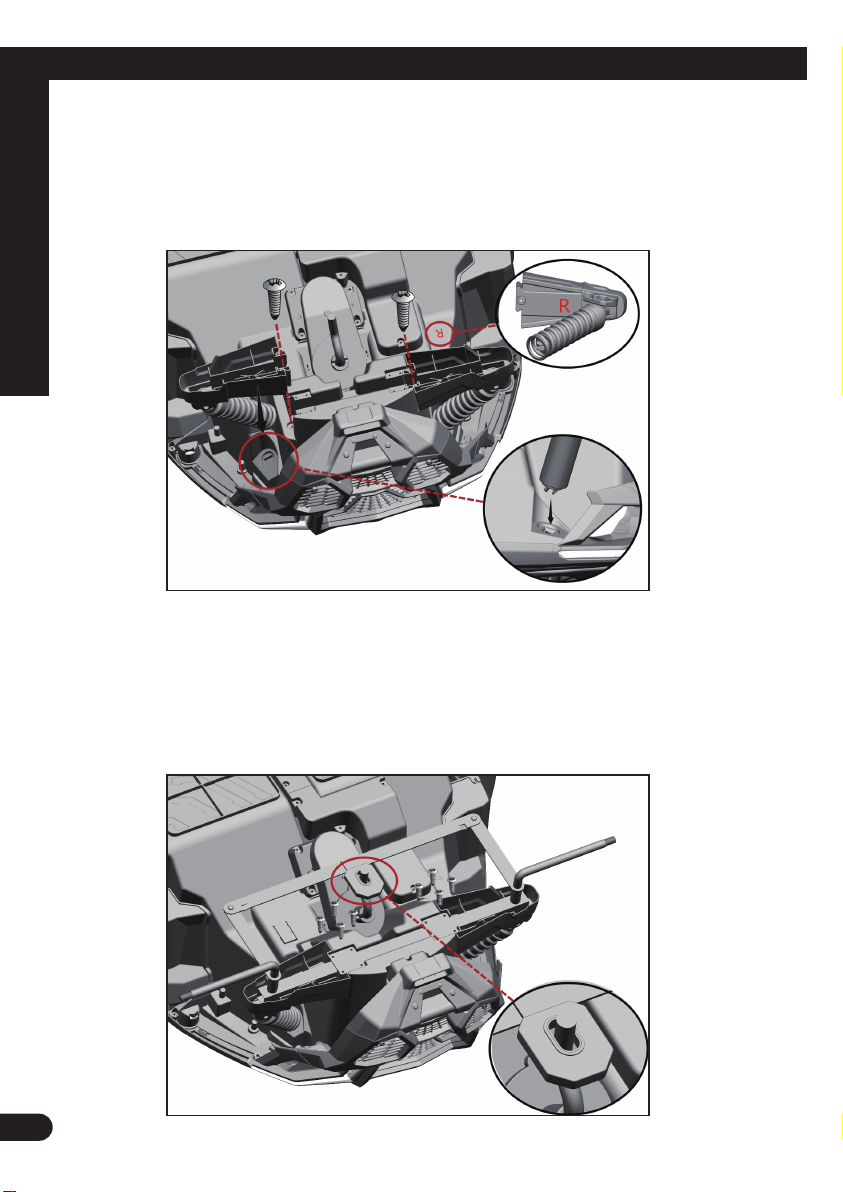
Installation steps