manuals.online logo
Brands
  1. Home
  2. •
  3. Brands
  4. •
  5. Freestyle
  6. •
  7. Watch
  8. •
  9. Freestyle 634 Xterra User manual

Freestyle 634 Xterra User manual

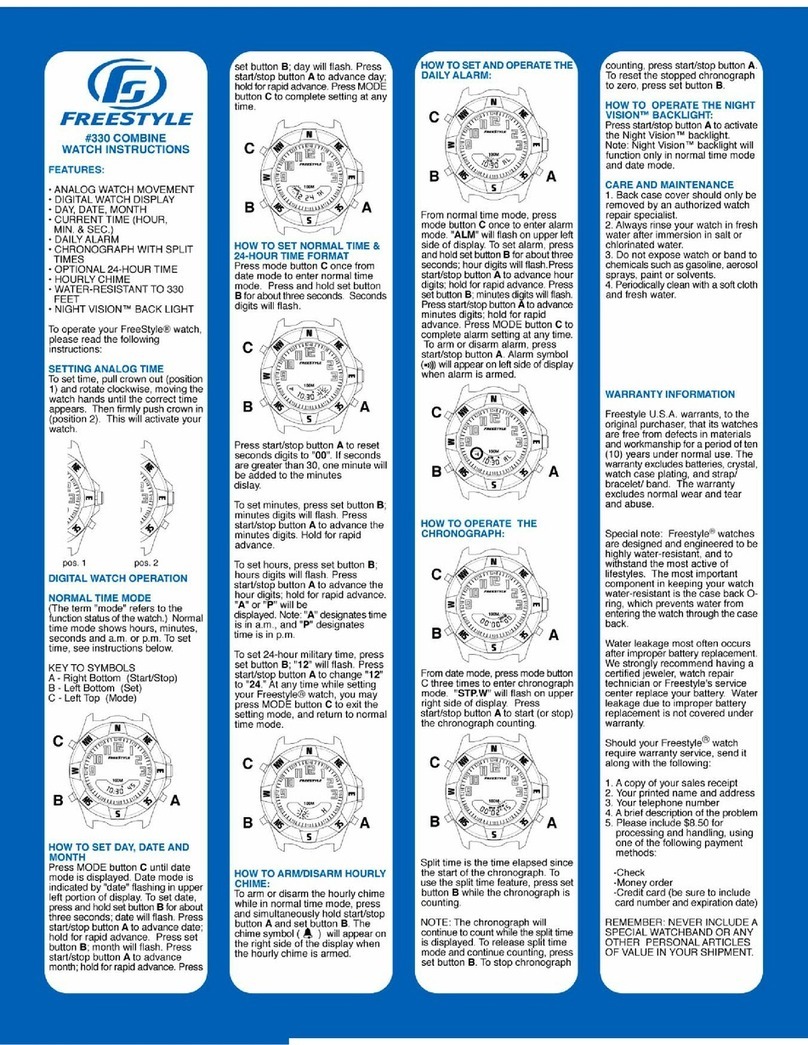
716 & 634 XTERRA
WATCH INSTRUCTIONS
FEATURES:
• CURRENT TIME (HR., MIN., &
SEC.) DAYAND DATE
• CHRONOGRAPH WITH SPLIT
AND LAP TIMER
• 100-LAPS CHRONOGRAPH
RECALL • TWO DAILYALARMS,
TWO WEEKDAYALARMS, TWO
DATEALARMS & HOURLY
CHIME
• COUNTDOWN INTERVALTIMER
WITH FIVE PROGRAMMABLE
SEGMENTS,AND COUNTDOWN
STOP TIMER.
• DUAL TIME
• OPTIONAL 24-HR. TIME
(MILITARY TIME)
• WATER RESISTANT TO 300 FT.
• NIGHT VISION™
ELECTROLUMINESCENT
BACKLIGHTING
KEY REFERENCES
D - Clear B - Light
A - Stop C - Mode
E - Lap
NORMAL TIME MODE
(The term “mode” means the function
status of the watch.) “Normal time
mode” shows hours, minutes,
seconds, day, date. To set time, see
operating instructions on “How to
Set Normal Time.”
HOW TO SET NORMAL TIME,
DATE AND 24-HOUR FORMAT
Before setting time, you must be in
“normal time mode.” Press and hold
CLEAR button Dwhile in “normal
time mode” to enter the “set time”
mode. Seconds digits will flash.
Press LAP button Eto reset the
seconds digits to zero. If seconds
are greater than 30, the minutes
display will increase by one.
Press MODE button Cto cycle
through the remaining digits to be
set. Advance flashing digits by
pressing LAP button E; hold for rapid
advance. Retard digits by pressing
STOP button A. The setting
sequence is: seconds, hours,
minutes, year, month, date, day,
12/24-hour format, and month-date
or date-month.
(Note: In the 12H mode, the “A” flag
indicates time is in a.m.; “P” flag
indicates time is in p.m.)
Press CLEAR button Dto complete
setting at any time.
Press LAP button Eto change
digits to larger format.
message “FULL” will be displayed,
and no additional lap times can be
recorded.
HOW TO RECALL LAP TIMES
From “normal time mode”, enter the
“recall mode” by pressing MODE
button Ctwice. Mode prompt
“CH-RC” will be displayed for one
second.
Segment one, and the day and date
of segment one will flash
momentarily, and then the first lap
time of segment one will be
displayed.
Press STOP button Ato select
recorded segment of choice.
Once a segment is selected, press
LAP button Eto view the contents
of that specific segment. The display
will show the lap number on the top
row, the lap time on the middle row
and the total elapsed time will
appear on the bottom row.
Press LAP button Eto advance
through the individual laps of that
segment. After viewing the last lap
of that segment, press STOPbutton
A to view the next segment.
TO CLEAR THE MEMORY
While in the “recall mode”, press
and hold CLEAR button D, (CLR-
HOLD will be displayed), to clear
the segment that was last viewed.
To clear all stored segments, press
and hold CLEAR button Dfor six
seconds; (CLR-HOLD-ALL will be
displayed), and then “NO DATA” will
be displayed.
HOW TO SETAND OPERATE THE
COUNTDOWN TIMER
From “normal time mode”, press the
MODE button Cthree times to enter
the “timer mode”. Mode prompt
“TIMER” will appear for one second.
The timer has two different timing
modes, and a range from one
second to 23 hours, 59 minutes, 59
seconds.
a. Countdown interval timer with five
programmable segments
(TMR1-5)
b. Countdown stop (TMR) - will
countdown from preset time and
stop.
Press STOP button Ato select
countdown timer choice.
Press and hold CLEAR button Dto
enter the setting mode; seconds
digits will flash. Press LAP button
Eto increase the flashing digit, press
STOP button Ato retard the flashing
digit. Press MODE button Cto
advance from seconds, to minutes,
to hours. Once the hours digits are
set, interval timer 1-5 digit will flash.
Press LAP button Eto select the
specific interval timer.
Press CLEAR button Dto complete
setting of each individual interval
timer. Continue with this procedure
until all five interval timers are set.
NOTE: It is not necessary to set all
five interval timers. For example, if
interval timer #3 is set to all zeroes,
then the timer will skip to interval
timer #4. The countdown-stop timer
is set the same way as the
interval timer.
Once all desired timers are set,
press CLEAR button Dto exit the
setting mode. The timer is now ready
to use.
Press LAP button Eto start the
timer. Press LAP button Eagain to
change display format to indicate
preset countdown time on the upper
middle row, and time counting down
on the lower middle row. Press
STOP button Ato stop the
countdown timer. Press CLEAR
button Dto reset timer to preset
time.
NOTE: While using the interval
timer, the number of completed
interval cycles will be indicated on
the lower row of the display
(REP-00).
HOW TO OPERATE THE ALARM
The Xterra™ has an hourly chime
and six different alarms: two daily
alarms (AL-1 &AL-2), two weekday
alarms (AL-3 &AL-4); and two date
alarms (AL-5 &AL-6), which can be
set in either normal time or dual
time.
Press MODE button Cfour times
while in normal time mode to enter
the alarm mode. Mode prompt
“ALARM” will be displayed for one
second.
HOW TO SET AND VIEW
DUAL TIME
From “normal time mode”, press
and hold STOP button Afor three
seconds. “T2 “ will appear in the
upper right corner of the display. To
set dual time, follow the same
procedure used to set normal time,
as indicated above. To return to
normal time mode, press and hold
STOP button Afor three seconds.
“T1” will appear on the upper right
corner of the display. To view dual
time from normal time mode, simply
press STOP button Amomentarily.
HOW TO OPERATE THE
CHRONOGRAPH/STOPWATCH
The chronograph stores lap times
in segment form. Asegment is a
group of laps (up to 100) recorded
during a single run. Every time the
chronograph is used, the lap times
for that particular segment are
automatically recorded into memory
(unless memory is full), along with
a segment number and the date.
The chronograph will record a
maximum interval of 23 hours, 59
minutes and 59 seconds, and has
a resolution of 1/100 second for
intervals less than one hour.
To enter the “chronograph mode,”
press MODE button Conce from
“normal time mode.”
Mode prompt “CHRON” will be
displayed for one second.
To start the chronograph, press LAP
button E. To use the lap time feature,
press LAP button E while the
chronograph is running. The display
will pause for a few seconds, then
momentarily show the lap number
on the top row, the current lap time
on the middle row, and the total
elapsed time on the bottom row.
The chronograph will continue
counting.
When the timing session is
complete, press STOP button Ato
stop the chronograph. Press and
hold STOP button Aagain, and the
number of available laps will appear
on the display (CHR-FREE 1-100).
Press and hold CLEAR button D
for four seconds to reset the
chronograph to zero. The lap times
of this session are automatically
stored in memory (unless memory
is full). When memory is full, the
D B
C A
E
“T1” or “T2” (indicating normal time
(T1) or dual time (T2)) and AL1-6,
(indicating which of the six alarms),
will be displayed on the lowest row.
Alarm time will be displayed on the
lower middle row. Daily, weekly or
date alarm will be displayed on the
upper middle row. The top row will
indicate whether or not the alarm
is armed.
TO SET DAILY ALARMS
Press STOPbutton Ato select which
of the two daily alarms (AL1-2), you
wish to set. Press and hold CLEAR
button Dto enter the alarm set mode.
Hours digits will flash. Press LAP
button Eto advance hour digits.
Press MODE button C; minutes digits
will flash. Press LAP button Cto
advance minutes digits. Press
MODE button C, “T1” (normal time)
OR “T2” (dual time) will flash. Press
LAP button Eto select either “T1”
or “T2.” (Note: When setting the
alarm time in the 12-hr. format, the
AM or PM flag will be displayed on
the left side of the display. “A”
designates that alarm time is set for
a.m., and “P” designates that alarm
time is set to p.m.) When setting is
complete, press SET button Dto exit
the setting mode.
TO SET WEEKDAY ALARMS
Press STOP button Ato select which
of the two weekday alarms, (AL3-
4), you wish to set. Press and hold
CLEAR button Dto enter the “alarm
set” mode. Hours digits will flash.
Press LAP button Eto advance
hours digits. Press MODE button
C; minutes digits will flash. Press
LAP button Eto advance minutes
digits. Press MODE button C; day
will flash. Press LAP button Eto
advance day. Press MODE button
C, second day will flash. Press LAP
button Eto advance second day.
Following indicates how day alarm
operates:
MO-MO = MONDAY ONLY
MO-FR = MONDAY TO FRIDAY
Press MODE button C; “T1” (normal
time) OR “T2” (dual time) will flash.
Press LAP button Eto select either
“T1” or “T2”. When setting is
complete, press SET button Dto exit
the setting mode.
TO SET DATE ALARMS
Press STOP button Ato select which
of the two date alarms, (AL5-6), you
wish to set. Press and hold CLEAR
button Dto enter the alarm set mode.
Hours digits will flash. Press LAP
button Eto advance hour digits.
Press MODE button C; minutes digits
will flash. Press LAP button Eto
advance minutes digits. Press
MODE button C; month digits will
flash. Press LAP button Eto
WARRANTY INFORMATION
Freestyle U.S.A. warrants, to the
original purchaser, that its watches
are free from defects in materials
and workmanship for a period of ten
(10) years under normal use. The
warranty excludes batteries, crystal,
watch case plating, and strap/
bracelet/ band. The warranty
excludes normal wear and tear and
abuse.
Special note: Freestyle®watches
are designed and engineered to be
highly water-resistant, and to
withstand the most active of
lifestyles. The most important
component in keeping your watch
water-resistant is the case back O-
ring, which prevents water from
entering the watch through the
case back.
Water leakage most often occurs
after improper battery replacement.
We strongly recommend having a
certified jeweler, watch repair
technician or Freestyle's service
center replace your battery. Water
leakage due to improper battery
replacement is not covered under
warranty.
Should your Freestyle®watch
require warranty service, send it
along with the following:
1. Acopy of your sales receipt
2. Your printed name and address
3. Your telephone number
4.A brief description of the problem
5. Please include $8.50 for
processing and handling, using
one of the following payment
methods:
-Check
-Money order
-Credit card (be sure to include
card number and expiration date)
REMEMBER: NEVER INCLUDE A
SPECIAL WATCHBAND OR ANY
OTHER PERSONALARTICLES
OF VALUE IN YOUR SHIPMENT.
Send to the following address:
Freestyle
Attn: Individual Returns
47-50 33rd Street
Long Island City, NY 11101
(718)-729-8890
Please allow 30 days for return of
your watch.
Neither this warranty, nor any other
warranty expressed, is assumed for
any incidental or consequential
damages, including but not limited
to the mathematical accuracy of the
product. Some states do not allow
limitations on how long an implied
warranty lasts, or the exclusions of
or limitations on consequential
damages, so the above limitations
may not apply to you. This warranty
gives you specific legal rights, and
you may have other rights which
vary from state to state.
This warranty applies to watches
purchased in the United States. For
watches purchased outside the
United States, please contact your
authorized Freestyle®dealer for
warranty information.
If your watch requires servicing not
covered under our warranty (battery,
crystal, strap/bracelet/band, watch
case plating), or refurbishing,
complete the return form (next
column) and return with your watch.
Visit our website at:
www.freestyleusa.com
advance months digits.
Press MODE button C; date digits
will flash. Press LAP button Eto
advance date digits.
Press MODE button C; “T1” (normal
time) OR “T2” (dual time) will flash.
Press LAP button Eto select either
“T1” or “T2”. When setting is
complete, press SET button Dto
exit the setting mode.
To arm or disarm any of the six
alarms or hourly chime, press
STOP button Ato select desired
alarm or hourly chime; then press
LAP button Eto arm (ON) or disarm
(OFF) the alarm.
HOW TO OPERATE THE NIGHT
VISION™ ELECTRO-
LUMINESCENT BACKLIGHT
Press LIGHT button Bto activate
the Night Vision™ electro-
luminescent backlight. Do not press
this while submerged in water.
CARE AND MAINTENANCE
1. Back case cover should only be
removed by an authorized watch
repair specialist.
2. Always rinse your watch in fresh
water after immersion in salt or
chlorinated water.
3. Do not expose watch or band to
chemicals such as gasoline, aerosol
sprays, paint or solvents.
4. Periodically clean with a soft cloth
and fresh water.
716004-1-2
Attn: Individual Returns
47-50 33rd Street
Long Island City, NY 11101
(718)-729-8890
Battery $ 4.00
Case 10.00
Bezel 6.00
Band(Polyurethane) 12.00
Band(Leather) 12.00
Band(Metal) 20.00
Band(Nylon) 7.00
Processing and handling 8.50
________
Total $
Check or Money Order
Master Card
Visa
__________________________________
Account# Expiration Date
__________________________________
Printed Name
__________________________________
Address
__________________________________
__________________________________
__________________________________
Phone Number
__________________________________
Signature

This manual suits for next models

2

Other Freestyle Watch manuals

Freestyle 798 BUZZ User manual

Freestyle

Freestyle 798 BUZZ User manual

Freestyle FS0000 User manual

Freestyle

Freestyle FS0000 User manual

Freestyle Solstice FS80920 User manual

Freestyle

Freestyle Solstice FS80920 User manual

Freestyle Blunt 191 User manual

Freestyle

Freestyle Blunt 191 User manual

Freestyle SHARK TIDE 816 User manual

Freestyle

Freestyle SHARK TIDE 816 User manual

Freestyle 520 User manual

Freestyle

Freestyle 520 User manual

Freestyle Flow 100 User manual

Freestyle

Freestyle Flow 100 User manual

Freestyle Avalon User manual

Freestyle

Freestyle Avalon User manual

Freestyle MacDaddy 813 User manual

Freestyle

Freestyle MacDaddy 813 User manual

Freestyle Predator 721 User manual

Freestyle

Freestyle Predator 721 User manual

Freestyle FS84840 User manual

Freestyle

Freestyle FS84840 User manual

Freestyle BOILER FS81239 User manual

Freestyle

Freestyle BOILER FS81239 User manual

Freestyle TIDE 3.0 User manual

Freestyle

Freestyle TIDE 3.0 User manual

Freestyle TIDE SHARK User manual

Freestyle

Freestyle TIDE SHARK User manual

Freestyle 526-Sugar User manual

Freestyle

Freestyle 526-Sugar User manual

Freestyle SHARK BUZZ 2.0 User manual

Freestyle

Freestyle SHARK BUZZ 2.0 User manual

Freestyle Convert FS81200 User manual

Freestyle

Freestyle Convert FS81200 User manual

Freestyle FS84889 User manual

Freestyle

Freestyle FS84889 User manual

Freestyle Nomad User manual

Freestyle

Freestyle Nomad User manual

Freestyle FS84851 User manual

Freestyle

Freestyle FS84851 User manual

Freestyle FS84951 User manual

Freestyle

Freestyle FS84951 User manual

Freestyle SHARK PREDATOR User manual

Freestyle

Freestyle SHARK PREDATOR User manual

Freestyle 40510 User manual

Freestyle

Freestyle 40510 User manual

Freestyle Targa 904 User manual

Freestyle

Freestyle Targa 904 User manual

Popular Watch manuals by other brands

Casio QW 5513 Operation guide

Casio

Casio QW 5513 Operation guide

Piaget 560P Instructions for use

Piaget

Piaget 560P Instructions for use

Armitron pro sport MD0346 instruction manual

Armitron

Armitron pro sport MD0346 instruction manual

West Marine BlackTip 13411293 Instruction Booklet and Care Guide

West Marine

West Marine BlackTip 13411293 Instruction Booklet and Care Guide

Jaeger-leCoultre HYBRIS MECHANICA CALIBRE 184 manual

Jaeger-leCoultre

Jaeger-leCoultre HYBRIS MECHANICA CALIBRE 184 manual

FOREVER iGO PRO JW-200 user manual

FOREVER

FOREVER iGO PRO JW-200 user manual

Relic OS10 quick start guide

Relic

Relic OS10 quick start guide

MyKronoz ZeClock manual

MyKronoz

MyKronoz ZeClock manual

Casio QW-782 General guide

Casio

Casio QW-782 General guide

Strikes and Spares SASM80 E-manual

Strikes and Spares

Strikes and Spares SASM80 E-manual

Christopher Ward C1000 Owner's handbook

Christopher Ward

Christopher Ward C1000 Owner's handbook

Lotus ILMFS01 instruction manual

Lotus

Lotus ILMFS01 instruction manual

Chronos Manufactures Chrono Diamond Thyrso 10400 instruction manual

Chronos Manufactures

Chronos Manufactures Chrono Diamond Thyrso 10400 instruction manual

Pandora WATCH2 quick guide

Pandora

Pandora WATCH2 quick guide

Suunto X6 user guide

Suunto

Suunto X6 user guide

Seiko N830 instruction manual

Seiko

Seiko N830 instruction manual

MotionX 365 user guide

MotionX

MotionX 365 user guide

Aplus GV18 user guide

Aplus

Aplus GV18 user guide

manuals.online logo
manuals.online logoBrands
  • About & Mission
  • Contact us
  • Privacy Policy
  • Terms and Conditions

Copyright 2025 Manuals.Online. All Rights Reserved.