manuals.online logo
Brands
  1. Home
  2. •
  3. Brands
  4. •
  5. Fricosmos
  6. •
  7. Kitchen Appliance
  8. •
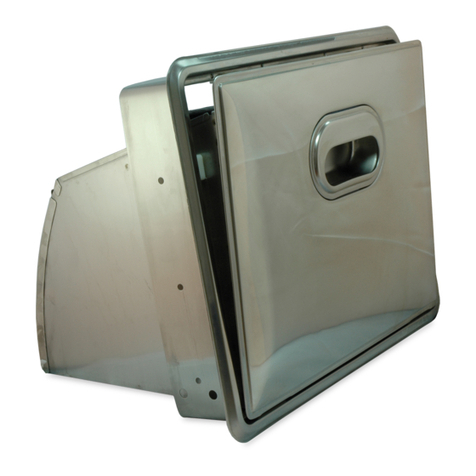
  9. Fricosmos 476010 User manual

Fricosmos 476010 User manual

Carros con guías para bandejas
Tray trolleys with supports
Chariots avec des guides pour plateaux
Abräumwagen für Tabletts mit Seitenschienen
Ref: 476010, 476020, 476022
Fricosmos, S.A.
Polígono industrial nº 1, C/ C, 16-18
28938 Móstoles (Madrid) - España
Tel. (+34) 902 304 420
Fax. (+34) 902 636 683
www.fricosmos.com [email protected] Skype user: fricosmos
Reg. San. 39.2737/M
El artículo tiene garantía de dos años. El mal uso del equipo elimina la garantía del mismo.
The equipment is guaranteed for two years. Misuse of equipment eliminates the warranty.
Le matériel est garanti pendant deux ans. Une mauvaise utilisation de l’équipement élimine la
garantie.
Das Gerät ist für zwei Jahre garantiert. Missbrauch von Geräten entfällt die Garantie.
Ref L A H h Kg GN
476010 625 460 1880 78 19
476020 555 385 1880 78 16 1/1
476022 675 590 1880 78 21 2/1
Lea atentamente las instrucciones antes de su uso. Read the instructions before connecting the
device. Lisez ces instructions avant de brancher le destructeur. Lesen Sie die Anweisungen, bevor
Sie das Gerät
SIMBOLOS - SYMBOLS - SYMBOLES - SYMBOLE
CARACTERÍSTICAS TÉCNICAS - CARACTERISTIQUES TECHNIQUES
TECHNICAL - TECHNISCHE SPEZIFIKATIONEN
GARANTÍA - GARANTIE - WARRANTY - GARANTIE
Capacidad para 20 bandejas.
Capacity 20 trays.
Capacité 20 plateaux
Kapazität für 20 Tabletts.
Una ambos laterales con guías mediante los travesaños. Para ello:
1. Importante a la hora de montar dejar las guías hacia el interior.
2. Atornille fuertemente todos los travesaños a uno de los laterales dejando las guías
hacia el interior.
3. Fije el otro lateral, con las guías hacia dentro, sobre los travesaños con los tornillos
apretándolos fuertemente.
4. Coloque los tapones embellecedores.
MONTAJE
Use un paño húmedo, no mojado con jabón neutro.
No emplee ácidos o detergentes agresivos, ni raspe con estropajos, espátulas, cu-
chillas u objetos cortantes o punzantes.
LIMPIEZA Y ESTERILIZACIÓN
ASSEMBLY
Clean the equipment regularly.
Use a damp, not wet with soap.
Do not use acids or harsh detergents or scrub with scouring pads, spatulas, knives
or sharp objects.
CLEANING AND STERILIZATION
INSTALLATION
Nettoyez l’appareil régulièrement.
Utilisez un chiffon humide, mais pas mouillé avec du savon.
Ne pas utiliser des acides ou des détergents agressifs ou frotter avec un tampon à
récurer, spatules, couteaux ou des objets pointus.
NETTOYAGE ET STÉRILISATION
MONTAGE
Reinigen Sie das Gerät regelmäßig.
Verwenden Sie ein feuchtes, nicht nass mit Seife.
Verwenden Sie keine Säuren oder scharfen Reinigungsmitteln oder schrubben mit
Scheuerschwämme, Spachtel, Messer oder scharfen Gegenständen.
DESINFEKTIONS- UND REINIGUNGSPLAN
Lea las instrucciones antes de conectar el equipo y consérvelas en un
lugar seguro para su consulta.
Read the instructions before connecting the device and store them in
a safe place for reference.
Lisez ces instructions avant de brancher le destructeur et conservez-
les dans un endroit sûr pour sa consultation.
Lesen Sie die Anweisungen, bevor Sie das Gerät und halten Sie sie
an einem sicheren Ort als Referenz.
Utilisez les barres transversales pour joindre les deux côtés avec des guides.
1. Attention ! Lors du montage, veuillez laisser les guides à l’intérieur.
2. Vissez fortement tous les barres transversales à un des côtés. Laissez les guides à
l’intérieur.
3. Fixez l’autre côté avec les guides à l’intérieur sur les barres transversales avec les vis.
Vissez fortement.
4. Placez les bouchons enjoliveurs.
Put together both sides through the crossbars.
1. Warning! During installation, please leave supports inside.
2. Secure tightly the crossbars to one of the sides. Leave the supports inside.
3. Screw tightly the other side to the crossbars, leaving the supports inside the crossbars.
4. Insert the sealing plugs.
An beiden Seiten werden Schienen angebracht: Dabei ist zu beachten:
1. Wichtig ist, dass die Schienen innen montiert werden.
2. Befestigen Sie stark die Schienen innen an einer Seite.
3. Befestigen Sie stark die Schienen innen an der anderen Seite.
4. Bringen Sie Abdeckkappen an.

This manual suits for next models

2

Other Fricosmos Kitchen Appliance manuals

Fricosmos 485408 User manual

Fricosmos

Fricosmos 485408 User manual

Fricosmos 480260 User manual

Fricosmos

Fricosmos 480260 User manual

Popular Kitchen Appliance manuals by other brands

Scarlett SC-JE50C05 instruction manual

Scarlett

Scarlett SC-JE50C05 instruction manual

Zanussi Professional Snack 600 Specifications

Zanussi

Zanussi Professional Snack 600 Specifications

Climadiff PCLP160 Use instruction

Climadiff

Climadiff PCLP160 Use instruction

Thane Housewares FlavorChef user guide

Thane Housewares

Thane Housewares FlavorChef user guide

Royal Catering RCVG-47 user manual

Royal Catering

Royal Catering RCVG-47 user manual

Vinotemp Element EL-142TSST owner's manual

Vinotemp

Vinotemp Element EL-142TSST owner's manual

Landmark L3024UI2WPR-LH owner's manual

Landmark

Landmark L3024UI2WPR-LH owner's manual

Bennett Read 6L Pressure Chef user guide

Bennett Read

Bennett Read 6L Pressure Chef user guide

Livington BLACK TWENTY 4 Instructions for use

Livington

Livington BLACK TWENTY 4 Instructions for use

CookTek UCG01 Quick reference guide

CookTek

CookTek UCG01 Quick reference guide

Sonnenkonig CAVA 12 A MONO user manual

Sonnenkonig

Sonnenkonig CAVA 12 A MONO user manual

Klarstein EL DORADO manual

Klarstein

Klarstein EL DORADO manual

Baumatic BCD905SS instruction manual

Baumatic

Baumatic BCD905SS instruction manual

PAC FOOD VS603 user manual

PAC FOOD

PAC FOOD VS603 user manual

Ivation IVABERKEG64 user guide

Ivation

Ivation IVABERKEG64 user guide

Haier HSW-032 user manual

Haier

Haier HSW-032 user manual

Lakeland 17170 Instruction booklet

Lakeland

Lakeland 17170 Instruction booklet

Electrolux EK 170 (S) User instructions

Electrolux

Electrolux EK 170 (S) User instructions

manuals.online logo
manuals.online logoBrands
  • About & Mission
  • Contact us
  • Privacy Policy
  • Terms and Conditions

Copyright 2025 Manuals.Online. All Rights Reserved.