Installazione / Installation
Operazioni che richiedono personale qualificato. Operare sempre con impianti privi di pressione. È cura
dell’utilizzatore garantire che il filtro non venga utilizzato a pressioni maggiori di quella di targa. Eventuali
sovrapressioni possono causare seri danni agli operatori ed all’attrezzatura.
Operations to be performed by qualified personnel. Never operate with plants under pressure. The user is
responsible to ensure that the filter will never be operated with pressure exceeding the nominal values. Eventual
over-pressure could be dangerous both for the operator and the equipment.
(2)
La modalità di assemblaggio e installazione del filtro sono le seguenti :
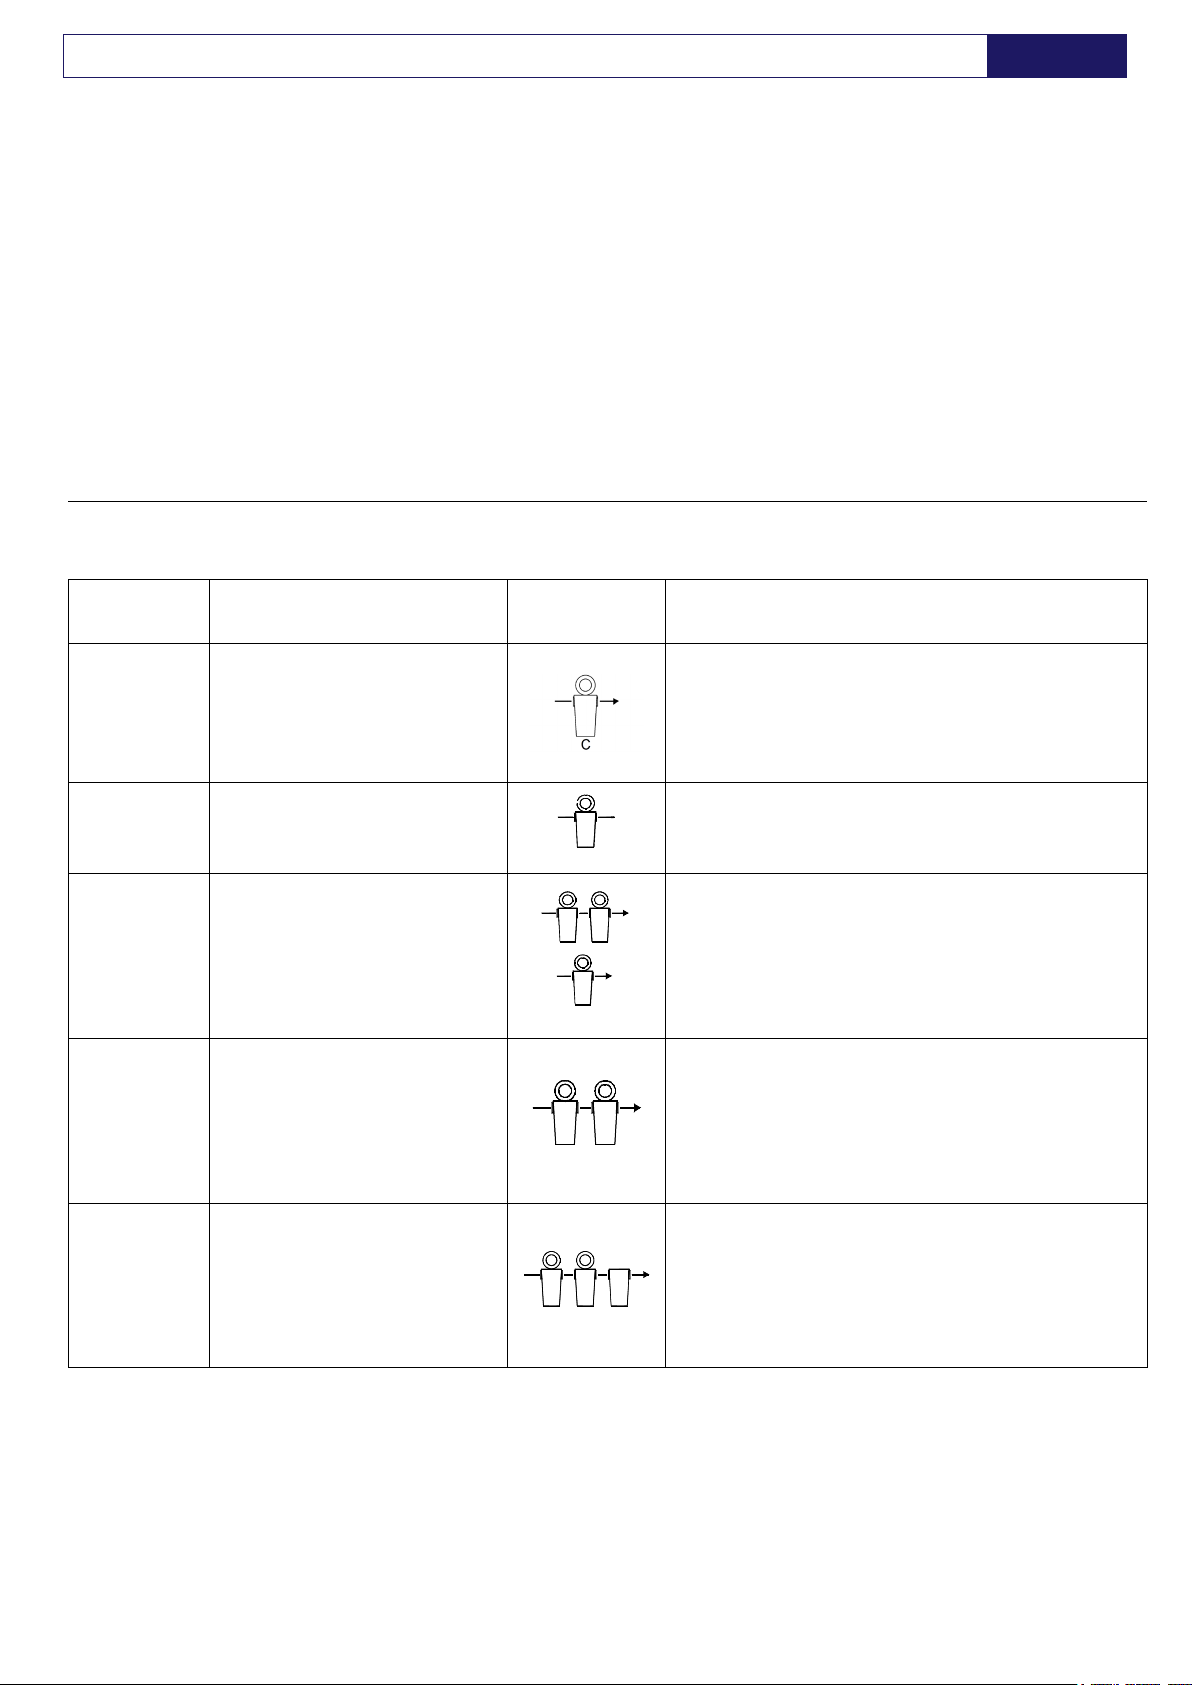
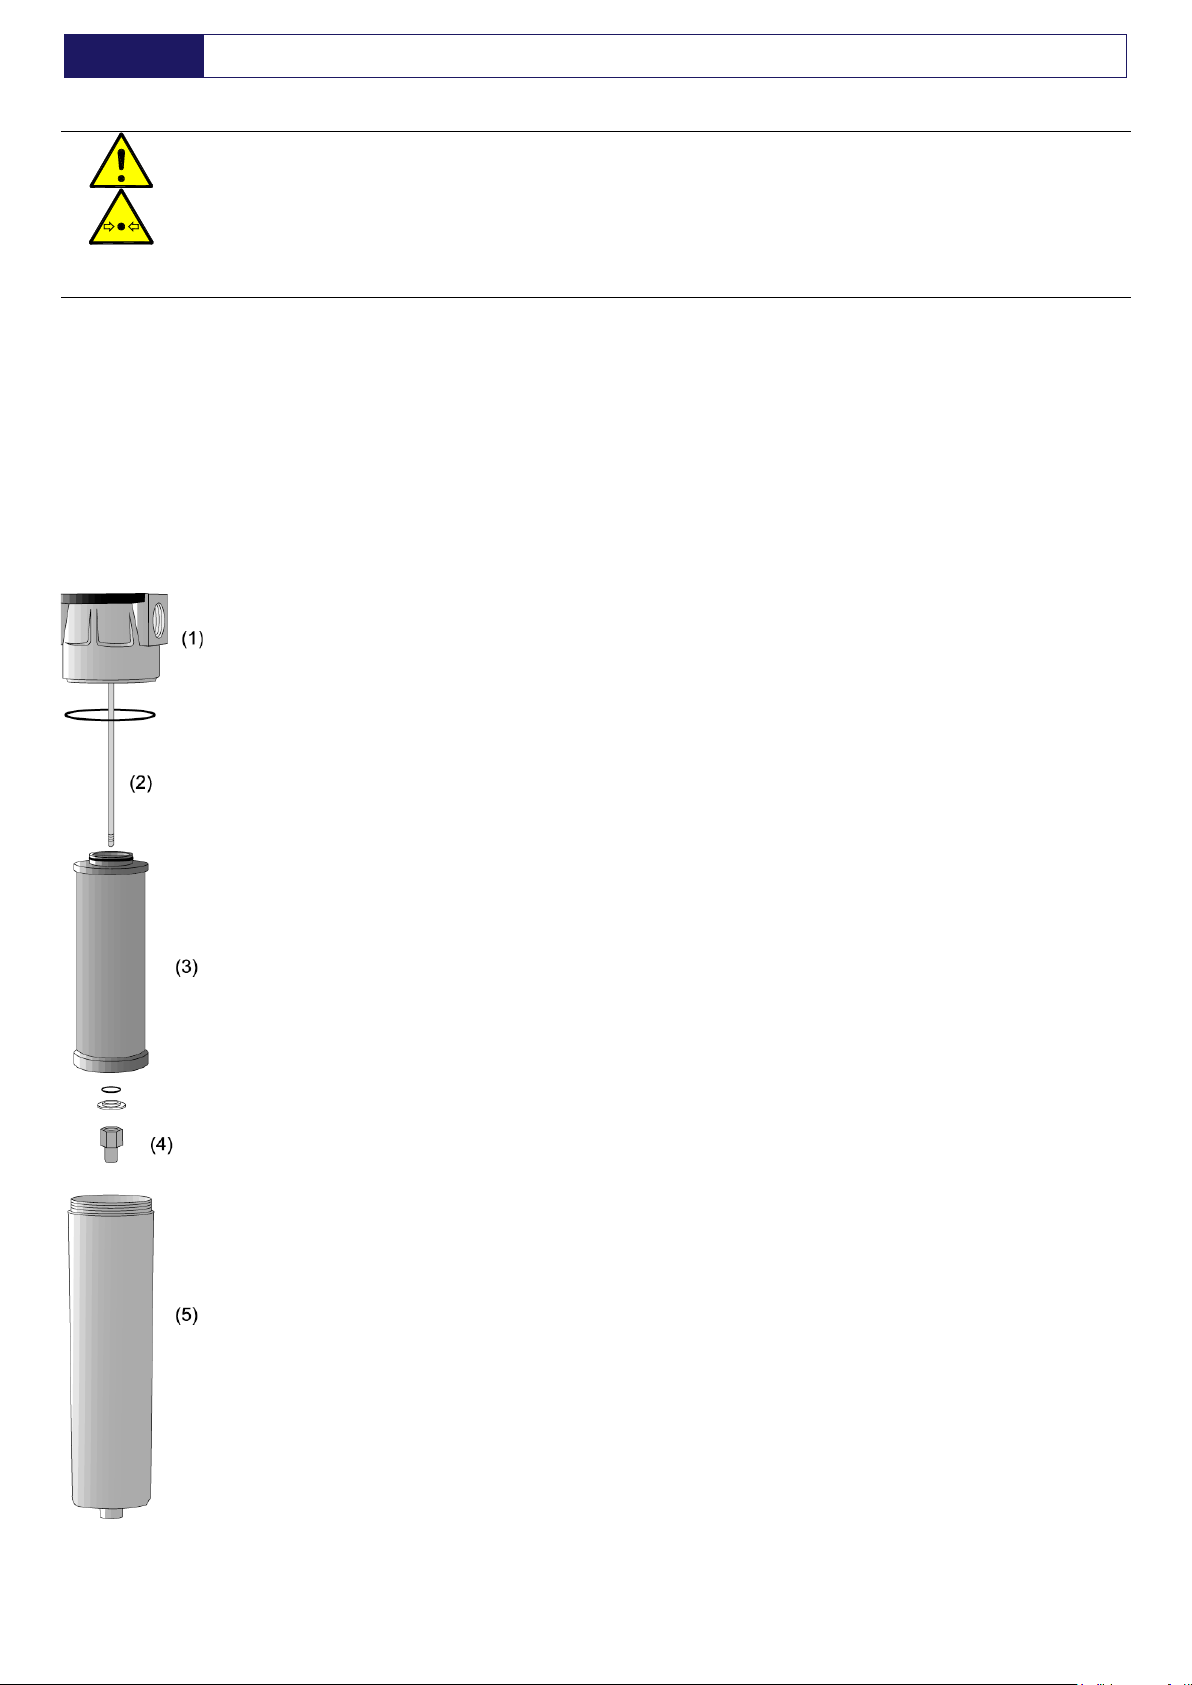
•Qualora sia previsto, installare sulla testa del filtro l’indicatore di intasamento o
manometro differenziale (optional). Vedi paragrafo specifico. NOTA!
installazione della cartuccia grado C, applicare sulla testa d
el filtro il coperchio in
plastica (2) fornito con la cartuccia. La freccia sulla testa del filtro indica ora
corretta del flusso dell'aria.
•
Collegare la testa del filtro alla tubazione di entrata e uscita dell’aria compressa
verificando che il flusso dell’aria rispetti la direziona della freccia posizionata sulla
testata (2). Per fissare la testa del filt
ro alle estremità delle tubazioni di linea,
utilizzare una colla frenafiletti medio o teflon (PTFE). Si raccomanda di non
utilizzare assolutamente colle e sigillanti a base di Benzene o Cloro-
quanto potrebbero dannaggiare irreparabilmente gli accessori installati.
•
Pulire accuratamente gli estremi della tubazione e la testa, una volta istallata, togliendo
eventuali trucioli, bave o sfridi da lavorazione.
•Ungere il doppio O-ring e le sedi di tenuta di testa e cartuccia.
polivalente (NO SILICONICO).
•
Inserire la cartuccia filtrante (1) sulla testa del filtro facendo una semplice pressione, il
doppio o-ring garantisce la tenuta.
•Inserire il bicchiere del corpo filtro e stringerlo accuratamente.
•I filtri devono essere sempre montati in
posizione verticale con sufficiente spazio
intorno ed al di sotto (v
edi quota minima C nelle tabelle dei dati tecnici) per smontare
l’involucro e la cartuccia come indicato (3).
•Applicare sul corpo del filtro (4) l’etichetta adesiva che riporta mese ed an
prossima sostituzione dell’elemento filtrante (max. un anno).
•
Applicare i bollini che riportano il grado di filtrazione sul coperchio in plastica della testa
del filtro (2) e l’adesivo relativo al tipo di cartuccia sul corpo del filtro.
•Pressurizzare l’impianto come indicato al paragrafo “Messa in esercizio” e verificare
che non vi siano perdite.
The filter assembly and installation procedures are as follows :
•If provided, install the clogging indicator or the Differential Pressure Gauge (optional)
into the filter head. See specific point.
NOTE! If installing the grade C cartridge, apply
on the filter head the plastic cover (2) supplied with the cartridge
. The arrow on the filter
head now indicates the correct direction of the air flow.
•Connect the filter hea
d to the compressed air piping and check that the airflow respects
the direction of the arrow positioned on the filter head cap (2).
into the pipeline ends use only medium-
strength thread locker glue or Teflon
(PTFE). Do not use absolutely sealant and glue of Benzene or Chlorine-Methane
base, which can damage and breaking the optional equipments installed.
•Clean accurately the extremities of the piping and the filter
head, after the installation,
to remove any shaving, slaver or scrap from tooling.
•Lubricate the two O-
rings and the sealing surfaces of the filter head and cartridge, use
multipurpose grease (SILICON FREE).
•Fit the filter cartridge (1) on the filter head
simply by pressing, tightness is ensured by
two o-ring.
•Fit the filter bowl and tight it accurately.
•
The filters must always be installed in a vertical position with sufficient space around
and below them (see minimum distance C in the technical data tabl
to disassemble the bowl and the cartridge as shown (3).
•
Stick the adhesive label showing the month and year for the next filtering element
change (max. one year) on the filter bowl (4).
•Apply the stamps which show the filtering grade on
the plastic cap (2) and the cartridge
stick in the filter bowl.
•Pressurize the plant like shown at paragraph “Starting up” and check for air leakage.