Front Runner VACC023 User manual

ENG
Stainless Steel Braai/BBQ
Cooking Grate
VACC023_REV_A01 © 2019 FRONT RUNNER VEHICLE OUTFITTERS
1
VACC023
Thank you for purchasing a Front Runner Stainless Steel Braai/BBQ Cooking Grate.
Before you start, take a moment to familiarize yourself with this Fitting Instruction and the components received.
Refer to Page 2 for a list of all the components, quantities and tools required.
READ ME !
IMPORTANT WARNING!
IT IS CRITICAL THAT ALL FRONT RUNNER PRODUCTS BE PROPERLY AND SECURELY ASSEMBLED AND ATTACHED TO YOUR VEHICLE. IMPROPER ATTACHMENT COULD
RESULT IN AN AUTOMOBILE ACCIDENT, AND COULD CAUSE SERIOUS BODILY INJURY OR DEATH. YOU ARE RESPONSIBLE FOR ASSEMBLING AND SECURING ALL FRONT
RUNNER PRODUCTS TO YOUR VEHICLE, CHECKING THE ATTACHMENTS PRIOR TO USE, AND PERIODICALLY INSPECTING THE PRODUCTS FOR ADJUSTMENT, WEAR AND
DAMAGE. THEREFORE, YOU MUST READ AND UNDERSTAND ALL OF THE INSTRUCTIONS AND PRECAUTIONS SUPPLIED WITH YOUR FRONT RUNNER PRODUCT PRIOR TO
INSTALLATION OR USE. IF YOU DO NOT UNDERSTAND ALL OF THE INSTRUCTIONS AND CAUTIONS, OR IF YOU HAVE NO MECHANICAL EXPERIENCE AND ARE NOT THOROUGHLY
FAMILIAR WITH THE INSTALLATION PROCEDURES, YOU SHOULD HAVE THE PRODUCT INSTALLED BY A PROFESSIONAL INSTALLER OR OTHER QUALIFIED PERSONNEL.
NOTE: Front Runner will not be responsible for any damage caused by the failure to install the product according to these instructions.
Please call us if you have any questions about the installation of this product.

VACC023_REV_A01 © 2019 FRONT RUNNER VEHICLE OUTFITTERS
2
IN THE BOX
FIGURE 1.1
1 3 X Leg
2 3 X Spacer
3 3 X Grid
4 12 X M5 x 25 Hex Bolt
5 12 X M5 Hex Nut
6 2 X Spanner/Wrench
IN THE BOX TOOLS NEEDED
IN THE BOX
2
5
4
3
3
1
6
3
Spanner/Wrench supplied with braai grate.
1GET ORGANIZED
Here is what you are looking at for VACC023
6

VACC023_REV_A01 © 2019 FRONT RUNNER VEHICLE OUTFITTERS
3
ASSEMBLY OF BRAAI / BBQ COOKING GRATE
2
2.2
2.3
2.4
2.1
2.1
2.2
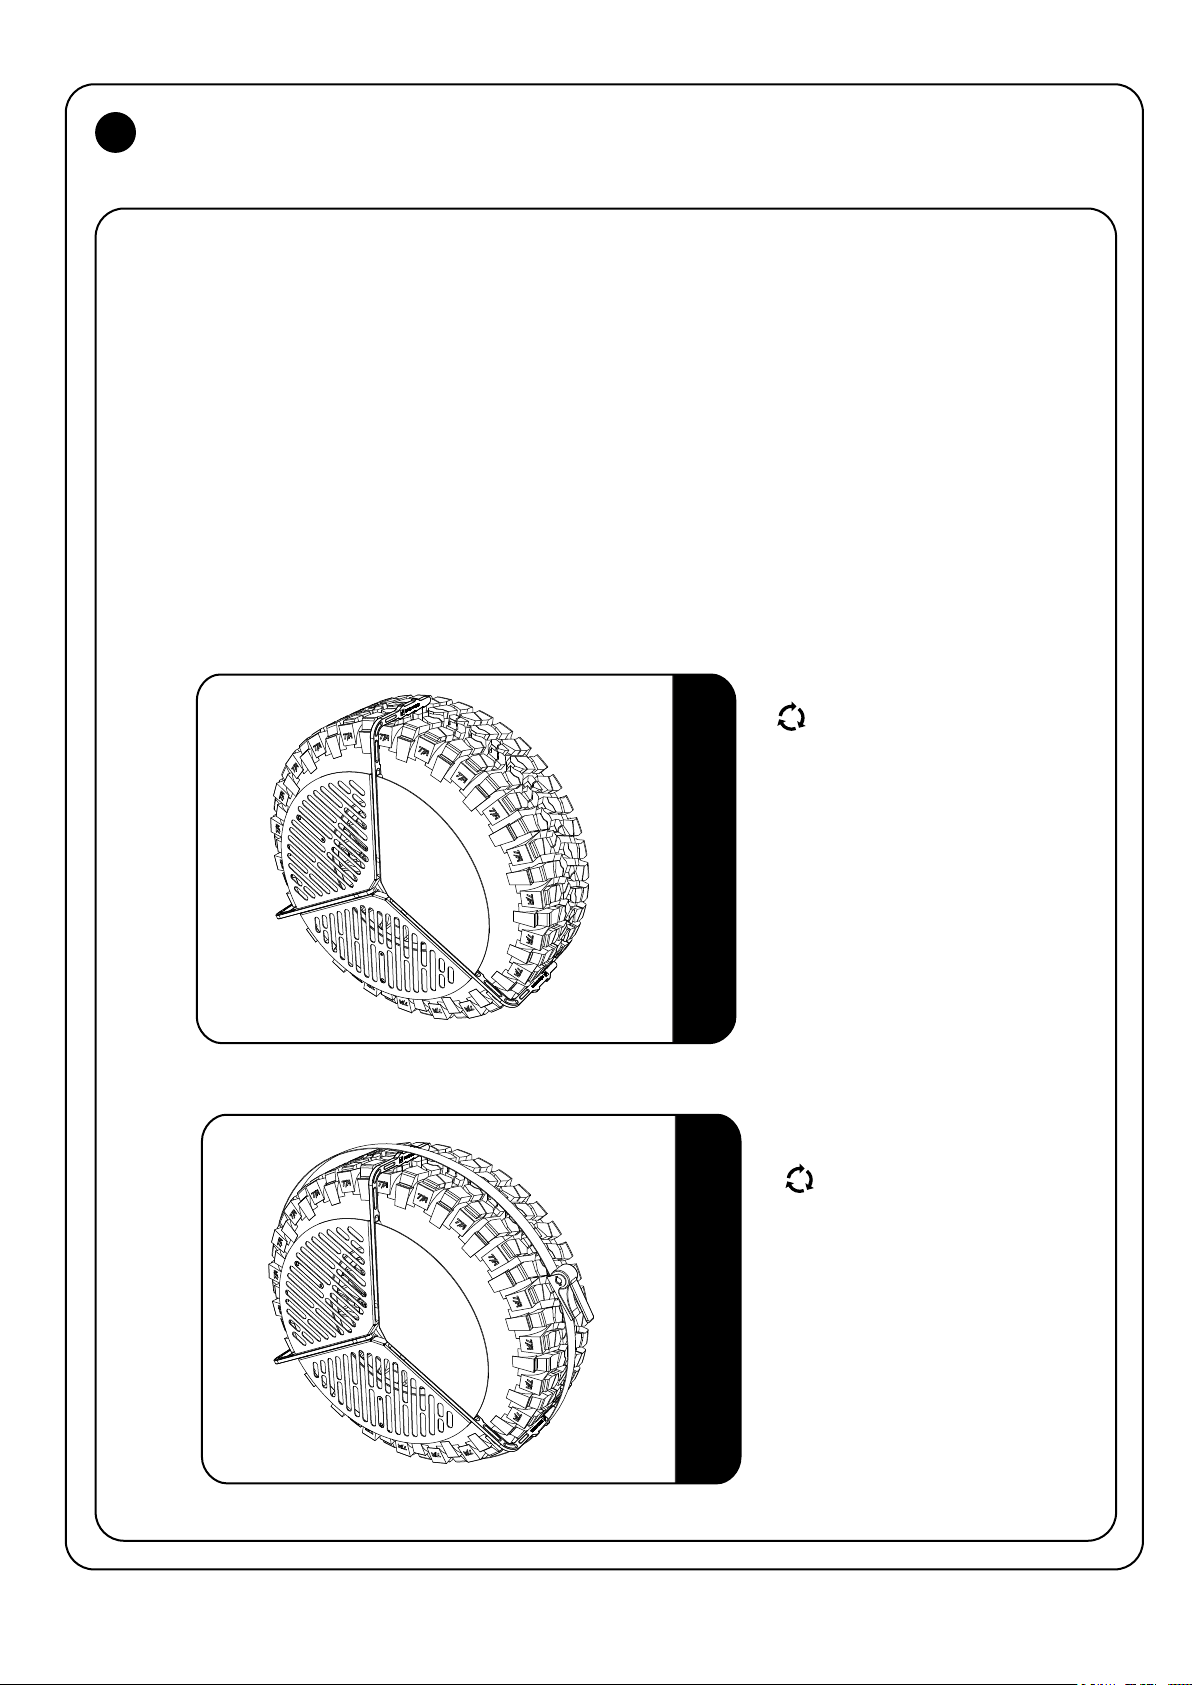
TIP: Use the spare wheel as a guide to adjust and position the Braai / BBQ cooking grate legs to the correct position.
For tyre diameters ranging from 740mm – 840mm ( 29”- 33”) the spacers are not required.
For tyre diameters ranging from 840mm ( 33”- 35”) the spacers must be used.
Secure the legs in place with items 4 and 5 using the 2 wrench’s provided in the cooking grate.
Test fit the assembled Braai / Cooking grate over the spare wheel to ensure it is set correctly. There should be a
slight resistance with the legs going over the tyre to ensure a proper and secure fit.
Should the resistance be too much, remove the legs and reposition to the next hole.
Reposition only one leg for a small increment, two legs for a bigger increment or all three legs.
NB: THE RESISTANCE SHOULD NOT BE EXCESSIVE, AS THIS MAY LEAD TO EXCESS STRESS IN THE LEGS.
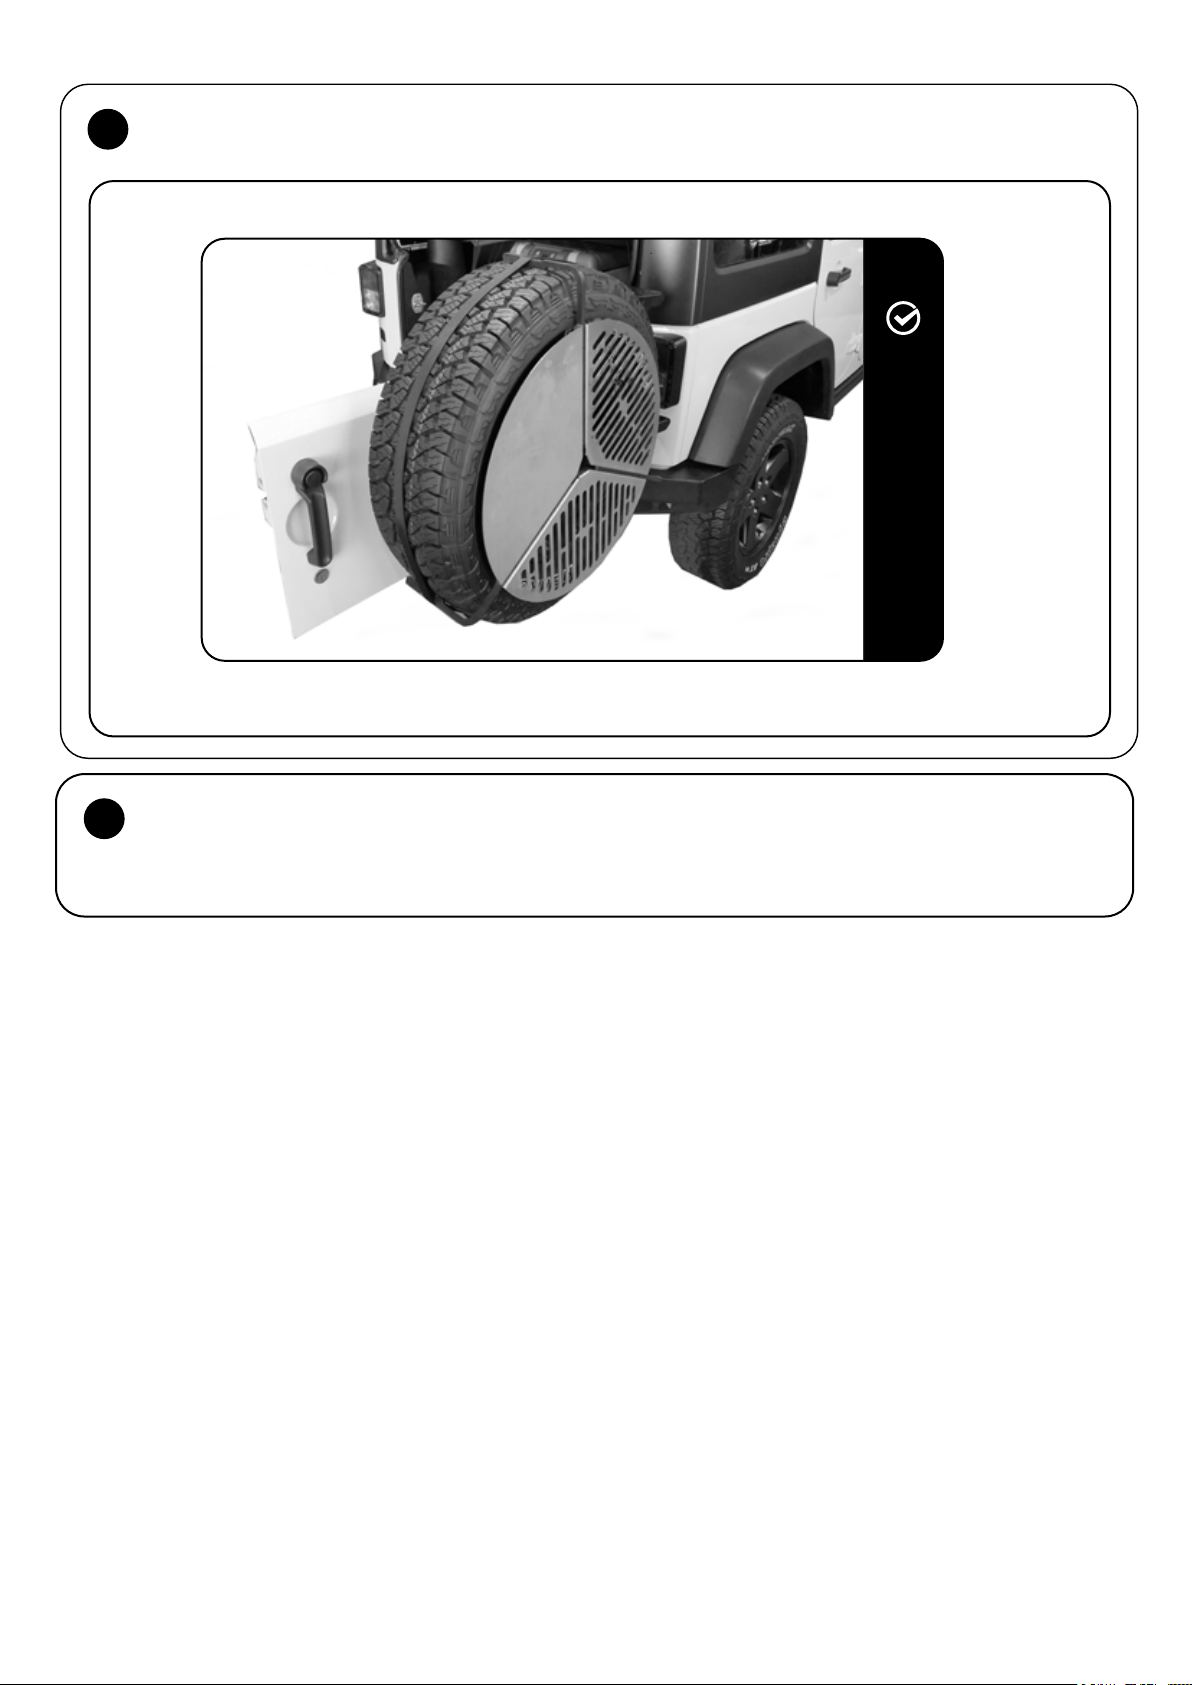
If set correctly no additional strapping is required to secure the braai / cooking grate to the tyre,
but should the tyre tread be worn or tyre diameter not match up with the holes provided, an endless
ratchet strap may be used to secure the legs to the tyre and insure a secure fit. We suggest using the Front Runner
Spare Tire Mount Step with strap included. The strap must be placed in the legs recess to insure it does not slide off.
Cooking Gate secured to the tyre with
no additional strap.
Cooking Gate secured to the tyre with
additional ratchet strap.

VACC023_REV_A01 © 2019 FRONT RUNNER VEHICLE OUTFITTERS
4
BUILDING A CAMPFIRE FOR COOKING
3
Step 1
Select a fire site at least 2.5m (8') from bushes or any combustibles. Be sure no tree branches overhang the site.
Step 2
Fill the fire area with crumpled paper or tinder. Lay kindling over paper in layers, alternating direction with each layer.
Use thin splits of wood or small dead branches. Do not put kindling down "teepee style". The whole fire area should be
covered with the kindling stack. Set a bucket of water near the fire area. Light the paper to start your fire.
Step 3
When kindling is ablaze, add firewood. The wood should be as close to the same size as possible. Distribute wood evenly
over fire bed. As soon as the last flames die down leaving mostly white coals, use a stick to push the coals into a
higher level at the back end and lower level at the front. This will give you the equivalent of 'Hi', 'Med' and 'Lo' cook settings.
Or, level the coals to your preference because by this point, you're probably starving.
Step 4
Once the coals are white hot, set the Braai/ BBQ Grate in the fire and start cooking! Enjoy.
Keep Braai / BBQ Grate like new by cleaning it with a nontoxic grill cleaner after every use. Do not place over a blazing
fire to burn clean, as this will shorten the life of your Braai / BBQ Grate.

VACC023_REV_A01
4
INSTALL OTHER VEHICLE AND RACK ACCESSORIES
5
Now's the time to visit your favorite Front Runner Dealer in person or online.
9
4.1
Congratulations. You did it. Take a step back and admire your work!
© 2019 FRONT RUNNER VEHICLE OUTFITTERS
5
COMPLETION
Table of contents