2
CAUTION: Fully assembled, the
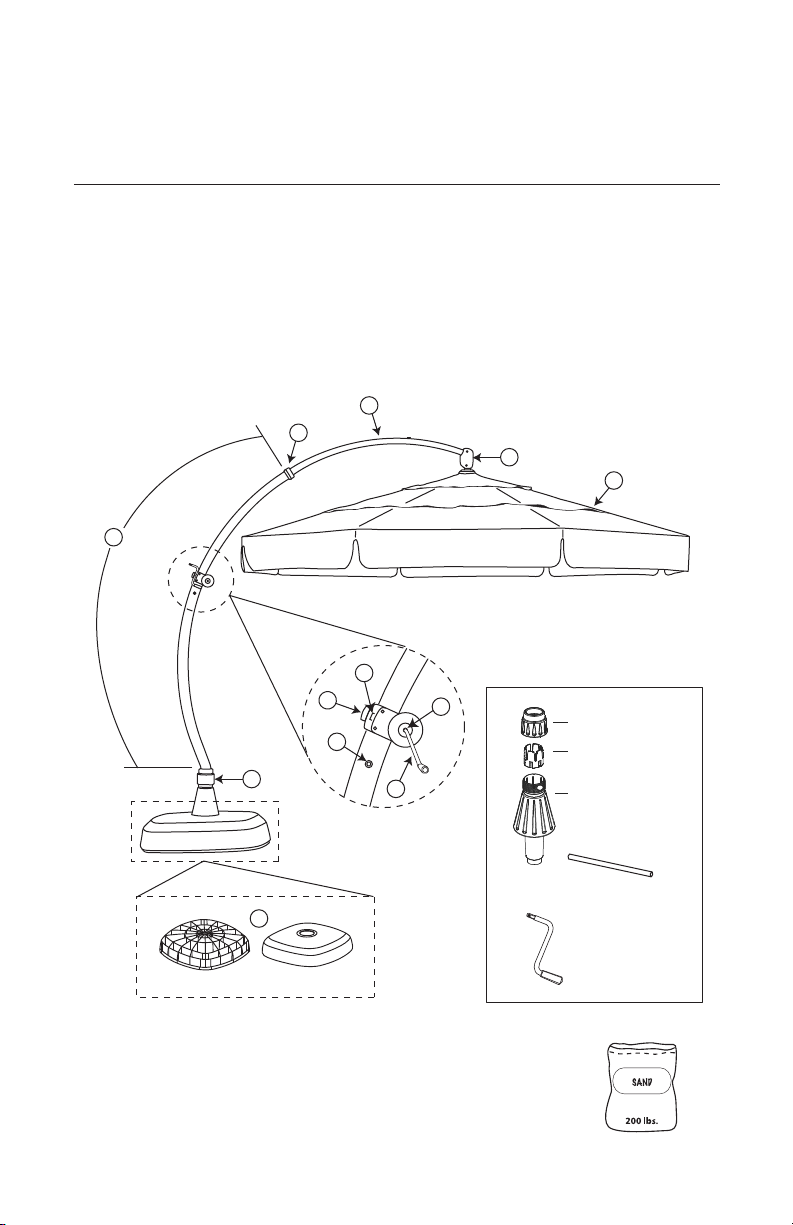
European Side Mount umbrella
weighs over 300 lbs. Moving the
umbrella fully assembled will
increase the risk of damage to your
umbrella and can cause serious
injury. We recommend a two-person
team to assemble the umbrella.
To ASSEMBLE Base:
1. Select area to set base and place in
desired location.
2. Remove base lid from base shell (Fig. 1)
then insert the base stem into the base
shell (Fig. 2). Turn collar base stem in a
clockwise motion to engage
threading.
3. Fill base shell with all purpose sand (not
included) (Fig. 3). NOTE: Base weight
holds up to 200 lbs. of sand. To achieve
minimum base weight, it is necessary to
pack sand into shell and partially wet
down with water.
4. Remove the base stem carefully and
avoid allowing sand into the center of the
base shell (Fig. 4).
IMPORTANT: Do not allow sand to spill
into the center of the base (Fig. 4) as it will
interfere with collar base stem installation.
5. Place base lid back onto base shell.
(Fig. 1)
(Fig. 3)
Avoid allowing sand into the
center of the base shell.
!
(Fig. 2)
(Fig. 4)
5
To ROTATE Umbrella:
1. Unlock the position of the umbrella by turning the collar of the base in a
counter-clockwise direction (Fig. 13).
2. Grab the main frame and rotate the umbrella (Fig. 14) in either direction to choose
your desired location (Fig. 15).
3. After desired location is chosen, return the base collar back to its original position
and lock umbrella position by turning the collar clockwise (Fig. 16).
(Fig. 15) (Fig. 16)
(Fig. 13) (Fig. 14)
SET UP: