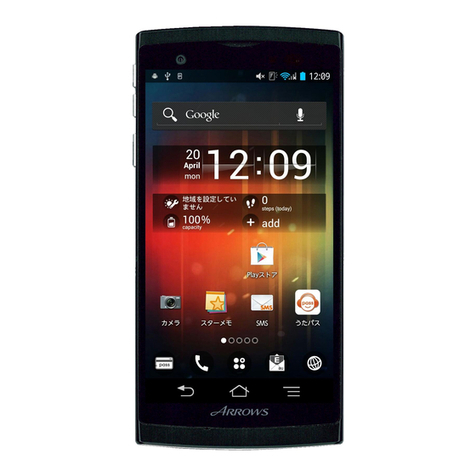
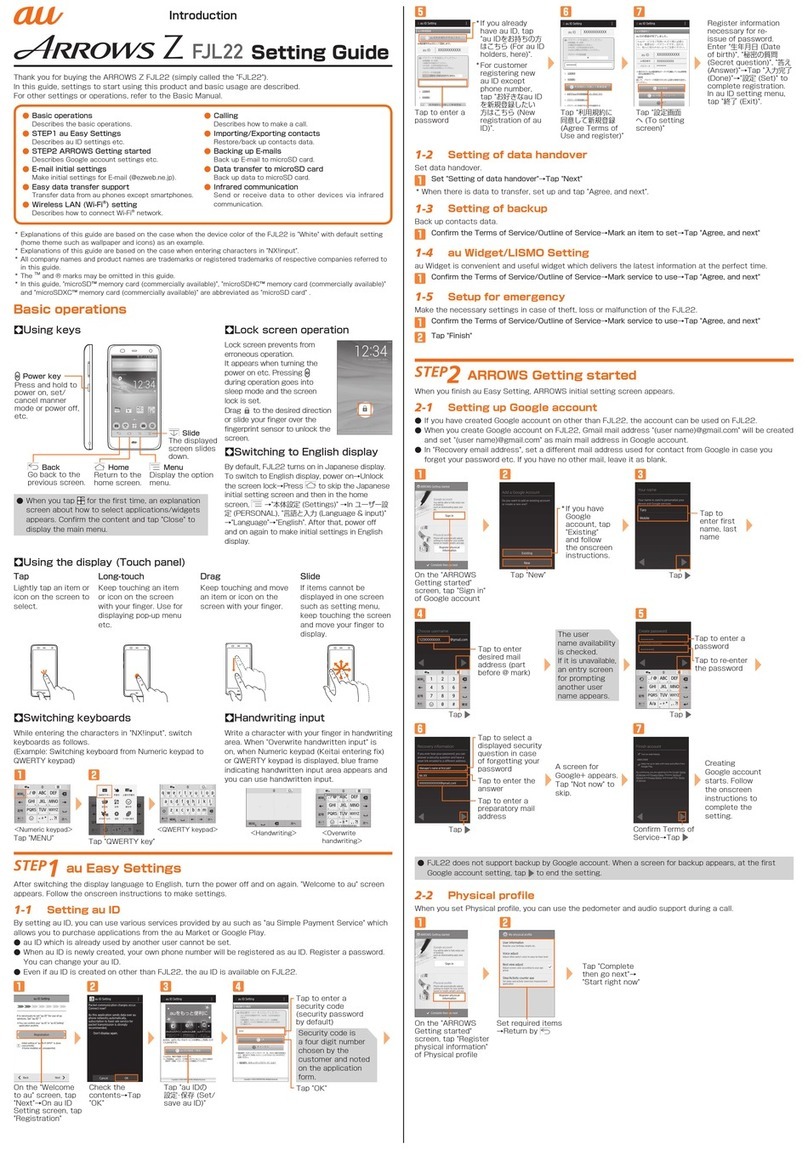
Fujitsu arrows U User manual

arrows U
User Guide


1
arrows U
arrows U User Guide Contents
Introduction
About the User Guide........................................................ 3
Getting Started
Parts & Functions.............................................................. 6
SIM Card.............................................................................. 7
SD Card................................................................................9
Charging Battery.............................................................. 12
Power On/Off................................................................... 13
Making Initial Settings.................................................... 14
Using a Google Account................................................... 16
Unlocking Screen...............................................................19
Basic Operations
Basic Operation.................................................................22
Manner Mode..................................................................... 22
Using Vibration/Mute.......................................................24
Airplane Mode................................................................... 25
Updating Software........................................................... 26
Touchscreen & Text Entry
Using Touchscreen............................................................ 28
Text Entry.........................................................................29
Handset Interface
Handset Screens............................................................... 32
Status Bar......................................................................... 34
Using Notifications Window............................................ 35
Using Quick Settings........................................................35
Phone
Placing/Answering Calls................................................... 38
Optional Services..............................................................40
Phone Number................................................................... 46
Using Contacts..................................................................46
Messaging
+Message (+メッセージ (+Message))..............................50
Using Gmail....................................................................... 51
Internet
Using Chrome.................................................................... 54
Camera
Capturing Still Images/Videos.........................................58
Viewing Captured Still Images/Videos (Photos).............59
Application Basics
Applications.......................................................................62
Adding/Deleting Application............................................63
Wi-Fi/Bluetooth®
Connecting by Wi-Fi.........................................................68
Using Bluetooth® Function.............................................. 69
2
Handset Settings
Handset Settings.............................................................. 72
Data Usage Settings.........................................................73
Battery Settings...............................................................74
Display & Wallpaper Settings..........................................74
Sound Settings..................................................................75
Security & Location Settings.......................................... 75
System Settings................................................................78
Other Settings.................................................................. 79
Global Services
Global Roaming................................................................. 84
Making Calls while Abroad.............................................. 85
Warranty/Specifications/Customer Services
Warranty & After-Sales Service..................................... 90
Specifications....................................................................90
Customer Service.............................................................. 91
Safety Precautions
Safety Precautions........................................................... 94
Materials..........................................................................103
Handset & Hardware Care............................................. 104
Bluetooth® Function.......................................................106
Wi-Fi (Wireless LAN)...................................................... 107
Water, Dust, and Shock Resistance.............................. 108
Export Control Regulations........................................... 110
Intellectual Property Rights..........................................111
Specific Absorption Rate (SAR) for This Product........112

3
Introduction arrows U
Introduction
About the User Guide
Thank-you for purchasing this product.
Screens and operation may differ depending on your
environment (updates, etc.).
Before Using This Product
Read "Quick Start" and "Safety Precautions" thoroughly for
proper usage.
Accessible services may be limited by subscription contract
conditions.
Data Communication
・Since constant Internet connection is possible with
the product, data communication may be performed
automatically.
・If you transmit a large amount of data, such as when
downloading applications or watching video, data
communication charges become high.Therfore, subscription
to the flat-rate service for data communication charfes is
recommended.
・Depending on the applications or service you use, data
communication charge may be applied even in Wi-Fi
communication.
Screenshots & Key Labels
Screenshots in the User Guide may differ in appearance with
actual Display. Key labels in the User Guide are simplified for
description purposes and differ with actual Display.
Other Notations
In the User Guide, the product is referred to as "handset."
microSD™/microSDHC™/microSDXC™ Card is referred to as "SD
Card."

4

Getting Started
Parts & Functions.............................................................. 6
SIM Card.............................................................................. 7
SD Card................................................................................9
Charging Battery.............................................................. 12
Power On/Off................................................................... 13
Making Initial Settings.................................................... 14
Using a Google Account................................................... 16
Unlocking Screen...............................................................19

6
Parts & Functions
Handset (Front)
Part Description
Front
Camera Use to shoot photos or videos of yourself.
Earpiece Hear the other party's voice here.
Display Touchscreen-type display, operate with
your fingers on Display.
Light/
Proximity
Sensor
Detects ambient light level, etc.
Notification
LED
Flashes for new mail, etc. Lights while
charging.
Handset (Back/Side)
Part Description
Sub-Mic Filters noise during calls. Also use as mic
for hands-free calls.
Internal
Antenna Area
Internal Antenna for calls and data
communication.
Wi-Fi/
Bluetooth®
Antenna Area
Internal Antenna for Wi-Fi and Bluetooth®
function.
Back
Camera Capture still images and video.
Mobile
Light Use as a light when taking photos, etc.
Straphole Attach a strap.
Speaker Listen to music, video sound, etc.
USB Type-
C™ Port Connect a USB Type-C cable, etc.
Stereo
Earphones
Port
Connect headphones, etc.
GPS
Antenna Area Internal Antenna for GPS function.
Slot Cap Install/remove SD Card and SIM Card.
FeliCa mark Hold up to a reader/writer to use NFC/
Osaifu-Keitai®.
Mic/
Recorder Mic Speak here.
Attaching Strap
Pass strap through Straphole as shown.

7
Getting Started arrows U
Keys
Part Description
Power Key Toggle Display on/off.
Long Press for power on/off.
Volume Up
Key Raise volume.
Volume
Down Key Lower volume.
Assistant
Key Activate Google Assistant, etc.
Notification LED
Flashes for new mail and lights while charging.
Color and
Pattern Indication
Lit red Charging
Flashing red Charging not normal
Lights green
once Handset started up
Flashing white New mail
SIM Card
SIM Card is an IC card containing phone number and other
customer information.
Handling SIM Card
For SIM card handling, see following items.
IC chip
For SIM card handling, see SoftBank Website.
https://www.softbank.jp/mobile/support/protect/usim/
(Japanese)
・Always keep the IC chip clean.
・Wipe clean with a dry, soft cloth.
・Avoid applying labels. May damage SIM Card.
SIM Card Cautions
Observe the following when using SIM Card.
・Customer is responsible for any damage caused by
inserting SIM Card in an other-brand IC card reader, etc.
The company is not responsible in such case.
・SIM Card is the property of the company.
・SIM is replaceable (at cost) in case of loss/damage.
・Return SIM Card to the company when cancelling
subscription.
・Returned SIM Cards are recycled for environmental
purposes.
・Note that SIM Card specifications and performance may
change without notice.
・It is recommended that you keep a separate copy of
information that is stored on SIM Card. The company is
not responsible for damages from stored information
that is lost.
・Always follow emergency procedures to suspend service
if your SIM Card or handset (SIM Card inserted) is lost/
stolen. For details, contact Customer Service.
・Always power off handset before inserting/removing SIM
Card.
Inserting SIM Card
Always power off beforehand.
With Display upward, insert SIM Removal Pin in hole in Slot
Cap
・Insert firmly and straight until Slot Cap ejects.

8
Pull Slot Cap out
・Slot Cap detaches from handset.
・Pull out straight without bending in direction shown.
・Do not push down on ejected Slot Cap. May damage Slot Cap.
Set SIM Card in Tray in Slot Cap with IC chip facing down
・Note orientation by notch.
・Make sure SIM Card is in Tray securely.
With Display upward, insert Slot Cap
SIM Card is inserted.
・Insert straight without bending in direction shown, and
press firmly where circled ○.
・Make sure there is no gap between handset and Slot Cap.
Removing SIM Card
Always power off beforehand.
With Display upward, insert SIM Removal Pin in hole in Slot
Cap
・Insert firmly and straight until Slot Cap ejects.
Pull Slot Cap out
・Slot Cap detaches from handset.
・Pull out straight without bending in direction shown.
・Do not push down on ejected Slot Cap. May damage Slot Cap.
Remove SIM Card
With Display upward, insert Slot Cap
SIM Card is removed.
・Insert straight without bending in direction shown, and
press firmly where circled ○.
・Make sure there is no gap between handset and Slot Cap.
SIM-Unlocking Handset
Handset can be SIM-unlocked. SIM-unlocking handset allows
other-carrier SIM cards to be used with it.
・Some services, functions, etc. may have restrictions when
an other-carrier SIM card is used. SoftBank Corp. does not
guarantee operation whatsoever.
・For details on SIM unlocking, see SoftBank Website.

9
Getting Started arrows U
SD Card
Handset supports SD Cards up to 400 GB. Some SD Cards may
not operate properly.
When using a new SD card for the first time, always format it
on handset.
SD Card Cautions
Data
Information stored on SD Card can become lost or changed
accidently or as a result of damage. It is recommended that
you keep a separate copy of important data. The company
is not responsible for damages from data that is lost or
changed.
Reading/Writing Data
Never power off while reading or writing data.
Battery Level
A low battery charge may prevent reading/writing to SD
Card.
Using Applications That Handle Large Amounts
of Data
Use a high-speed SD card (class 10 or faster
recommended).
Handling SD Card
Use/store SD Cards away from the reach of infants. May
cause choking if swallowed.
Inserting SD Card
Always power off beforehand.
With Display upward, insert SIM Removal Pin in hole in Slot
Cap
・Insert firmly and straight until Slot Cap ejects.
Pull Slot Cap out
・Slot Cap detaches from handset.
・Pull out straight without bending in direction shown.
・Do not push down on ejected Slot Cap. May damage Slot Cap.
Set SD Card in Tray in Slot Cap with metal terminals facing
down
・Make sure SD Card is in Tray securely.
With Display upward, insert Slot Cap
SD Card is inserted.
・Insert straight without bending in direction shown, and
press firmly where circled ○.
・Make sure there is no gap between handset and Slot Cap.

10
Formatting SD Card
In Home Screen, (Settings)
Storage
SD card
Storage settings
Format
FORMAT SD CARD
Done
All data on SD Card is erased.

11
Getting Started arrows U
Formatting SD Card Cautions
When using a new SD Card for the first time, always
format it on handset.
・Formatting erases all data on SD Card. Carefully check
any SD Card that was used on another device before
formatting.
・Charge Battery while formatting, or format with
adequate battery charge.
Unmounting SD Card
Always unmount SD Card before removing.
In Home Screen, (Settings)
Storage
for "SD card"
SD Card is unmounted.
Removing SD Card
Always unmount SD Card and power off first.
With Display upward, insert SIM Removal Pin in hole in Slot
Cap
・Insert firmly and straight until Slot Cap ejects.
Pull Slot Cap out
・Slot Cap detaches from handset.
・Pull out straight without bending in direction shown.
・Do not push down on ejected Slot Cap. May damage Slot Cap.
Remove SD Card
With Display upward, insert Slot Cap
SD Card is removed.
・Insert straight without bending in direction shown, and
press firmly where circled ○.
・Make sure there is no gap between handset and Slot Cap.

12
Charging Battery
Charging Cautions
Never connect USB Type-C plug while handset or peripheral
equipment is wet.
Internal Battery
Battery is built into handset.
Handset Battery is the following type.
Displayed Battery Type
Li-ion 00 Lithium-ion
Recycling
This is the recycling mark for lithium-ion batteries.
Charging with AC Charger
Be sure to use an AC Charger specified by SoftBank. For
information on AC Charger and other peripheral devices, see
SoftBank Website.
Operation using AC Charger (USB Type-C rapid charging AC
Charger with USB PD capability [ZSDBAS] (SB-AC20-TCPD)) is
explained here.
Insert USB Type-C plug of AC Adaptor into USB Type-C Port
Raise plug on AC Charger and plug into household AC outlet
Notification LED lights up when charging starts.
Notification LED goes out when charging ends.
Remove AC Charger from handset, unplug from outlet, and
lower plug
Charging ends.

13
Getting Started arrows U
Power On/Off
Powering On
Power Key (Long Press)
Lock screen appears.
・See "Unlocking Screen" to unlock the screen.
・Startup wizard appears the first time handset is powered
on. See "Making Initial Settings" to make settings.
Powering Off
Power Key (Long Press)
Power off
OK
Handset powers off.

14
Making Initial Settings
When powering on the first time, an initial settings wizard
appears for optionally making Wi-Fi, Google™ account, and
other settings. Follow onscreen instructions to set items.
Making Initial Settings
Select language then START
Tap Wi-Fi network to connect to
・To skip Wi-Fi settings, select Use mobile network for
setup . Continue by following onscreen instructions.
Select Wi-Fi network to connect to
DON'T COPY
・Tap NEXT to copy data from another mobile with Google
account settings. Follow onscreen instructions.
Follow onscreen instructions to set up a Google account
・For details on Google accounts, see "Creating a Google
Account."
・If not making Google account settings, Tap Skip .
In Google services settings, set services to use
・Tap / for service to toggle on ( )/ off( ).
ACCEPT

15
Getting Started arrows U
Follow onscreen instructions to set screen lock
・To not set a screen lock, Tap SKIP .
Follow onscreen instructions to set Google Assistant
・To not set Google Assistant, Tap No Thanks .
Follow onscreen instructions to add Google Pay™ payment
information
・To not add payment information, Tap Skip .
Select other items to set, and follow onscreen instructions
DONE FOR NOW
Settings are complete.
・If confirmation appears, follow onscreen instructions.

16
Using a Google Account
Use a Google account and get more convenience with Google
services. A Google account is required to use some services or
fully use some applications.
Google Account Cautions
Be careful not to forget your Google account mail address
or password.
Creating a Google Account
In Home Screen, (Settings)
Accounts
Add account
Google
Window for adding a Google account opens.
・If Security unlock preference is setting other than None
or Touch/Swipe , first Tap Google and unlock screen.
Create account
For myself
Enter first name Enter last name Next

17
Getting Started arrows U
Enter date of birth and gender Next
Create a different Gmail address
Enter username (mail address) Next
Enter password Enter password again (for confirmation)
Next
Yes, I'm in
I agree
A Google account is created.
Next
Set Google services ACCEPT
Account is created.

18
Logging In with a Google Account
In Home Screen, (Settings)
Accounts
Add account
Google
Window for adding a Google account opens.
In window for add a Google Account, enter mail address
Next
Enter password Next
Follow onscreen prompts
You are signed in to your Google Account.
Table of contents
Other Fujitsu Cell Phone manuals

Fujitsu
Fujitsu Pocket Loox T810 User manual

Fujitsu
Fujitsu Docomo F-07F User manual

Fujitsu
Fujitsu F905i User manual

Fujitsu
Fujitsu F-07C Loox User manual

Fujitsu
Fujitsu Arrows Z FJL22 Service manual

Fujitsu
Fujitsu F-022 User manual

Fujitsu
Fujitsu au F001 Installation guide

Fujitsu
Fujitsu ARROWS NX F-01K User manual

Fujitsu
Fujitsu F-03A User manual

Fujitsu
Fujitsu Arrows EF FJL21 Installation guide