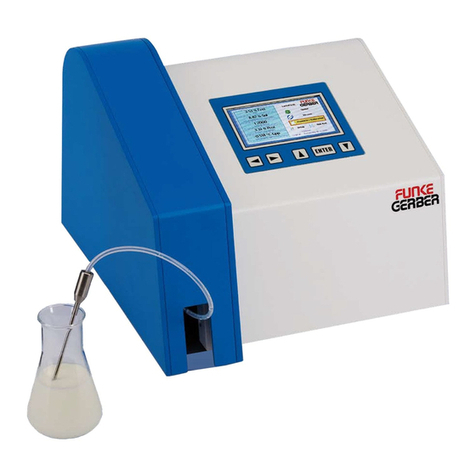
Funke Gerber CryoStar I User manual

Manual
CryoStar I
Article Nr. 7150
January 2016

Table of contents
1.Introduction........................................................................................................................4
1.1.working with the manual.............................................................................................4
2.Security precautions...........................................................................................................4
a)For your protection....................................................................................................4
b)Measures to the working safety................................................................................4
.Installation..........................................................................................................................5
.1.Unpacking...................................................................................................................5
.2.Scope of delivery........................................................................................................5
. .Installation location.....................................................................................................5
.4.Filling with cooling bath liquid.....................................................................................6
4.Operation...........................................................................................................................6
4.1.Connections................................................................................................................7
4.2.Screen.........................................................................................................................8
a)Start...........................................................................................................................8
b)Status........................................................................................................................9
c)History........................................................................................................................9
d)Statistic....................................................................................................................11
e)Setup.......................................................................................................................11
f)Help..........................................................................................................................1
g)About.......................................................................................................................1
5.Performing measurements...............................................................................................14
5.1.Insert sample vial......................................................................................................14
5.2.Start measurement...................................................................................................14
5. .Saving measurements..............................................................................................14
6.Calibration........................................................................................................................15
6.1.Preparing for calibration............................................................................................15
6.2.Perform calibration....................................................................................................16
a)Adjust the machine to the calibration standard.......................................................16
b)A-calibration............................................................................................................16
c)B-calibration.............................................................................................................16
6. .Pre-calibration...........................................................................................................16
7.Maintenance.....................................................................................................................17
7.1.Replacing the thermistor...........................................................................................17
8.WEEE Notice...................................................................................................................18
9.Error messages................................................................................................................19
9.1.Error codes...............................................................................................................19
a)error lift: end position not reached, please check...................................................19
b)uncalibrated or defective thermistor:.......................................................................19
c)error on calibration: please check solution..............................................................19
d)frozen too early........................................................................................................20
e)plateau not found.....................................................................................................20
f)not frozen..................................................................................................................20
g)cooling system not ready yet...................................................................................20
h)communication error ...............................................................................................21
9.2.Detection of errors during use..................................................................................21
a)Mixing up the A-solution with the B-solution:..........................................................21
b)Mixing up A-calibration instead of B-calibration .....................................................21
c)Defective thermistor.................................................................................................22
2

d)Agitator error ..........................................................................................................22
10.Guarantee conditions.....................................................................................................2
10.1.Guarantee period....................................................................................................2
10.2.Guarantee terms.....................................................................................................2
11.Specification...................................................................................................................2
12.Appendix........................................................................................................................24
12.1.Principle of the freezing point determination..........................................................24
a)Fixed time................................................................................................................25
b)Plateau search........................................................................................................25
c)Maximum search.....................................................................................................25
1 .CE..................................................................................................................................26

1. Introduction
1.1.working with the manual
Field Interactive fields on the touch screen are
marked like the example on the left
fat Special hints are marked fat.
2. Security recautions
a) For your rotection
The device must not be used in hazardous environments; it is
not gas-tight (danger from the formation of sparks, corrosion
due to the entry of gases)
Always adhere to hazard warnings and safety tips when using
reagents, chemicals and cleaning agents.
b) Measures to the working safety
The device should not be opened as live parts might be exposed. If in exceptional cases
the device has to be opened, remove the mains plug from the socket before opening the
device!
Under no circumstances should you expose the device to the following:
•Direct sunlight
•High humidity (above 80%)
•Strong electric or magnetic fields
•Strong vibrations
•Corrosive gases or liquids
•Temperatures below 5°C and above 40°C
4

3. Installation
3.1.Unpacking
After opening the carton, remove all accessory parts from the side areas of the carton.
Afterwards, you can lift out the machine included the moulded foam parts. Remove these
moulded parts from the machine. Please keep both the carton as well as these transport
moulded parts in case the machine has to be transported.
3.2.Scope of delivery
The following parts are included in the scope of delivery:
CryoStar I
Mains cable
1 bottle of cooling bath liquid(500 ml)
1 bottle of calibration solution A(250 ml)
1 bottle of calibration solution B (250 ml)
1 cooling bath container
1 pack (50) of sample vials
1 stand for 27 sample vials
1 Phillips screwdriver
1 Allen key
1 copy of these Operating Instructions
Please check the delivery is complete.
3.3.Installation location
Select an even, level place in your laboratory for the machine. The machine should not be
installed in the vicinity of ovens, water baths or other sources of heat or in a humid
environment. The machine requires a very large amount of cooling air which is sucked in
on the right-hand side of the machine and below the machine. Therefore, ensure that the
air slots on the sides are always unobstructed and that there is no other equipment within
approx. 20 cm (right and left), especially not heat-emitting equipment. Do not place any
loose sheets of paper or similar near the machine. These could be sucked in with the air
stream and obstruct the air access.
5

3.4.Filling with cooling ath liquid
There is a holder for the cooling bath liquid container on the back.
Fill up the cooling bath liquid container bevor turning on the
machine for the first time up to the MAX marking. Insert the
container into the holder and insert both tubes into the container.
Make sure that the longer one is beyond the MIN marking in the
container. Now turn on the device. It will automatically fill up the
cooling system with coolingbathliquid.
Please make sure, that there is enough cooling bath liquid in
system, by pressing the pump button in Settings->System-
>pump . The liquid should be flowing visible into the sample tube
opening. If not, activating the pumpe again until the liquid is filling
the opening.
4. O eration
The device is equipped with a touch sensitive screen. There is no force necessary for
using. Single fields can be activated by touch.
The display of chart can be changed after a measurement.
Touch: activation of a field or an
action
Drag in a chart with one finger
Zoom in a chart with two fingers
6

Up-count / down-count of
numbers
For entering numbers a virtual
keypad. Enterings have to be
accomplished always with
↵
4.1.Connections
1) USB B ort for connections with a PC
The device is setup as an serial device.
2) USB A ort for USB-mass storage
USB-Sticks formatted preferably with FAT file system can
be connected. Usage of USB-hard-disks is not
recommended.
3) Ethernet- ort
4) serial ort for extensions
5) serial ort for rinter
The baud rate is 9600 Baud/s with 8N1 setting.
Main connection
The device can be connected to an AC Power source with
84 to 264 volts
7

4.2.Screen
a) Start
The Start screen shows all relevant informations for measurements or calibrations.
Measurements or calibration can started and stopped.
1. Measure: start a new measurement, see 5.
2. A Cali ration: start an A-calibration, see 6.2. b), the selected calibration solutions
is shown
. B Cali ration: start a B-calibration, see 6.2. c), the selected calibration solutions is
shown
4. Stop :stops a running measurement or calibration
5. show the actual setup user and probe number. By touching both fields can be
changed
6. temperature:changes from red to blue when the cooling system is ready
7. Screen shot: when an USB-stick is connected, the actual screen can be saved to
the USB-stick
8. Time
9. Status-line for messaged
10.Chart for measured values
11. the actual measurement value, the unit and in Celsius mode the added water is
shown
12.Pages can be activated by touching the tabs
8
9 8 7 6
5
2
1
10
12
11
4

b) Status
The Status screen shows actual parameters and possible problems of the device.
If there was an error while measuring, it is shown here. Error codes, error messages and
possible solutions are available in 9..
The status-area on the right shows the state of several components. They all should be
green. A red state means a serious technical problem has occurred and the service should
be contacted.
c) History
The device has a built-in memory for saving of 500 measurement values. Measurements
and calibration are saved.
9

Column Name Descri tion
1 Mode kind of measurement. The following abbreviation are used
M Measure
Acal A-Calibration
Bcal B-Calibration
Pre Pre-Calibration
2 Date The date of the measurement
User. The set user
4 Id The sequentially id of the measurement
5+6 Value/
Unit
The value and the unit of the measurement
7 Parameter For the different plateau-criteria, see 12.1
for example:
S[0.4:22] Plateau Search, with criteria 0.4 mK and 22 seconds
time
F[50] Fix-time, with the criteria 50 seconds measurements
after hit
M[0.4] Maximum, with criteria 0.4 mK difference between
maximum and measured value
8 Error for descriptions of error codes, see 9
For the last 100 measurements the charts are also available.
These can be shown by selecting a measurement in the history. A pop-up window will
show the chart and the possibility to zoom into the values. The chart can be saved to the
USB-stick as a png file.
The shown measurements are always shown descending, a navigation is possible with the
fields beyond the table.It is possible to export the whole history to stick as a text-file in csv
format. One line means one measurement.
Example:
M 21 Apr 2015 12:05:52 1 66 -0.6008 °C S[0.4:22] 0
M 21 Apr 2015 12:03:28 1 65 -0.5997 °C S[0.4:22] 0
BCal 21 Apr 2015 11:51:09 1 61 -0.6 °C S[0.4:22] 0
M 21 Apr 2015 11:45:50 1 59 -0.4076 °C S[0.4:22] 0
ACal 21 Apr 2015 11:43:10 1 58 -0.408 °C S[0.4:22] 0
ACal 21 Apr 2015 11:40:39 1 57 -0.408 °C S[0.4:22] 0
10

d) Statistic
The Statistic screen is for fast comparison of the last 10 measurements. By selection
single cells values can be compared and statistic value are calculated.
e) Setu
On the Setup screen are all parameters, the can be changed by the user. On the left is the
navigation area, on the right the parameters.
Recommended settings
Designation Settings
A-calibration value 0.000°C or -0.408°C
B-calibration value -0.557°C or -0.600°C
Base value -0.520°C (Limit EU)
beat
temperature.
-2.00°C ( - .00°C Minimum)
coolingbath temperature -6.50 °C
Mode Celsius
Plateau Plateau search: 0.4 m°C / 22s
Fixed time: 50 s
Maximum: 0.2m°C
Stirring device see below
11

•Common: Mode can be changed to Celsius, Osmol, Hortvet or alcohol mode. The
base value for added water in Celsius mode, the user and the id can be changed.
•Tem erature: The temperature of the cooling bath and the beat temperature can be
changed.
•Calibration: The used solutions for A- and B-calibration can be changed. And with
Pre-Cali ration a Pre-calibration can be started.
•Plateau: Plateau Search, Fixed time and Maximum are available. The parameters
can be changed depending on the selected plateau mode, see 12.1
•Stirrer: The stirring and beat amplitude and the stirring frequency can be changed.
To test the different settings, two different fields are available. By Stirrer On the
agitator starts moving. The agitator should be set to approx. 2 mm movement width
by changing stir amplitude . If the agitator is considered from the side, the
oscillation distance can be seen well. The agitator movement should be checked
regularly and readjusted if needed. The agitator frequency should not be
changed. It has already been adjusted at the factory. In the case that the
frequency has to be adjusted, it should be set to 4 Hz higher than the resonance
frequency. The resonance frequency is determined, e.g. by starting at 150 Hz and
constantly increasing the frequency afterwards. The resonance frequency is at the
point where the agitator movement achieves a maximum. By eat- amplitude the
amplitude when beating can be changed and with eat the amplitude can be
checked. For this purpose, hold a sample vial filled with 2.5 ml of water on the
measuring head so that agitator and thermistor dip in the water and activate the
agitator by touching eat. On the one hand, the agitator should strongly strike the
glass wall of the sample vial so that the freezing process is well and quickly
triggered: on the other hand it should not be too strong in order to prevent
damaging the sample vial.
12

•Language: The language can be chosen from several languages.
•System: Date and time can be changed. The cooling bath pump can be tested,
history database can be cleared and updates can be installed.
•technical: all technical parameters, that user normally do not need to change. If
parameters need to be changed, please contact the service.
•At least the error log and information to used software.
f) Hel
Error codes, error-messages and solution for solving problems are available on the Help
screen.
g) About
The actual software version and further information are shown.
1

5. Performing measurements
5.1.Insert sample vial
The milk sample to be measured is pipetted into a sample vial. The sample quantity must
be between 2.0 ml and 2.5 ml, preferably 2.2 ml. The sample vial is placed at the
measuring point.
5.2.Start measurement
By touching Measure a new
measurement starts. The chart shows
the actual temperature of the
thermistor in degree Celsius. On the
vertical axes are the temperature
values. On the horizontal axes the time
in seconds. The measurement can be
stopped by touching Stop.
After reaching the triggering
temperature (beat temperature), e.g.
-2.00°C, the machine changes over to
plateau display. This means the
temperature range is displayed
strongly magnified. The area
underneath the green line represents
the specified plateau criterion. Thus it
can be checked in a simple and
retraceable way whether the specified
plateau criterion is satisfied. If the
plateau criteria are reached, the
measurements stops and values are
saved.
5.3.Saving measurements
If an USB-stick is connected while measuring, the measured values are saved for further
processing on the stick.
The file is parted in two sections:
14

1. The parameters
user 1
probe 1
ate 4/20/15 9:32 AM
mo e measure
value -0.575 °C [0.0 %]
plateau S[0.4:22]
2. The measured values:
0.4 33.4049
0.6 33.0357
0.8 32.5181
1.0 31.7487
aso.
First column is time in seconds, second is temperature in °C.
Attention: You can still export the measurement in history mode, if no USB-stick was
present while measuring. See 9c .
6. Calibration
In order to obtain precise measurements, it is necessary to calibrate the machine. This is
due to the physical ambient conditions such as the air pressure. It is recommended to
check the calibration at least once per day and recalibrate if needed. The calibration can
be checked easily using a control standard. Funke-Gerber has such a control standard (-
0.512°C) in its product range.
The machine is calibrated using two-point calibration, an A-calibration and a B-calibration.
Funke-Gerber provides two different A-calibration standards (0.000°C and -0.408°C) and
two different B standards (-0.557°C and -0.600°C). As the machine can be freely
programmed, other calibration standards can also be used.
6.1.Preparing for cali ration
Ensure that the machine is set to the correct calibration values. Otherwise, the calibration
values must be changed accordingly. (see 4.2. e)). Three vials each are needed for the A
and B calibration. Place the vials in
the vial stand; ensure that the sample vials are separated from each other in the vial stand
so that mix-ups between A and B are ruled out. Pipette sample vials each with 2,2 ml A-
Standard and vials each with 2.2 ml B-Standard.
Tip: In order to ensure that the vials are really clean, or that the calibration liquids in the
vial correspond to 100% of their value, we recommend rinsing the vials with the respective
calibration fluid in advance.
15

6.2.Perform cali ration
a) Adjust the machine to the calibration standard
The machine can be adjusted to different calibration standards (see 4.2. e).
b) A-calibration
a) Pipetting
sample vials are each pipetted with 2.5 ml of the “A” calibration liquid.
b) Measurement with calibration liquid “A”
Put sample vial with calibration liquid “a” in the cooling bath opening. Start
measurement (see 5.). This is only a preliminary measurement for flushing
purposes.
c) A-calibration with calibration liquid “A”.
Place sample vial in the cooling bath opening. Select the “A-calibration” function by
touching A-Cali ration .
d) Remeasurement with calibration liquid “A”.
This is used for controlling whether the A-calibration has been carried out
successfully. The measurement value should match the first measurement value in
the context of repeatability (+ 0.0020°C).
c) B-calibration
a) Pipetting
sample vials are each pipetted with 2.5 ml of calibration liquid “B”.
b) Measurement with calibration liquid “B”.
Place sample vial with calibration liquid “B” in the cooling bath opening. Start
measurement (see 5.). This is only a preliminary measurement for flushing
purposes.
c) B-calibration with calibration liquid “B”.
Place sample vial in the cooling bath opening. Select the “A-calibration” function by
touching B-Cali ration .
d) Remeasurement with calibration liquid “B”.
This is used for controlling whether the B-calibration has been carried out
successfully. The measurement value should match the first measurement value in
the context of repeatability (+ 0.0020°C).
6.3.Pre-cali ration
In normal usage re-calibration is not necessary.
Using pre-calibration, the measuring technology is put into a defined condition. Such a pre-
calibration is necessary in particular cases, e.g. for a thermistor change. Without pre-
calibration, it would often not be possible to perform a normal calibration. A sample vial
with calibration liquid “A” is needed for the pre-calibration. The pre-calibration can be
started after the vial has been placed in the cooling bath opening. After pre-calibration a
normal calibration has to follow.
16

7. Maintenance
7.1.Replacing the thermistor
Proceed as follows to replace the thermistor:
•Remove the blue measuring head cover. Undo the Phillips screw on the rear side of
the measuring head for this. The cover can be lifted off afterwards.
•There is a hole on each side of the bottom part of the measuring head. In both
these holes, there is an Allen screw which fastens the thermistor.
•Both the screws can be slackened (slacken only, do not undo completely) using the
small Allen key included in the scope of delivery. Pull the thermistor connector out of
the connection socket. The thermistor can be removed afterwards. Rotating the
thermistor slightly makes its removal easier. Now, you can start installing the new
thermistor.
•The new thermistor is inserted into the bore provided with a slight rotary movement.
•Im ortant: The slot in the thermistor case must be
aligned exactly parallel to the oscillation movement of the
agitator (see Fig.). The agitator must never touch the
thermistor case at any point. The agitator must oscillate
completely freely.
•Now tighten both the Allen screws (grub screws).
Attention: do not screw too tight or even with force!
Afterwards, plug the connector completely, i.e. until the
plug engages, into the connection socket. Carefully lay
the cable in the area of the rear coil so that it can never come into contact with the
moving parts of the agitator.
•Replace the measuring head cover afterwards.
17

8. WEEE Notice
The WEEE (Waste Electrical and Electronic Equipment)
Directive, which was adopted by European legislation on
February 1 , 200 , has led to a major reconsideration of the
disposal of electrical and electronic equipment.
The purpose of this directive is primarily to avoid WEEE, i.e.
electrical and electronic waste, and also to promote the reuse,
recycling and other forms of continuing use of this type of
waste in order to reduce waste quantities.
The WEEE logo on the product or its packaging indicates that this product must not be
placed in your household waste. It is your responsibility to take any harmful waste from
electrical and electronic equipment to designated collection points. By separately collecting
and correctly recycling your electrical and electronic waste, you can contribute to
environmental protection. The proper recycling of electrical and electronic equipment
promotes the health of the general population and protects the environment. Further
information on the disposal, re-use and collection of electrical and electronic waste can be
obtained from the household refuse collection service, recycling centres, as well as from
the seller and manufacturer of the device.
18

9. Error messages
9.1.Error codes
Error code Descri tion
1 : error lift: end position not reached, please check
: uncalibrated or defective thermistor
4 : error on calibration: please check solution
5 : frozen too early
6 : plateau not found
7 : not frozen
- : cooling system not ready yet
- : communication error
a) error lift: end osition not reached, lease check
When starting a measurement or calibration, the device tries to move the lift at
first to the upper position and after that to the lower position and checks the
movement. If the lift can't move freely or is blocked and can't reach the final
positions, the device will show the lift error. This can be caused by defective
final position switches or defective lift motor or broken cable to the switches or
motor.
b) uncalibrated or defective thermistor:
The instrument tests the current thermistor value when starting a measurement
or calibration. Its electrical resistance is known to be a function of the
temperature. This electrical resistance is translated with an ADC (analogue
digital converter) into a number which is then used by the instrument. If the
thermistor has a short circuit or a disruption, its resistance is zero or infinite,
both of which conditions are impossible for a properly functioning thermistor. In
this case, the thermistor will not start the measurement. If the temperature
which is given from the current thermistor value together with the calibration
constant stored in the device is lower than +1°C (which is not possible with a
thermistor which is located in a new, i.e. still warm sample), the device will also
fail to start the measurement.
c) error on calibration: lease check solution
see 9.2
19

d) frozen too early
The state of the sample is unstable when it is below its freezing point. It can therefore
happen that the sample freezes due to an unintentional influence or on its own before the
device triggers freezing. There are many possible reasons for this. If stirring is too strong
or if the stirring rod is grinding against something, jolting can occur and trigger freezing.
The longer cooling takes the more time the sample has to freeze on its own. Therefore the
cooling should be carried out as quickly as possible. If the sample is contaminated,
freezing may be triggered.
e) lateau not found
This error can only occur when the “Plateau Search Method“ in accordance IDF is used to
determine the freezing point. With this method, the temperature value must be within the
defined range for a certain time during the plateau. It can so happen that a certain milk
sample does not fulfil this criterion. Then a second sample of this milk must be measured.
If this error occurs frequently even though the device is otherwise functioning correctly, the
error is either with the thermistor or the result of external disturbances.
f) not frozen
If the temperature set for supercooling (the “trigger temperature”) is reached, the device
beats against the glass wall of the sample tube to trigger freezing. The temperature
should then start to rise. A criterion for this is a rise in temperature of at least 0.1° C. This
is always the case with water or calibration solutions if the stirring rod is set in such a way
that it beats hard against the glass wall. This is not always the case with milk. Some milks
freeze slowly. Should this error occur rarely with individual milk samples, the milk in
question should be heated to approx. 40°C, cooled and measured again. However, if this
error occurs often in a certain region, then it is better to lower the trigger temperature so
that the samples are supercooled more aggressively, causing them to freeze easier. If this
error occurs with calibration solutions, then the calibration of the device is incorrect or
cooling bath liquid has leaked into the sample.
g) cooling system not ready yet
the device should reach a cooling bath temperature of at least -6°C in a reasonable
amount of time. This time depends on the surrounding temperature, but should not
be longer than 20 minutes. Temperature of the cooling bath can be checked with the
internal thermometer and the value shown at the status page or with an external
thermometer. If the device can't reach the selected value, the following needs to be
checked:
•the cooling block temperature on the status page should show a value, not
an error. When showing error, please check the cable between the cooling
block sensor and the measuring board.
•the peltier element dot should be green. If not, please check the cable to the
cooling block.
•the fan should be running and the fan status on the status page should be
green
20
Table of contents
Other Funke Gerber Laboratory Equipment manuals