Funke Gerber LactoFlash User manual

FUNKE
FUNKEFUNKE
FUNKE
GERBER
GERBERGERBER
GERBER
Funke-Dr.N.Gerber Labortechnik GmbH
Ringstraße 42
12105 Berlin
C
CC
C
EC Declaration of Conformity
under the EC Machine Directive 06/42/EC
We declare that the machine referred to herein below, as put on the market,
has been designed and manufactured to the undamental safety and health
standards as defined in the EC Machine Directive. This Declaration shall
become null and void in the case of any modification made without our prior
consent.
Designation of the machine: LactoFlash
Maschinen type: Milk analyzer
Serial number: 3530-
Applicable EC Directives: EC Machine Directive as amended by 06/42/EC
Low Voltage (2006/95 EC
Electromagnetic Compatibility (2004/108/EC)
Berlin, this ______________________
Funke-Dr.N.Gerber Labortechnik GmbH
Dipl.-Ing. K. Schäfer, CEO
20 LactoFlash 31. Januar 2013
GB
Device for the Determination of Fat and SNF in Milk
LactoFlash
User and Reference Manual
Date: Januar 2013
Artikel-No: 3530
LactoFlash 31. Januar 2013 1

Contents
Initial Operation
1. Initial Operation / Unpacking and Checking the Scope of Delivery 3
2 Initial Operation / Setting up 3
3. Initial Operation / Electrical Connection of the Device 3
4. Initial Operation / Connecting the Power Cable 3
5. Initial Operation / Connecting the Hoses 3
6. Initial Operation / Printer Connection 4
7. Initial Operation / Turning the Device on 4
8. Initial Operation / Turning the Printer on, Inserting a Roll of Paper 4
9. Initial Operation / Operating the Device 4
10. Initial Operation / Turning the Device off / on 4
11. Initial Operation / Zero Calibration 5
Operation 6
1. Operation / Measuring --------------------------------------------------- 6
2. Operation / Rinsing --------------------------------------------------- 7
3. Operation / Product Selection / Example 7
4. Operation / Cleaning 7
5. Operation / Setup 7
5.1. Return 7
5.2 System Status: 8
5.3. Intensive Cleaning 8
5.4. Configure Parameters 8
5.5. Language Selection 9
5.6. Adjust pump 9
5.7. Measurements per Sample 9
5.8. Date 9
5.9. Time 9
Calibration 9
6. Operation / Calibration 11
6.1. Performing Calibration 11
6.2. Return 11
6.3. Name 11
6.4. Matrix 11
6.5. Product Selection 11
6.6. Fast / Precise 12
6.7. Selection of the Substance Parameters to be Calibrated 12
6.8. Entering the Reference Values 12
6.9. Starting B Calibration 12
How the LactoFlash works 13
1. Structure of the Device 13
2. Description 13
3. Sample suction tube 14
4. Pump 14
5. Replacing the pump head 14
Requirements of the Milk Samples to be Analysed 15
2 LactoFlash 31. Januar 2013
Ordering data
3530 * LactoFlash
3563 * Cleaner, 0,5 litre
3565* -
--
-FUNKE GERBER
FUNKE GERBERFUNKE GERBER
FUNKE GERBER Zero-Diluent
8818* Erlemeyer flask, 100 ml
7151* Thermal printer, incl. 1 roll thermal paper
(items marked with * are included in the 3530 package)
Accessories (optional)
3040 Milk sample bottle without metal base , 80 ml / PE
3041 Milk sample bottle with metal base, 50 ml / PP
7157 Thermal paper roll for thermal printer
Spare and consumable parts
3530-023 Hose pump, complete
3530-023 A Pump head (attachment for hose pump)
7157 Thermal paper roll for thermal printer
Guarantee conditions
1. Guarantee period
The guarantee period is 12 months from the date of invoice.
2. Guarantee terms
During this period replacement parts will be exchanged at no cost.
The measuring cells will only be exchanged after they have been returned at no
cost to us and under the condition that they are intact, i.e. no attempts of repair
or opening have been made. After expiry of the guarantee period, these analyser
units are only sold after return of the defective unopened components.
The attachment for the hose pumps (hoses) is a consumable part. Depending
on the sample applications, these pump heads must be replaced from time to
time (e.g. annually).
LactoFlash 31. Januar 2013 19

Technical data:
Connection values: 230V / 115V AC (50..60 Hz) 180 W
Resolutions:
Measured values:
Fat: 0.01 %
SnF: 0.01 %
Calculated values:
Protein: 0.01 %
Lactose: 0.01 %
Freezing point:0.001 °C
Maximum values:
dependent on the calibration, however not larger than:
Fat: 14.99 % Lactose: 9.99 %
Protein: 9.99 % SnF: 14.99 %
Minerals:
Freezing point: unlimited, as only calculated
Sample flow rate: up to 100/h (typical 60/h)
Sample volumes: 10 ml
Interfaces: 1 x parallel, 1 x serial (RS 232/ 9600 Baud) 6 Volt power
supply for thermal printer (Item No. 7151)
Dimensions: 30 x 24 x 33 cm (W x H x D)
Weight: approx. 5.kg (net)
18 LactoFlash 31. Januar 2013
What to do in the Case of Milk Precipitations 15
Entrainment 16
Error Messages / Troubleshooting 16
Technical Data 17
Order Data
Spare und consumable parts 17
Guarantee Conditions 18
Important note
In case of transporting or the device must be stored, the
measuring cells must be rinsed before with air. Please start
the "Rinsing" with air instead off rinsing liquid. After 3-4
rinsing circles the measuring cells including the whole device
are ready for despatch. This is very important when ambient
temperatures are less than 0 °C!
LactoFlash 31. Januar 2013 3

1. Initial Operation / Unpacking and Checking the Scope of Delivery
The following parts must be present:
a) LactoFlash
b) 1 mains cable
c) 1l cleaning solution
d) 2 l Funke-Gerber Zero-Diluent
d) Report printer
e) 1 electricity supply cable (6 V) for report printer
f) Connection cable for the parallel interface for connecting the printer
g) Operating instructions for LactoFlash and printer
h) 1 hose for the output (waste)
i) Erlenmeyer flask, 100 ml
2. Initial Operation / Setting up
Place the device on a horizontal surface.
3. Initial Operation / Electrical Connection of the Device
Power connection: 230 V / 180 VA or 115 V / 180 VA
The power connection is located on the back side of the device together with
the on/off switch, voltage selector switch and mains fuse.
First select the correct mains voltage using the voltage selector switch: 230 V
or 115 V.
4. Initial Operation / Connecting the Power Cable
Ensure that the device is connected to a shockproof socket that has been
installed in accordance with the safety regulations.
5. Initial Operation / Connecting the Hose
Connect the waste hose to the connector located on the return of the device
and lead the end of the hose either to a waste vessel of corresponding size
(approx. 5-10 l) or directly to a drain.
4 LactoFlash 31. Januar 2013
For milks of the same class (e.g. different full cream milks) the falsification by
entrainment is below the dissolving limit and thus insignificant.
However, if you switch to a very different product e.g. from skimmed milk to
cream or vice versa the first measurement in the new area must be discarded
as it is falsified by entrainment.
Error messages / Troubleshooting
Following error messages appears on the display and will printed:
Error message Cause / Resolution
Error
error on the first
measuring cell
1. There was not enough sample quantity in the bottle -- the
device has sucked in air.
2. Leak in the hose. Check the hose for leaks.
3. The sample quantity is too small. Due to wear of the pump
head, the specified minimum quantity can no longer be sucked in.
Check sample quantity, replace pump head if necessary.
4. Fault in the one or both measuring cells.
Please contact Funke-Gerber in order to replace.
.
Error
error on the
second
measuring cell
Error
error on both
measuring cells
Error
measurement is
not usable
Software failure: measurement value is not reliable. Please repeat
measurement.
Error
sample not
measureable
Sample too "thick". The fat or SNF content or both together is too
high. The sample must either be diluted or cannot be analysed.
LactoFlash 31. Januar 2013 17

Requirements for the milk samples to be examined
1. pH value: Minimum 6.3
2. Free of air bubbles: The sample must not foam, because air bubbles
significantly distort the measurement.
3. The sample must be liquid. It must not contain any solids.
4. The sample must be well mixed / stirred. For raw milk, the fat globules must
be well distributed.
5. Sample temperature: From 8°C to 40°C. The milk samples should show as
far as possible a uniform temperature.
The LactoFlash is a physical properties measurement device. It does not
perform any chemical analyses. Therefore, some basic chemical properties of
the samples must be met for successful usage of the LactoFlash:
■It should be a real milk. Fermented milk products such as yoghurt, whey
and similar have properties which deviate too much from natural milk to expect
reliable results.
■Additives which are not usually contained in milk such as, e.g.
flavourings, thickening agents, dyes, salts, preservatives, sugar and similar can
falsify the measurement results in unpredictable ways.
■The sample does not necessarily need to be homogenised, but it must
not be viscid, sour or clotted in any case. In such cases, there is the additional
risk of blockages which can make the device unusable.
Procedure in the case of milk coagulations
It should first be ensured that no stale or precipitating milk (see above pH value
< 6.3) is being measured with the LactoFlash. However, if this does happen,
then rinse thoroughly immediately until the water in the waste hose is clear. An
intensive cleaning should be carried out afterwards
Entrainment
As with all measurement equipment where samples are pumped through internal
measurement chambers, the LactoFlash also has the interference effect of
entrainment. This consists of the precious sample or previous rinsing water not
being exactly 100 % flushed out so that small residues of this are mixed with the
current sample in the measurement section and can therefore falsify the
measurement result.
16 LactoFlash 31. Januar 2013
6. Initial Operation / Printer Connection
Insert the printer cable into the 6 V connection located on the rear of the
device. Then insert the other end of the cable into the corresponding socket
on the rear of the printer.
Proceed in the same way with the parallel interface cable. The two cables are
fitted with different plugs so that it is not possible to make a wrong connection.
7. Initial Operation / Turning the Device on
Turn the device on by the power switch.
After 15 Minutes warm-up phase the device
can be used.
8. Initial Operation / Turning the Printer on
Turn the printer on with the help of the sliding switch on the left-hand side of
the printer (see also the operating instructions for the printer).
Open the paper compartment of the printer. Remove the roll of thermal paper
from the compartment and insert the thermal paper into the slit provided. As
soon as the paper is detected in the slit, the printer pulls in the paper. Then
turn the printer to “Online Mode” by pressing the left-hand button.“Online-
Mode” is indicated by the green diode next to the button. Now the printer is
ready to print. If you would like to move the paper on, turn the printer to “Offline
Mode” with the left-hand button. Then press the right-hand “Feed” button -- the
paper is moved forward.
9. Initial Operation / Operating the Device
The device has 4 arrow buttons and one
“Enter” button. The “Enter” button is used to
start the function or action that has been
selected with the help of the arrow buttons.
LactoFlash 31. Januar 2013 5

10. Initial Operation / Turning the Device off / on
Before being turned off the device must be cleaned in order that no milk
residues can remain in the device.
Zero calibration has to be performed after the warming-up. The zero calibration
lasts approximately 5 minutes.
11. Initial Operation / Zero Calibration 6 minutes
After the warming time up the zero calibration
can be started.
Starting zero calibration:
a) Place the sample suction tube in a sample
glass filled with the “-
--
-FUNKE GERBER
FUNKE GERBERFUNKE GERBER
FUNKE GERBER Zero-
Diluent“. There should be at least 50 ml of
liquid present. Otherwise the device would
draw in air, which would then call up the error
message “No Plateau”.
b) Use the arrow keys to select the “Zero-Cali”
menu item.
c) Press the “Enter” button -- zero calibration
starts. Progress is shown by means of a
moving bar.
Zero calibration is used to calibrate the hardware. It is not calibration of the
substances in the milk. This is performed with the B calibration. If you would
like to check the zero calibration process, please carry out a control
measurement with the “-
--
-FUNKE GERBER
FUNKE GERBERFUNKE GERBER
FUNKE GERBER Zero-Diluent“ as you used before
doing the Zero-calibration. For this control measurement profile 0 must be
used. Profile 0 cannot be calibrated and is therefore suitable for this control
measurement.
6 LactoFlash 31. Januar 2013
3. Sample suction tube
The suction tube should be inserted at least 30 mm deep into the milk sample.
The suction tube can be removed from the milk sample after the suction process
unless several analyses have been configured.
4. Pump
The pump discharge in a common line, which runs first through the
measurement cells and afterwards into the waste hose.
The sample taken from a milk sample container is not pumped back there. The
sample quantity taken approx. 10 ml is thus not
available for further examination.
The pump head is located on the left side of the
instrument. As this is a hose pump, the pump head
must be replaced from time to time. This is a
consumable part which can be obtained as Item No.
3530-023 A. We recommend replacing these pump
head at least once per year, possibly more often
depending on usage.
5. Replacing the pump head
The following steps must be taken for replacing the pump
head:
5.1. Remove the pump head: Press both plastic lugs
simultaneously and remove the pump head.
5.2. Undo the hose connections: Detach the hoses from the
hose connectors.
5.3. Install new pump head: Move the new pump head
carefully onto the motor axle. Press further until the plastic
lugs engage in the holder.
5.4. Connect hoses: Trim the hoses to the correct length
and push the hose ends onto the respective connectors.
Please ensure that the hoses are not too long.
LactoFlash 31. Januar 2013 15

Hose
Pump
Measuring
Cell
Measuring
Cell
Output
Waste
Input
Milk
How the LactoFlash works
1. Structure of the device
As can be seen from the picture and the operating principle diagram, the device
is equipped with 2 measurement cells.
2. Description
These modules there are thermo analytical measurement cells which operates
at two different measurement temperatures. Measurement cells are hermetically
sealed for thermal reasons (insulation).
14 LactoFlash 31. Januar 2013
Operation
1. Operation /Measuring 1 Minute
First select the desired product. There are a total of 18 different product
calibrations available (e.g. for full milk, skimmed milk, cream, goat’s milk,
sheep’s milk, cow’s milk etc.) (see section 3. Operation / Product Selection /
Example)
Place the sample suction tube in a sample vessel glass with the milk sample.
There should be at least 30 ml of milk present (correspondingly more in the
case of multiple measurements). Otherwise the device would draw in air, which
would then call up the error message “No Plateau”. The conditions applicable
to the milk samples are to be found on page 15.
a) Use the arrow buttons to navigate to the “Start Measurement” menu item.
b) Press the “Enter” button - the measurement begins.
At first 10 ml of milk is drawn in.
The following 4 phases form part of each measurement:
1) Drawing in the sample
2) Warming the sample
3) Fine temperature
4) Measurement
The progress of the measurement is shown by
a moving bar. One measurement lasts
approximately 1 minute (depending on the
setting). After the measurement has finished,
the result is displayed on the screen and
printed out on the report printer.
LactoFlash 31. Januar 2013 7

2. Operation / Rinsing 5 seconds
a) Place the sample suction tube in a sample glass filled with the “-
--
-FUNKE
FUNKEFUNKE
FUNKE
GERBER
GERBERGERBER
GERBER Zero-Diluent“. There should be at least 50 ml of the liquid present.
c) Use the arrow buttons to select the “Rinsing” menu item.
b) Press the “Enter” button -- the rinsing process begins.
During the rinsing process a certain quantity of liquid is pumped through the
measuring cells. Rinsing can be repeated as often as required.
3. Operation / Product Selection / Example
It is possible to calibrate and store 18 different product profiles. The following is
an example of a product selection:
Select product 3:
a) Use the arrow keys to select “Products/Calibration”.
b) Press the “Enter” button . - -
The following image appears:
c) Use the arrow buttons to select “Product
Selection”.
d) Press the Enter button.
e) Use the arrow buttons to select the desired
number. In this case the number “3".
8 LactoFlash 31. Januar 2013
6.4. Matrix: The device is already calibrated by manufacturer. This
fundamental calibration may be improved by the customer.
6.5. Product Selection: See 3. “Operation / Product Selection / Example”
6.6. Fast / precise: The device can be set to “fast measurement”
(35 seconds = 100 samples per hour) and “precise measurement” (60
seconds = 60 samples per hour).
6.7. Selection of the Substance Parameters to be Calibrated
a) Use the arrow buttons “▲” or “▼” to select the desired substance
(e.g. fat, protein, lactose etc.).
✕b) Press the “Enter” button -- the “√” symbol appears in place of the “ ”
symbol.
c) Continue in the same manner until all of the desired substance
parameters have been selected.
Between 1 and 6 parameters can be selected for calibration.
6.8. Entering the Reference Values (Reference Milk Values)
a) Navigate with the arrow buttons to the respective B value.
b) Press the “Enter” button.
c) Use the arrow buttons to set the desired value, figure for figure.
d) Press the “Enter” button. This confirms and stores the setting.
e) Continue in the same manner until all of the desired values have
been entered.
6.9. Starting B Calibration
Place the sample suction hose in a sample vessel filled with reference
milk. There must be at least 80 ml of reference milk available.
a) Navigate with the help of the arrow buttons to the menu item ”Start
B”.
b) Press the “Enter” button -- automatic B calibration begins.
After approximately 5 minutes B calibration is finished. Now it is
possible to measure unknown milks of the same type with the
previously selected profile, e.g. no. 3.
Note: Do not perform any calibrations immediately after cleaning the device
with cleaning liquid or other cleaning agents. Such agents falsify the
measurement results to a significant extent. As they strongly moisten the
surfaces of the measurement chambers, they have to be rinsed very
thoroughly after use.
Never operate the LactoFlash without rinsing or cleaning after finishing the
measurements. The device contains two sensitive measurement chambers
which are kept at a certain temperature. If milk protein precipitates in such a
measurement chamber and is deposited on the walls, the measurement
chamber will be destroyed.
LactoFlash 31. Januar 2013 13

6. Operation / Products / Calibration
6.2. Performing Calibration
Use the arrow buttons to select the “products / calibration”. Then press
the Enter button – the following image appears:
6.2. return: After the Enter button has been pressed, the display returns
to the main menu.
6.3. Name: Profile name. Any name can be entered. With the help of the
arrow buttons it is possible to select and enter the respective letters.
Example: The profile name to be entered is “Milch 1”.
a) Press the “Enter” button
b) Keep the arrow button ”▲” or “▼” pressed until the desired letter
“M” appears.
c) Use the “right-hand” arrow button to position the next letter.
d) Keep the arrow button ”▲” or “▼” pressed down until the desired
letter “I” appears. Note: the capital letters are followed by the small
letters.
e) Continue the procedure until the entire word has been entered.
f) Press the “Enter” button. This confirms and stores what has been
entered.
12 LactoFlash 31. Januar 2013
4. Operation / Cleaning ca. 7 Minuten
For this approximately 100 ml of cleaning agent solution is required. Cleaning
takes around 7 minutes. The cleaning agent that we recommend is P3-topax
66 in a dilution of 2% (2% cleaning agent, 98% Water).
Cleaning procedure:
a) Use the arrow keys to select “Measure”.
b) Press the “Enter” button . - - The cleaning starts. Please ignore the
“measuring values” because it is insignificant. Please repeat the cleaning
approx. 3 times. After the cleaning the device should be rinsed 3-4 times with
destilled water.
5. Operation / Set up
5.1. Return: After the Enter button has been pressed the display returns to
the main menu.
5.2. System-Status: After the Enter button has
been pressed, the following image
appears:
The system status can be printed out if
necessary for error diagnosis.
5.3. Intensive-Cleaning Approx. 1 hour
Performing Intensive Cleaning:
a) Place the sample suction hose in a sample vessel filled with approximately
200 ml of intensive cleaning agent. The intensive cleaning agent that we
recommend is “P3-topax 66" made by the firm “ECOLAB” in a dilution of 1:20
(19 parts water, 1 part P3-topax 66)
b) Also place the waste water hose in this sample vessel. This creates a
closed circuit.
c) Navigate to ”Intensive Cleaning”
d) Start the process with the “Enter” button -- intensive cleaning begins.
Intensive cleaning is continued until you stop it by pressing the Enter button or
an arrow button. After intensive cleaning the device has to be carefully rinsed,
i.e. start “Rinsing” (see Operation / Rinsing) five times. We recommend that
intensive cleaning should be carried out once a month.
LactoFlash 31. Januar 2013 9

5.4. Configure parameters
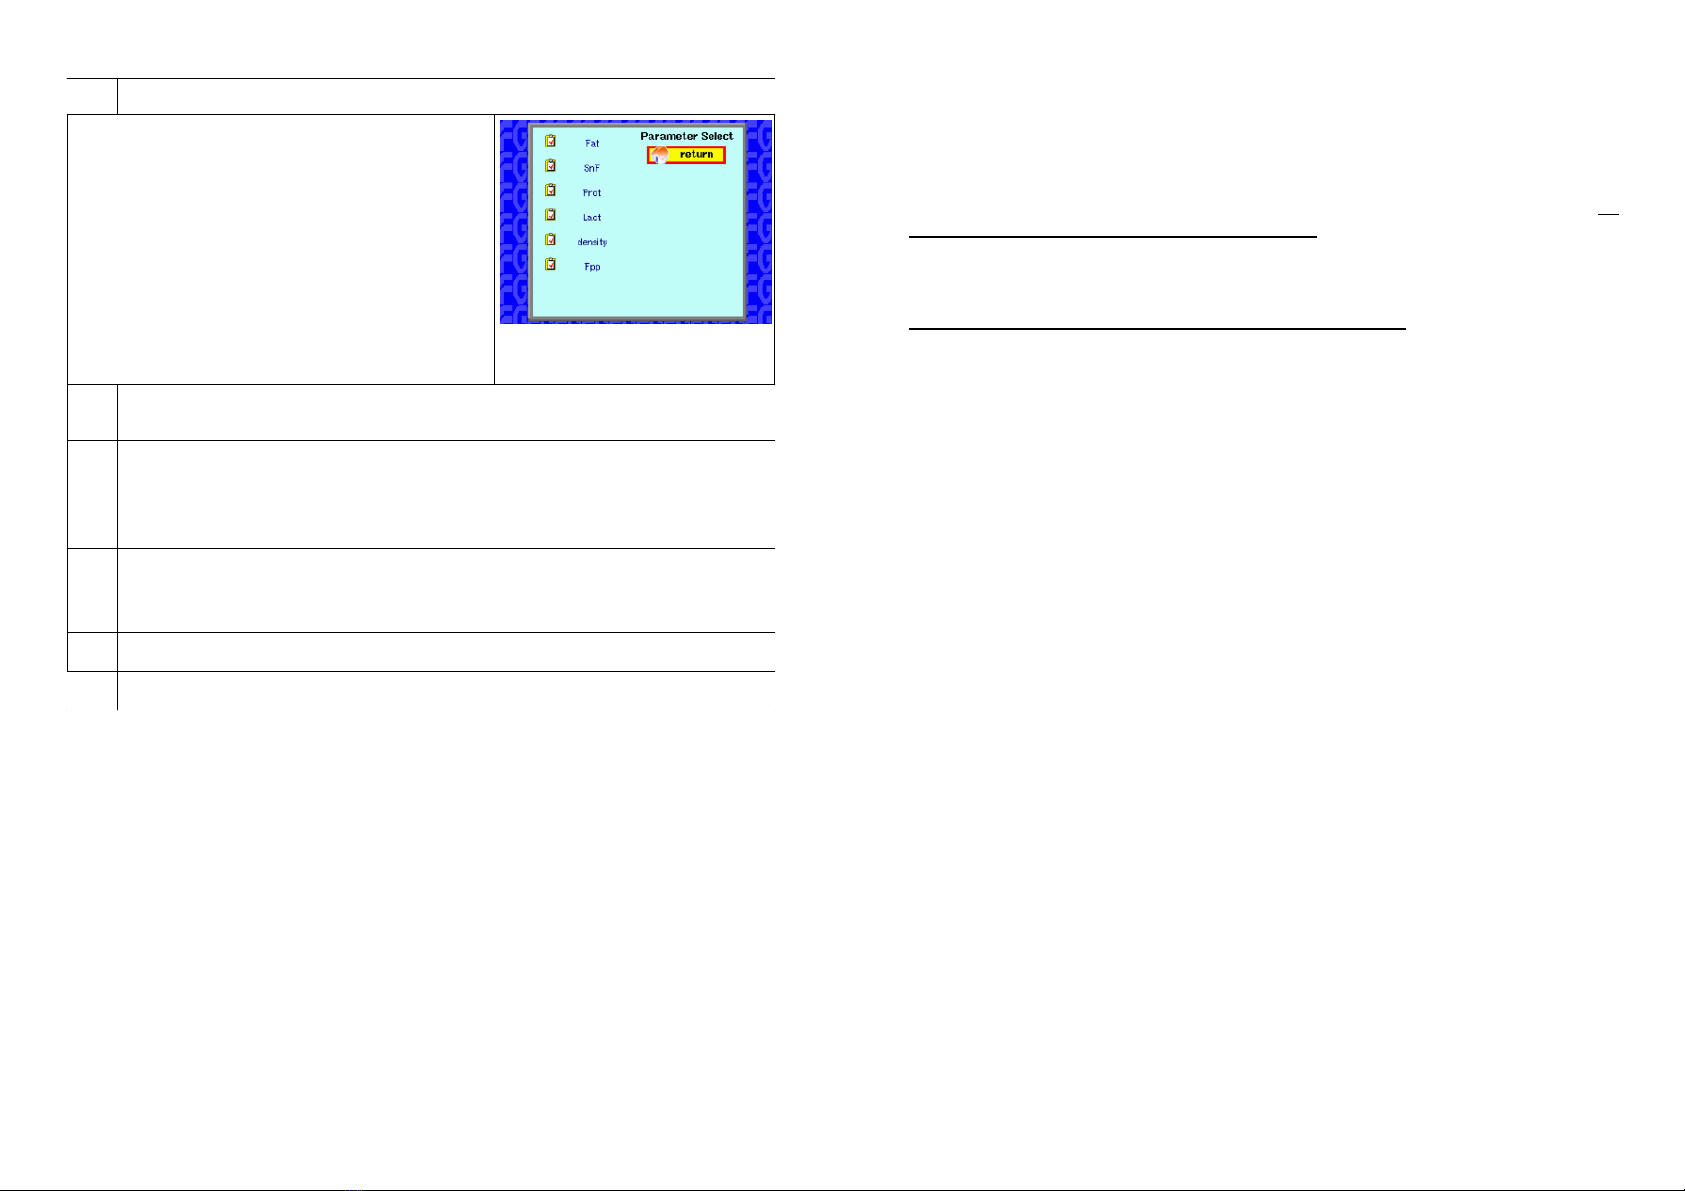
Configure Parameters: After the Enter button
has been pressed, the following image
appears:
From this list you can select the relevant
parameters. The selected parameters are
shown by a tick, those that are not selected by
an X. Selected parameters are printed out and
shown on the display, while those that are not
selected are disabled.
5.5. English: Language selection: the desired language can be selected
(“Deutsch” or “English”).
5.6. Adjust Pump: You can adjust the sample pump in such a way that the
sample quantity displayed is the same as the actual sample volume.
This is necessary because the sample quantity can vary according to
how the hose pump is used and may therefore have to be adjusted.
5.7. Measurements per Sample: You can set the number of measurements
from 1 up to 9. Please ensure that in the case of very many repeat
measurements there is enough sample volume present.
5.8. Date: The date can be set here.
5.9. Time: The time can be set here.
Calibration
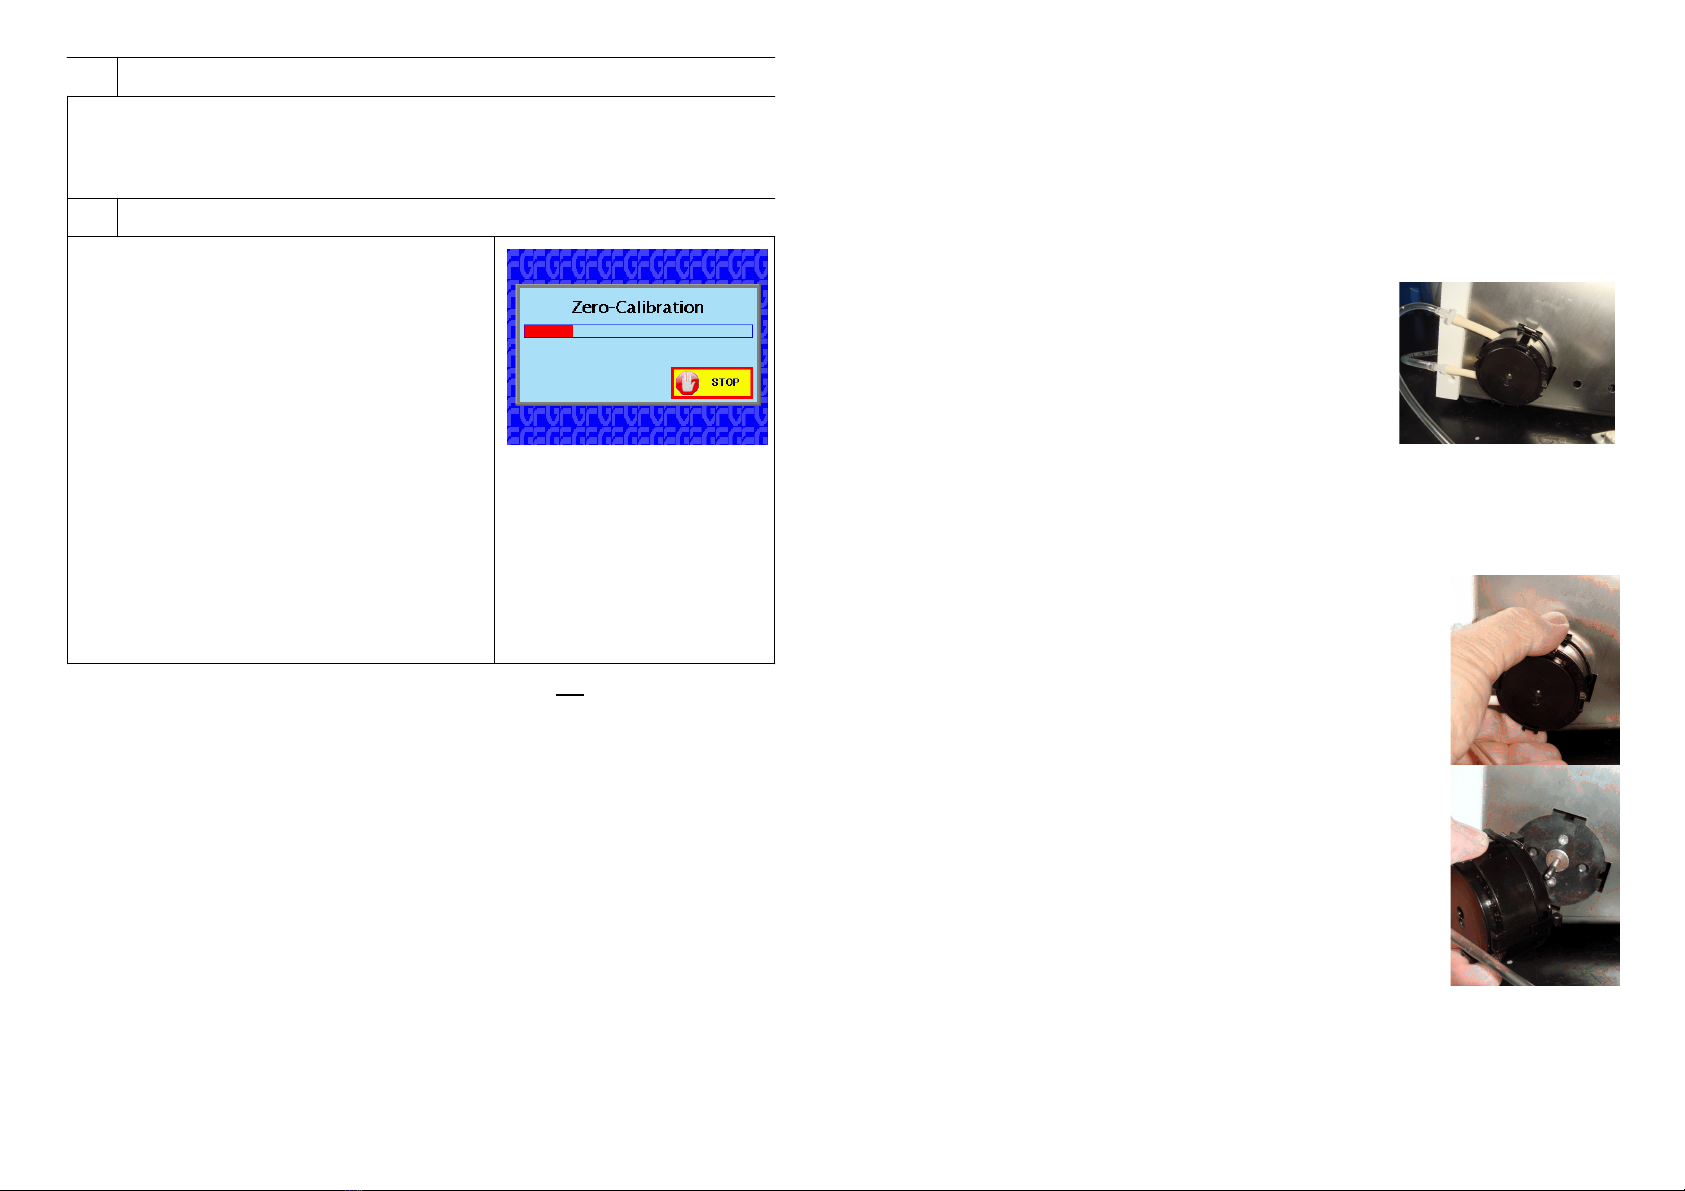
Before it left the factory the LactoFlash was equipped with a fundamental
calibration system based on various reference milks. This fundamental
calibration possesses a fairly high level of accuracy for the matrix “raw
milk/cow’s milk”. Quite often this calibration is fully sufficient for the required
demands. In these cases the device does not have to be calibrated, as the daily
zero calibration with “-
--
-FUNKE GERBER
FUNKE GERBERFUNKE GERBER
FUNKE GERBER Zero-Diluent“ is enough this can be
performed at any time.
In other cases it may be necessary to calibrate only a single substance, e.g. fat.
This is made possible by the parameter selection (see 6.1., page 12, selection of
the substance parameters to be calibrated).
However, in principle it is possible to calibrate all substance parameters in one
calibration procedure. Only one reference milk is required for which all of the
substance parameters are known. In this manner the device can be adapted or
corrected by the user to the corresponding type of milk (e.g. raw milk, cheese-
10 LactoFlash 31. Januar 2013
making milk, skimmed milk, sheep’s milk, goat’s milk, etc.). The LactoFlash
stores a total of 18 different calibration data sets for the various types of product.
Accordingly it is possible (after appropriate calibration) to switch between
various types of product without recalibrating the device - e.g. from skimmed
milk to cream and back.
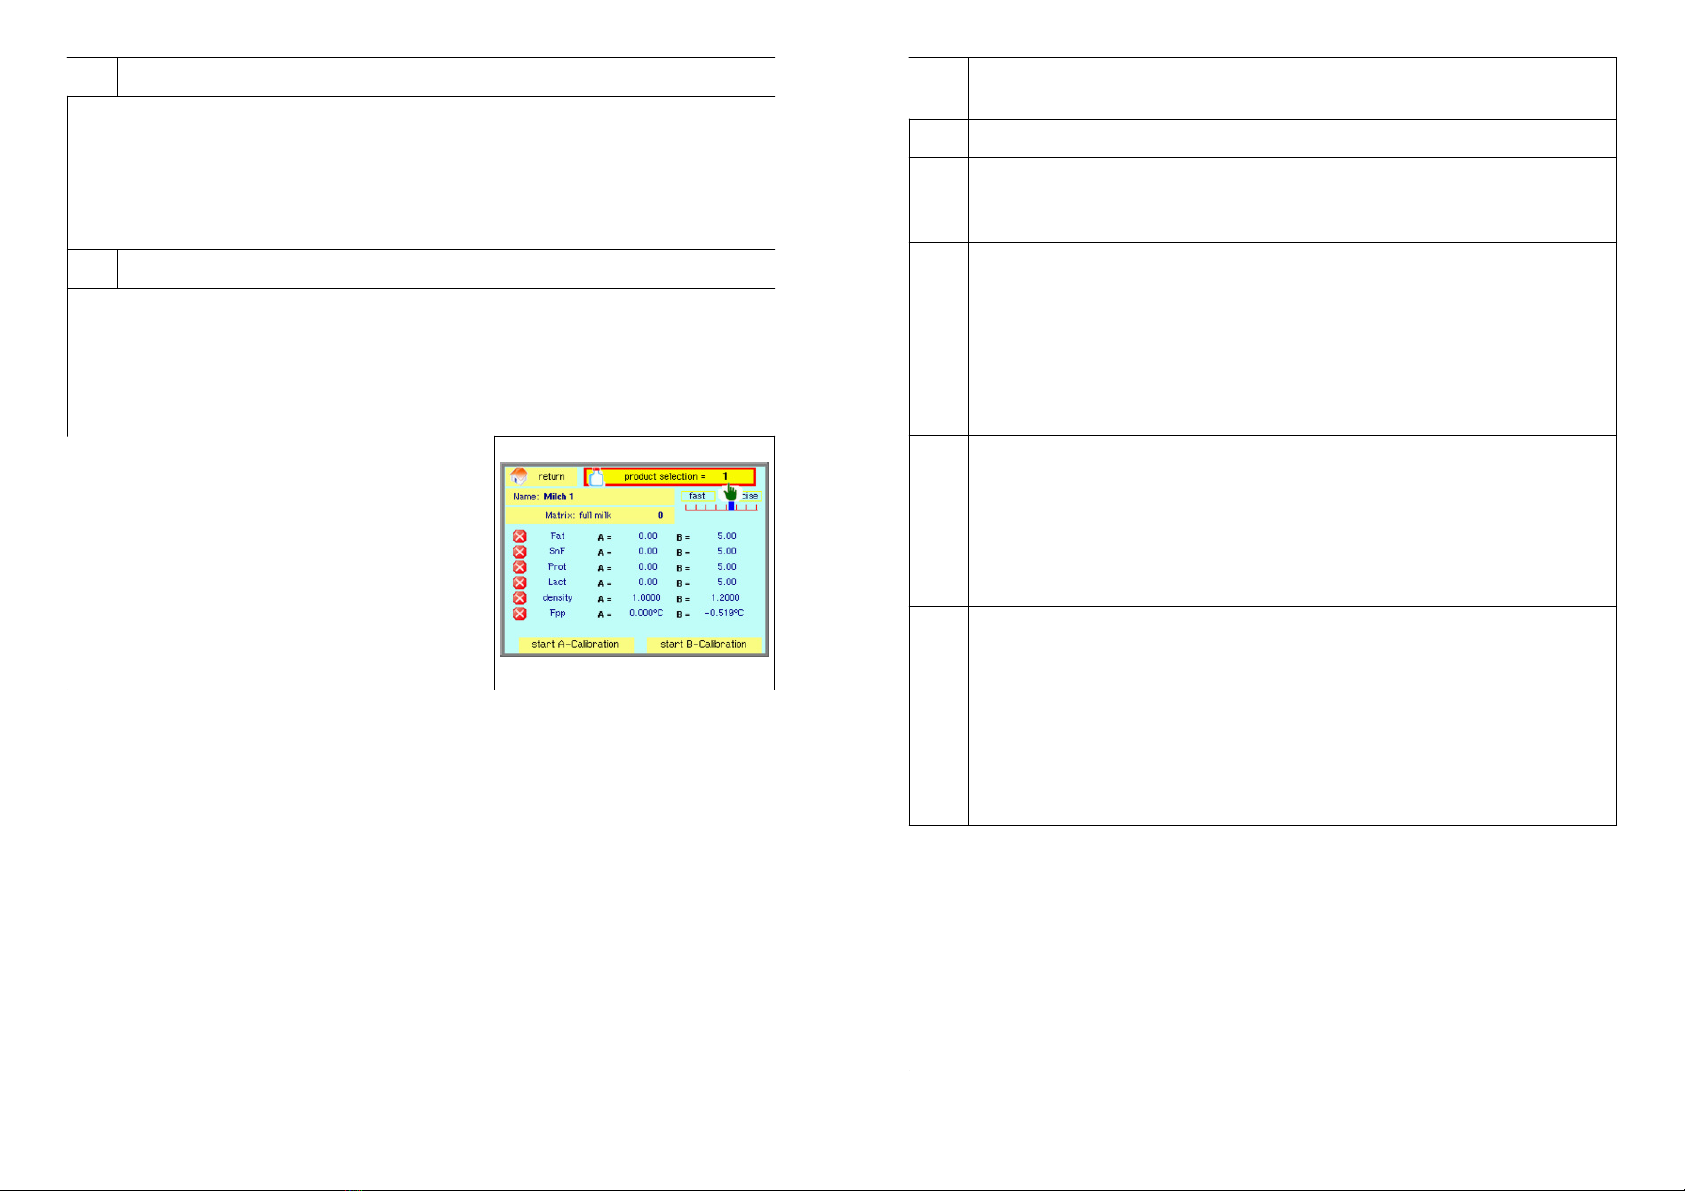
Product-specific substance calibration usually consists of B calibration. A-
type calibration is not normally necessary. Only in the case of special
milks, e.g. flavoured milks (strawberry milk, vanilla milk etc.) do you need
two-point calibration , i.e. A calibration and B calibration.
B Calibration (typical method for “normal” types of milk)
For this you require a reference milk. A reference milk is a milk which has
previously been analysed with the known reference procedures (e.g. Röse-
Gottlieb, Kjeldahl etc.). This reference milk should fulfil certain requirements. It
must be similar to the milks that are to be measured in terms of its important
ingredients or have a similar matrix.
These product-specific calibrations only have to be performed once. Afterwards
only the daily zero calibration is sufficient to compensate for drifting and ageing.
Note: The substance calibration is based on zero calibration. For this reason it is
advisable to perform zero calibration shortly beforehand.
Special Case : Two-Point Calibration
Only in the case of special milks, e.g. flavoured milks (strawberry milk, vanilla
milk etc.) do you require two-point calibration, i.e. A-type calibration and B
calibration.
Two-point calibration (A / B calibration):
(This is not normally required!)
A-type calibration is performed with a type of milk (A-type milk) that has lower
levels of substances in all parameters, while the B calibration is performed with a
reference milk (B milk) that is richer in terms of the substances it contains. The
A- type milk is acquired from the B milk by diluting the B milk with water. It is
important that this dilution is carried out with an accurate balance and is
thoroughly mixed in order to prevent errors with the calibration.
We suggest a dilution of e.g. 20% (80% reference milk / 20% distilled water). In
principle the two reference milks, the A milk and B milk, should cover the
expected measurement range.
The device places certain requirements on the B milk in that this milk should be
similar to the milks to be measured in terms of the important substances that
they contain or have a similar matrix. The differences between the A and B milk
with respect to the substances they contain should not be too small, i.e. the
dilution should be between 20% and 50%.
LactoFlash 31. Januar 2013 11
This manual suits for next models
1
Table of contents
Other Funke Gerber Laboratory Equipment manuals
Popular Laboratory Equipment manuals by other brands

Drucker Diagnostics
Drucker Diagnostics 642M Operator's manual

Neuation
Neuation iSWIX JR. NXT Product user manual

Miles Technology
Miles Technology Multisonic M44 Operation manual

Buchi
Buchi C-660 Operation manual

3D Histech
3D Histech Pannoramic MIDI user manual

Macherey-Nagel
Macherey-Nagel Visocolor manual