Funn Ripper Guide

WWW.FUNNMTB.COM RIPPER CLIPLESS PEDALS 2022.08.20 / REV. 1
LEFT
LEFT RIGHT
RIGHT
LEFT RIGHT
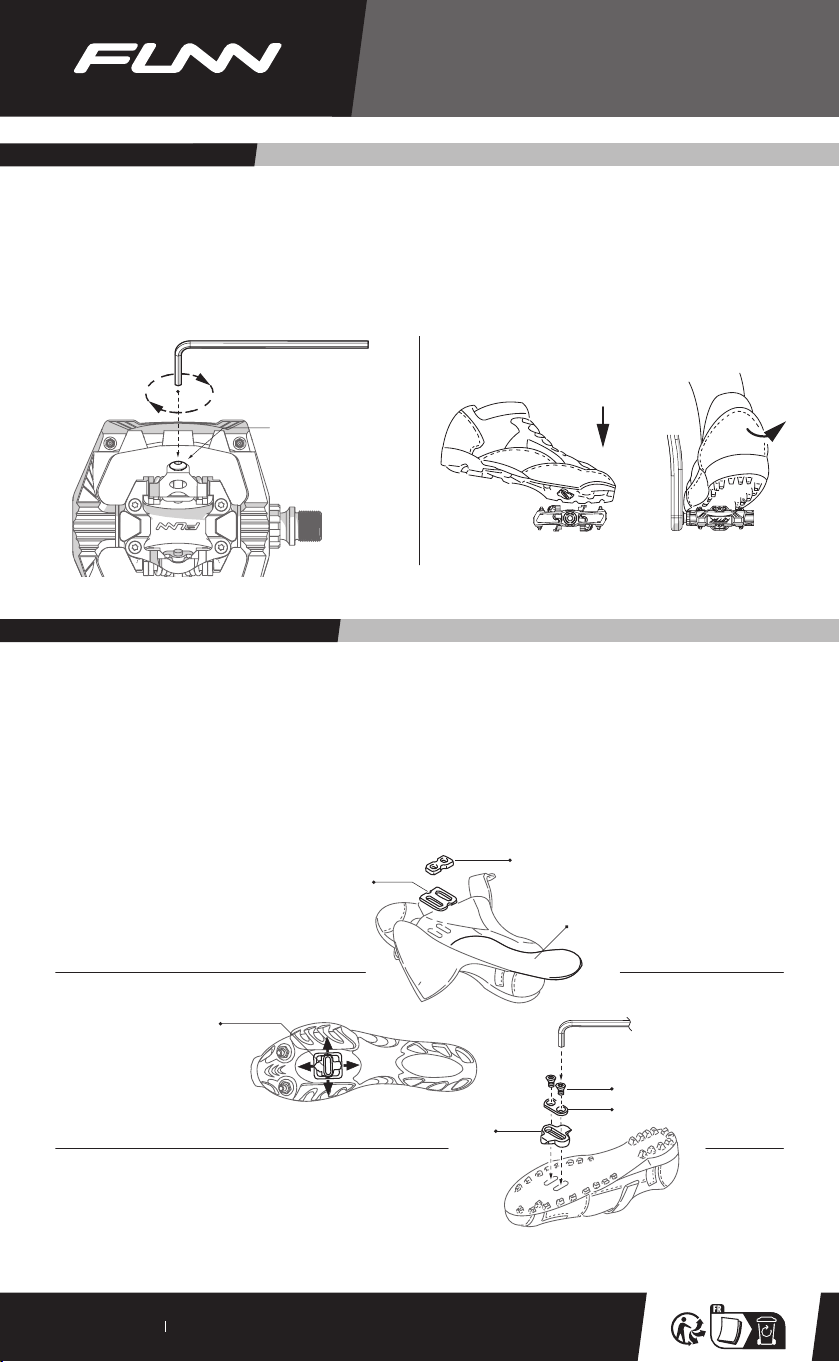
Socket wrench 4mm
8mm
34 Nm
34 Nm
Thank you for purchasing this RIPPER CLIPLESS PEDALS.
Please read the instructions thoroughly before attempting to install this item.
Proper installation is required for compliance with FUNN’s warranty policy.
.Hex key 3mm
.Hex key 8mm
.Socket wrench 4mm
8mm
INSTALLATION AND USE
RIPPER CLIPLESS PEDALS
contents
tools required
.Pedals
.Traction pins
.Cleat kit
.Socket wrench 4mm
PEDAL installation
SET
PCS
1
16
1
1
SET
PC
Begin by identifying the left and right pedals. The left side
pedal has a single indented line surrounding the spindle.
1. Install the traction pins with the 4mm socket wrench.2.
Lightly lubricate the axle threads with anti-size grease before installing to the crankset.
Thread the axle into the crank hole with your fingers. Please follow the illustrated directions for tightening the left and
right pedals.
Insert a 8mm hex key to further tighten the screw to 34Nm (300 lb-in) torque and avoid excessive force.
3.
4.
5.
WWW.FUNNMTB.COM RIPPER CLIPLESS PEDALS 2022.08.20 / REV. 1
Insole
Flat nut
Insole washer
Adjust cleat vertically
and horizontally
Hex key 4mm
Cleat bolts
Cleat
Cleat washers
・Tightening torque
5-8 Nm (43–69 lb-in)
INSTALLATION AND USE
The tension adjuster is located on the rear binding. To adjust binding tension, use a 3 mm hex key for turning the tension adjuster.
Binding Adjustment
ATTACH CLEATS TO CYCLING SHOES
Adjustable
binding tension.
Binding adjustment range
8-14 Nm (69–121 lb-in)
・INCREASE
Hex key 3mm
RIPPER CLIPLESS PEDALS
Increase tension in a clockwise direction
(+)for a more secure pedal binding, but more difficult to engage and disengage.
Decrease tension in a counter-clockwise direction
(-) for a less secure pedal binding, but easier to engage and disengage.
Engage cleated shoes in pedals by aligning the cleat between front and rear bindings while pushing down. Disengage by
twisting heel outwards (away from bicycle). Cleat will also be realeased by twisting heel inwards if necessary.
1.
2.
Left and right cleats are identical.
Lightly lubricate the cleat bolt threads with grease.
Use the 4 mm hex key to attach cleat bolts and the cleat washers loosely onto the shoe soles. The lateral center line of the
cleat should be aligned with the center of the ball of the shoe sole. Adjust vertically via slots in shoe sole. Adjust
horizontally via the play between the cleat washer and cleat.
Tighten the cleat to 5-8 Nm (44–70 lb-in) and avoid excessive force. Cleat position can be fine-tuned to preference after
trial rides. It may take several rides to find your optimum cleat set-up.
1.
2.
3.
Other manuals for Ripper
1
Table of contents
Other Funn Bicycle Accessories manuals


