4
OK
MODE
A worn out device should not be
thrown away, it should be returned to
the producer or a utilization company
Please, read this manual thoroughly
in order to use this product
effectively.
Should you need any servicing
help contact the Funtronic Service
Centre.
The Funtronic company is not
responsibleforanylostbenets
or losses caused by the product
ineciency.
All brand names and names of
products appearing in this manual
are registered trademarks and
belong to their owners.
Technical data given in this manual
can be changed without previous
warning.
IMPORTANT SECURITY RULES DANGERS WARNINGS
Use batteries only of the type which
fulllstechnicalrequirementsof
this device. Do not connect cables
in a forbidden way, do not heat
or burn batteries. Do not install
batteries with incorrect polarity.
The product cannot be placed close
toasourceofreordirectsunlight.
Avoid electrical discharge and
short-circuits, they may damage
this device.
Be careful and do not look for
a longer period of time straight
into the lens (very important for
children).
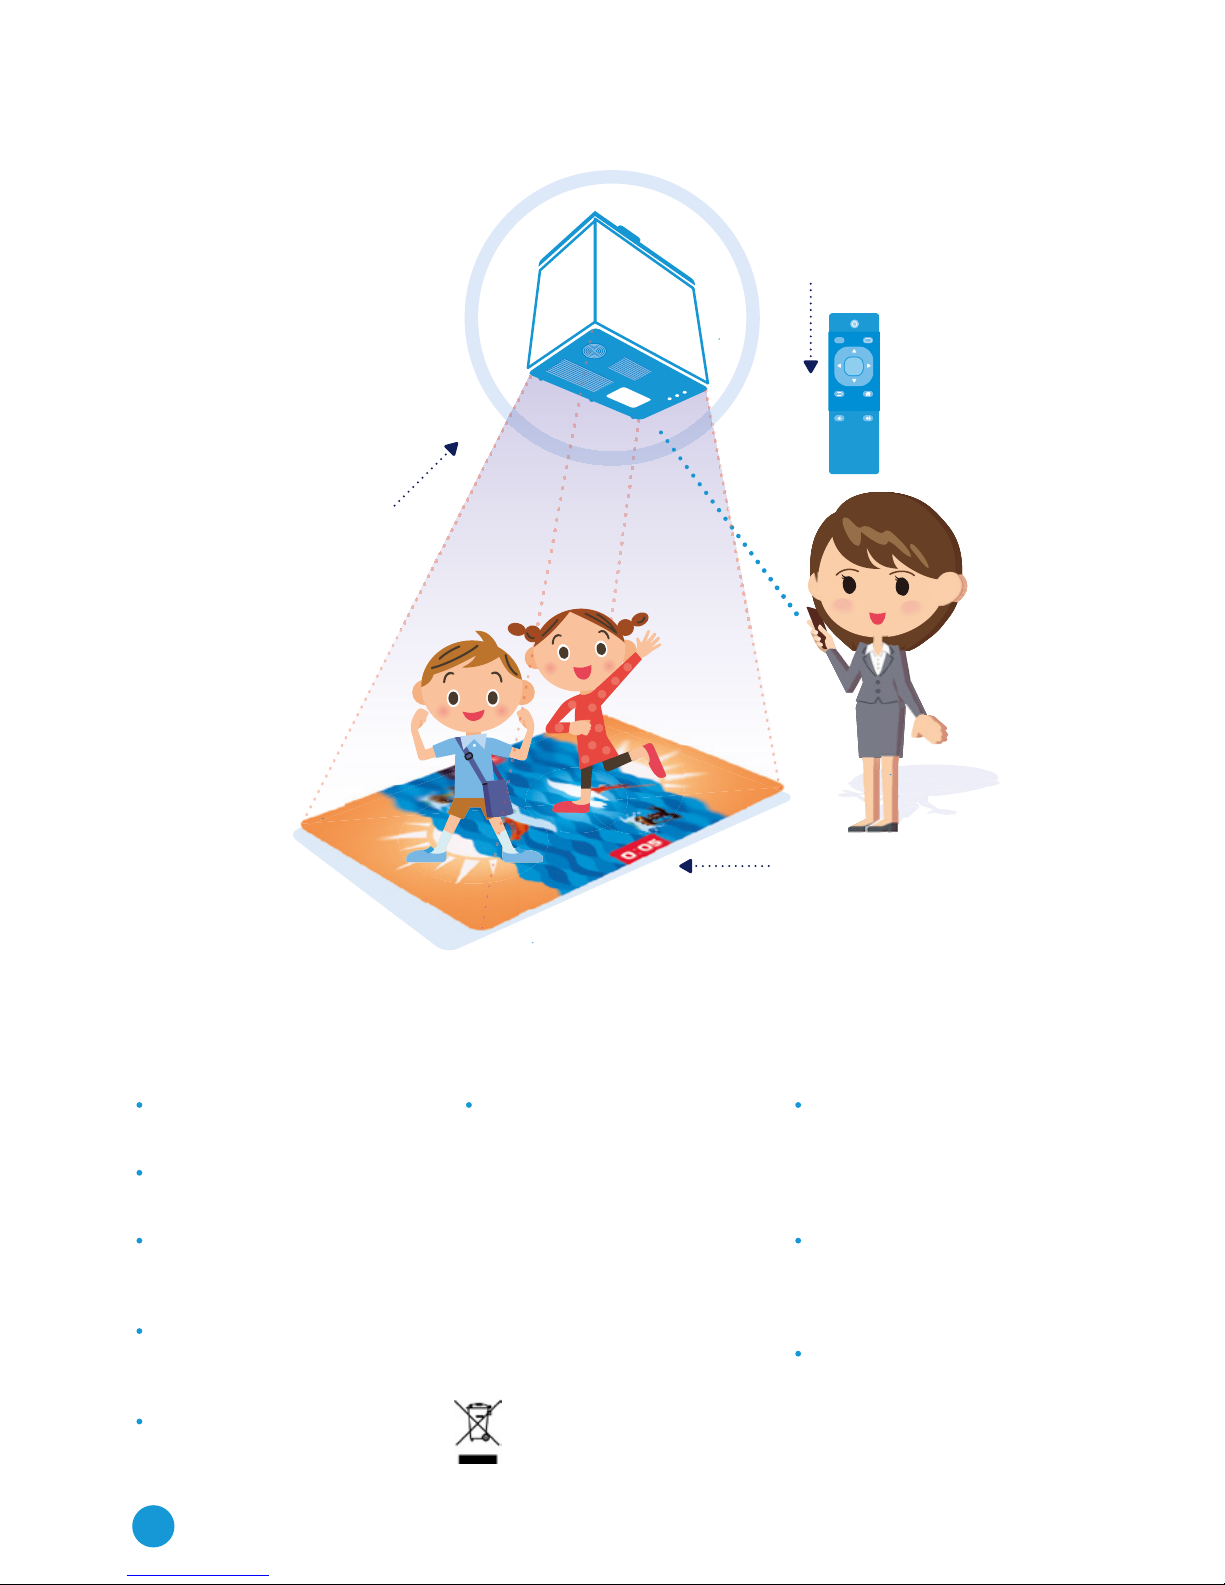
REMOTE CONTROL
MOTION SENSOR SYSTEM
ACTIVE AREA
Do not try to modify this device in
anyway.Youmaycausere,injury,
electrical shock or serious damage
of this device. All testing and
servicing can be done only by the
Funtronic Service Centre.