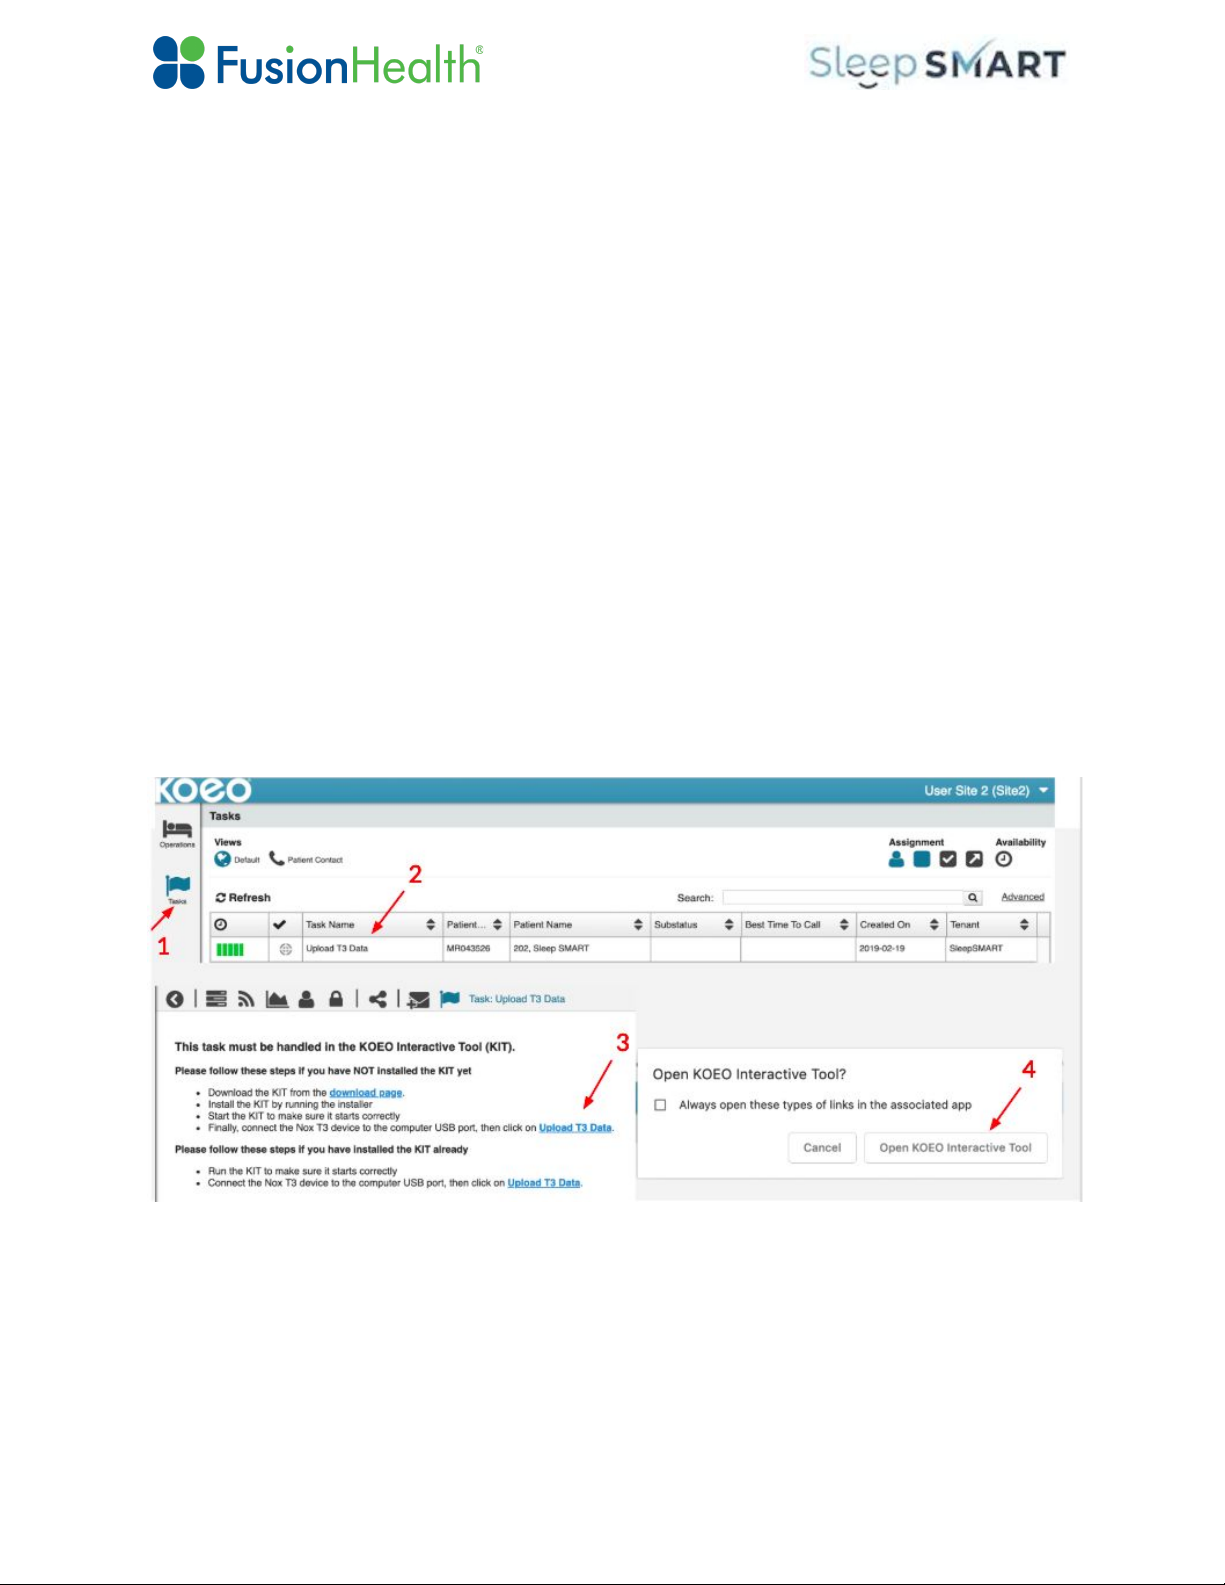
●Redo Upload T3 Data: A systems issue has arisen with the data transfer, and testing
data need to be uploaded with another attempt.
●Repeat T3 Setup: This is a “repeat testing task”, indicating that a scorer has invalidated
the test due to signal quality issues, and the test will need to be repeated, if possible.
●T3 Test Inadequate: This task appears after there have been three (3) attempts to
render a valid T3 Test result. The Sleep SMART protocol allows for up to 3 T3 tests. If
none render a valid outcome, the subject is to be excluded from further participation.
●Subject Eligible: The test is scored and the subject IS eligible for the Run-In Night.
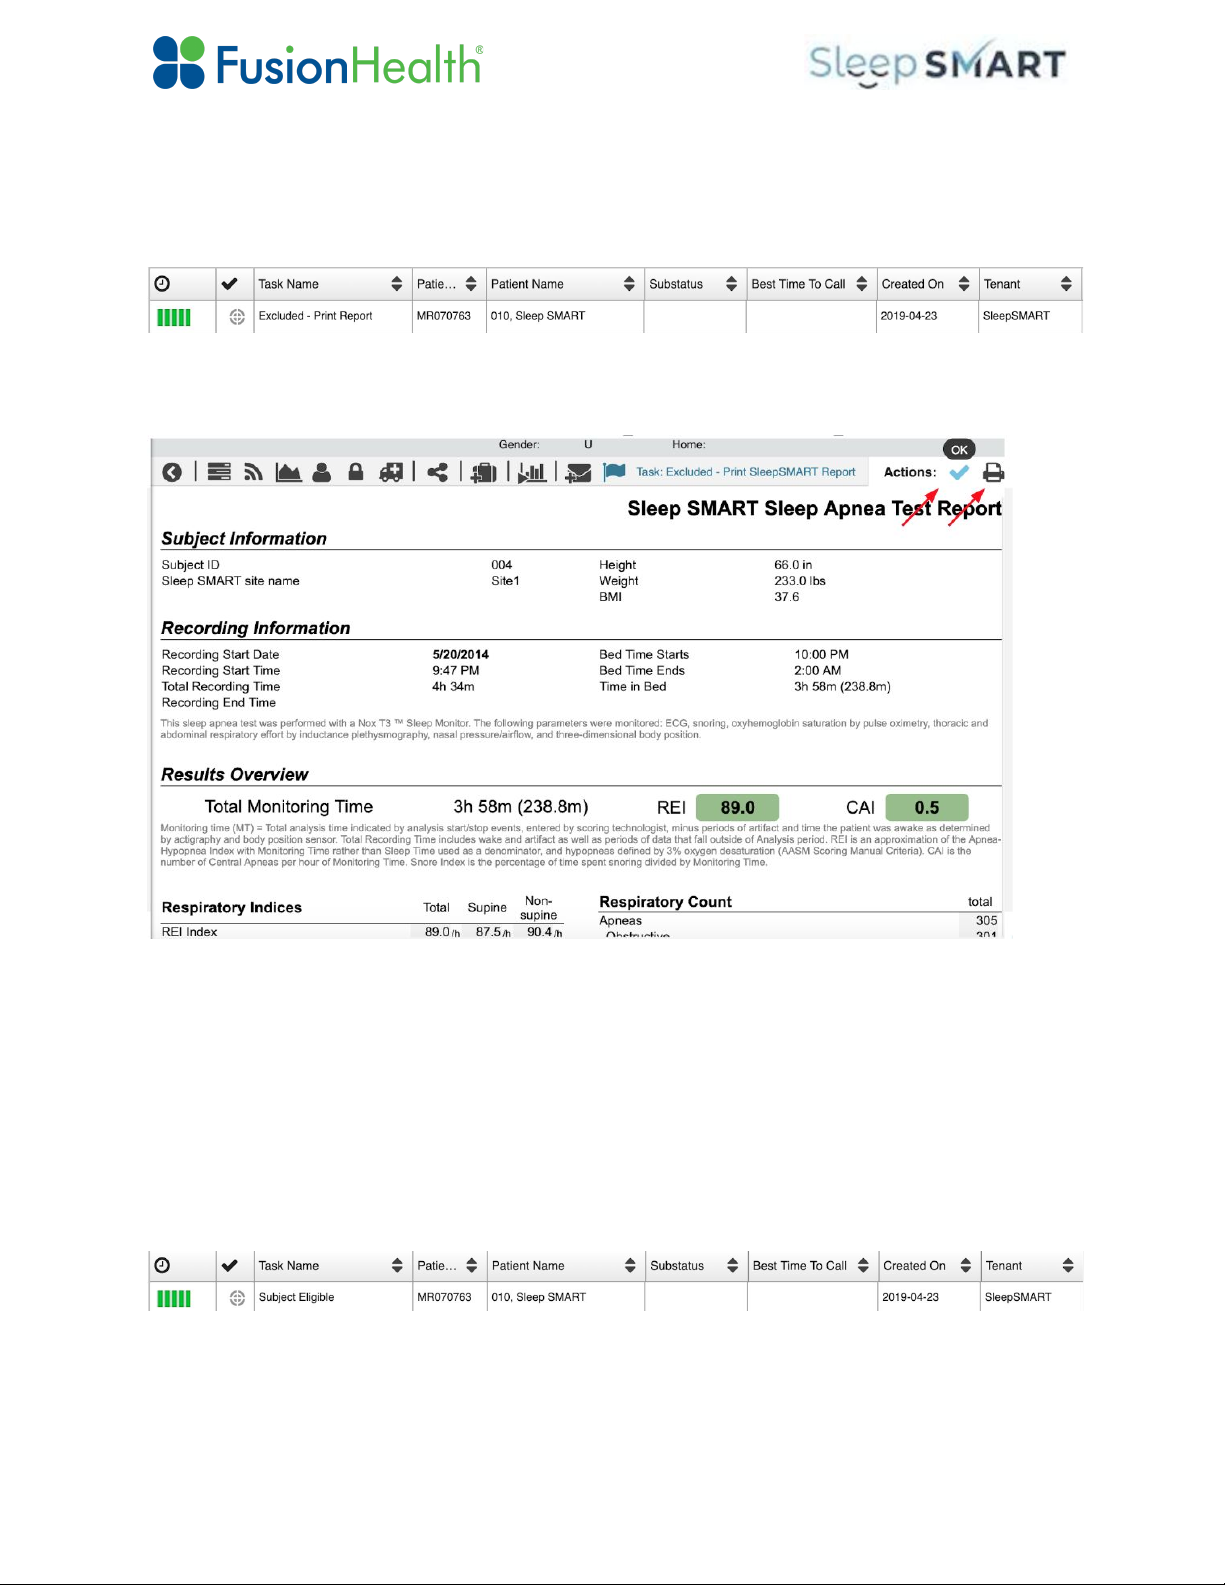
● Excluded - Print Report: The test is scored and the subject IS NOT eligible for the
Run-In Night. If there are extenuating circumstances that by protocol allow you to repeat
the study, you may do so by starting from page 1 instructions “Connecting the T3 device
to the computer”.
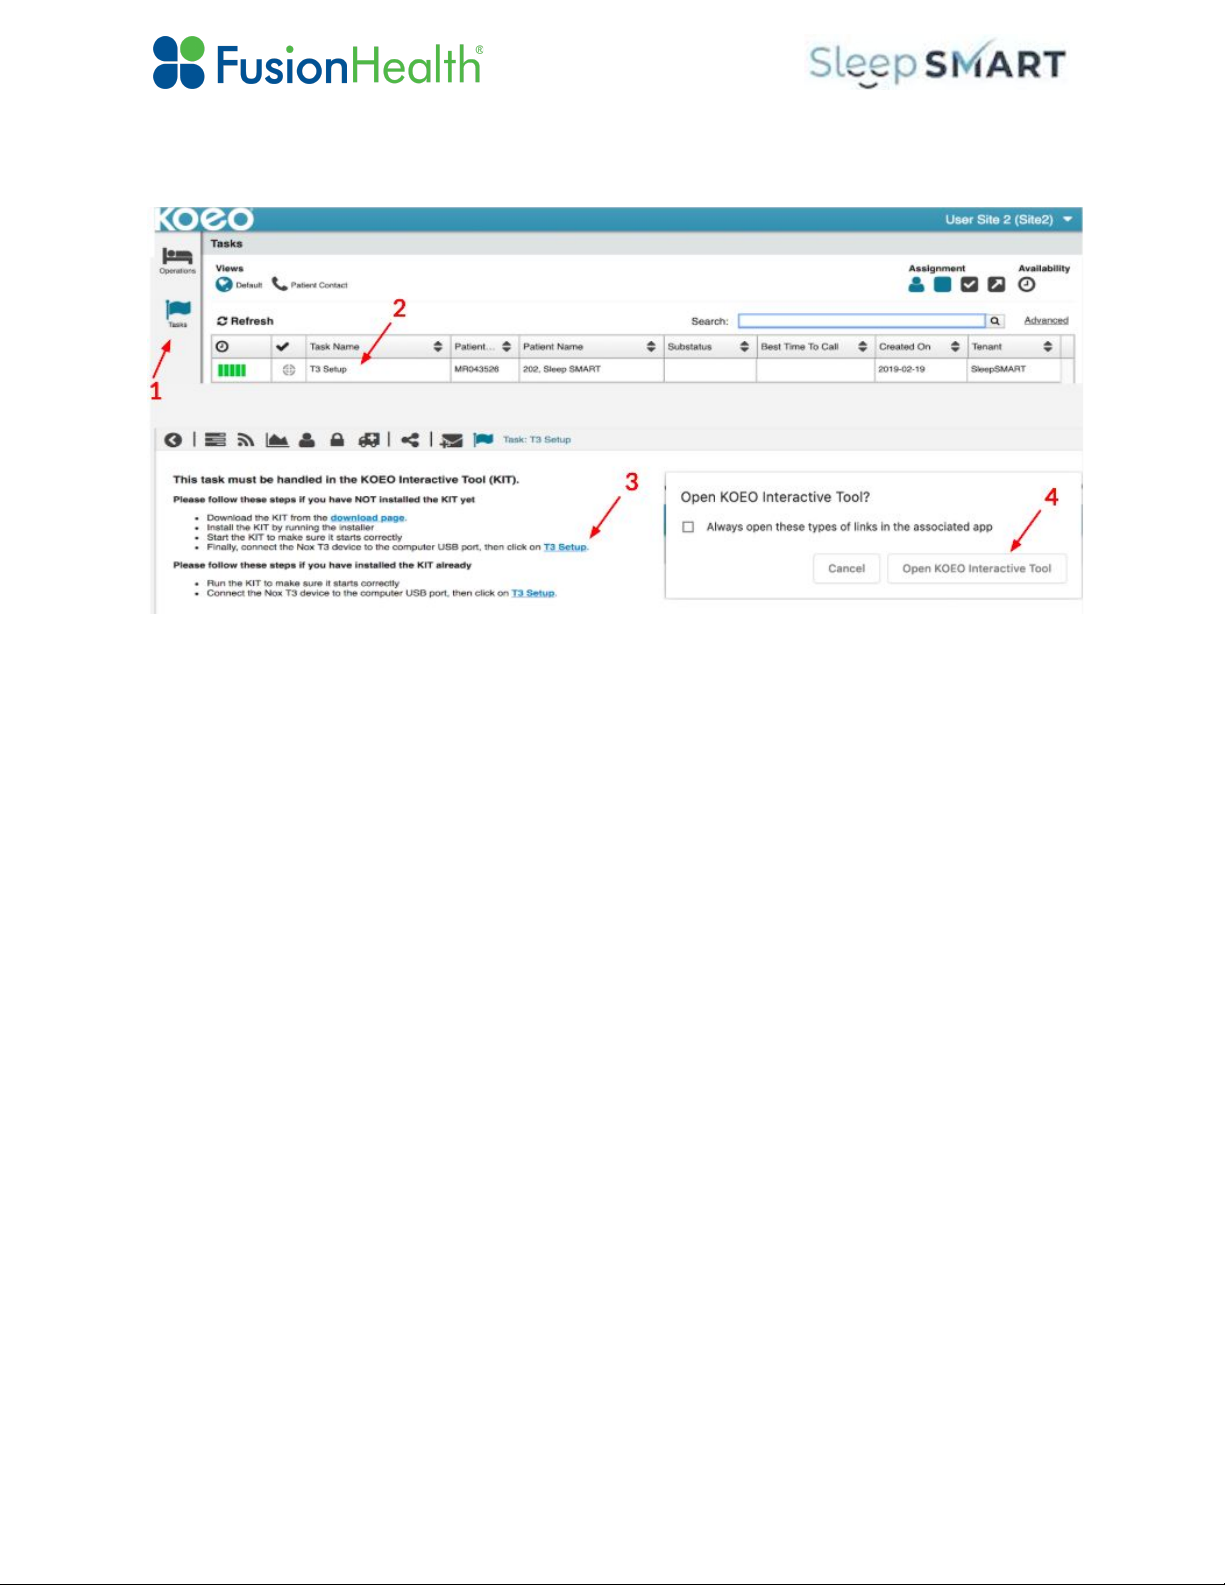
If the “Repeat T3 Setup” task appears in KOEO, the study has been deemed invalid, but the
subject is eligible for a repeat study. The same steps are required to retest the subject, outlined
above in Steps 3-6. You do NOT need to relaunch the Sleep SMART Process. You will NOT
need to create a new subject again in KOEO.
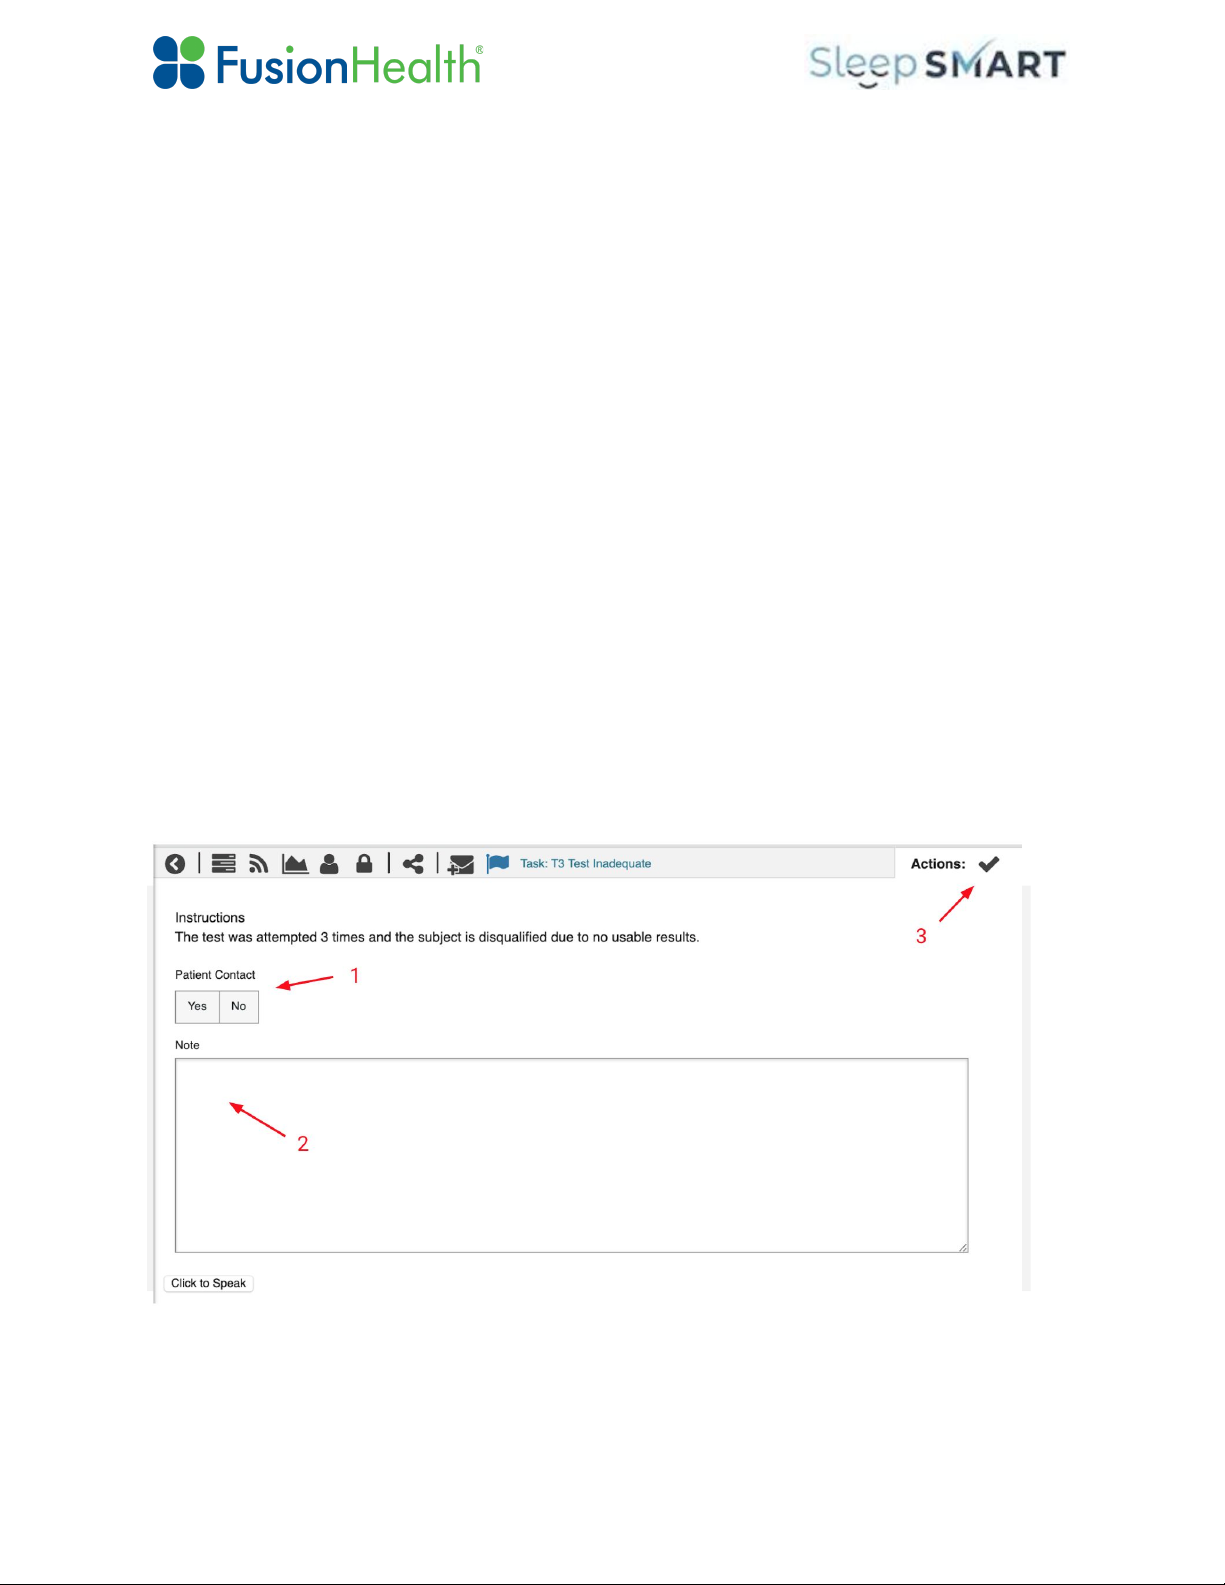
If the “T3 Test Inadequate” task appears, the subject is NOT eligible to continue in Sleep
SMART. There is an acknowledgement task that follows:
Click on the T3 Test Inadequate task in KOEO, and the following appears:
● Click on Patient Contact. Select “Yes” (Arrow #1)
● Type Note, “Subject was Excluded due to...” [enter reason for exclusion] (Arrow #2)
● Click on the check mark in the upper right hand corner (Arrow #3)
This will end the Sleep SMART Process for this subject in KOEO.
8