GÜDE Expert Opto Bridge 0403 User manual

Bedienungsanleitung /
Manual
Expert Opto Bridge 0403
USB-/USB-Übertrager mit
galvanischer Trennung
USB/USB interface transmitter
with galvanic isolation
Bedienungsanleitung /
Manual
Expert Opto Bridge 0403
Bedienungsanleitung /
Dear customer,
thank you for choosing a GUDE product.
All our devices are developed and manu-
factured in Germany in order to meet our
customers’ expectations towards reliable IT infrastructure.
Expert Opto Bridge 0403 is a connecting plug for the USB
interface of a PC. By its electrical isolated data transmission
it assures maximum protection against disruptions, failures
and damages on the interfaces, allowing a trouble-free
operation of connected devices.
1. Operations
Connect Expert Opto Bridge 0403 to the USB interfaces of
the PC (USB host) and of the requested device (USB device).
Now the transmitter is immediatelty ready for operations,
there are no drivers needed for installation. All functions
of Expert Opto Bridge 0403 are possible without external
power supply.
2. Meaning of status LED
If Expert Opto Bridge 0403 is connected to a PC or USB hub,
the following device states are indicated by the LED:
Status LED ready for use Funktionsstatus
green yes low speed modus
orange yes full speed modus
blinking or o no power limitation is active
In case that the power limitation is active, please deploy an
external power supply (see 3.).
3. External power supply
If the status LED of Expert Opto Bridge 0403 blinks or
remains dark, you should connect the transmitter to an
external power supply. You take the optional available
Power Supply Unit 7900 and connect it to the power
connector (USB-mini-B socket) of Expert Opto Bridge 0403
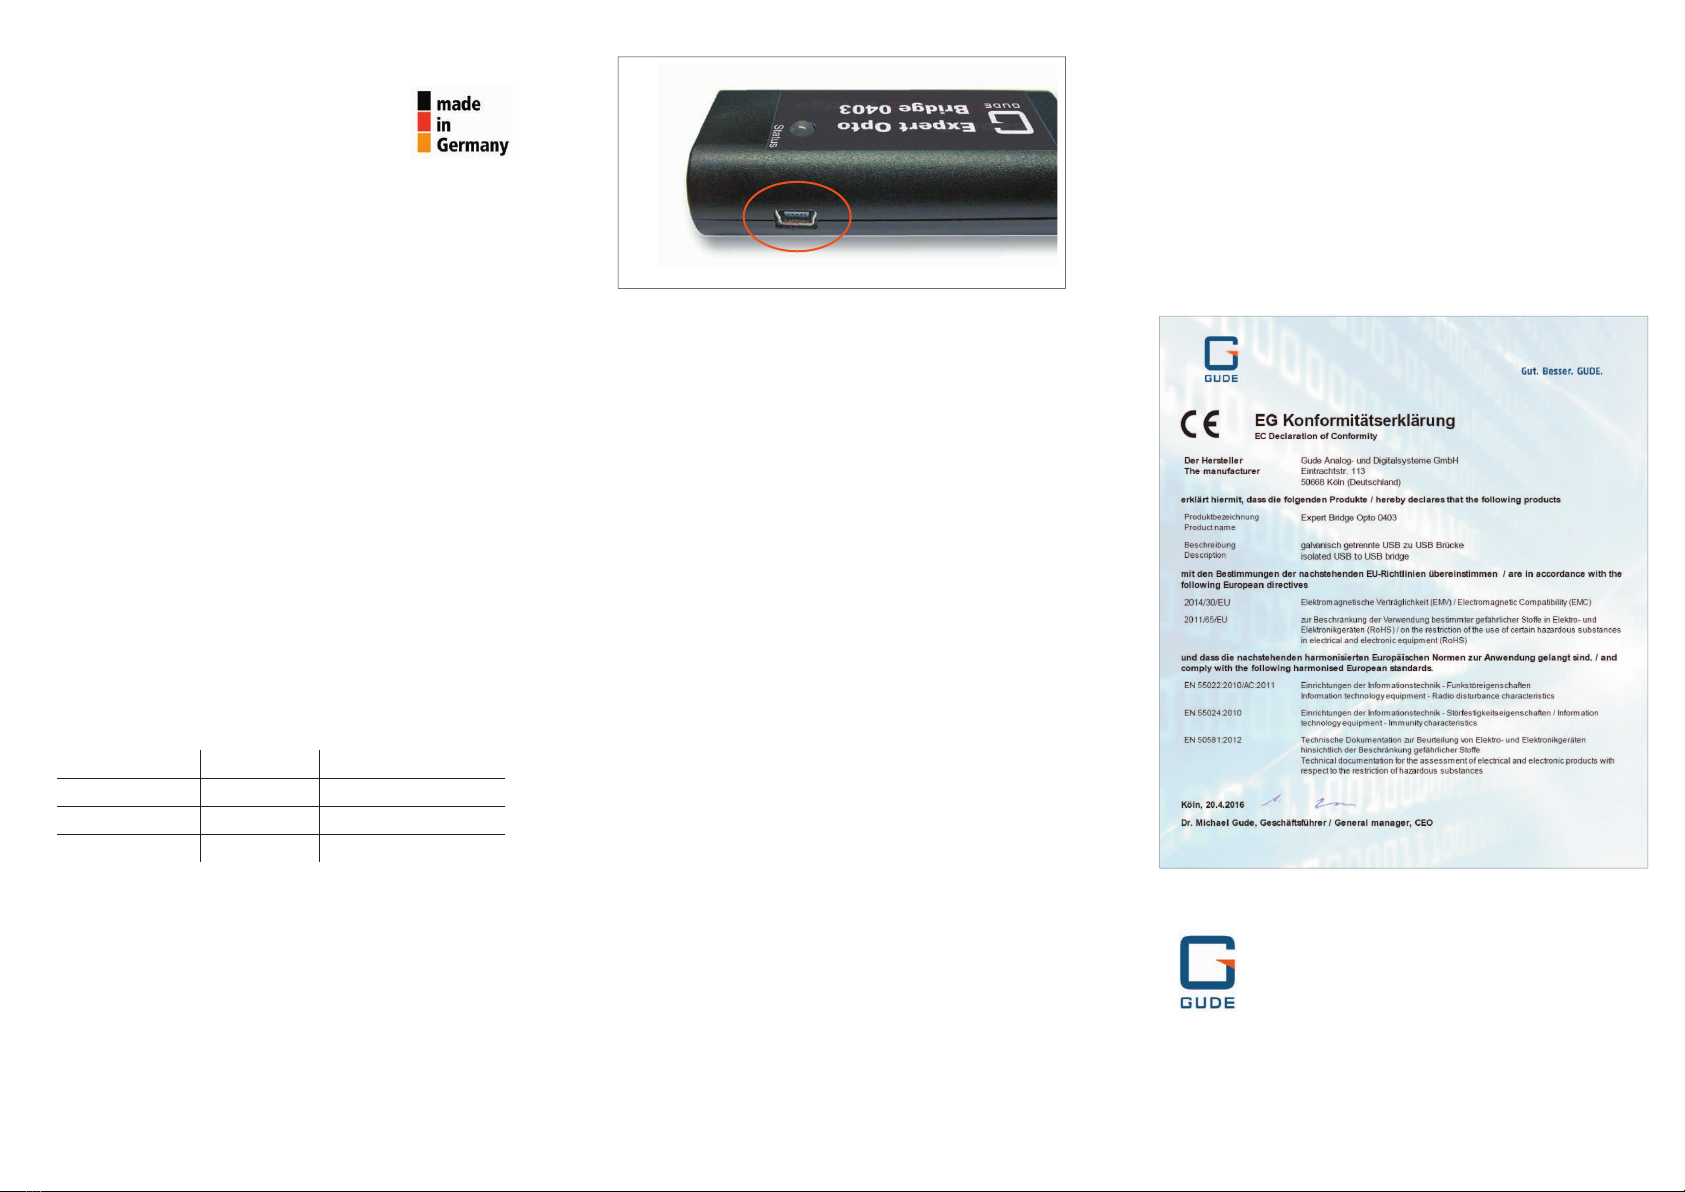
as shown in Fig. 1 (Abb. 1).
4. Attributes
Features
• Galvanic isolation of USB device from USB host
• Isolation voltage max. 2500 V
• Supply of connected USB device of 100 mA by USB
host
• Supply of connected USB device from 100 mA to
500 mA by external Power Supply Unit 7900
(optional avaialble)
• LED status monitor
• Easy installation without driver
• Developed and manufactured in Germany
Electrical Connections
• USB-A socket
• Cable with USB-A plug
• USB-mini-B socket for connection to optional Power
Supply Unit 7900
• USB 1.1 low speed modus (1.5 Mbit/s) and USB 2.0
full speed modus (12 Mbit/s)
Technical Details
• Plastic case, LxHxD: 78 x 22 x 37 mm
• Weight: ca. 55 g
• Cable length: ca. 40 cm
• Operating temperature: 0 - 50 °C
• Storage temperature: -20 - 70 °C
• Rel. humidity: 0-95 % (non-condensing environment)
5. Support
All relevant information of the product can be downloaded
at gude.info/nc/support/downloads. Please have a look at
gude.info/wiki for further questions or feel free to contact
our service team.
with galvanic isolation
Sehr geehrte Kundin, sehr geehrter Kunde,
vielen Dank, dass Sie sich für ein Produkt
der Firma GUDE entschieden haben. Unsere
Geräte stammen aus eigener Entwicklung
und Fertigung mit dem Ziel höchsten Qualitätsansprüchen
gerecht zu werden.
Die Expert Opto Bridge 0403 ist ein Übertrager für die USB-
Schnittstelle des PC. Sie bietet durch elektrisch isolierte
Datenübertragung maximalen Schutz vor Störungen und
Ausfällen und vor Schäden an der Schnittstelle.
1. Inbetriebnahme
Verbinden Sie die Expert Opto Bridge 0403 mit der USB-
Schnittstelle des PCs (USB-Host). Schließen Sie nun das
gewünschte Gerät (USB-Device) an die USB-Buchse der
Expert Opto Bridge 0403 an. Der Übertrager ist sofort
betriebsbereit. Für die Installation werden keine Treiber
benötigt. Alle Funktionen der Expert Opto Bridge 0403
sind ohne externe Stromversorgung realisierbar.
2. Bedeutung der Status-LED
Wenn die Expert Opto Bridge 0403 mit einem PC oder
USB-Hub verbunden ist, lassen sich an der LED am Gehäuse
die folgenden Zustände ablesen:
Status-LED einsatzbereit Funktionsstatus
grün ja Low-Speed-Modus
orange ja Full-Speed-Modus
fl ackernd oder aus nein Strombegrenzung aktiv
Für den Fall, dass die Strombegrenzung aktiv ist, schließen
Sie bitte ein externes Netzteil an (s. 3.).
3. Externe Stromversorgung
Falls die LED der Expert Opto Bridge 0403 fl ackert oder aus
ist, sollte eine externe Stromversorgung angeschlossen
werden. Schließen Sie hierfür das optional erhältliche
Steckernetzteil 7900 an die Stromanschluss-Buchse (USB-
mini-B) der Expert Opto Bridge 0403 an (s. Abb. 1).
4. Eigenschaften
Leistungsmerkmale
• Trennt ein USB-Device galvanisch vom USB-Host
• Isolationsspannung bis 2500 V
• Versorgung des angeschlossenen USB-Devices bis
100 mA durch den USB-Host
• Versorgung des angeschlossenen USB-Devices über
100 mA bis 500 mA über externes Steckernetzteil
7900 möglich (optional erhältlich)
• Anzeige des Funktionsstatus durch LED am Gehäuse
• Einfache Installation ohne Treiber
• Entwickelt und produziert in Deutschland
Anschlüsse
• USB-A-Buchse
• Kabel mit USB-A-Stecker
• USB-mini-B-Buchse für Speisung durch optionales
Steckernetzteil 7900
• USB 1.1 Low Speed Modus (1,5 Mbit/s) und USB 2.0
Full Speed Modus (12 Mbit/s)
Technische Daten
• Kunststo gehäuse LxHxT: 78 x 22 x 37 mm
• Gewicht: ca. 55 g
• Kabellänge: ca. 40 cm
• Betriebstemperatur: 0 - 50 °C
• Lagertemperatur: -20 - 70 °C
• Rel. Luftfeuchtigkeit: 0 - 95 % (nicht kondensierend)
5. Support
Unter gude.info/nc/support/downloads stehen die für
das Produkt relevanten Informationen zum Download zur
Verfügung. Bei weiteren Fragen werfen Sie einen Blick
auf gude.info/wiki oder wenden Sie sich an unser Service-
Team.
6. EG Konformitätserklärung / EU Declaration of
Conformity
v.0.2
Abb. 1: Die USB-mini-B-Buchse für die Stromversorgung der Expert Opto
Bridge 0403
Good. Great. GUDE.
Gude Analog- und
Digitalsysteme GmbH
Eintrachtstrasse 113
50668 Köln
T +49.221.912 90 97
F +49.221.912 90 98
mail@gude.info
www.gude.info
Table of contents
Languages:
Popular Transmitter manuals by other brands


Dejero
Dejero EnGo 3x manual

Rosemount
Rosemount 4600 Reference manual

Speaka Professional
Speaka Professional 2342740 operating instructions

trubomat
trubomat GAB 1000 instruction manual

Teledyne Analytical Instruments
Teledyne Analytical Instruments LXT-380 instructions

Rondish
Rondish UT-11 quick start guide


